Add/Change seat limits across an RSVP Event Series simultaneously
Normally, changing the seat limits on an RSVP event needs to be done one event at a time, which when you have a large event series can be very tedious. This guide shows how to use a custom template to add/change the seat limits on multiple RSVP events in an event series all at once.
New and Improved Feature!
Custom Templates are no longer available in AddEvent 2.0. This is because we've built design templates. Design templates are a no-code feature allowing you to customize your event landing pages, calendar landing pages, and embeddable calendar. Please check out the Event Landing Page Designs help section for details.
The ability to add or change the seat limits on an RSVP event already exists in AddEvent. This guide is for changing the seat limit across a large number of RSVP events all at once. If you only have a small number of events that need the seat limits added/modified, or only a single event that needs that adjustment, please see the instructions on how to set the event seat limit.
Creating a template
-
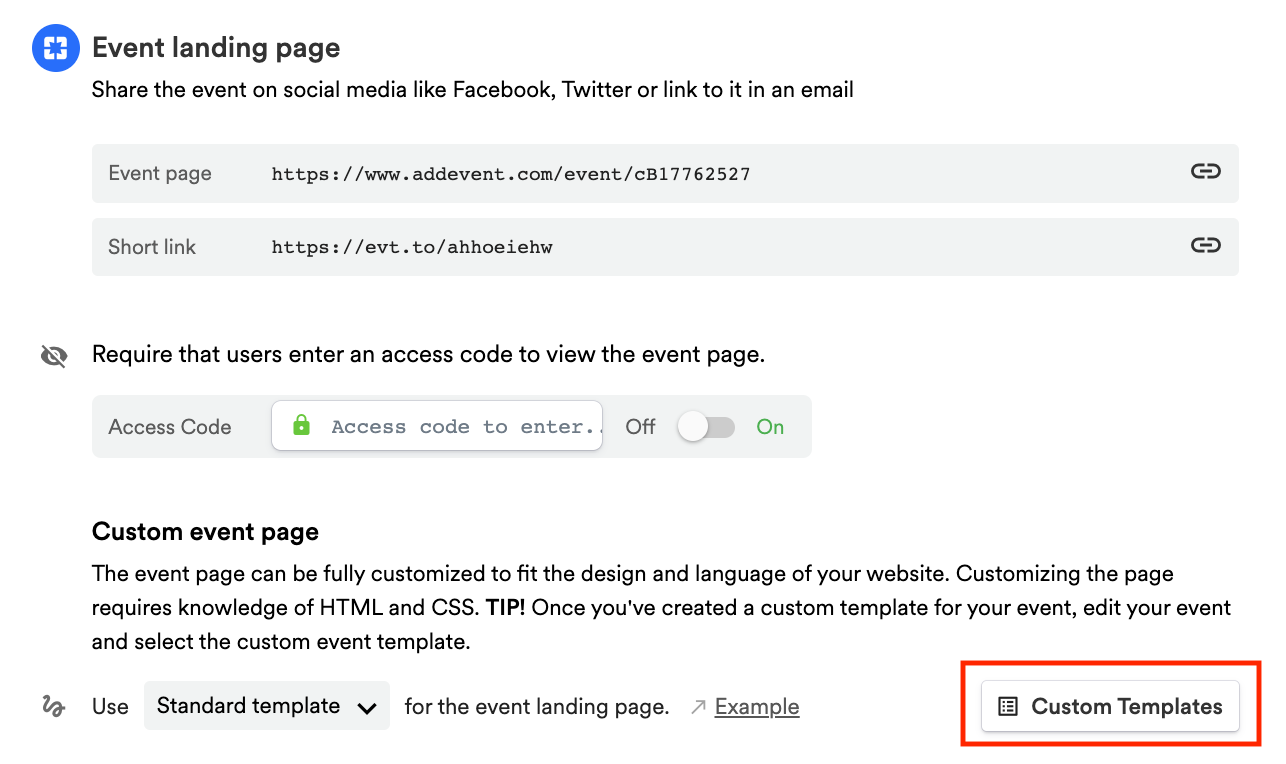
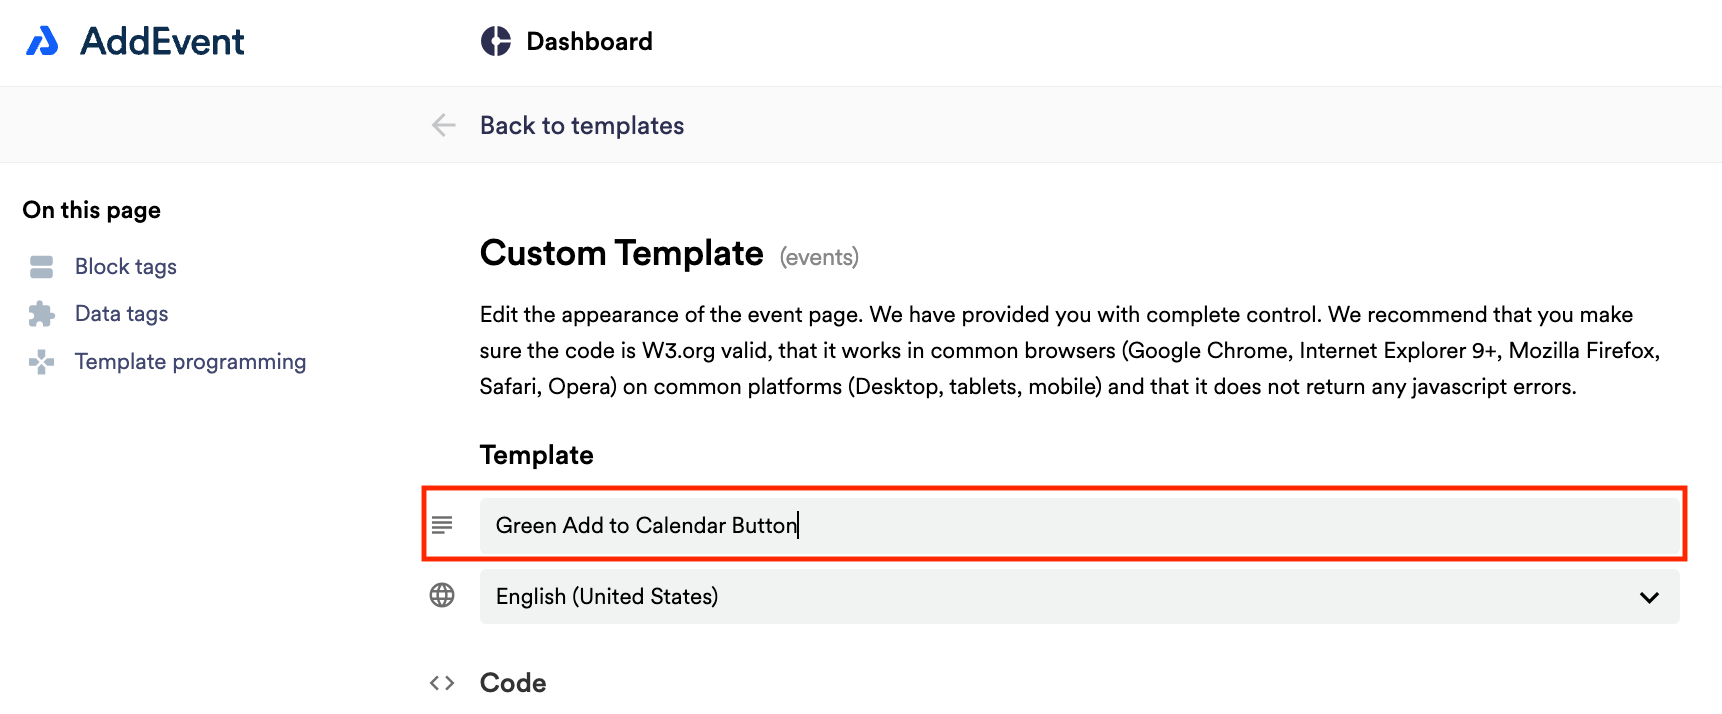
Scroll down to the first sharing method, Event landing page. Create a custom event landing page template by clicking Custom Templates in the app and clicking + New Template. Add a name for the template.
Adding the Seat Limit functionality
-
Copy the following line of code:
<div id="customseatlimit" custom-seat-limit="3"></div> -
Paste the code directly after the opening:
<body>tag in the custom template (on or near line 39) -
Replace the
{{block:rsvp-seat-limit-reached}}block tag (line 99 in the standard template) with the following code snippet<div id="if-seats-limited" class="hide"> <div class="attention-t1"> <p>Sorry, we're out of seats for this event.</p> <i class="material-icons">warning</i> </div> </div> -
Replace the
{{block:rsvp-seats-limited}}block tag (line 109) with the following snippet<div class="row eventopts"> <div class="ico"> <i class="material-icons">event_seat</i> </div> <div class="txt"> <p><span id="seatnum" class="notice-t1"></span></p> </div> </div> -
Paste the following code snippet at the very end of the template, just above the closing
</body>tag<script> var seatlimit = document.getElementById("customseatlimit").getAttribute("custom-seat-limit"); var seatsleft = seatlimit - {{rsvp-going-count}}; $('#seatnum').html(seatsleft+' more seats available'); if (seatsleft==0) { document.getElementById("rsvpform").setAttribute("data-rsvp-limit-reached", "true"); document.getElementById("if-seats-limited").removeAttribute("class"); // Hide register form $('.button-register-t1').hide(); // Hide RSVP form in case Respond Button is removed $('#rsvpform-wrap').hide(); $('#seatnum').html('No more seats available'); } </script> -
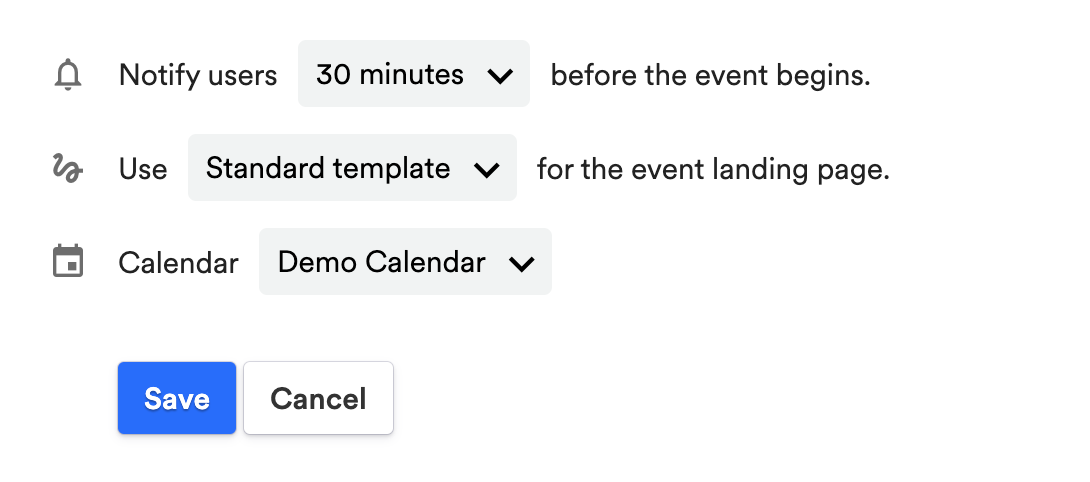
Save the template, and then go to the Edit Event page for one of the events in your event series
-
Select the new template from the dropdown menu, and then click Save
-
Because the event is part of a series, you will be shown options for which events you'd like to apply this new template to. You can choose to apply the new seat limits to just this specific event, any events in the series following this event, or all the events in the series, past and future
Adjusting the Seat Limit
Now that you have created and set the custom seat limit template on your RSVP event, following the steps above, you can adjust the seat limit to whatever you'd like
Because this change is being made to the template itself, it will be applied to every event on your calendar that uses this template. If you'd like to make different seat limits for different series' of RSVP events, you can duplicate your new template and rename it to reflect which seat limit or series it is for. You can then make changes to each template without affecting the other series with this funtionality
- Open up the custom template in the editor
- Go to the line of code:
<div id="customseatlimit" custom-seat-limit="3"></div>from step #1 in the Adding the Seat Limit functionality section - In that line, you pasted in the number following the "custom-seat-limit" attribute is the seat limit for every event using that template (in the line of code you pasted in, it is currently set to 3 seats
- Change the number (currently "3") to whatever number of seats you'd like to allow your users to RSVP for the event
- Scroll to the end of the template editor and click Save
- Your events will now all have the new seat limit applied to them
Updated 5 months ago