Brand Kit! The top ways to customize your event template to match your branding
This guide is meant to jumpstart your use of Custom Templates for Regular and RSVP event landing pages! It contains the most commons ways organizations customize their templates, and is organized around 1-2 code snippets to make it easier to make the changes you want, and put everything in one place. Doing this setup now means that as you create events in the future, you will be able to set their landing pages to match your branding with one click, rather than needing to make the changes and set them to each event manually, after the fact. Additionally, if you ever make any changes to your branding down the line, all you will need to do is tweak this template, and every event already using this template will get the updated kit instantly.
New and Improved Feature!
Custom Templates are no longer available in AddEvent 2.0. This is because we've built design templates. Design templates are a no-code feature allowing you to customize your event landing pages, calendar landing pages, and embeddable calendar. Please check out the Design Template help section for details.
Grab your coffee, roll your sleeves up, and let's get customizing!
Creating a Template
-
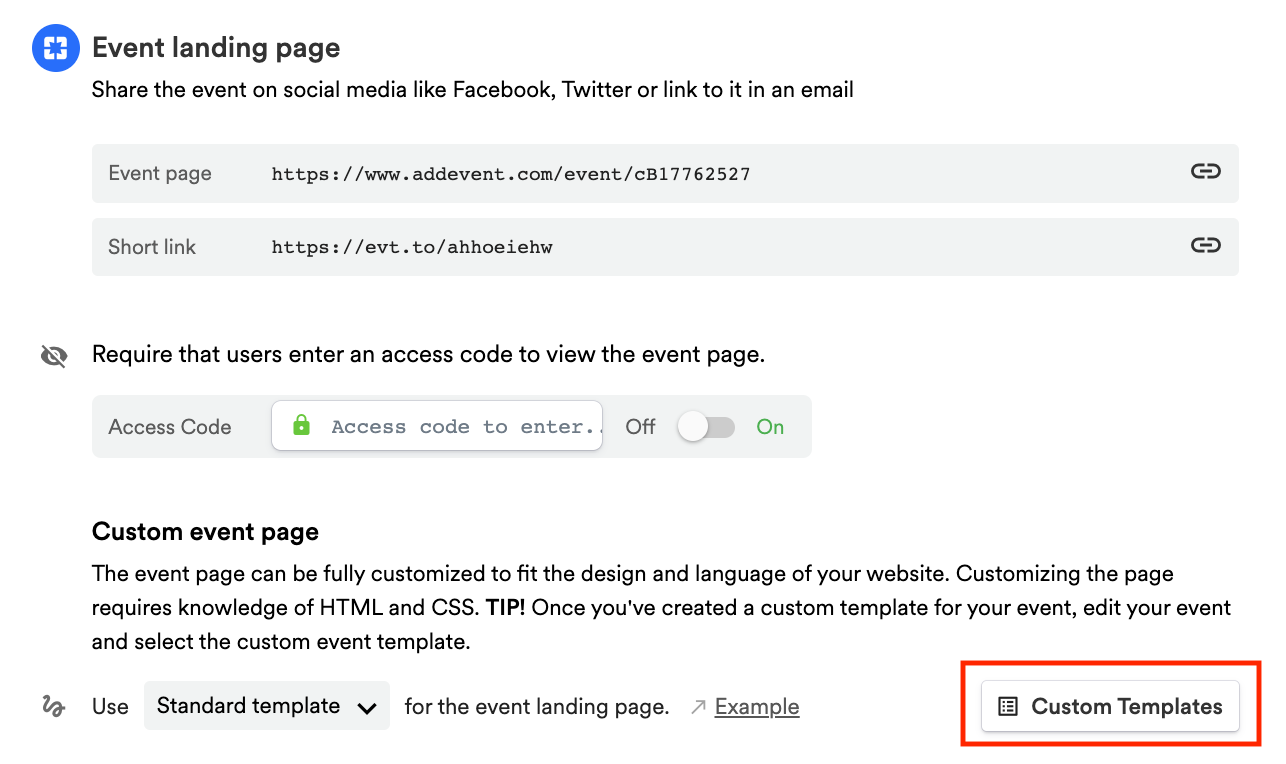
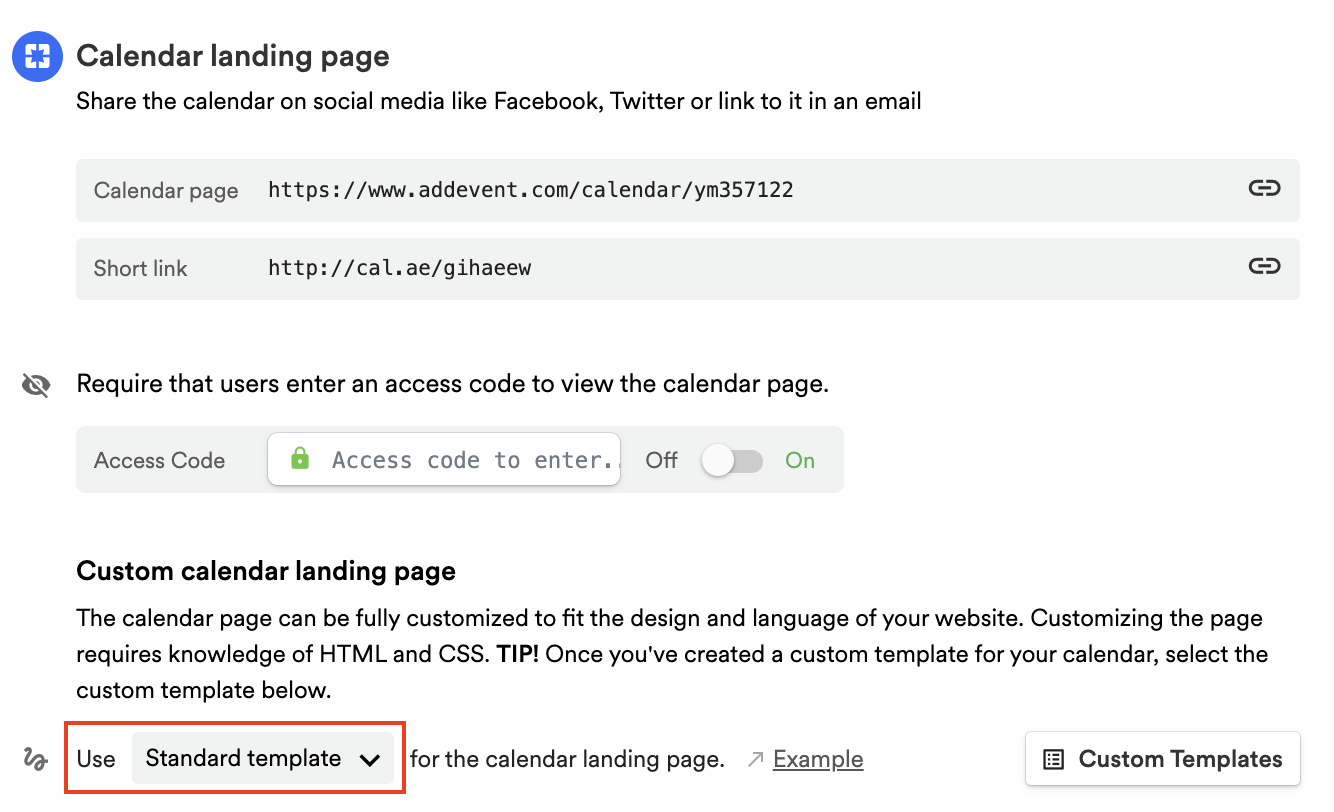
Scroll down to the first sharing method, Event landing page. Create a custom event landing page template by clicking Custom Templates in the app and clicking + New Template. Add a name for the template.
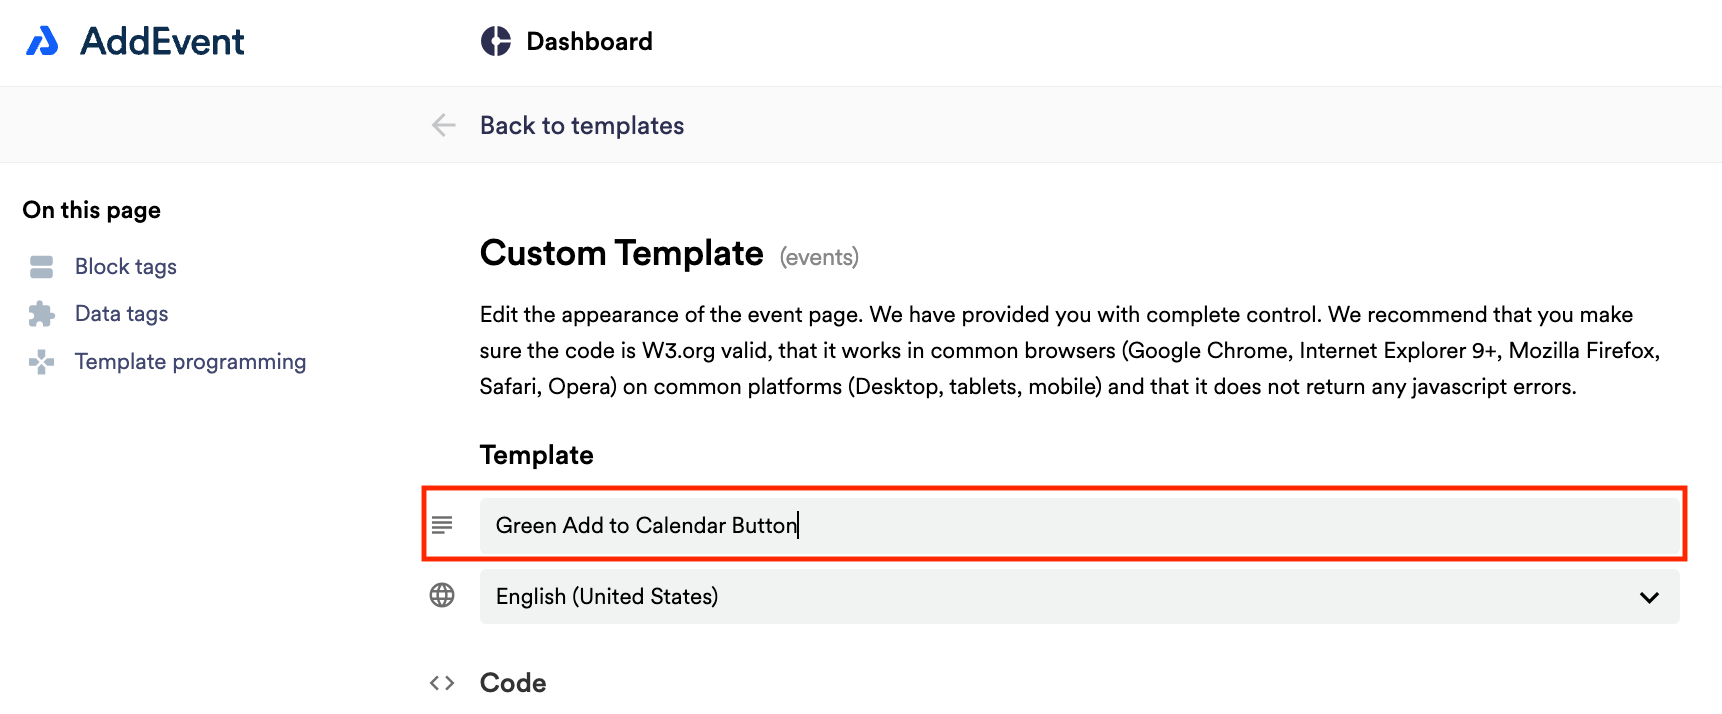
- Scroll to the bottom of the code editor, and click Create
Prepping the template
We need to copy some code snippets to the template to allow us to make changes to the look and feel of the landing page. Don't worry if you do not know HTML/CSS. This is all copy and paste!
-
First, copy this snippet into the header of the page, just above the closing
</head>tag (between lines 36 & 37), you can add extra space to paste it in by hitting the Enter key several times:
  <style>

    html, body {background:#f1f5f9 !important;} /* page background color */
    .box {background:#ffffff !important;} /* background color of the box everything is inside of */
 /* .confirmation-t1 {background:#fff url(https://cdn.addevent.com/libs/imgs/pop-deco-t1.png) repeat-x !important;} */ /*  background color confirmation box (for RSVP events) */

    html, h1 {color:#1d3054 !important;} /* Title color */
    .selp .sel .ico i {color:#1d3054 !important;} /* color of the timezone icons */
    .date-t1 .ico i {color:#0aa700 !important;} /* color of the clock icon */
    .share {background:#ffffff !important;} /* background color behind share icon */
    .rel i {color:#1d3054 !important;} /* color of the share icon */
    .eventopts .co-t1 i {color:#f81b1b !important;} /* color of the location  icon */
    .addeventatc {background:#286efa !important;} /* "Add to Calendar" button color */
    .addeventatc:hover {background:#286efa !important;} /* "Add to Calendar" button color */
    .buttonregister {background:#286efa !important;} /* "Respond" Button color (for RSVP events) */
    .submit {background:#286efa !important;} /* "Register" button color (for RSVP events) */
    .going.selected {color:#fff !important; background: #0aa700 !important;} /* "Going" color (for RSVP events) */
    .maybe.selected {color:#fff !important; background: #f2992a !important;} /* "Interested" color (for RSVP events) */
    .notgoing.selected {color:#fff !important; background: #e64420 !important;} /* "Can't Go" color (for RSVP events) */

  /* Image box with image */
  .img1 {clear:both;margin:0px 0px 10px 0px;border-radius:8px;}
  .img1 img {width:100%;max-width:100%;display:block;}

  /* Font code */
  *:not(.material-icons, .material-icons-outlined) {font-family: 'Circular-AddEvent', Lato, 'Open Sans',sans-serif !important;}

  /* Respond Button removal block */
  /* .button-register-t1 {display:none;} */
  /* .rsvpform {display:block;} */

  </style>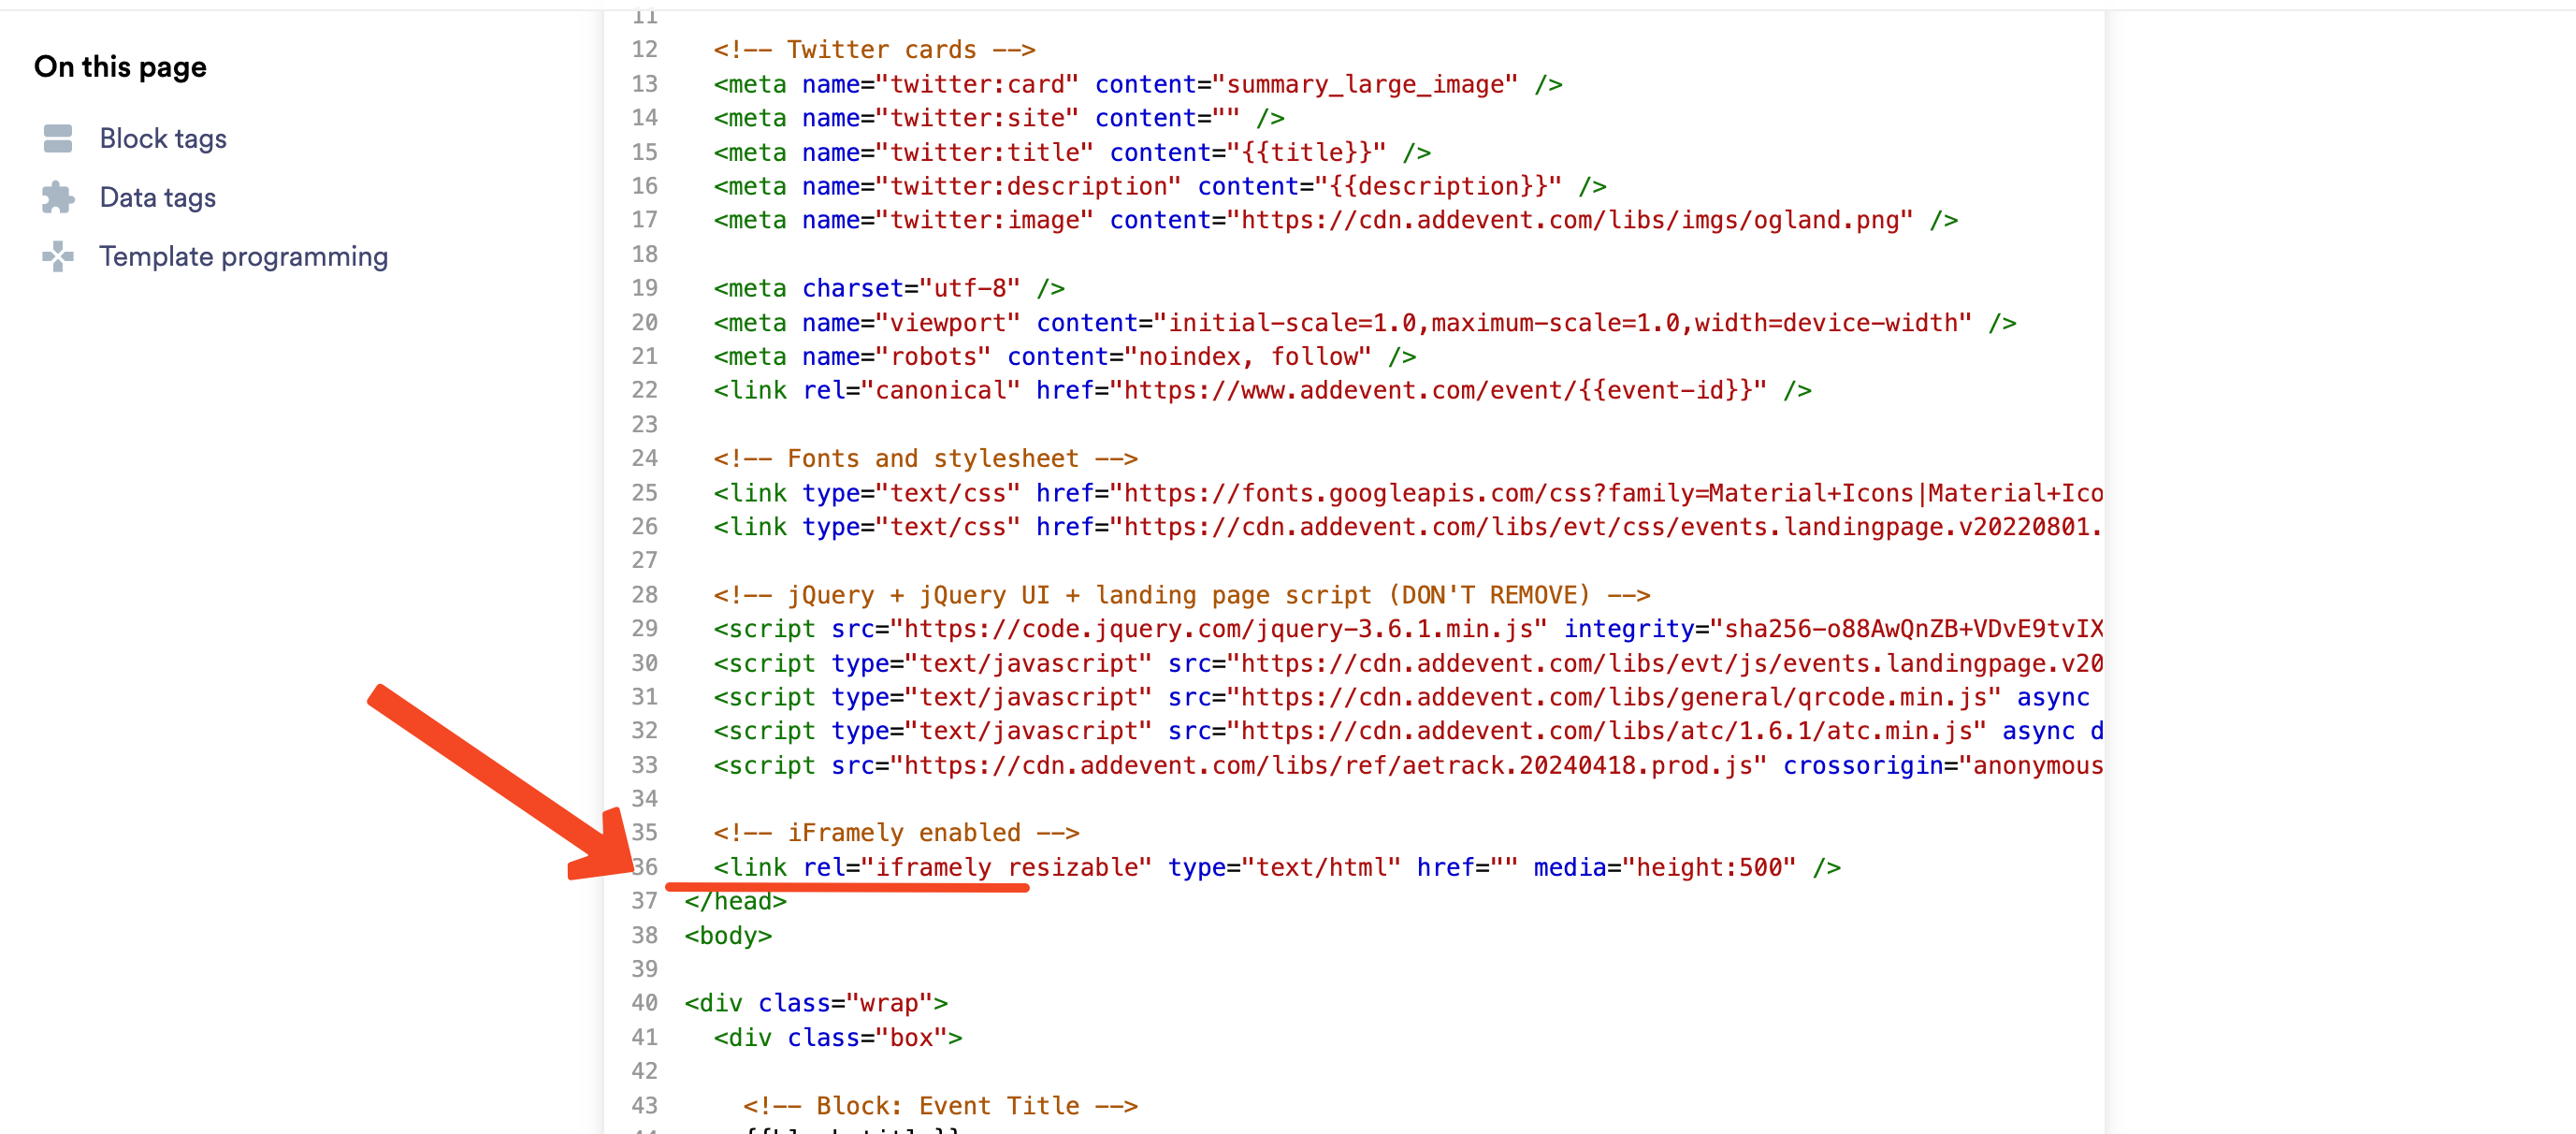
-
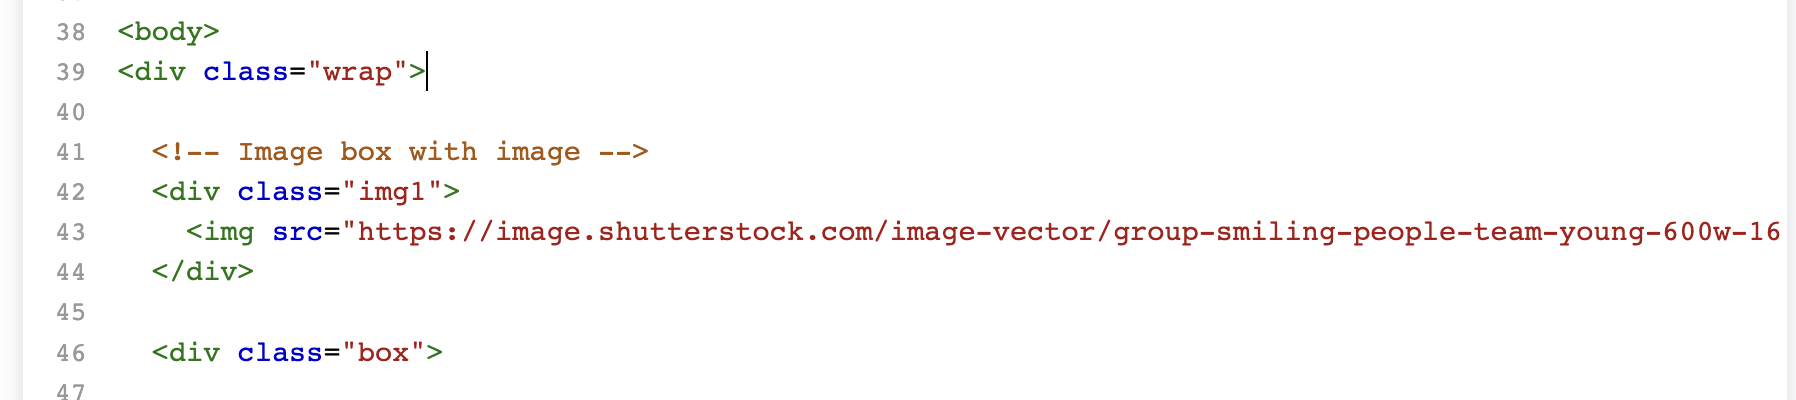
Next, add the following snippet of code to the body section of your custom landing page template between the opening
wrapandboxclass tags:
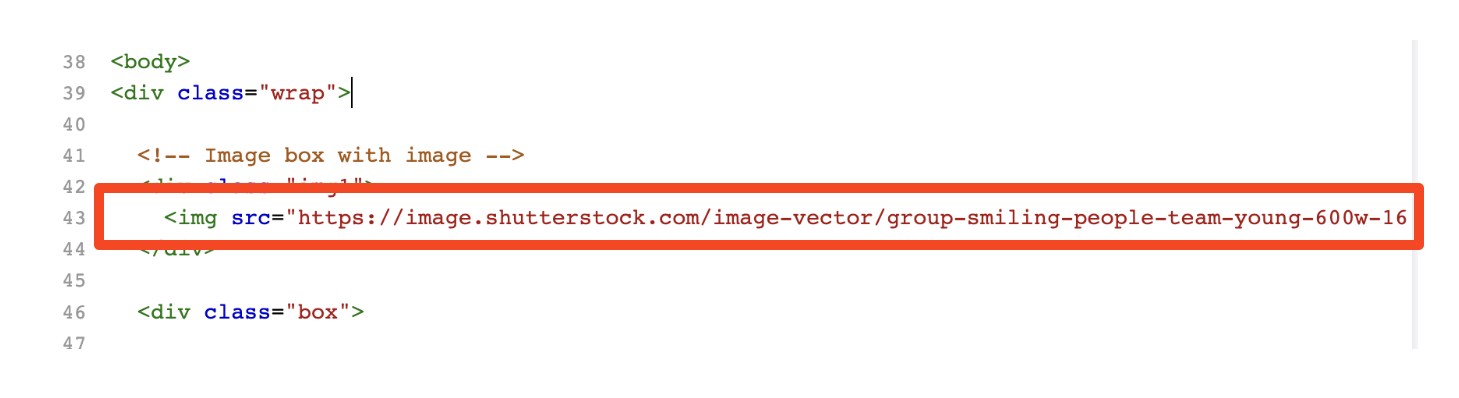
  <!-- Image box with image -->
    <div class="img1">
      <img src="https://image.shutterstock.com/image-vector/group-smiling-people-team-young-600w-1677180133.jpg">
    </div>
For reference on where to place the snippet, refer to the screenshot below, in particular, the line numbers on the left side:
-
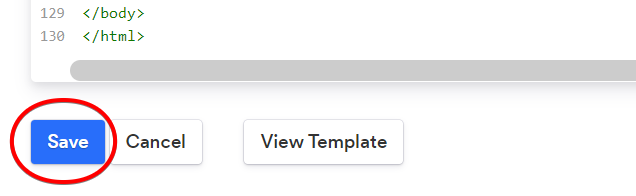
Save the template by scrolling down and clicking Save at the bottom of the code section:
-
(OPTIONAL) If you want to do this now, instead of doing it after making all of your changes, you can return the the Event Page and select your new custom template from the dropdown menu. Click the Set button that appears
Setting the template to the event now means that any change you make will immediatly be applied after you hit save, allowing you to simply refresh your event every time you make a change, to see how it looks before proceeding.
If you do not set the template now, you will need to do so aafter you are done making changes, otherwise your event will landing page will not reflect your customizations.
Changing the Color of the Add to Calendar Button
-
In the big code snippet you pasted into your template, find the two lines labeled
/* "Add to Calendar" button color */(the labels are at the end of each line; in the snippet above, they are on lines 13 & 14).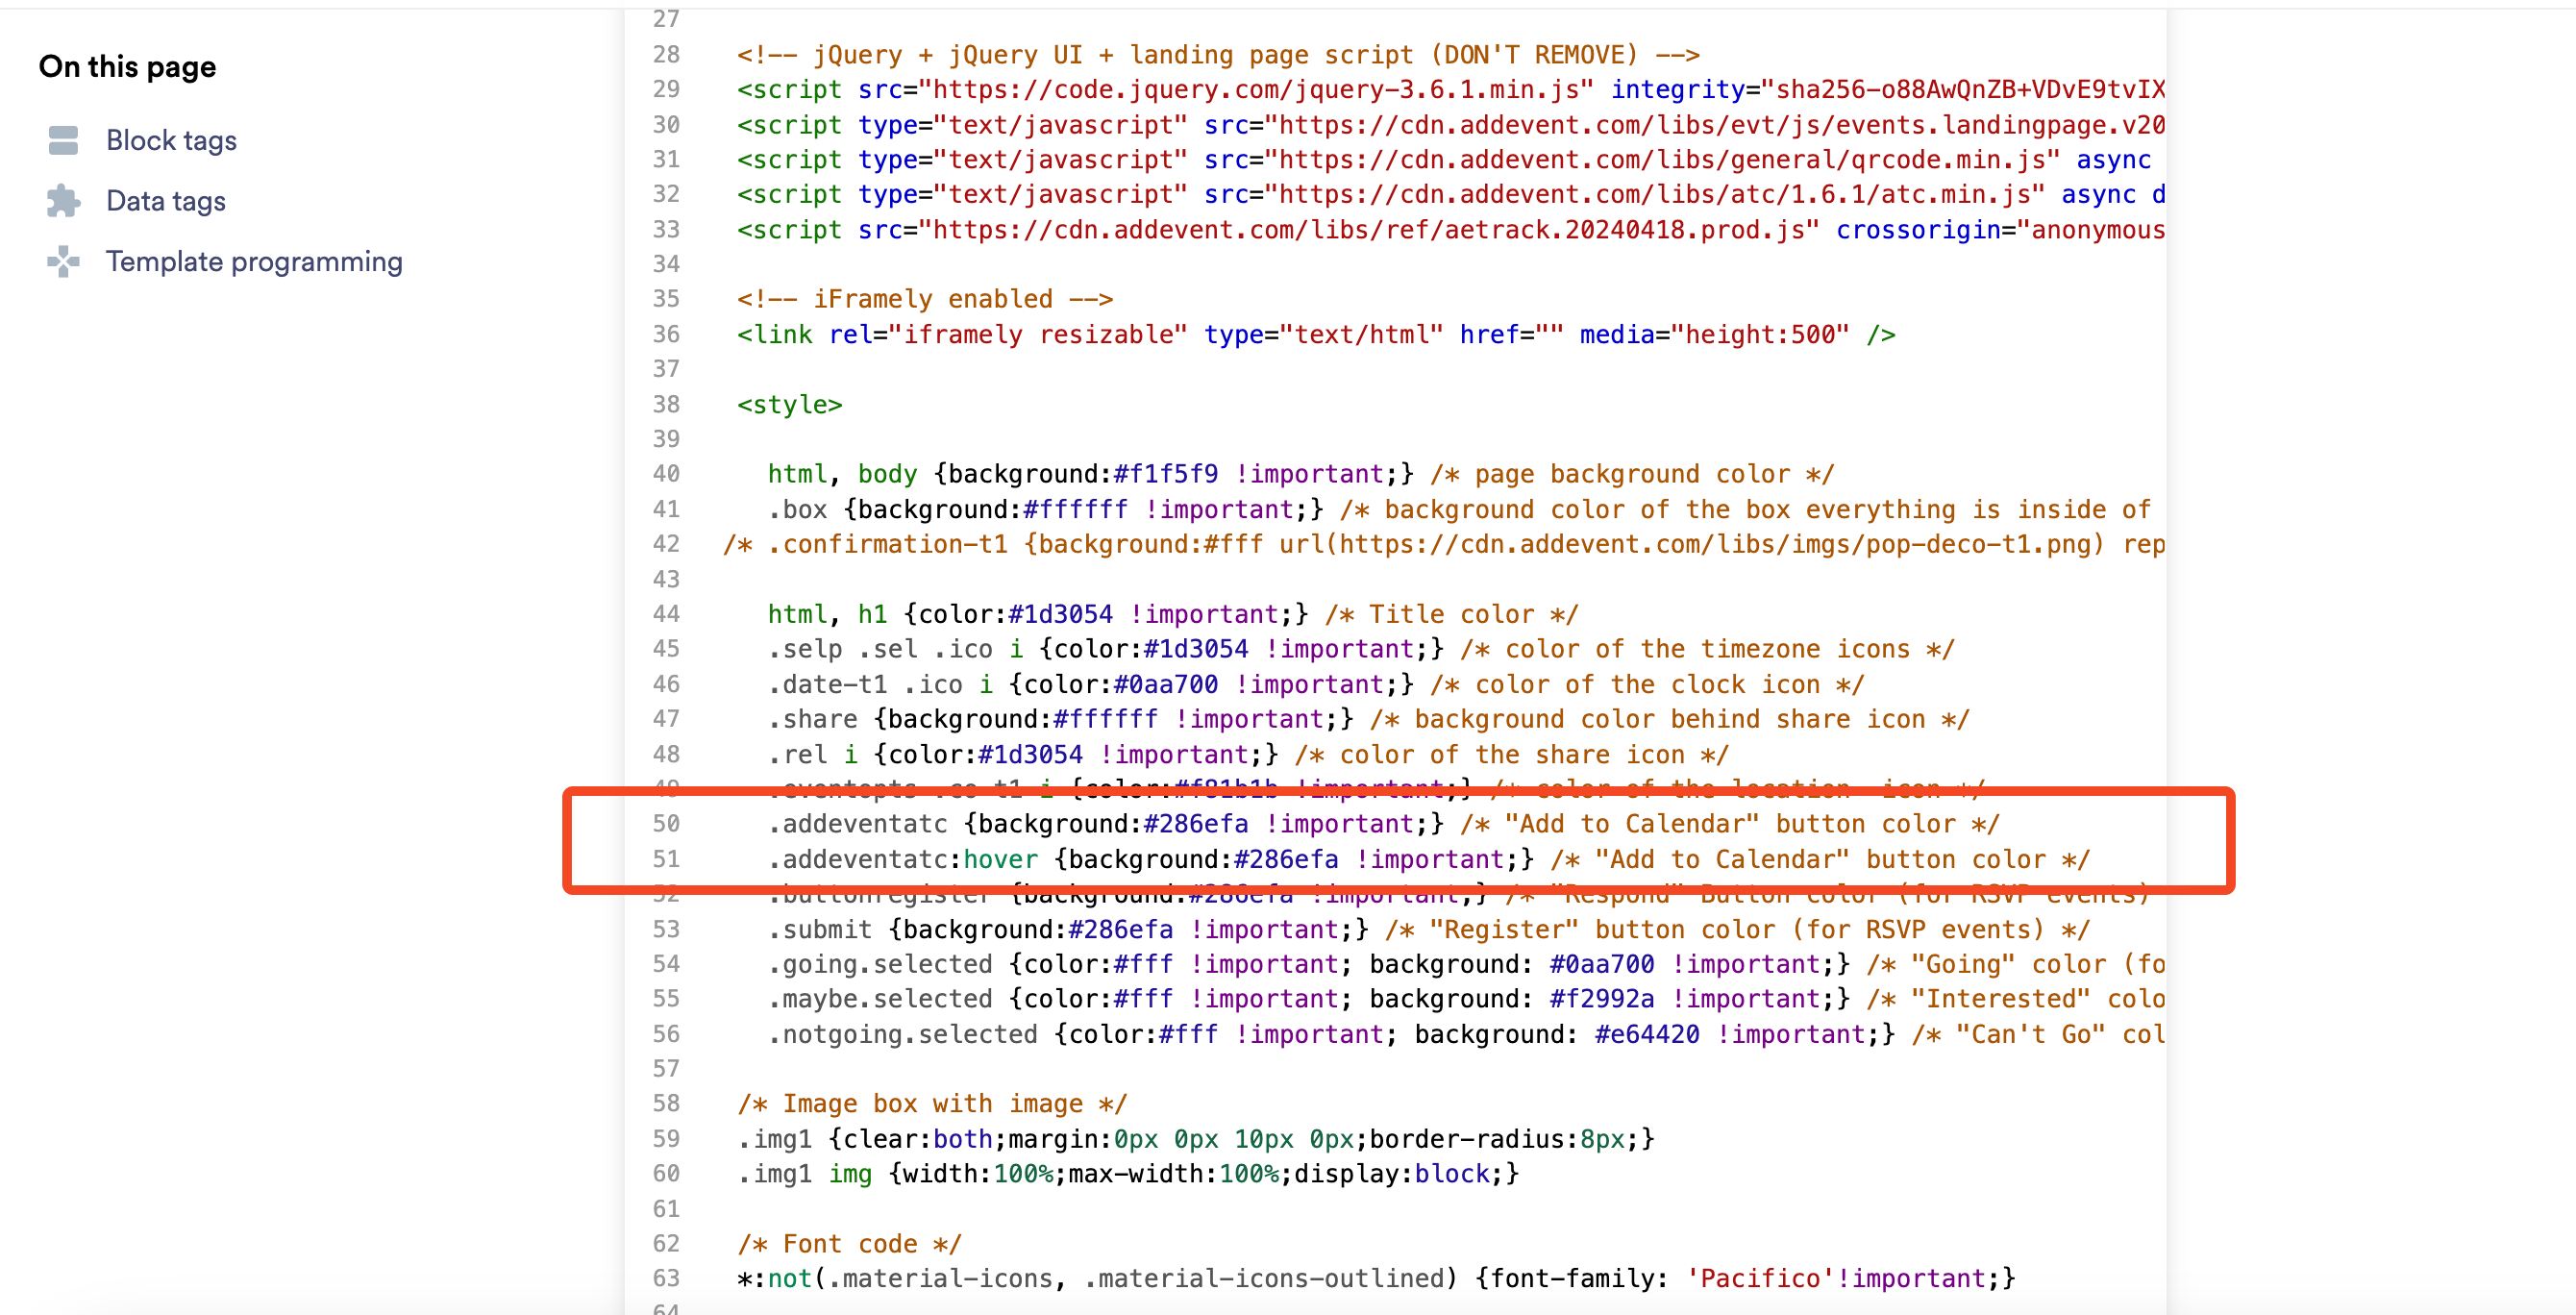
-
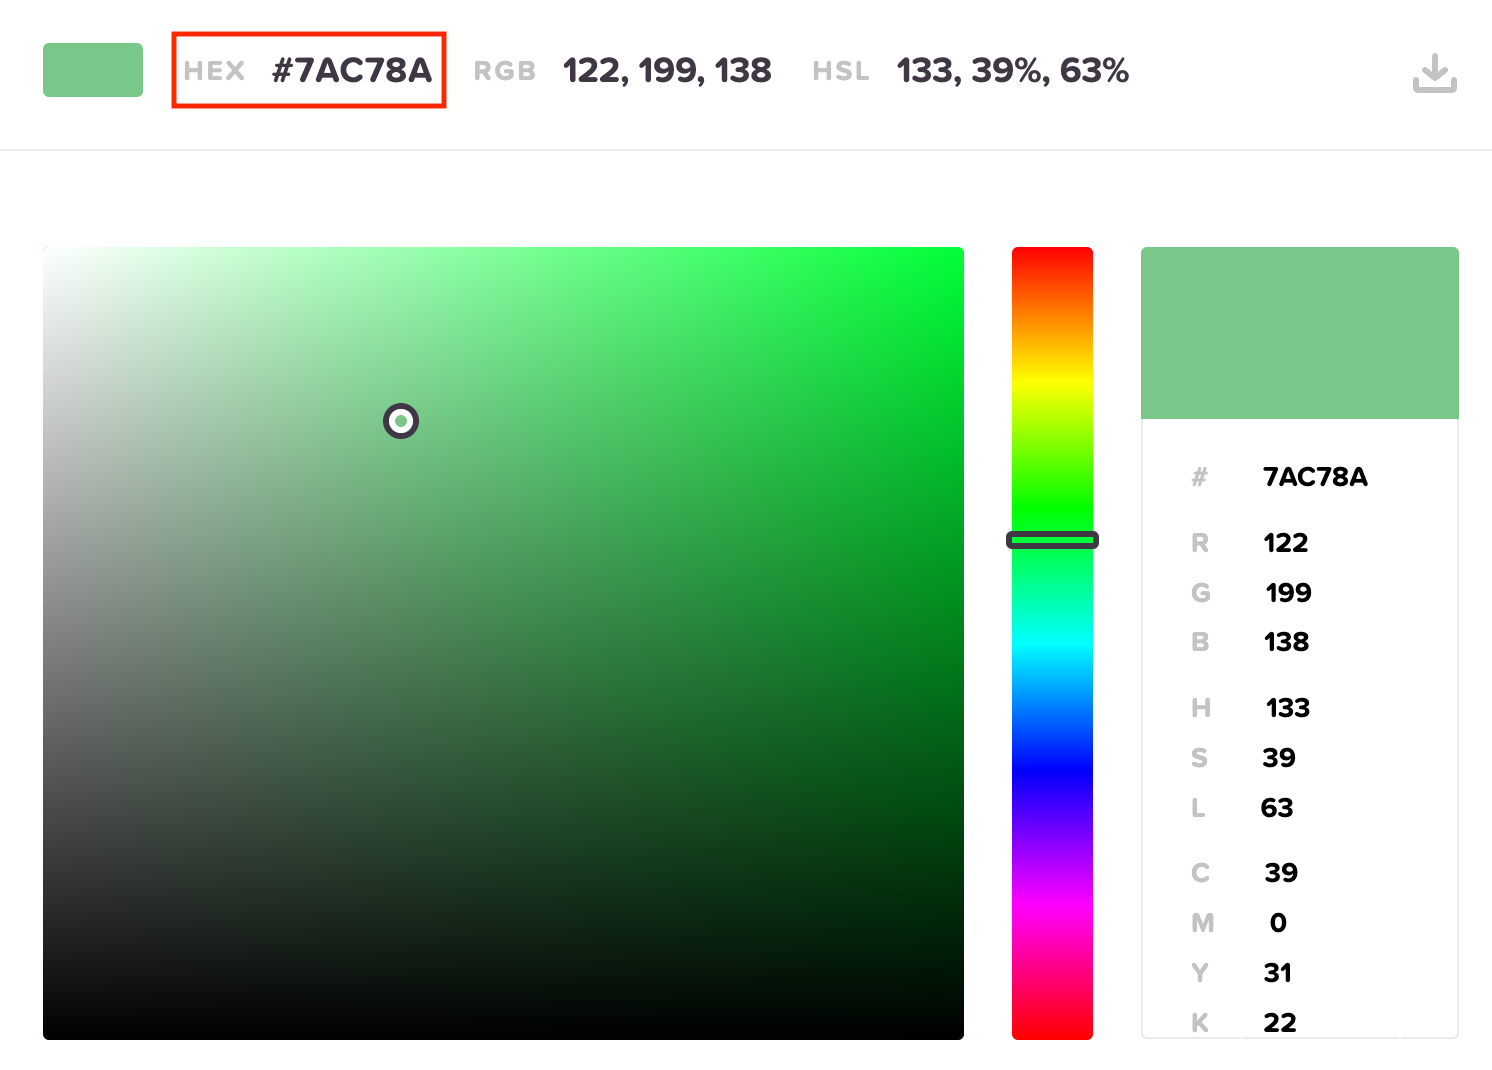
Change the hex code (currently
#286efa) in each line to whatever color you want\Most brand kits for an organization have your brand's various colors and their corresponding hex codes listed. If you want to get a color hex code manually, you can use the website HTML Color Codes to get one.
-
Save the template by scrolling to the bottom and clicking Save
Adding a Header Image or Logo
Uploading the Image
-
Go to the Edit Event page for your event, navigate to the event description section and click the Insert Image icon to open the image uploader.

-
If you have no images uploaded already, you must upload a new one. To upload an image, click New, then Image and then you can either click Upload an image to browse the files on your computer, or drag & drop an image directly onto the pop-up.
-
As soon as the image is finished uploading, click Continue.
-
From the image manager, if you are in the gallery view, click on the image, and then click the i icon at the bottom of the image. On the info pop-up, click Copy to copy the public link to the image source. If you are in list view, you can just click the Copy button directly.
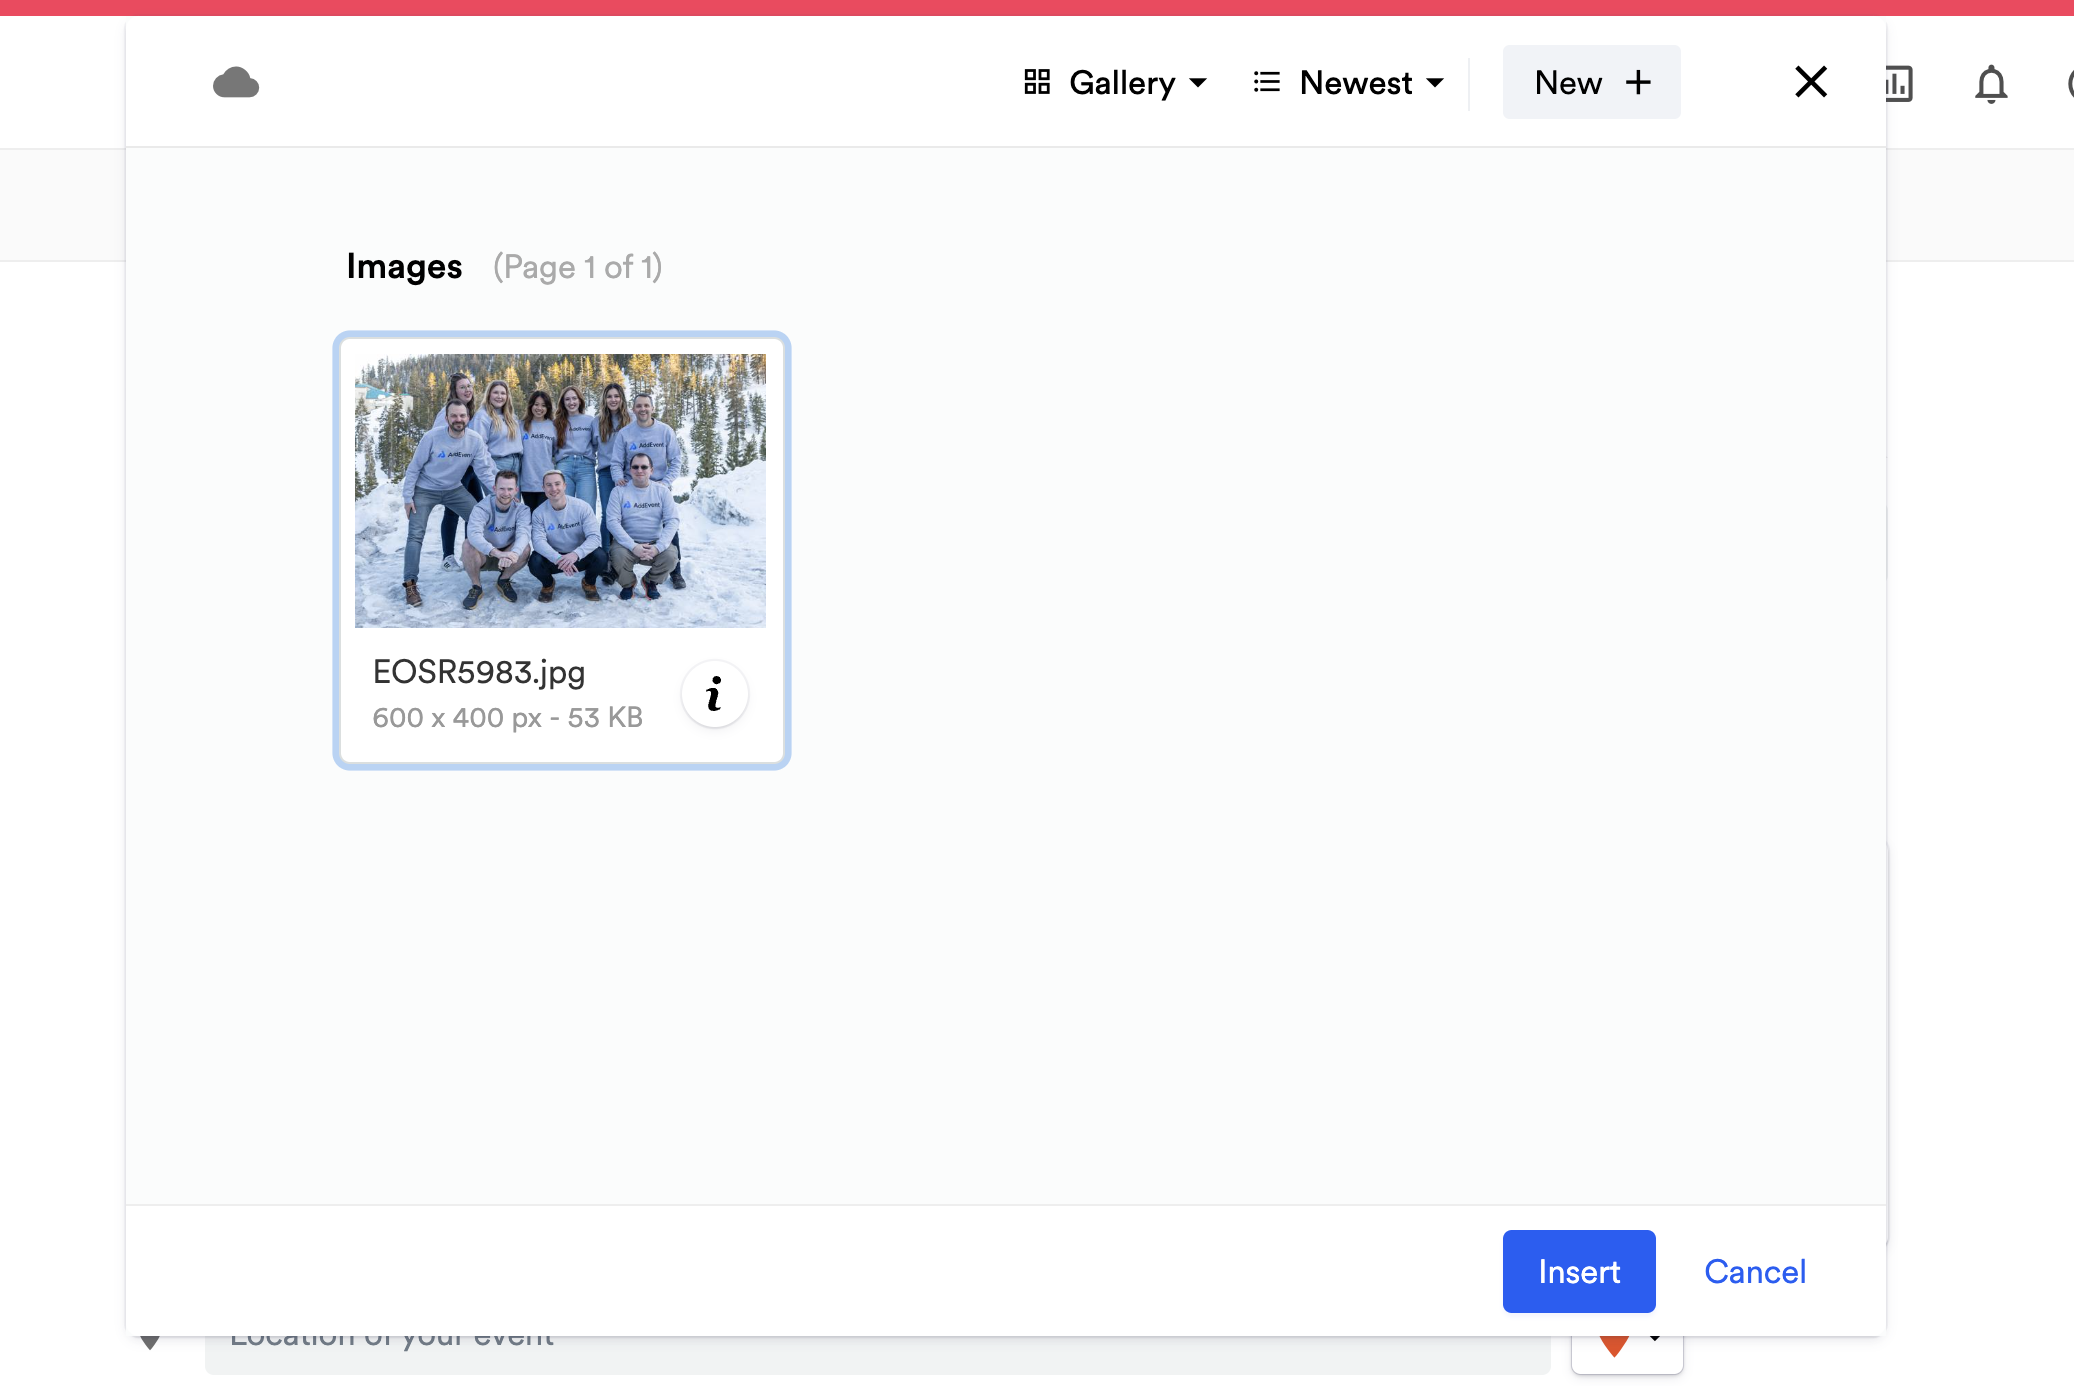
- Once the link has been copied, you can click Cancel on the image manager pop-up and click Cancel at the bottom of the page to exit the event creation flow. To confirm that the link is copied correctly, paste the link into a new tab in your web browser - the image you selected should appear.
Adding the image into the template
-
Find the current URL of the image in the second snippet you pasted in between the
wrapandboxtags -
Highlight the URL currently in the snippet and replace it with the URL you just copied from the image manager.
-
Save the template by scrolling to the bottom and clicking Save
Changing the Preview image for Social Media
-
Get the URL for the image you want to use after you upload it (as in steps #4 & #5 above)
-
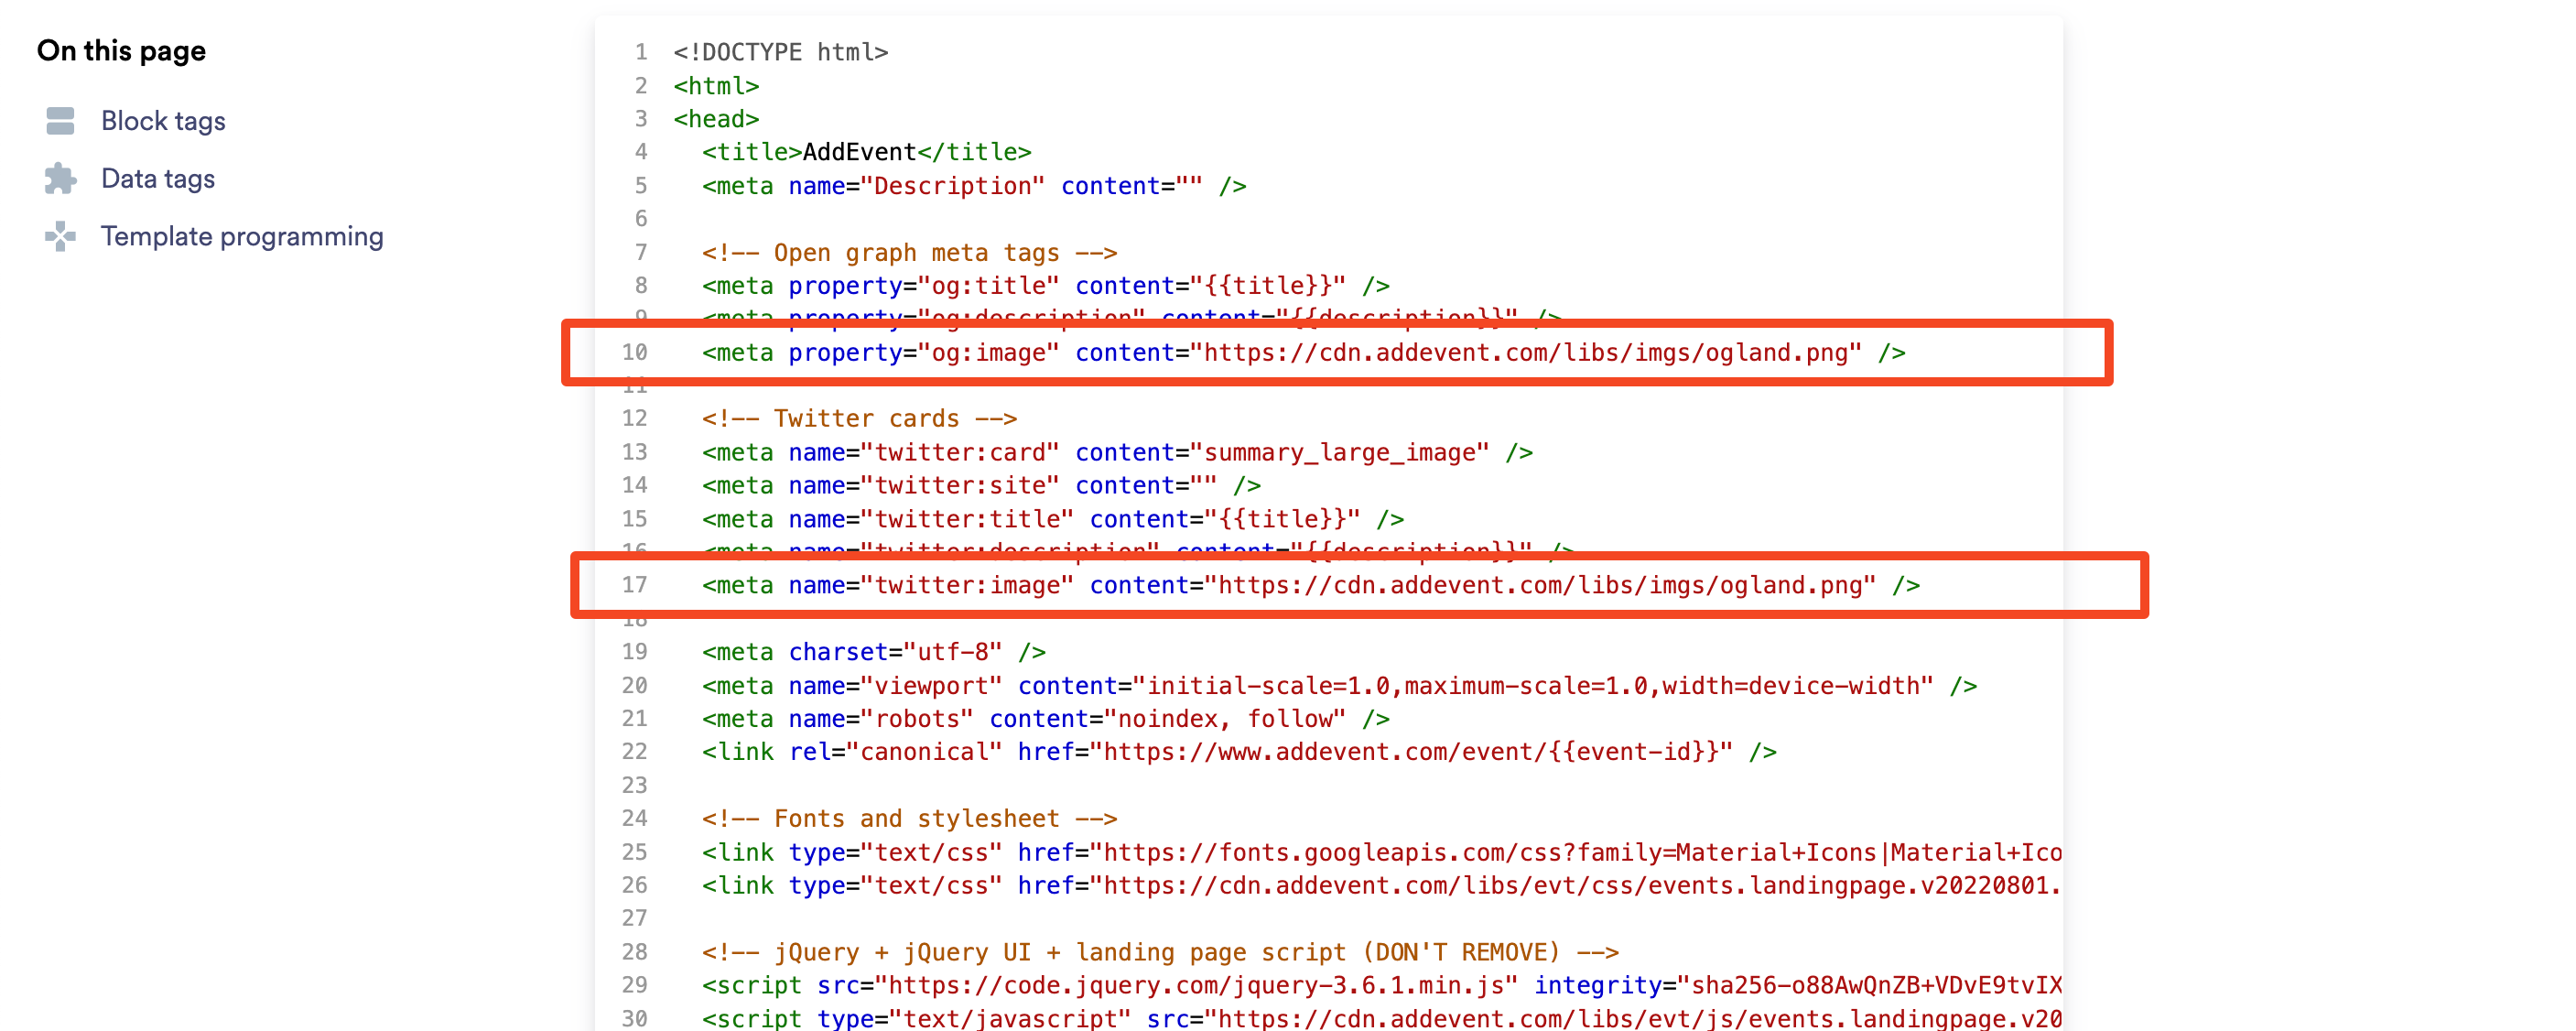
Paste that URL into two different locations, following the screenshot below. The
og:imageURL will change how the image appears on sites using Open Graph to manage the image previews (Meta, LinkedIn, and others), while thetwitter:imageURL affects how the image looks on Twitter/X.
-
Save the template by scrolling to the bottom and clicking Save
Changing the Color of the Respond and Submit Buttons
This process is essentially the same as changing the Add to Calendar button color. If you need help getting a color hex code, please scroll back up to that section for instructions.
-
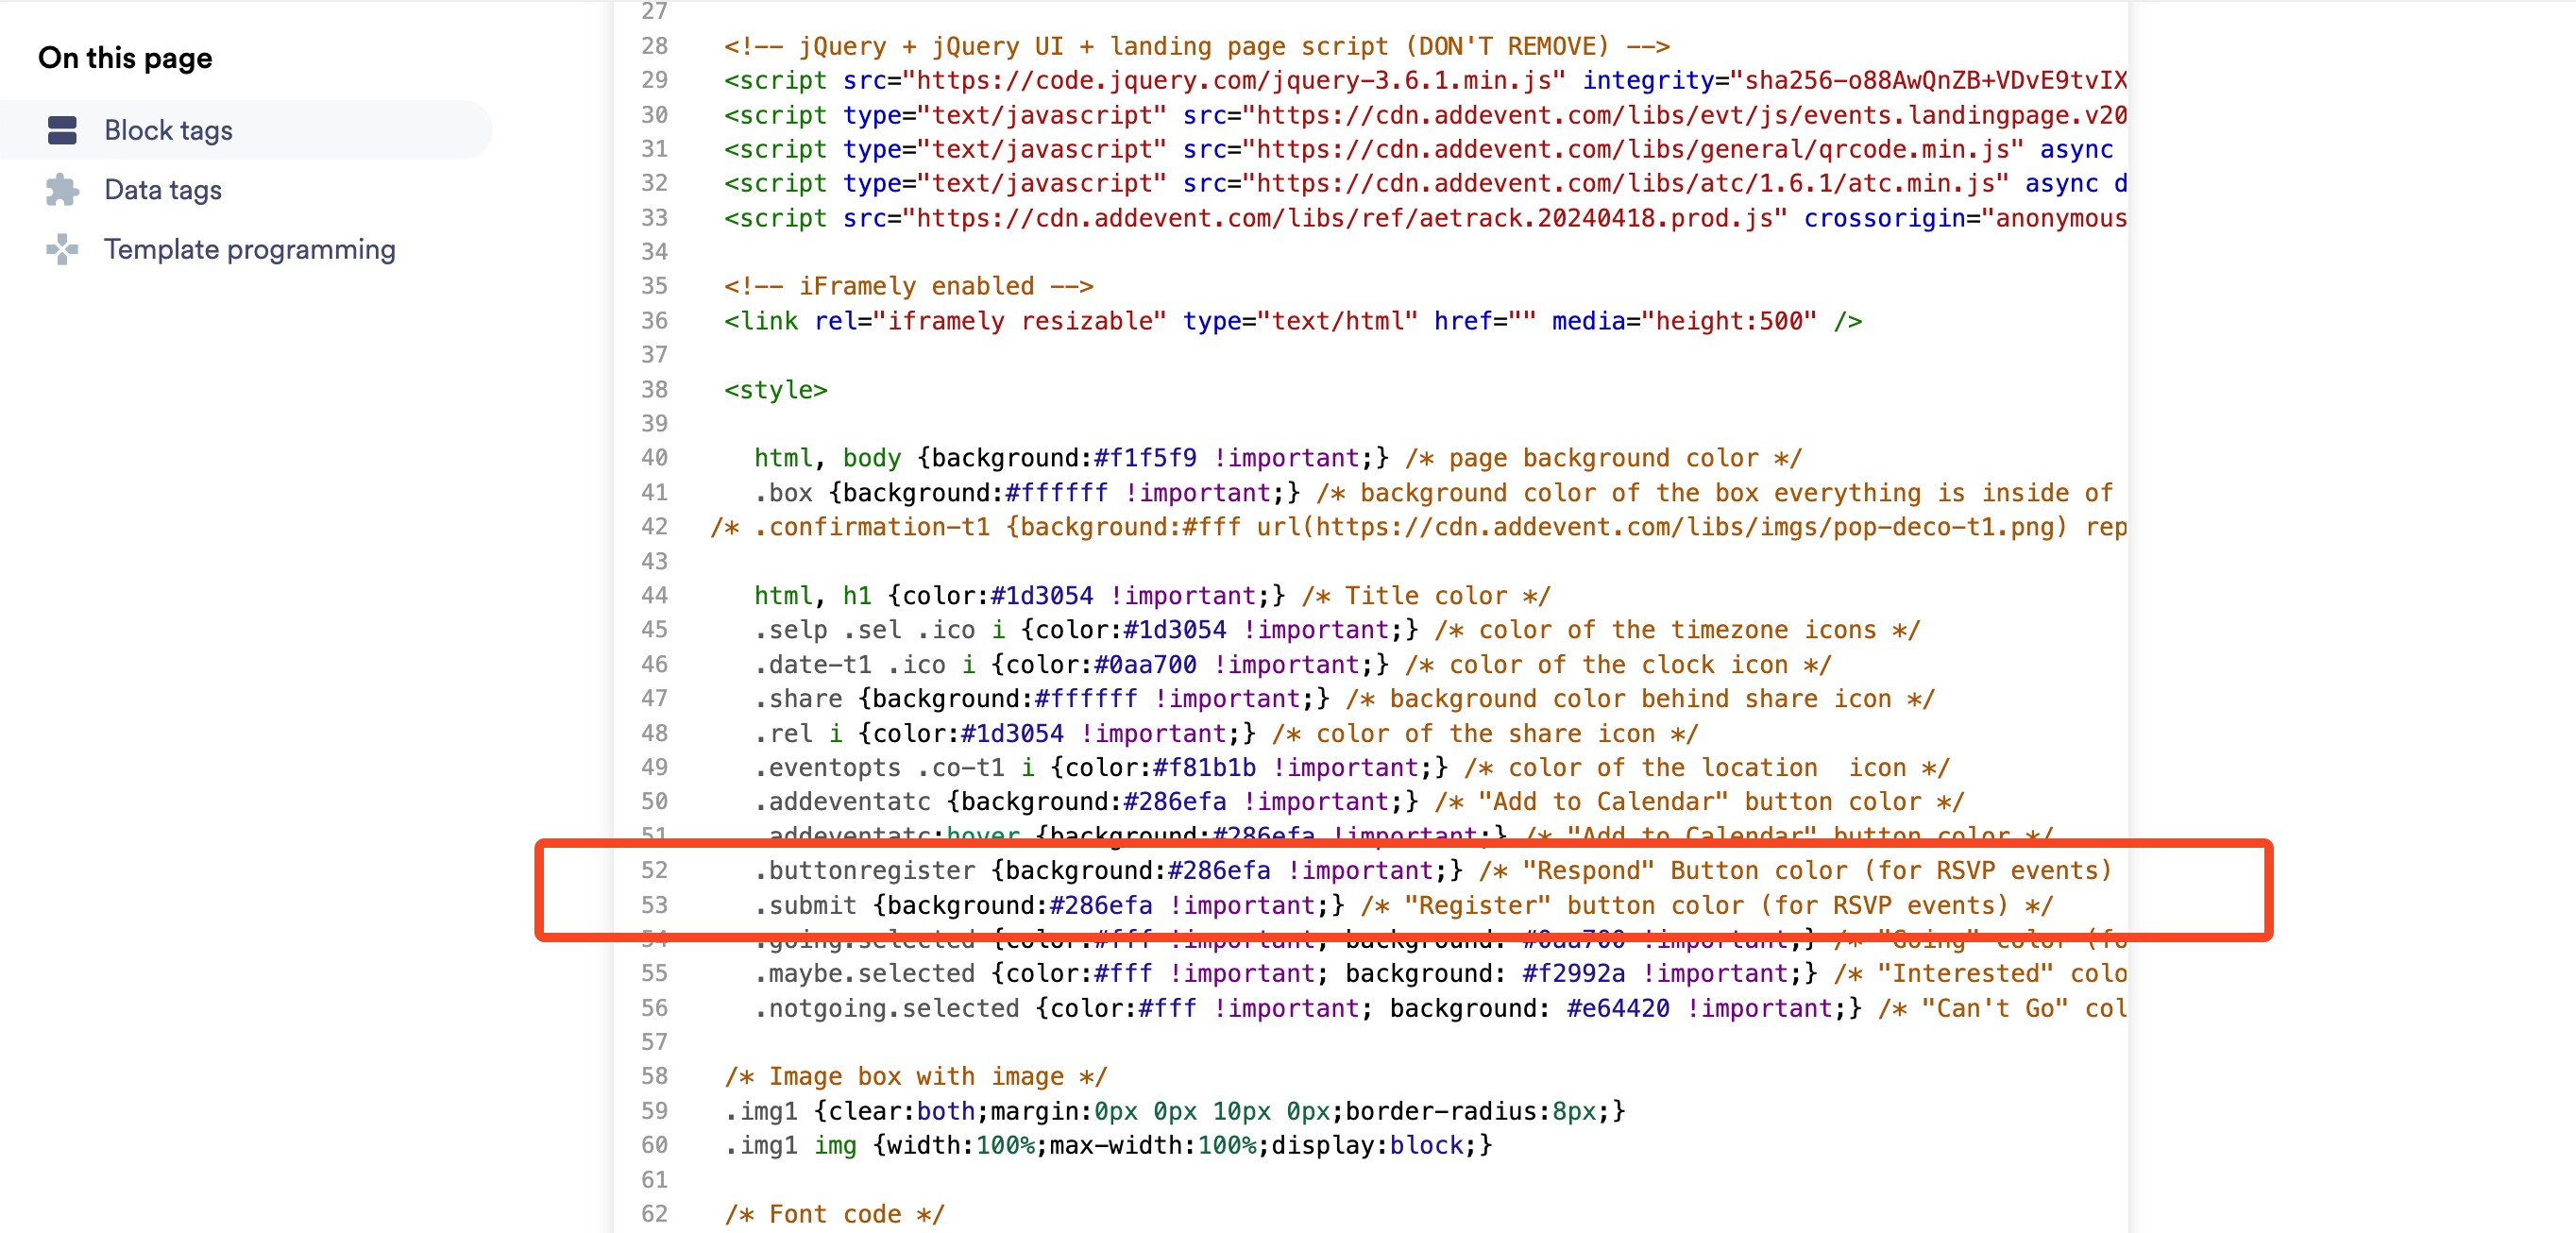
In the big code snippet, find the lines labeled
/* "Respond" Button color (for RSVP events) */and/* "Register" button color (for RSVP events) */(in the snippet above, the are on lines 15 & 16).
-
As with the Add to Calendar button, change their color hex codes (currently
#286efa) to match whatever color you'd like for them -
Save the template by scrolling to the bottom and clicking Save
Removing the Respond Button
-
If you'd prefer to remove the "Respond" button altogether so your users go straight to the RSVP form, find the section of code in your snippet, highlighted in the screenshot below:\
-

For lines 66 & 67 in the screenshot (29 & 30 in the snippet above) remove the
/*and the*/(also known as "comments") around each line. You will see their colors change to match the rest of the code when you are finished. If they are still gold/tan when you are finished, it means you missed removing a/* -
Save the template by scrolling to the bottom and clicking Save
Do not remove the comments from the line
/* Respond Button removal block" */This line is meant to describe what the following code is for, not be a part of the code itself. Removing the comments from this line will break your template's functionality
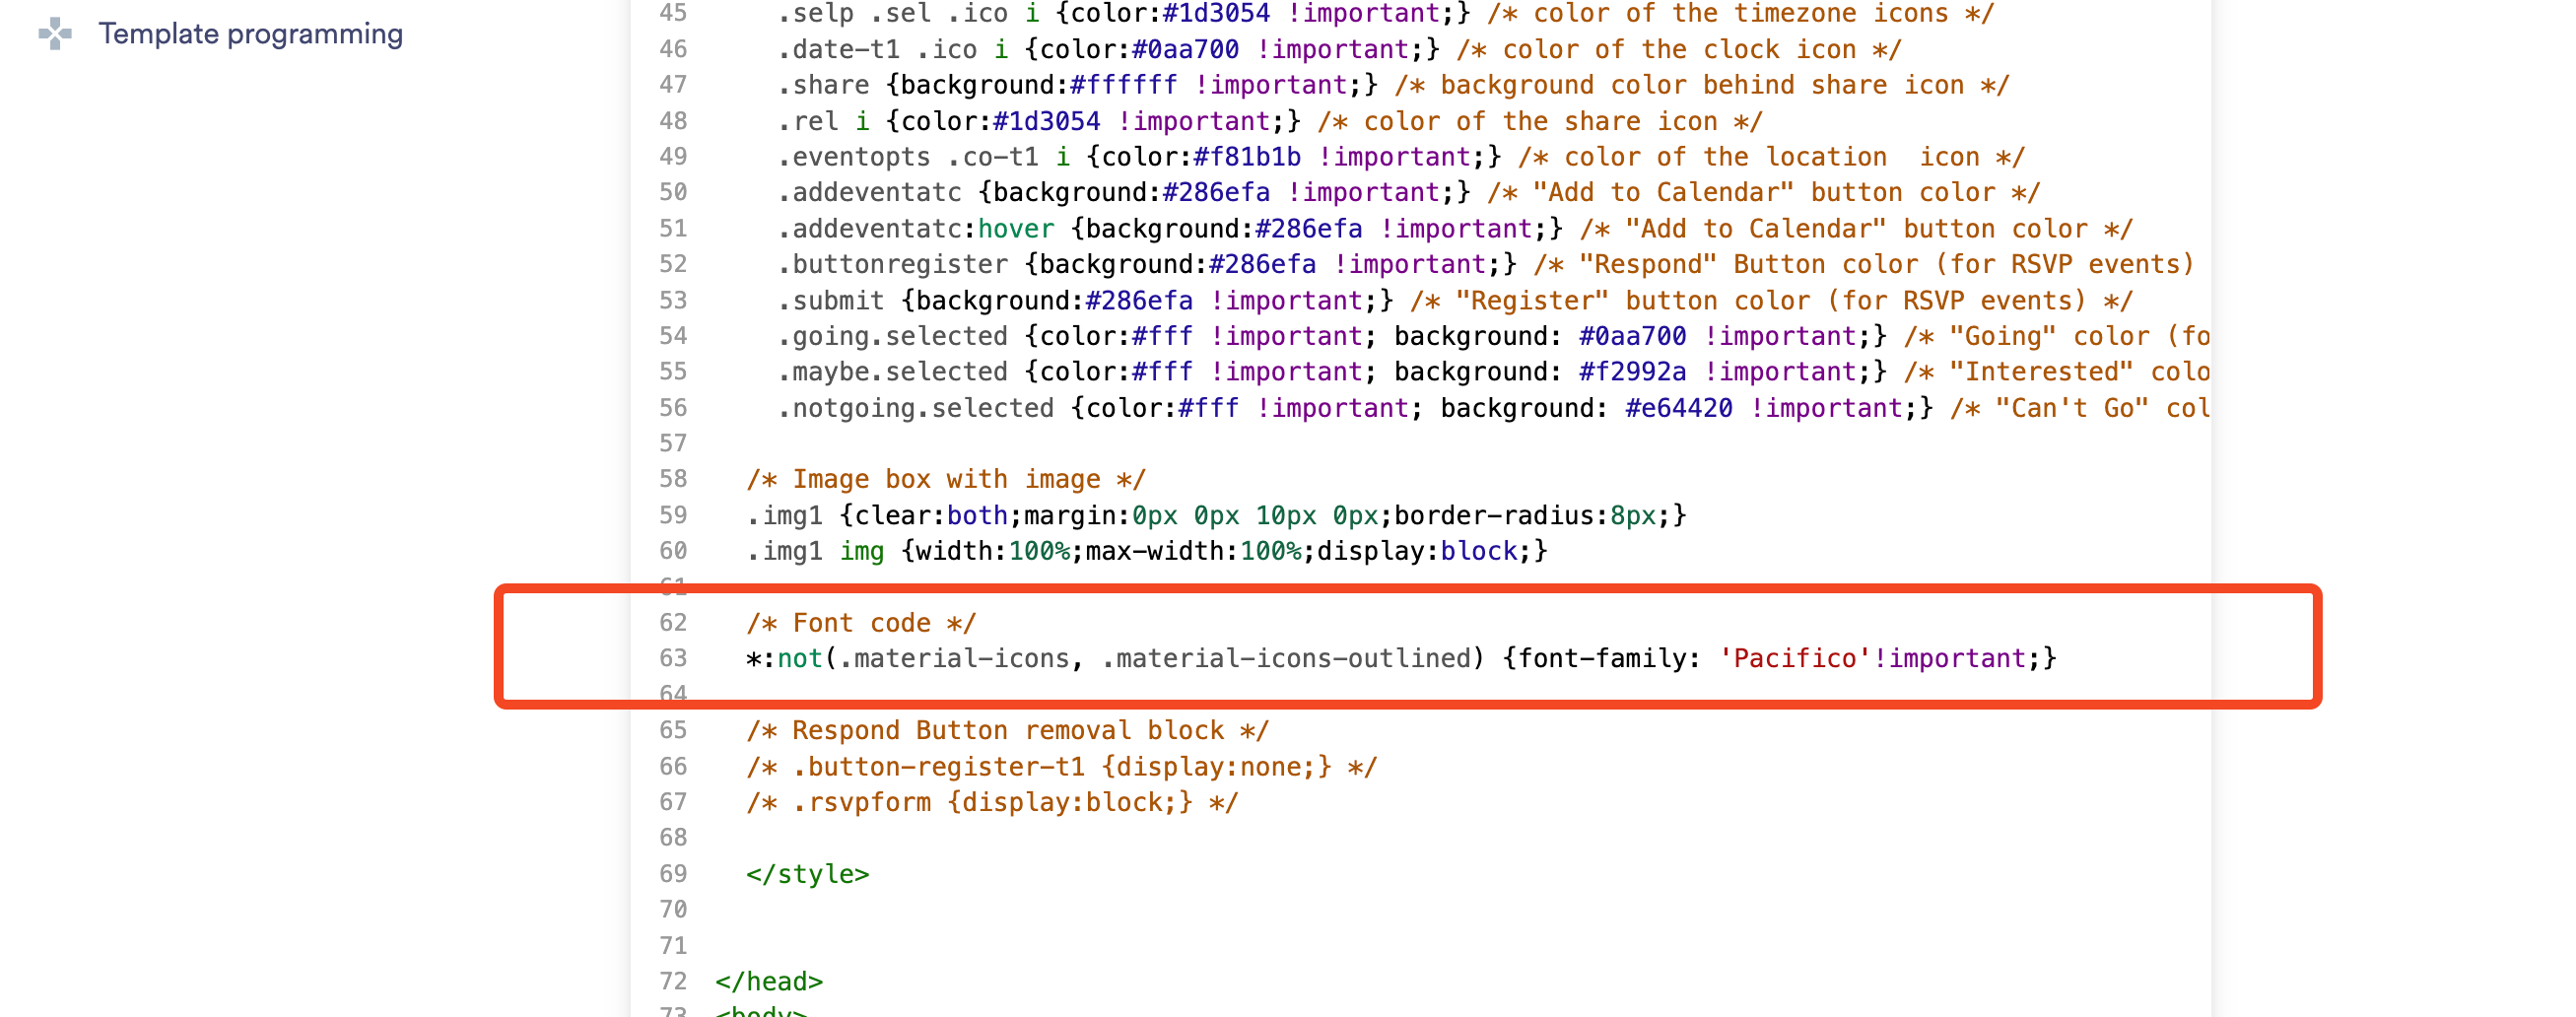
Changing the Font
-
In the section of the snippet titled
/* Font Code */change the font name from'Circular-AddEvent', Lato, 'Open Sans',sans-serifto the font family you want to use
-
Save the template by scrolling to the bottom and clicking Save
AddEvent's templates support the Google fonts library right out of the box. You do not need to import a new library if you want to change the font to one that is already present in the Google Fonts library.
You can also import any font not found in Google's library by following the import instructions that font family provides for you.
Assigning the template to a calendar
If you did not already do this at the end of the "Creating a Template" section, you will need to assign your shiny new template to an event that you want the landing page of to match your branding.
- Once your template has been created, navigate back to your Event page.
- Go to the Event landing page section again, but this time, click the template dropdown and select the template you want to assign to the event.
- Click the Set button that appears
Congratulations! Open (or refresh) your event landing page to see how all your changes look!
Updated 9 months ago