Set a Seat Limit
This help doc explains how to set a maximum number of attendees for an RSVP event by enabling the seat limit feature. Setting a seat limit restricts the number of people who can RSVP and allows you to display a custom message when the limit is reached. Follow these steps to set a seat limit for your event.
How to Enable a Seat Limit
To enable a seat limit on an RSVP event, follow these steps:
- Go to your Event edit page of the RSVP event.
- Click on the RSVP settings tab.
- Scroll down to Maximum seats/number of attendees are and choose from "unlimited" or "Limit to" and if you have a limit, enter the maximum number in that field.
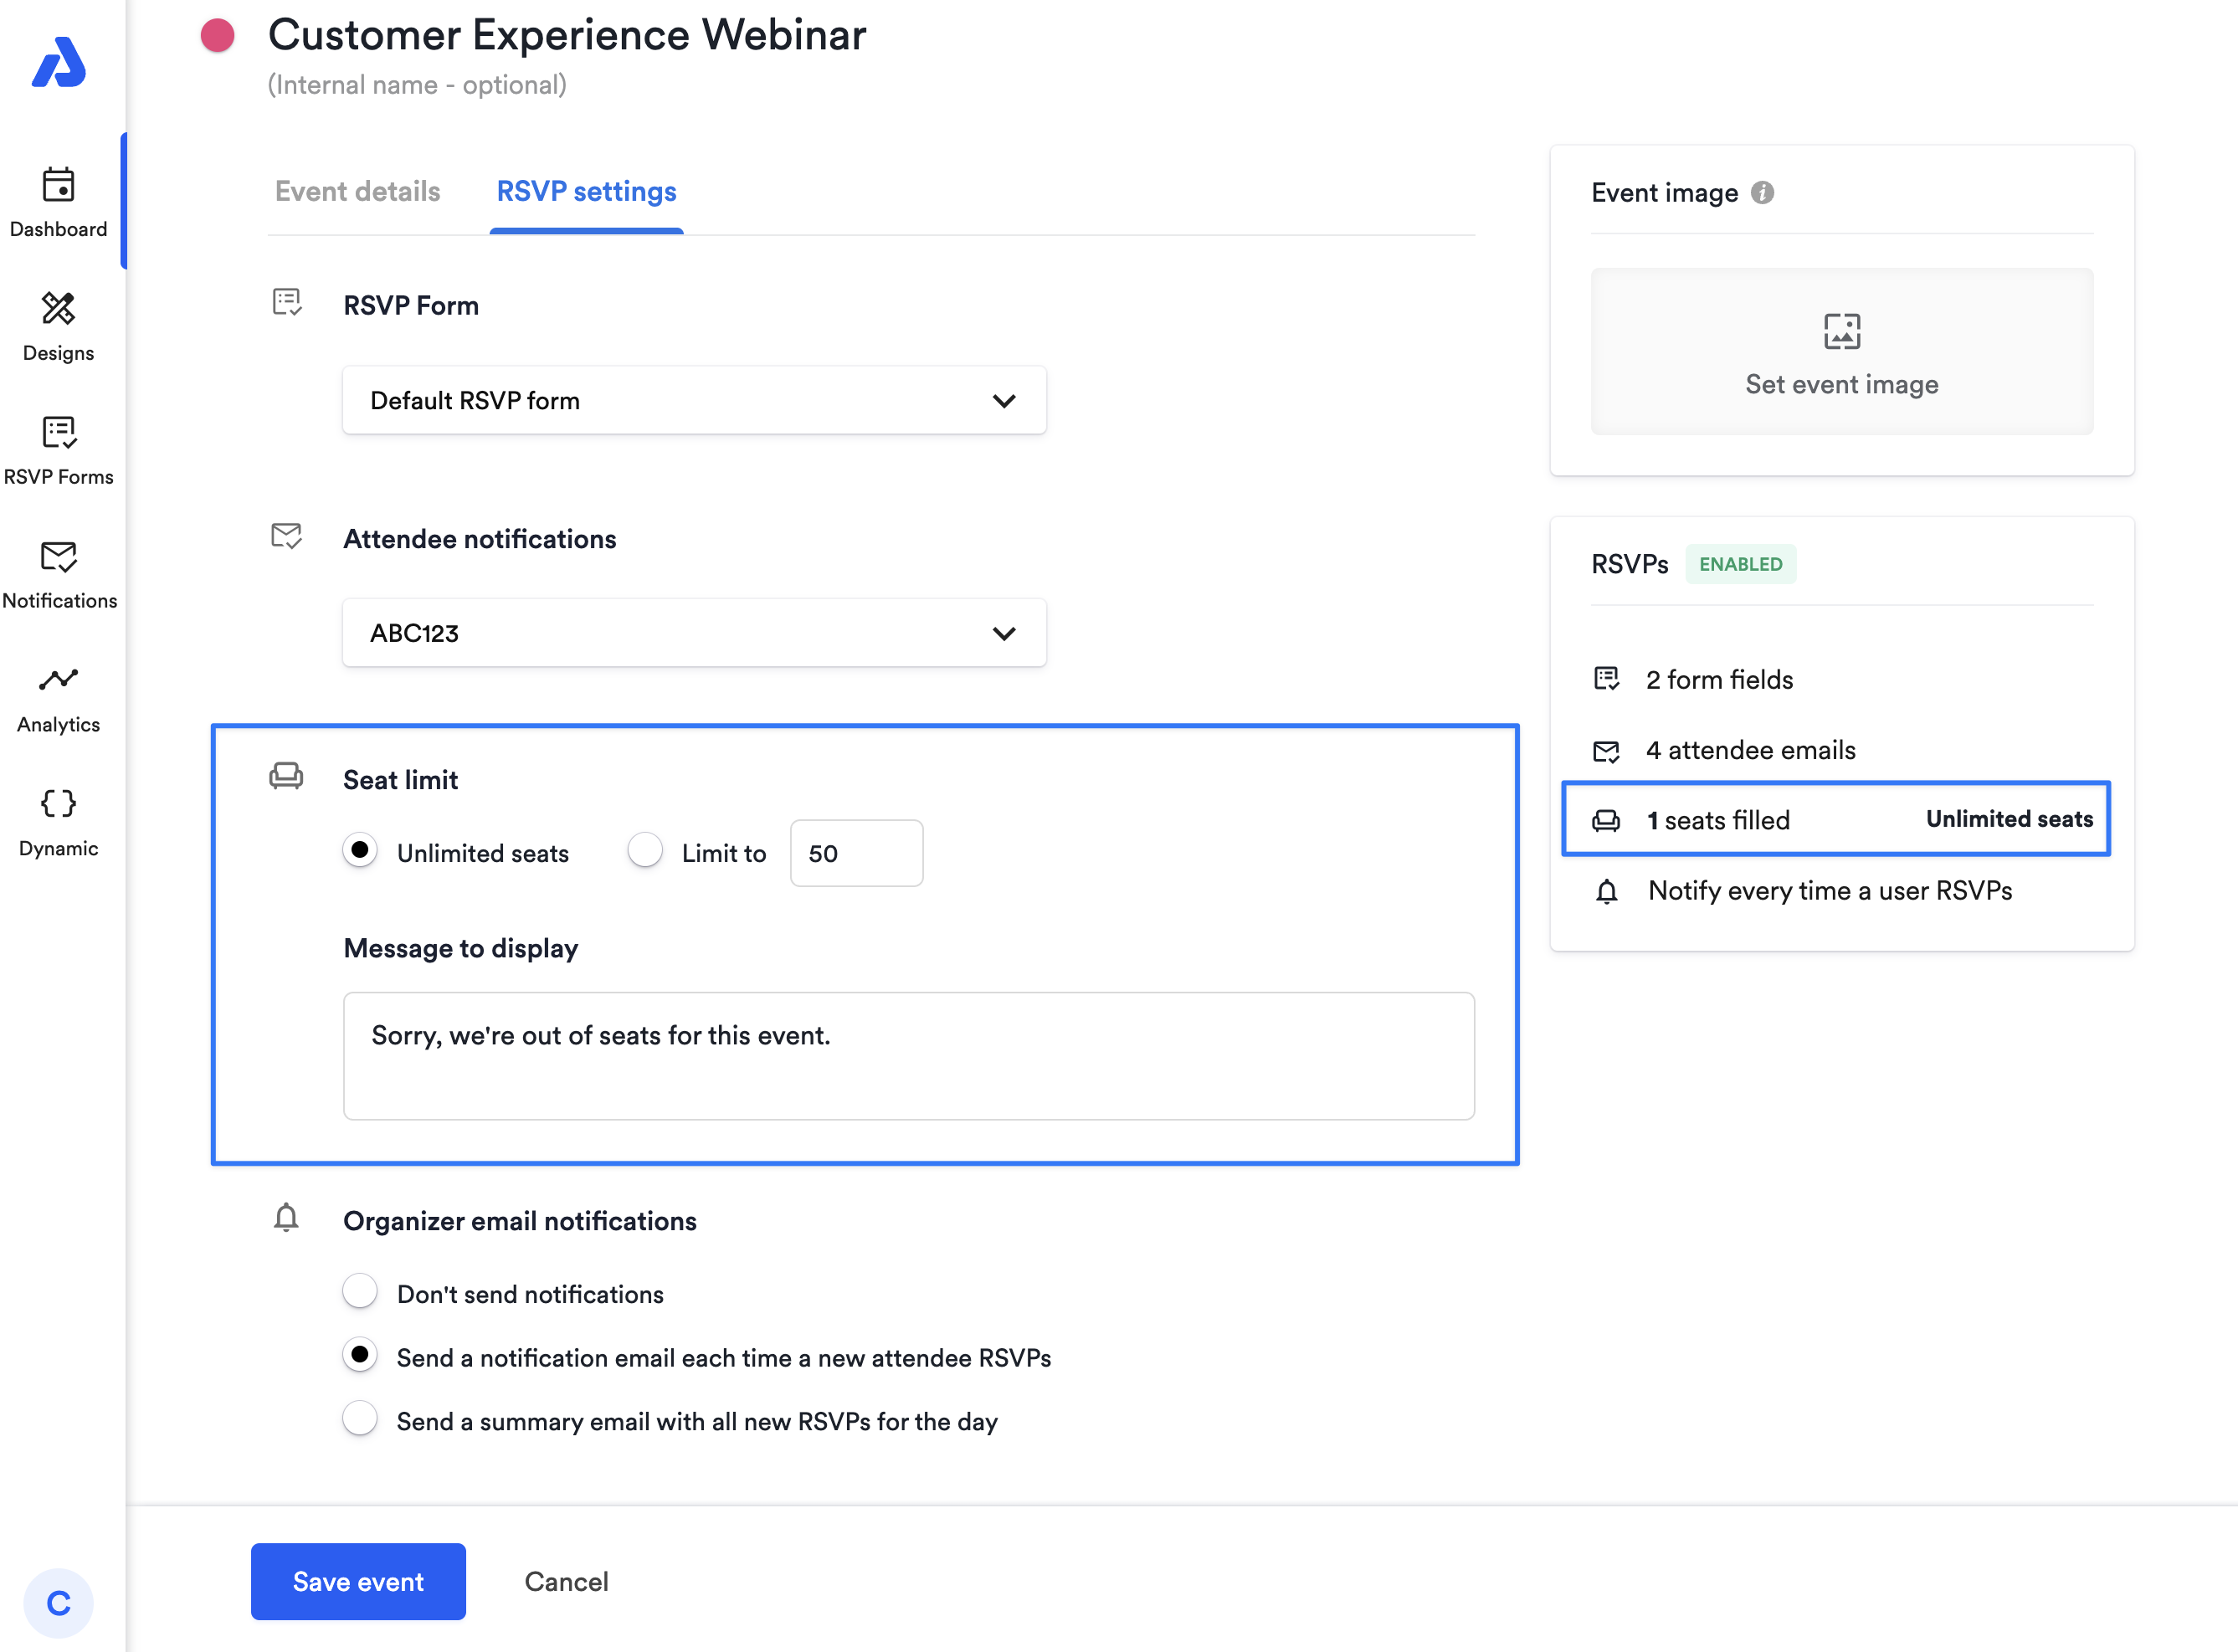
What Happens When the Seat Limit is Reached?
If the seat limit for your event is reached, any additional user who attempts to RSVP will see the custom message you entered in the RSVP settings section of the event. This message informs them that the event is full and that no additional RSVPs are being accepted.
For example, you could enter a message such as: “This event has reached its maximum capacity, and we are no longer accepting RSVPs. Thank you for your interest!”

By following these steps, you can effectively control the number of attendees for your event and provide clear communication to users once the limit is reached.
If your RSVP event description includes a meeting link and the seat limit has already been reached, anyone who wasn't able to RSVP for the event before the limit was reached will not be able to access the meeting link.
Updated about 2 months ago