Send an Email Update
This help doc explains how to send a manual email to RSVP event registrants. This feature is useful when event details change and you want to ensure everyone who RSVP’d has the latest information. You can customize the email, choose which attendee groups receive it, and update the default template if needed.
Email Attendees
To send an email update to your RSVP event registrants:
-
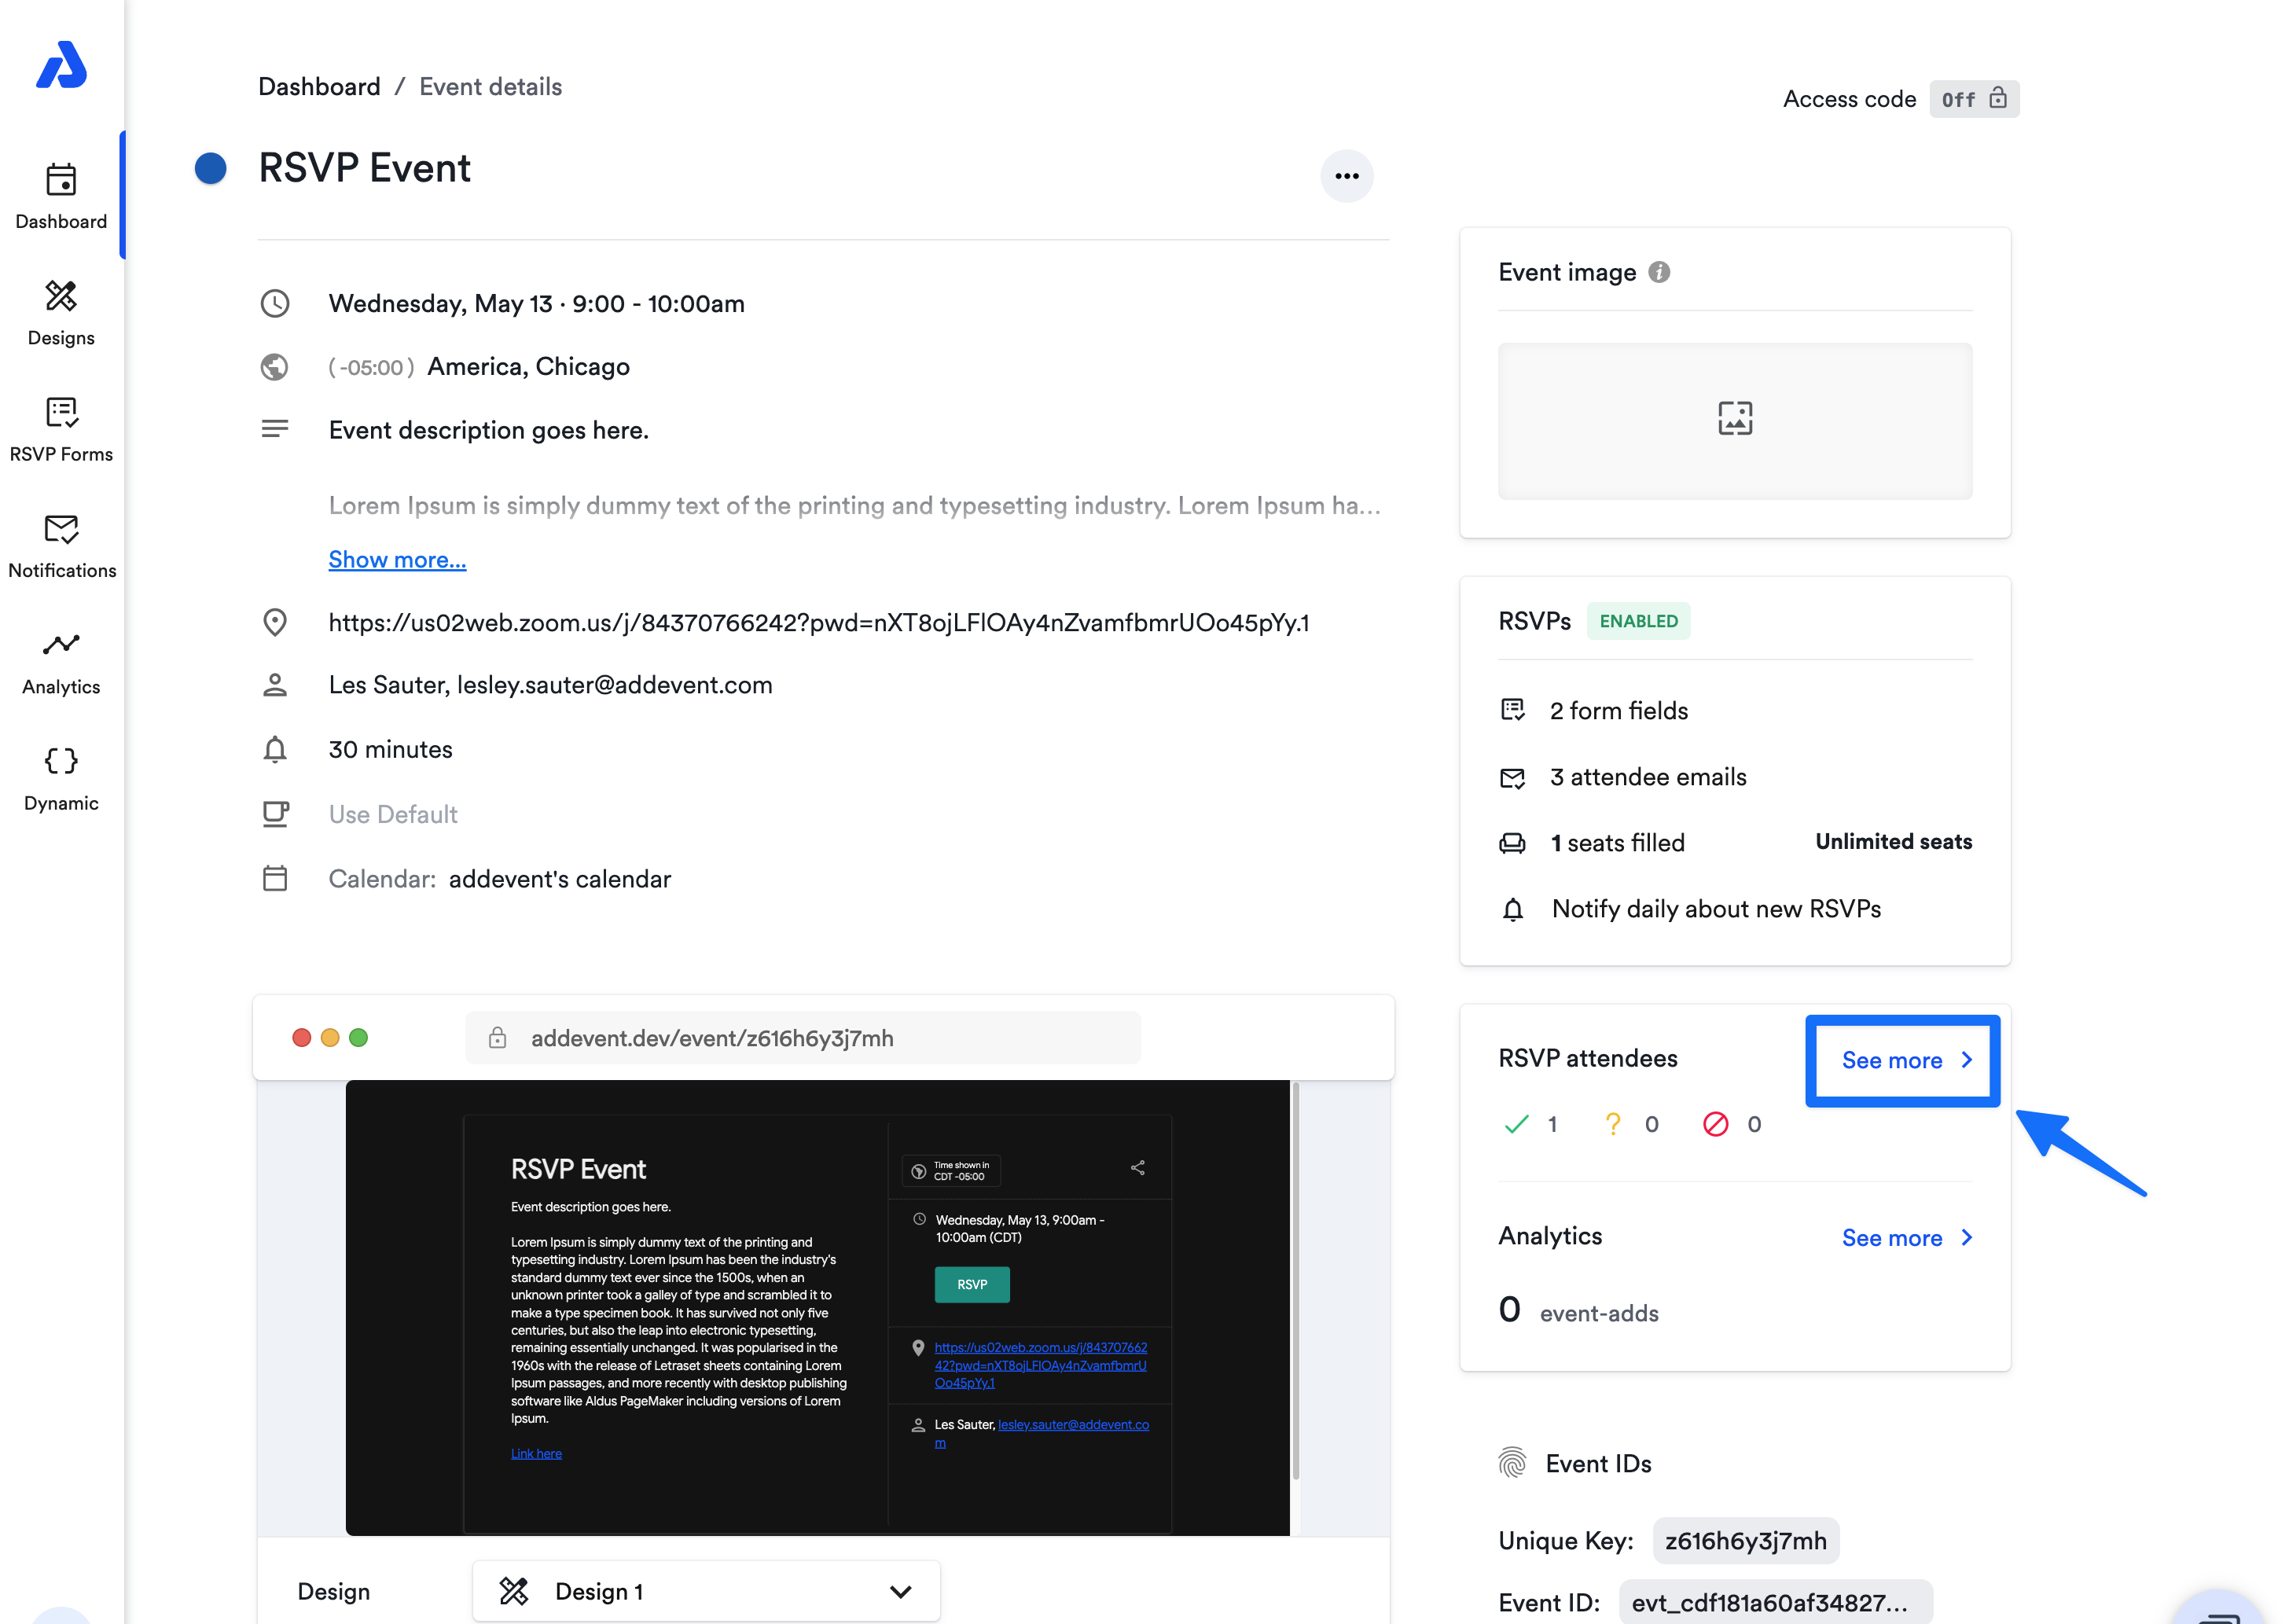
From the Dashboard, click on the RSVP event's title. You will be directed to the Event details page.
-
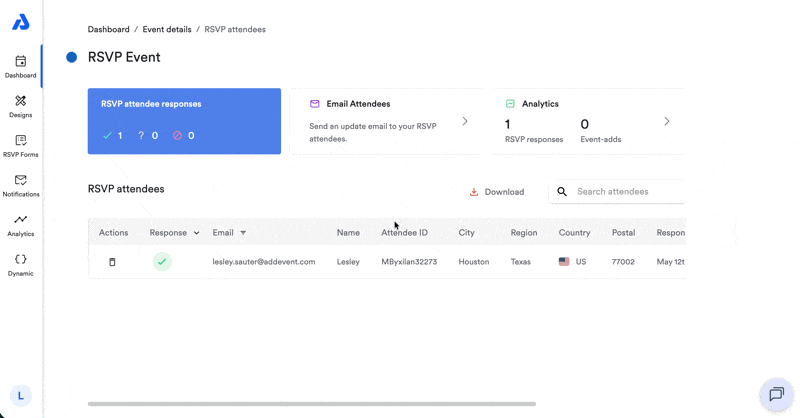
Click the See more link on the right-hand side of the page to open the RSVP attendees page.
-
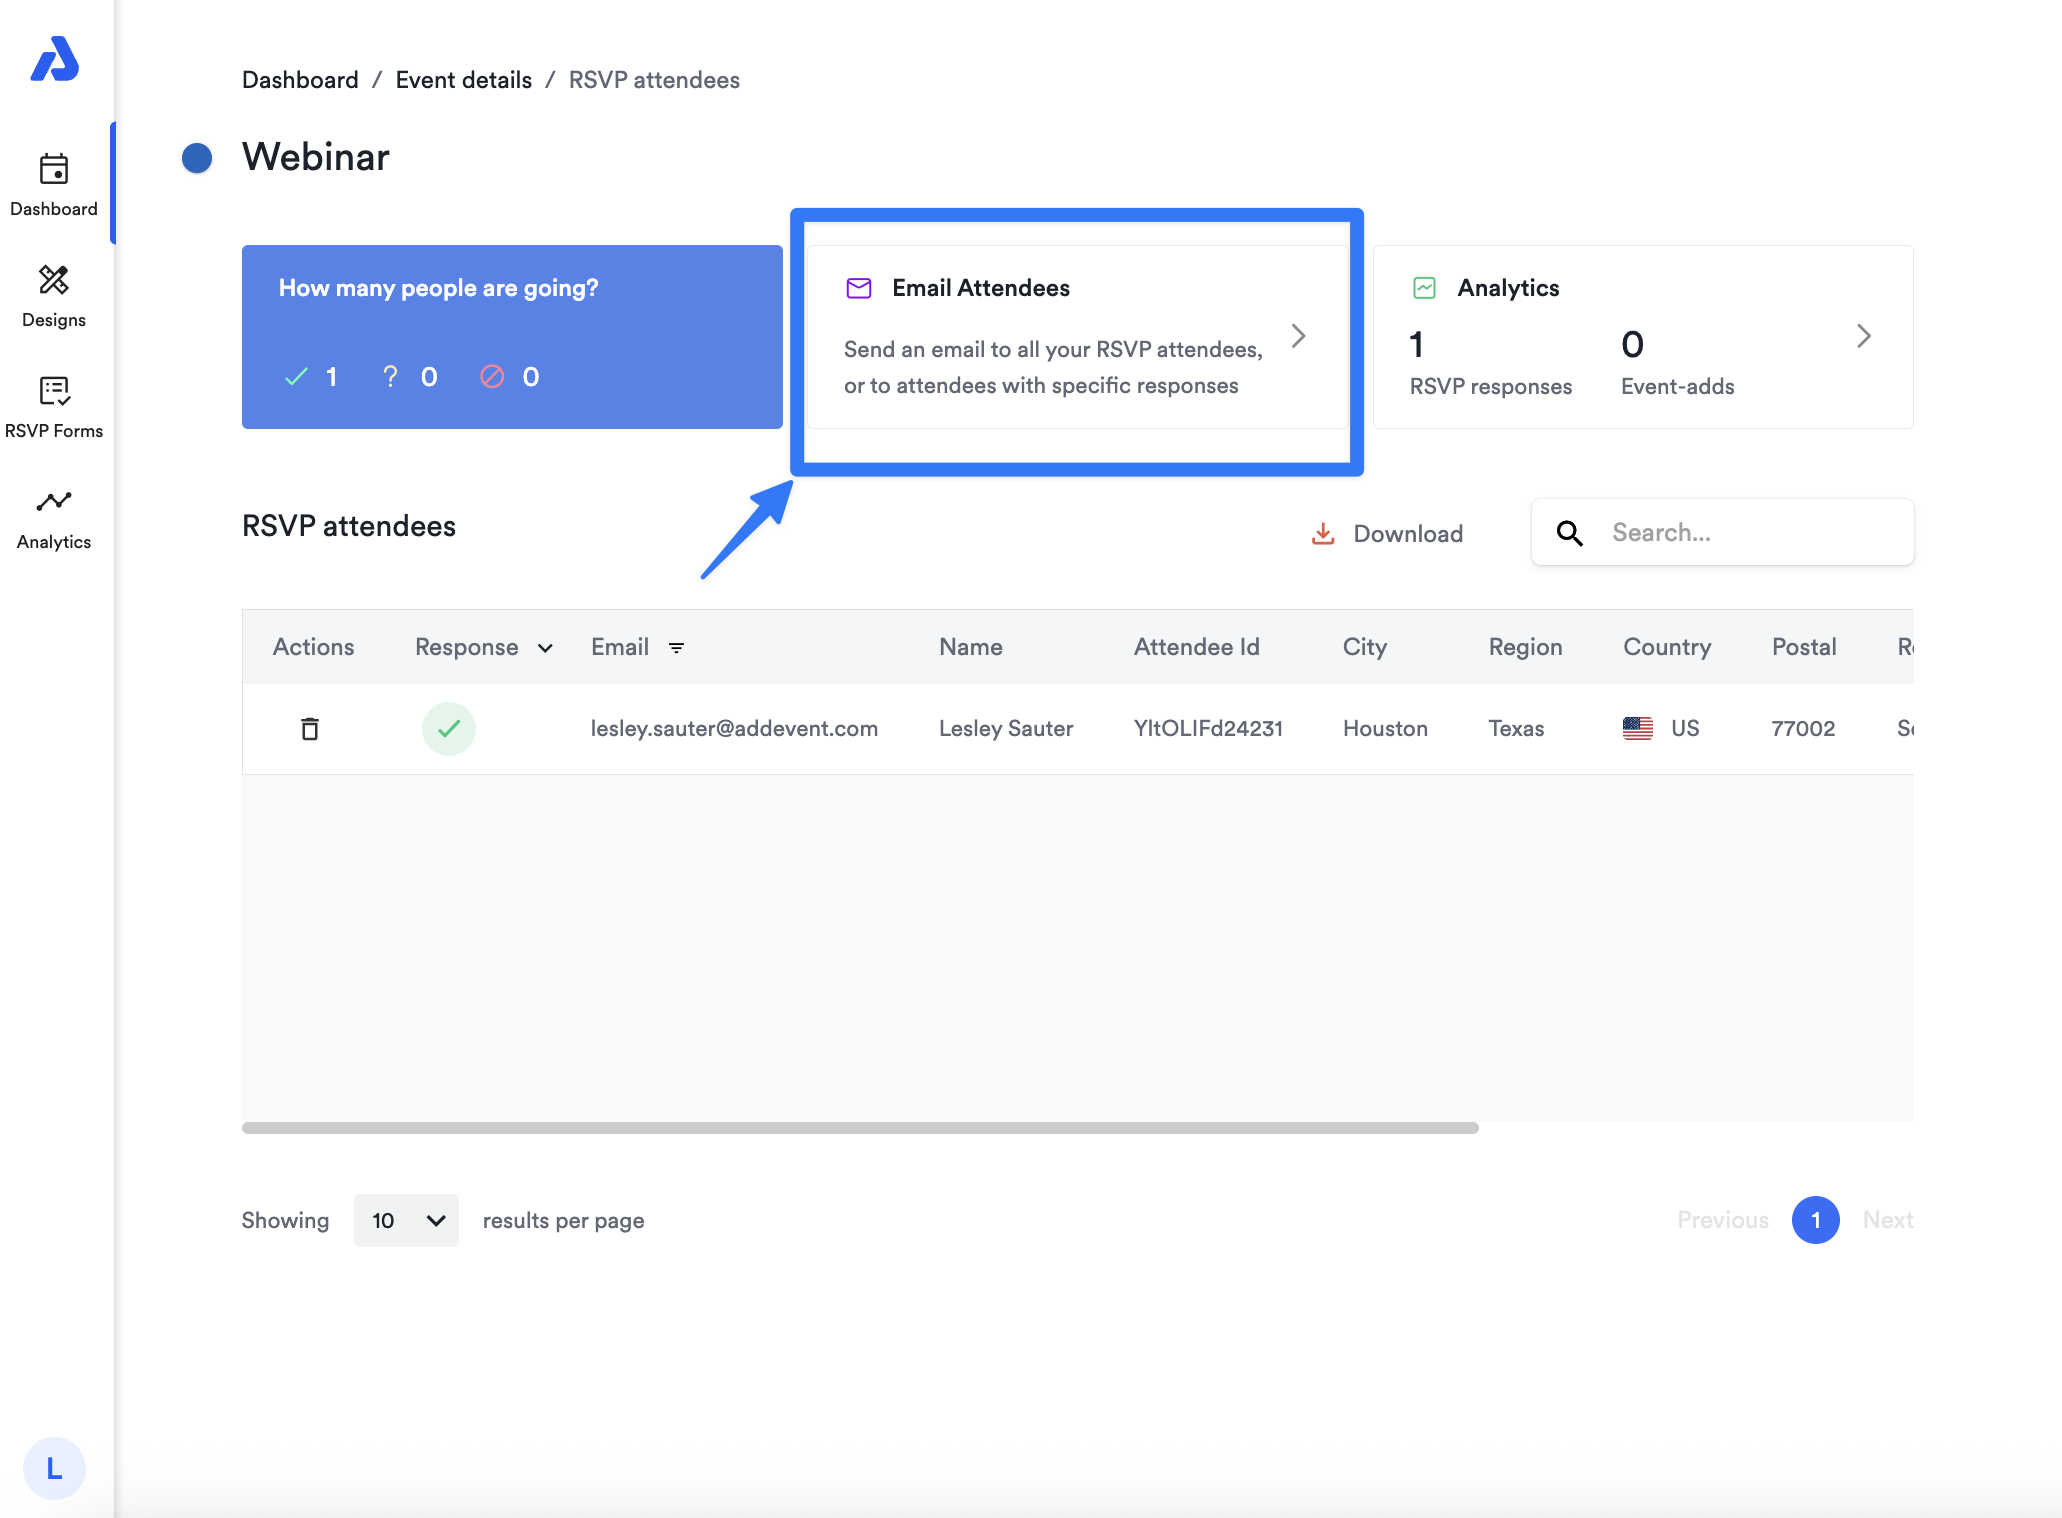
On the RSVP attendees page, click the Email Attendees section to open the email editor.
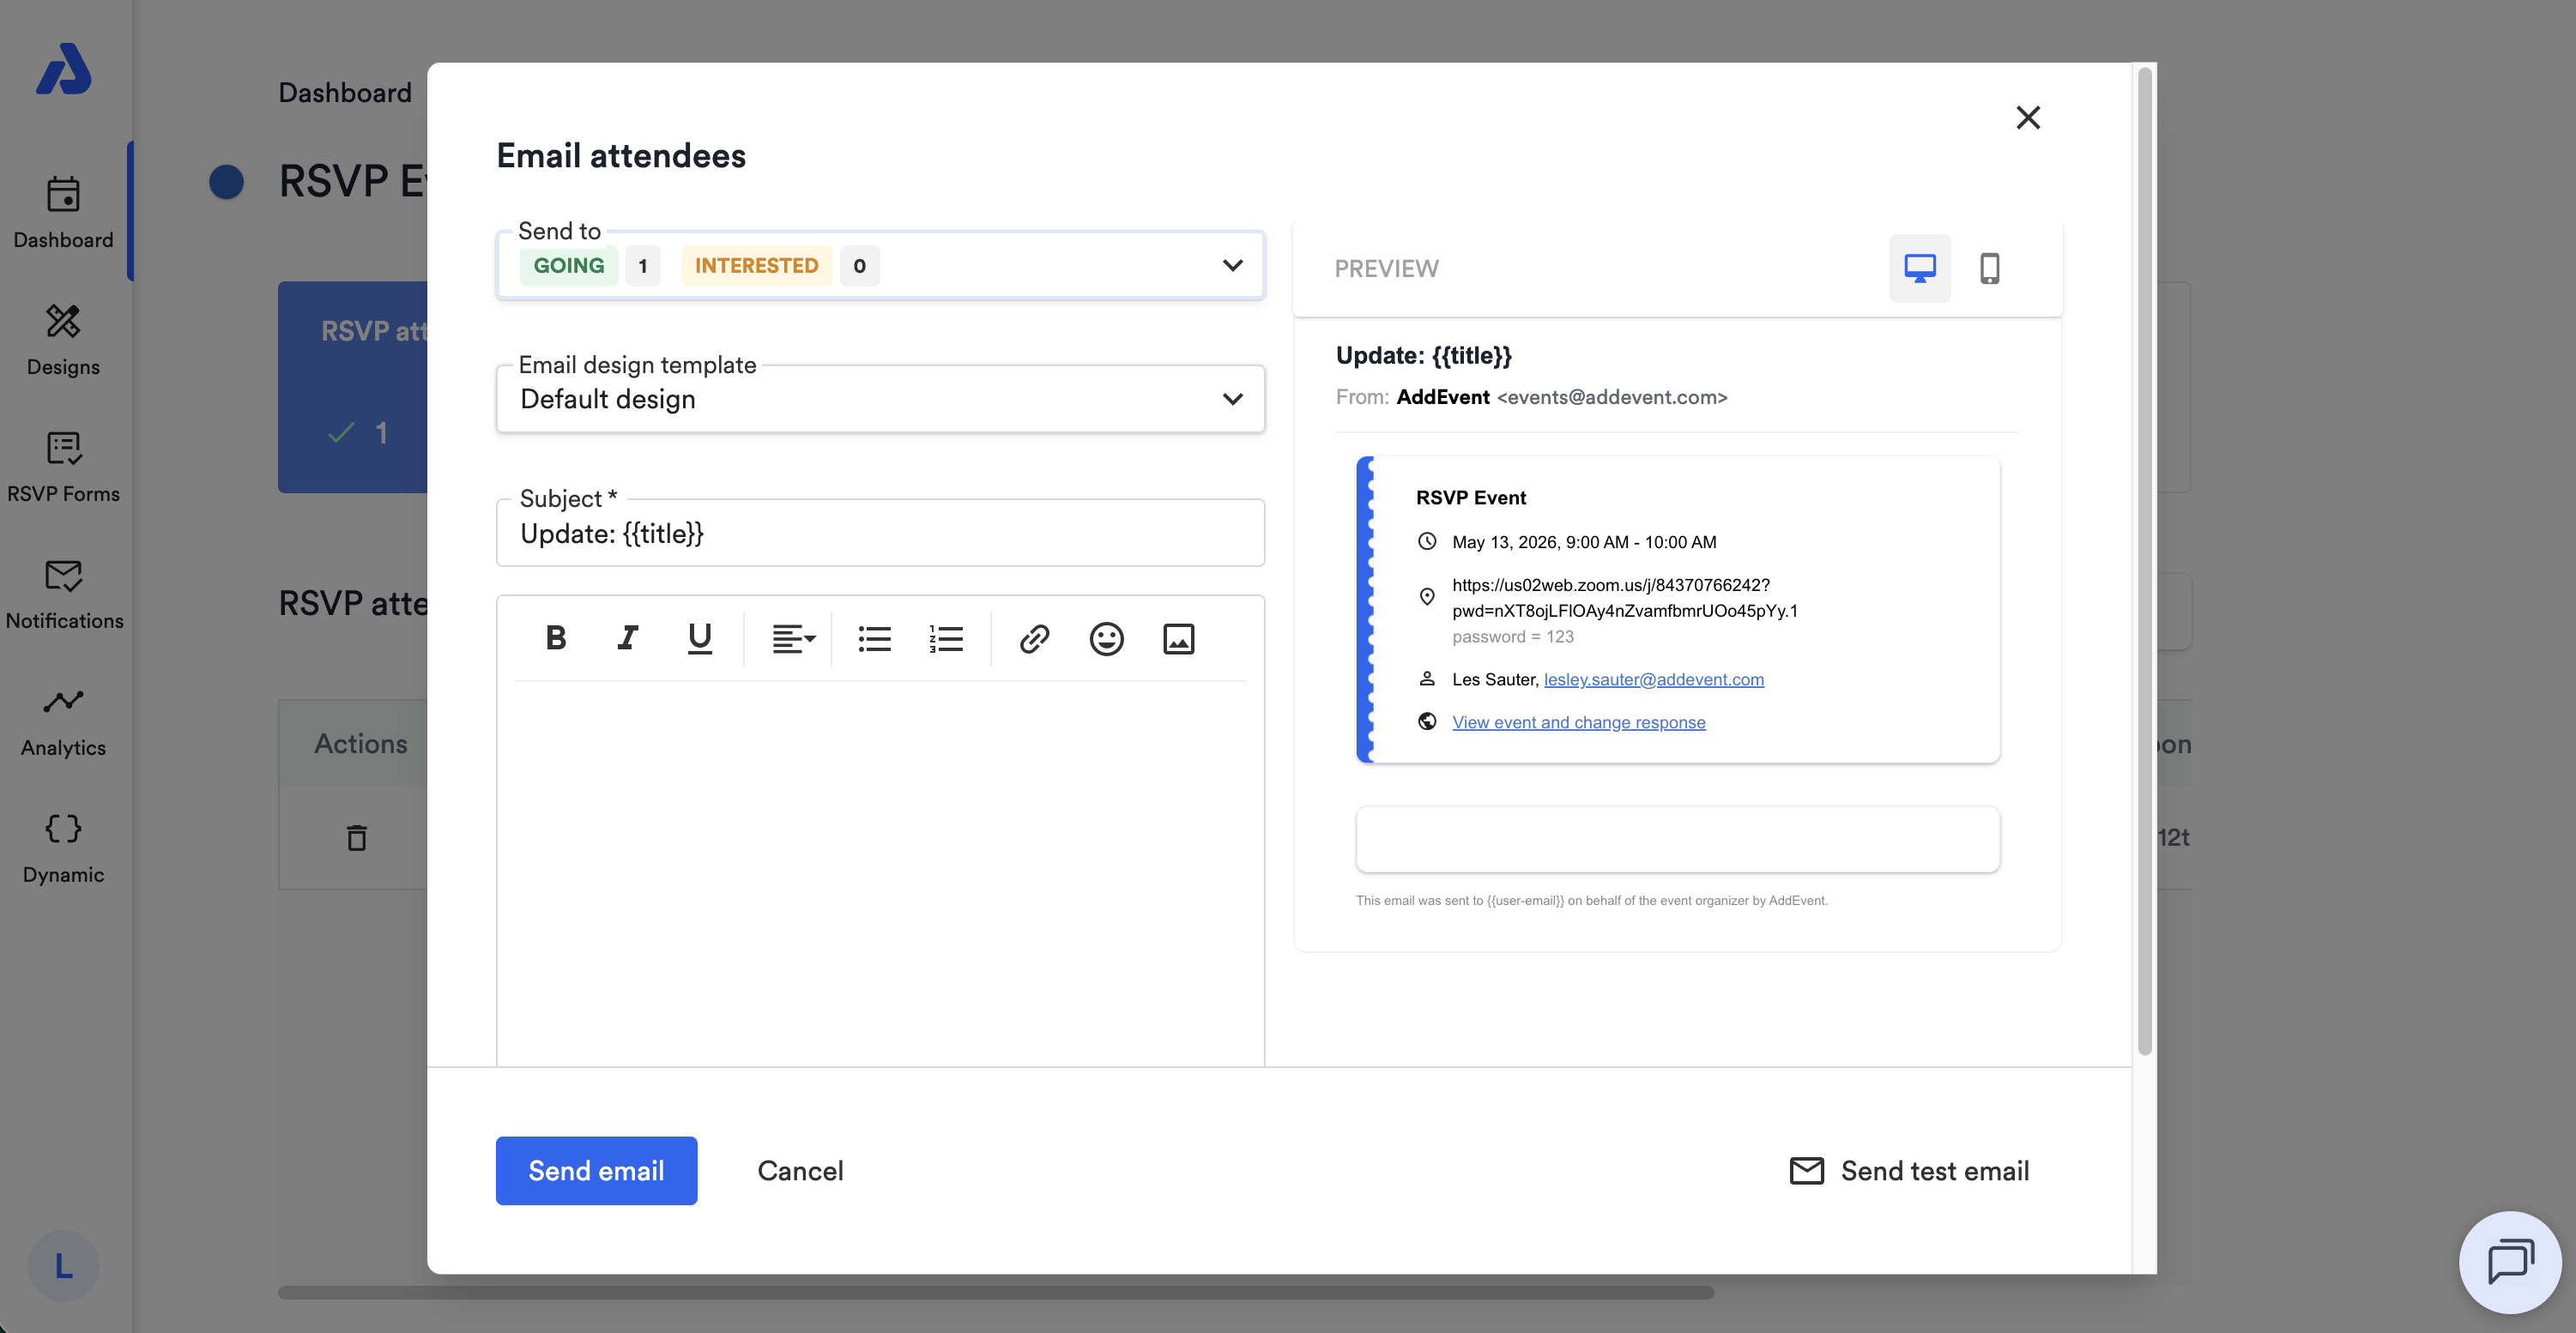
In the following pop-up window, you can:
- Select which registrants to send the update email to (i.e., registrants who submitted "Going", "Interested", and/or "Can't Go")
- Select your preferred email design template
- Customize the Subject line
- Input your customized message that you want to include in your update email
- Sent a test email for review before sending the email to your registrants
If you would like to edit the sender's email address, refer to our help doc on customizing your sender settings here.
Selecting Recipients
You can choose which registrants will receive the update email by filtering their RSVP status/response:
- Going: confirmed attendees
- Interested: registrants who submitted “Interested”
- Not going: registrants who submitted "Not going"
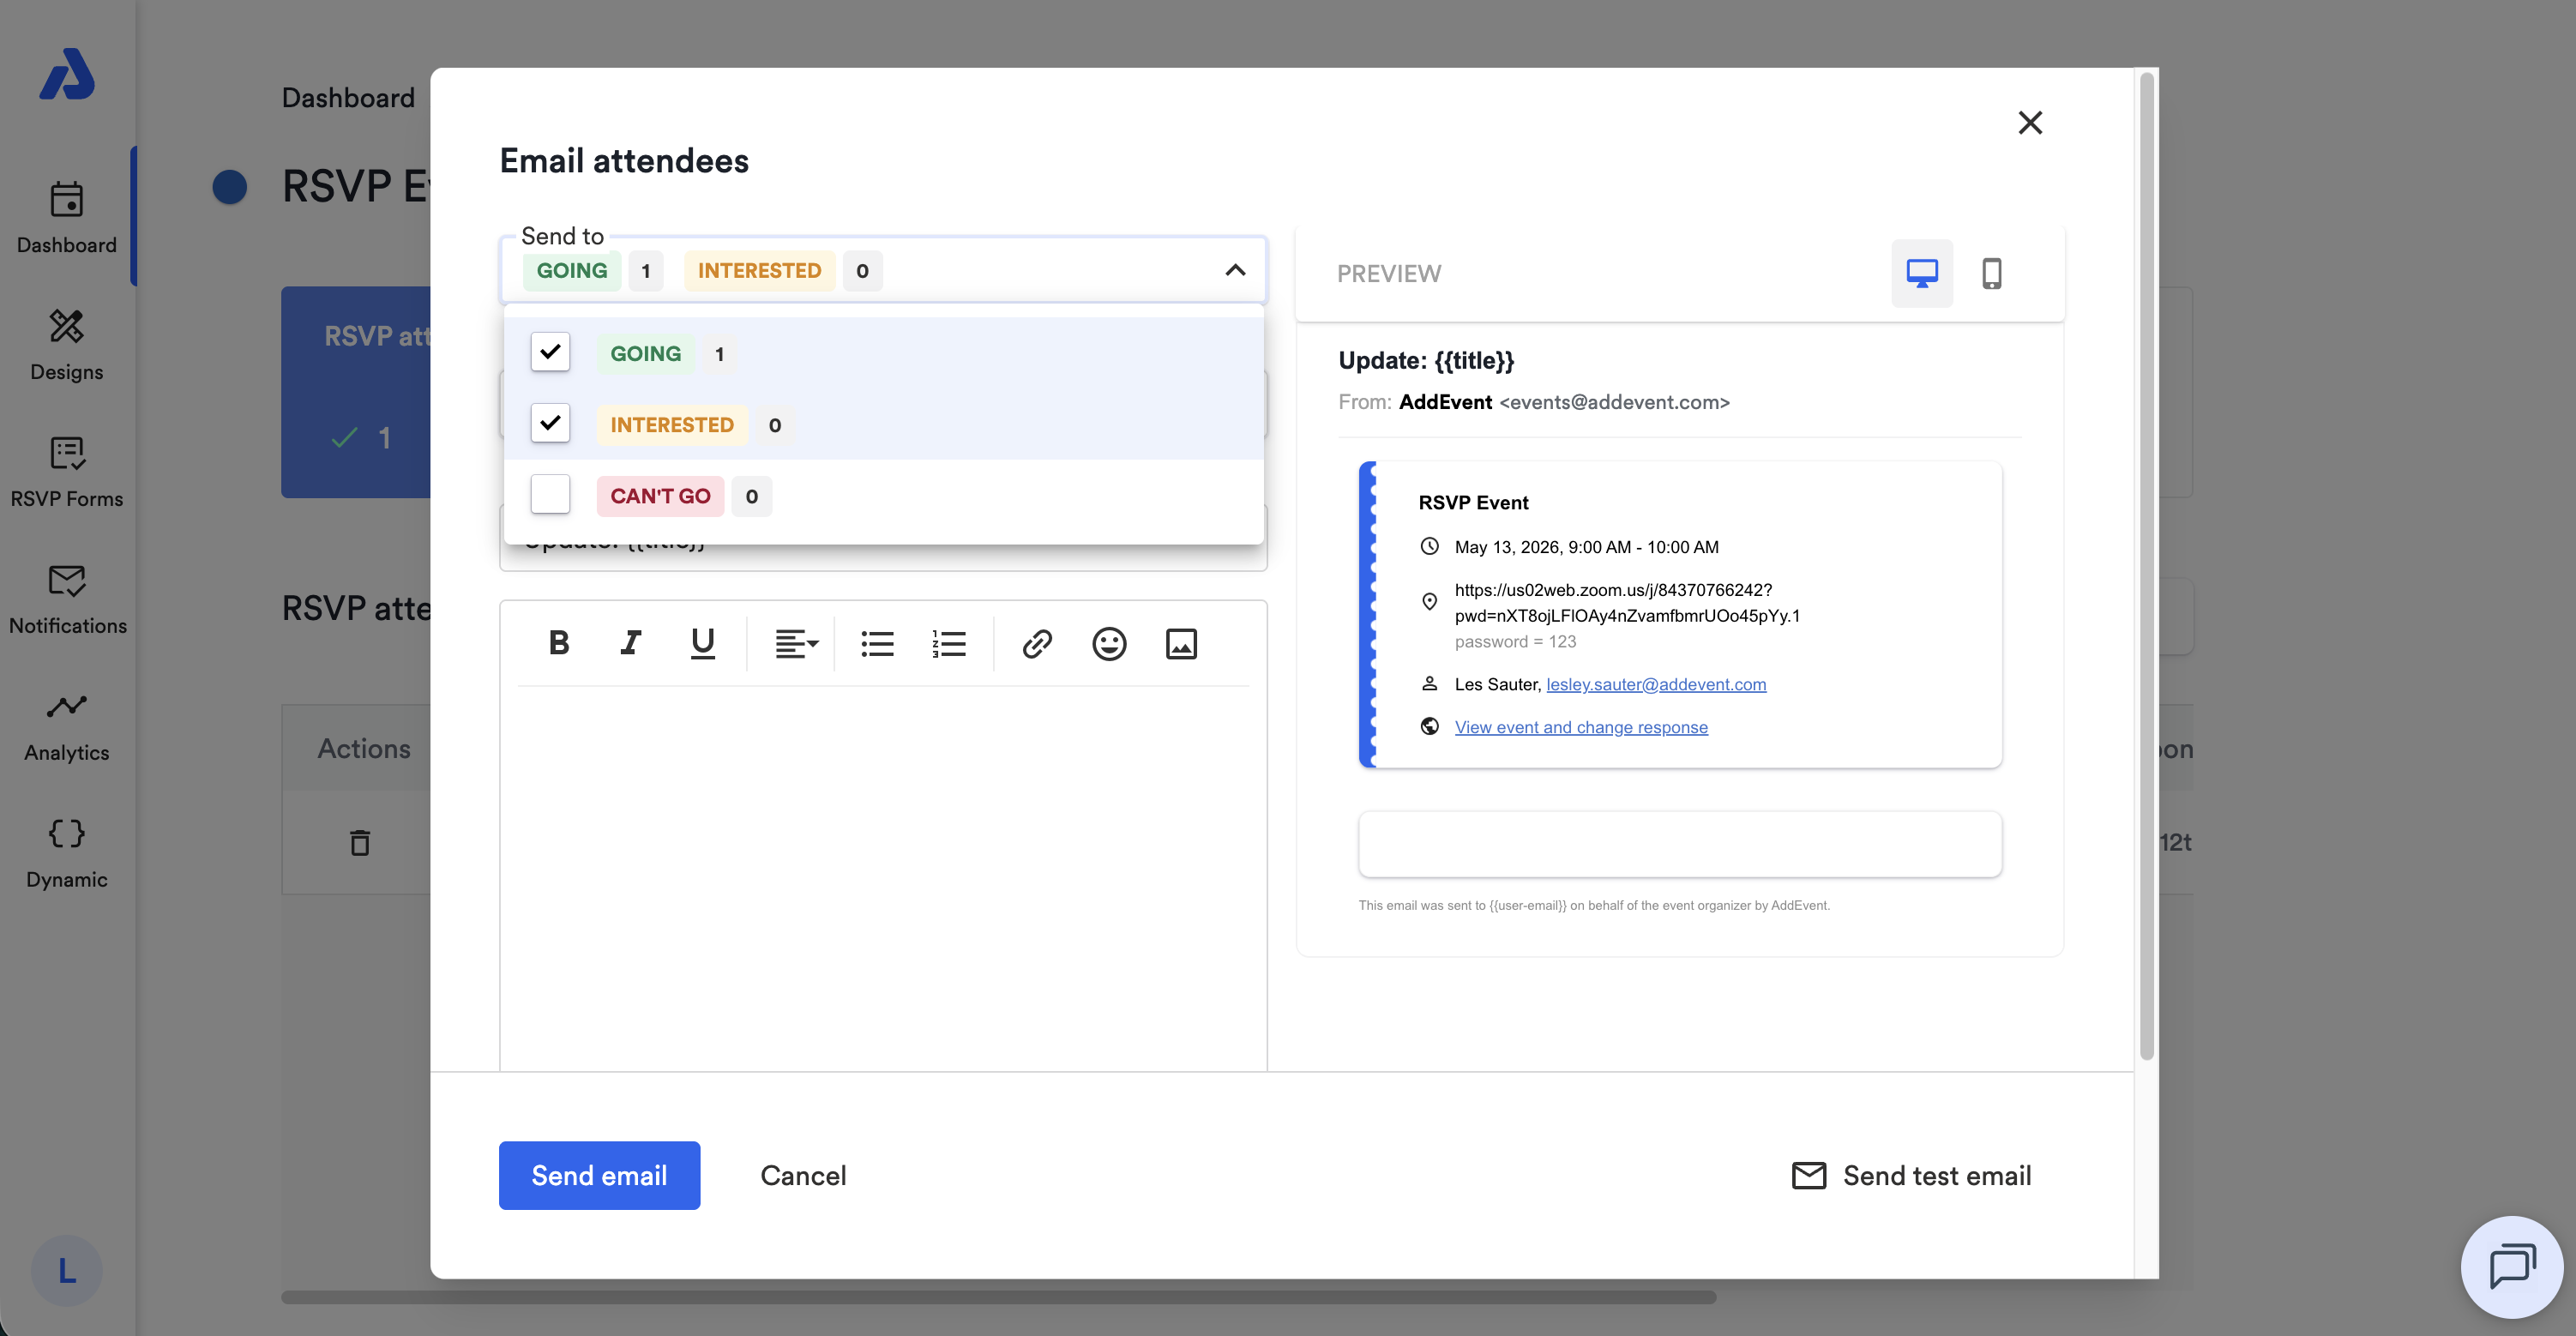
This functionality allows you to target only the registrant groups who need the update.
Customizing the Subject Line
To change the subject line of your update email, click into the subject line field and type your preferred title.
Writing the Email Content
You can customize the message you want attendees to receive in the content box.
On the right side of the window, you'll see a live preview of the email while you're customizing, along with the option to preview the mobile version of the email.
Sending a Test Email
Before sending the update email to your registrants, you can send a test email for your review.
- Go to the RSVP attendees page.
- Click the Email Attendees section.
- Click the Send a test email button located on the bottom-right side of the window.
- Enter your email address in the input field and click Send.
Sending a test email allows you to confirm layout, wording, and placeholder positioning.
Send the Update Email
Once you're ready to send the update email to your registrants:
- Return to your event’s RSVP attendees page.
- Select the Email attendees section.
- Select the registrant groups you want to notify.
- Select your preferred email design template.
- Include your subject line and body content.
- Click the Send email button.

Your update email will be delivered immediately to the selected registrant group(s).
By following these steps, you can ensure all event registrants receive important updates, helping to keep your attendees informed and prepared.
Watch this Tutorial!
Updated 27 days ago