Change the Preview Image for Social Media
When you share your event on social media, you'll see the AddEvent preview image by default. This guide shows how to change that preview image by using custom templates and then replacing two image URLs with your own.
New and Improved Feature!
Custom Templates are no longer available in AddEvent 2.0. This is because we've built design templates. Design templates are a no-code feature allowing you to customize your event landing pages, calendar landing pages, and embeddable calendar. Please check out the Design Template help section for details.
To update the preview image for your event or calendar link, you’ll need to create a custom landing page template and adjust specific image URLs within that template. Follow these steps for a clear and successful setup.
Step 1: Creating a Custom Landing Page Template
To change the preview image, start by creating a custom landing page template:
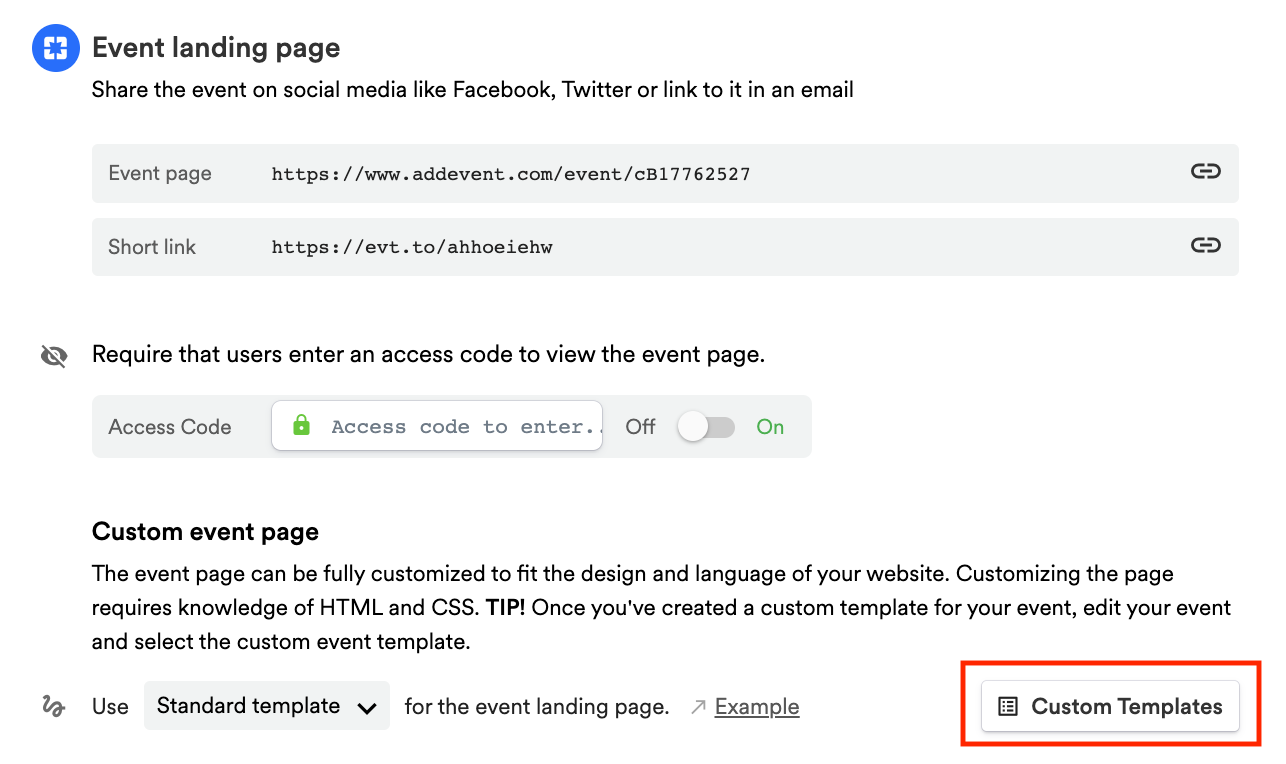
- Navigate to the Custom Templates section: In your dashboard, go to the Event page for your event and click Custom Templates.
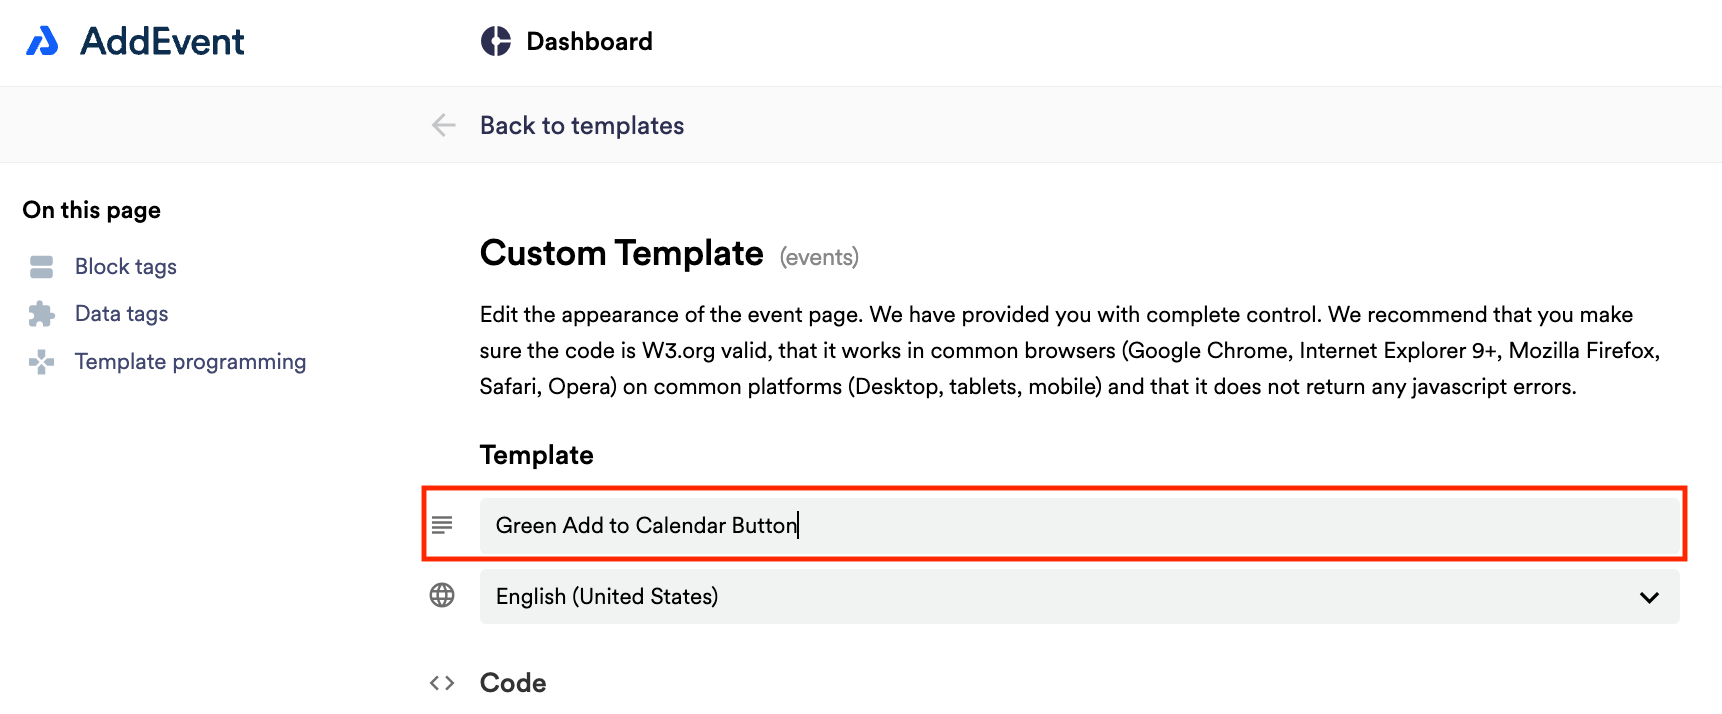
- Create a New Template: Click + New Template to begin a new custom template.
-


Step 2: Changing the Preview Image in the Custom Template
Preparing an Image URL
To set a preview image, you need a publicly accessible URL for your image. If you don’t have one, you can follow a guide on “How to upload images for custom templates” to upload your image and obtain a URL.
Updating the Open Graph Image
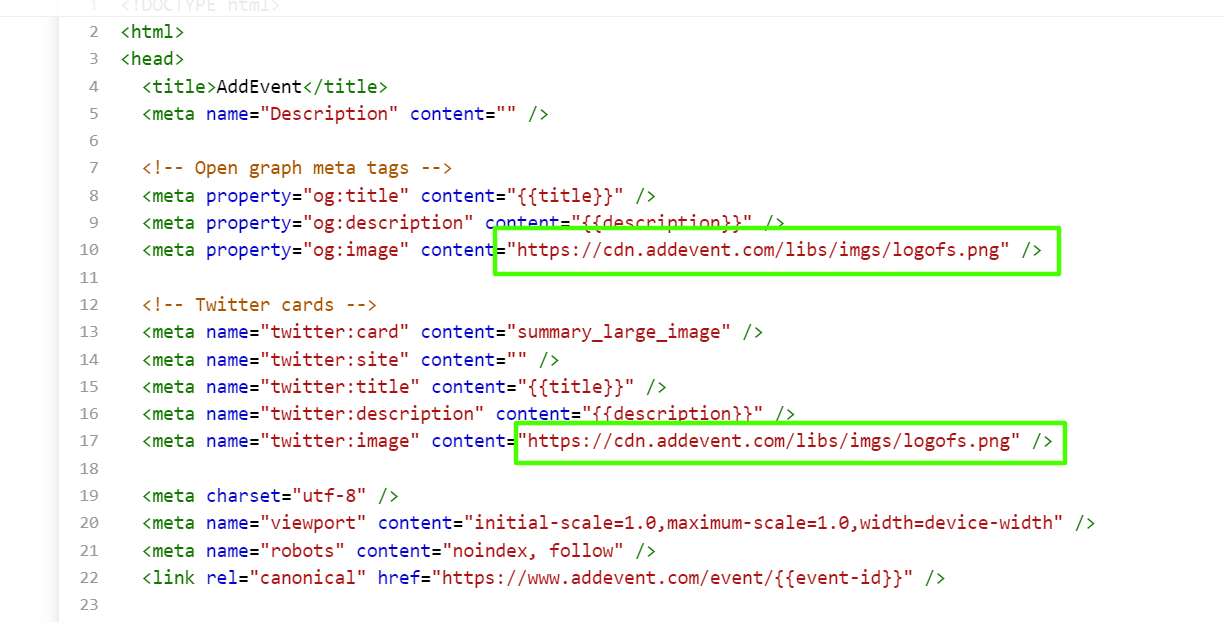
- Locate the “og:image” Field: At the very top of the template editor, find the line labeled “og:image” (typically line 9 in the standard template).
- Replace the URL: Enter the public URL of the image you want as the preview. This image will appear in social media previews for platforms like Facebook.
Updating the Twitter/X Image
- Locate the “twitter:image” Field: Look for the line labeled “twitter:image” (usually line 17 in the standard template).
- Replace the URL: Input the public URL for the Twitter/X preview image. This image will display when your event or calendar link is shared on Twitter/X.

Step 3: Saving and Applying the Template
- Save the Template: Once you’ve updated both the Open Graph and Twitter image URLs, click Save at the bottom of the page.
- Apply the Template: Go back to your event or calendar settings. Select your new custom template from the dropdown menu, and click Set to activate it. Your updated preview images will now appear when the link is shared.

Tips & Tricks for Creating Social Media Images
To make your images display optimally across different social media platforms, follow these image size guidelines:
Facebook
- Horizontal images: 1,200 x 630 pixels
- Vertical images: 1,080 x 1,350 pixels
- Links with an image: 1,200 x 630 pixels
- Stories: 1,080 x 1,920 pixels
LinkedIn
- Horizontal images for company or profile pages: 1,104 x 736 pixels
- Links with an image: 1,200 x 628 pixels
For further insights:
- Buffer’s social media image guide: Ideal Image Sizes for Social Media Posts
- Facebook’s Debugging Tool: Facebook Debugger
Watch this tutorial!
Following these steps and tips will help ensure your event or calendar previews look professional and engaging across all platforms.
Updated 4 months ago
