Update RSVP Email Sender Name and Email Address
This help doc explains how to configure the sender name, sender email address, and verified sender domains used for RSVP attendee emails in AddEvent. Configuring a verified sender domain helps improve email deliverability and prevents attendee emails from being marked as spam. AddEvent uses a secure email delivery provider to verify sender domains and authenticate outgoing emails.
What are Sender Domains?
A sender domain is the domain used to send RSVP and attendee emails from your account.
Examples:
yourcompany.comevents.yourcompany.com
Before a sender domain can be used, it must be verified by adding DNS records to your domain provider.
Once verified, the domain can be used in:
- Notification flows
- Email design templates
- RSVP attendee update emails
- Default sender settings
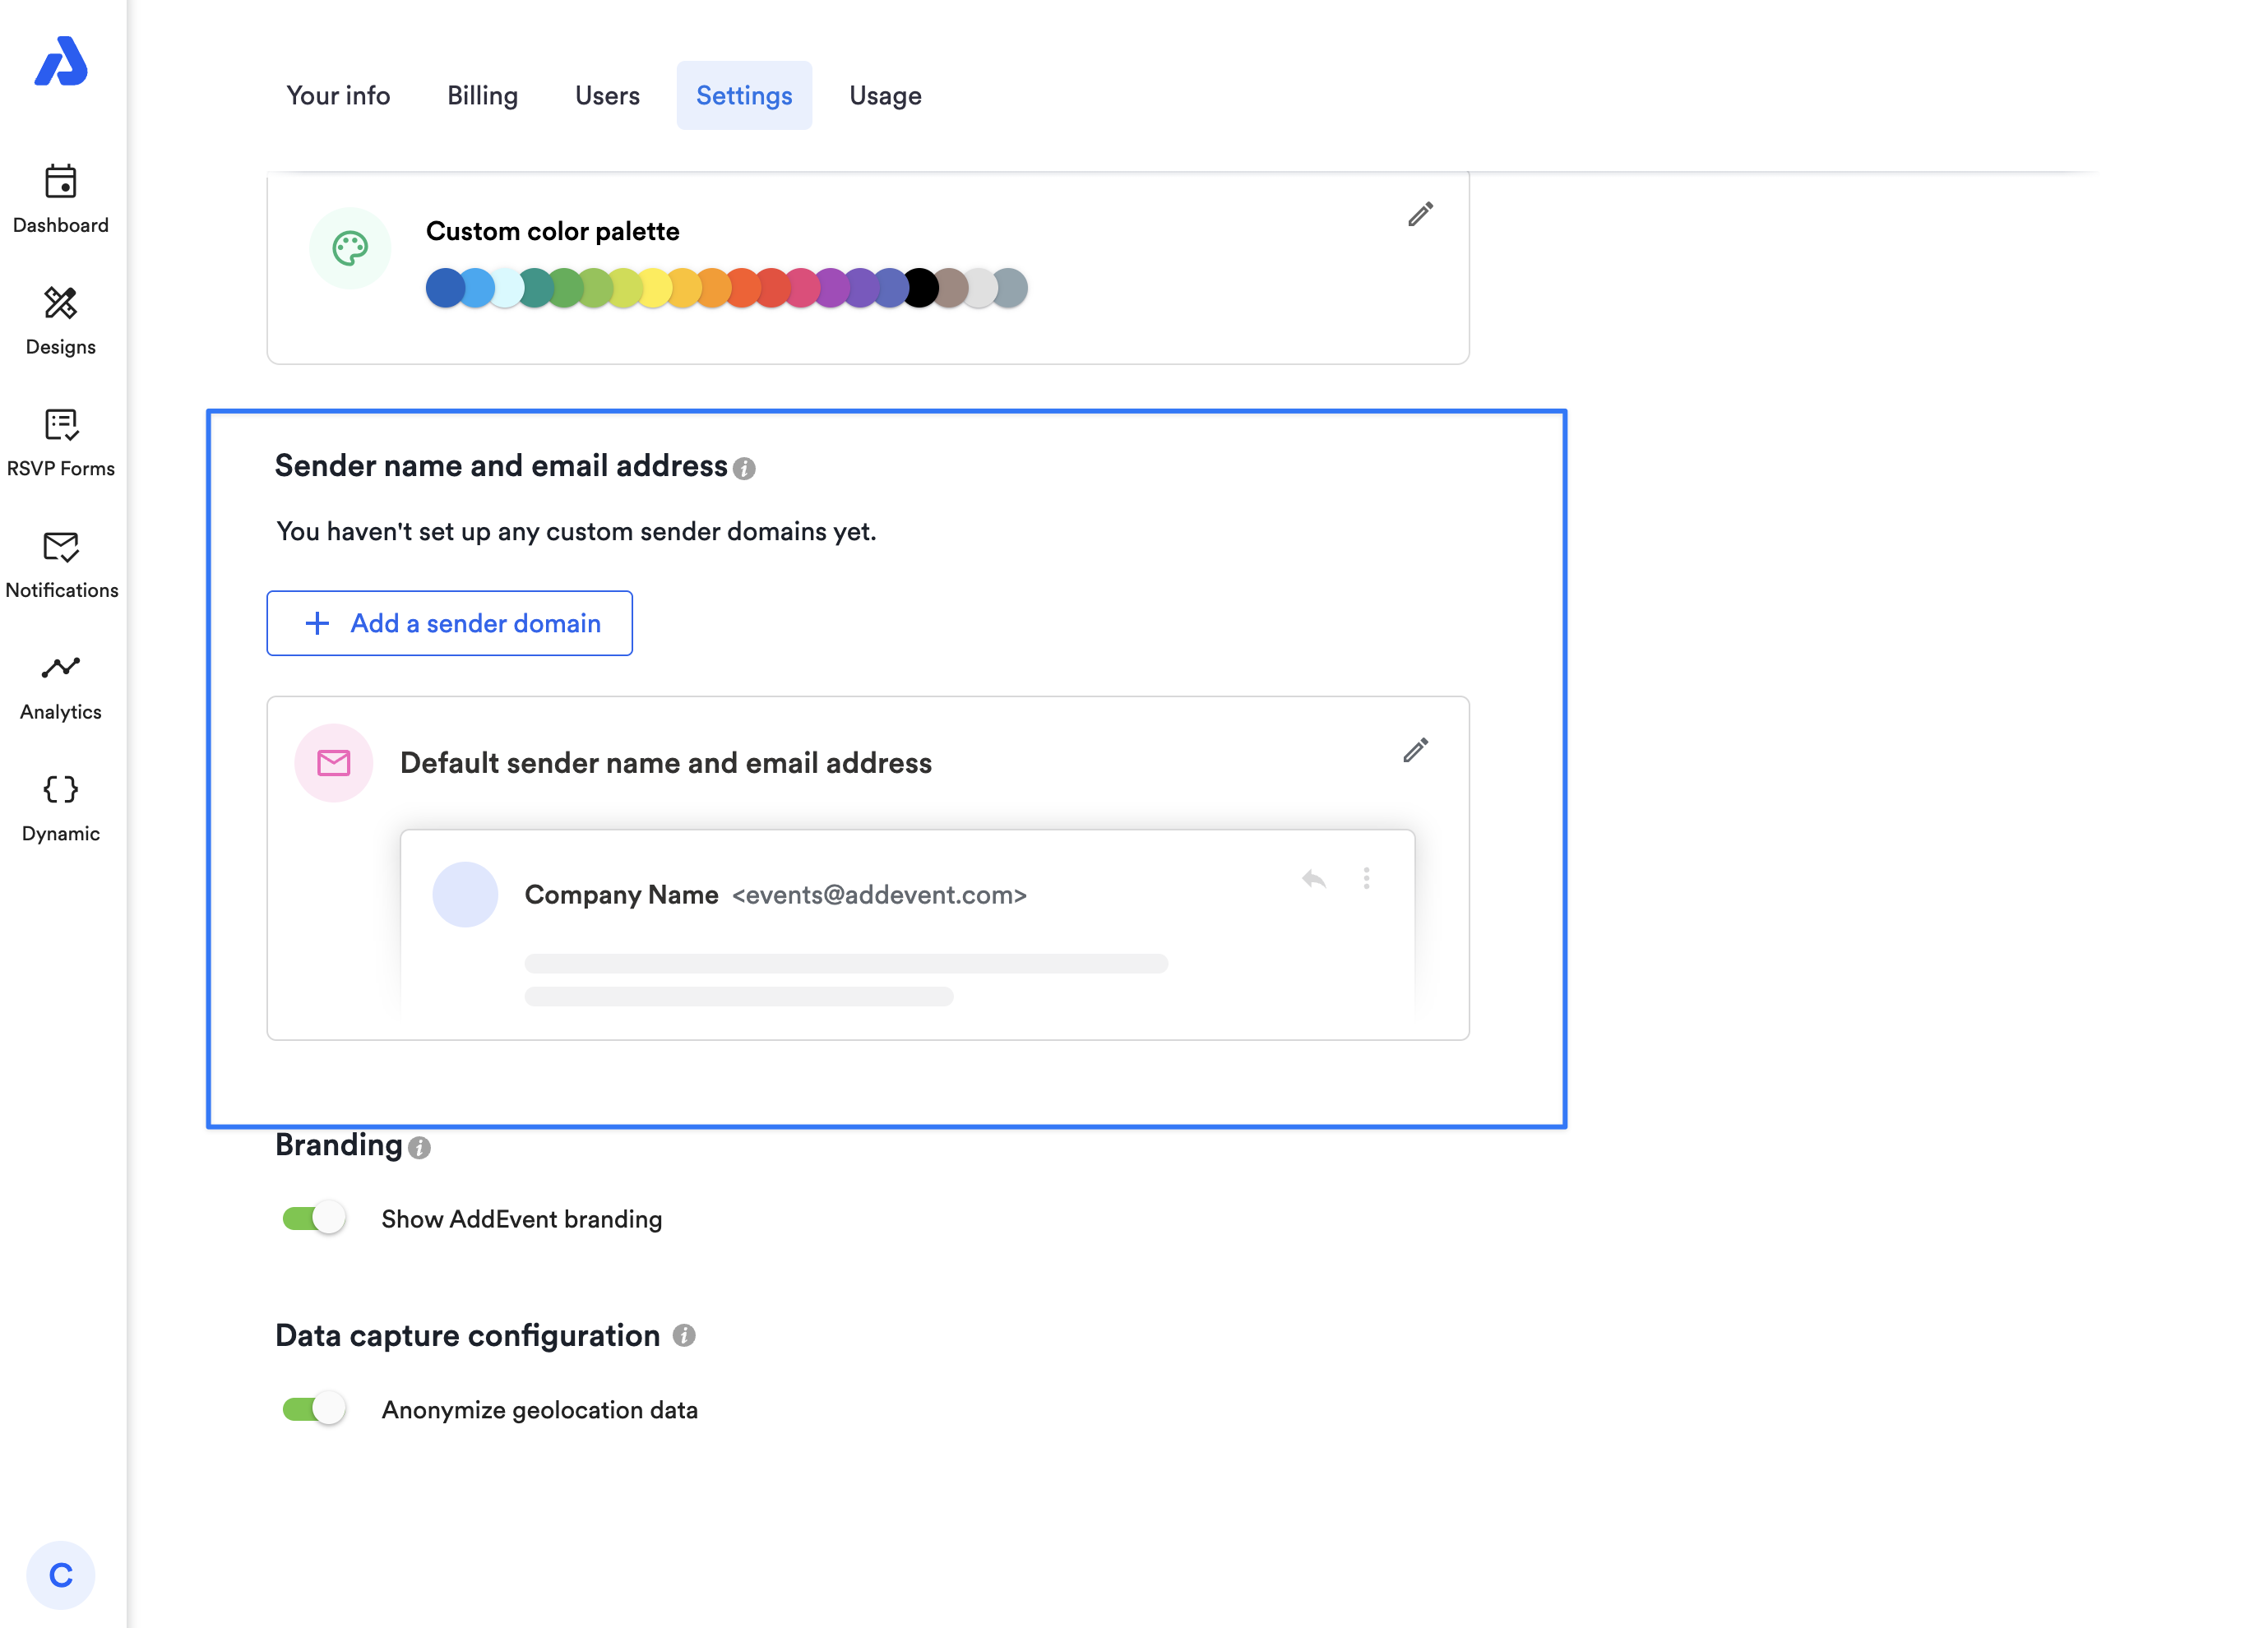
Open Sender Name and Email Settings
- Click the Account icon in the lower-left corner of the dashboard.
- Click Settings
- Scroll to the Sender name and email address section.
- Click the Edit icon.
Adding and Verifying a Sender Domain
Before you can send emails from your own domain, you must verify domain ownership.
Free email providers like Gmail, Yahoo, Outlook, or AOL cannot be used as sender domains. You must own and control the domain.
Add a Sender Domain
Navigate to your Account Settings and click + Add a sender domain.
Step 1: Domain
Enter the domain you want to use as your sender domain.
The domain must:
- Be a valid domain
- Not already be verified on another AddEvent account
- Not belong to a restricted provider or free email provider
Configure DNS Records
Step 2: Create a TXT record with the provided name and value
Your DNS provider may take several minutes to apply changes.
Step 3: Add CNAME records
Add the required CNAME records shown in AddEvent.
These records enable DKIM authentication and improve email deliverability.
Step 4: Create a TXT record with the provided name and value
Add the DMARC TXT record shown in AddEvent.
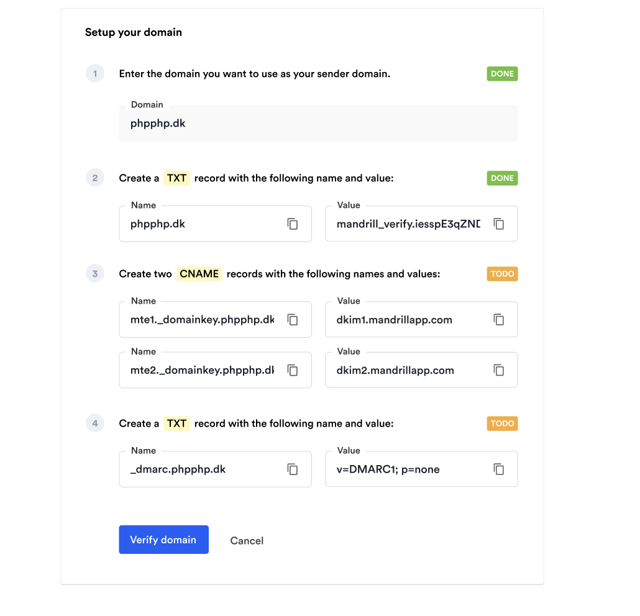
Verify the Domain
After all DNS records have been added:
- Return to AddEvent
- Click Verify domain
If verification succeeds:
- All records will display as Done
- The domain becomes available for sender addresses and email designs
If verification fails:
- Missing or incorrect records will remain marked as Todo
- AddEvent will display which records still need attention
DNS changes may take time to propagate depending on your provider.
Using Verified Sender Domains
Once verified, a sender domain can be selected when configuring:
- Default sender email address
- Email design templates
- Notification flow emails
If a non-AddEvent domain is selected:
- The local part of the email address becomes editable
- Example:
[email protected]
Multiple Sender Domains
Professional and Enterprise plans allow multiple verified sender domains.
This is useful if you:
- Manage multiple brands
- Send emails for different organizations
- Want separate sender identities
Deleting a Sender Domain
You can remove a verified sender domain at any time.
Deleting a domain will:
- Remove the domain from your account
- Reset affected sender addresses to the default AddEvent sender
- Remove the domain from connected email systems
To delete a domain:
- Click the Delete icon next to the domain
- Type
Deleteto confirm
Deleting a sender domain may affect active notification flows and email designs currently using that domain.
Important Notes
- Sender domains cannot be edited after being added
- To re-verify a domain, delete it and add it again
- Test emails are not affected by email design caching
- DNS propagation can sometimes take several hours
Permissions and Plan Availability
- Sender domains are available on paid plans only
- Multiple sender domains are available on Professional and Enterprise plans
- Only Admin users can manage sender domains
Related Docs
Updated about 1 month ago