Hide Calendar Options
This guide describes how to remove certain calendar options from the list of available choices the end user has to add you event to their calendar. For instance, if you know your audience does not use Outlook Desktop, you can use one of these methods to hide the gold Outlook option.
Prerequisites
This guide assumes you are embedding the Add to Calendar button on your webpage or putting the Add to Calendar links into an email using the custom code block in an email builder (or directly into the email code itself). It also assumes the following:
- You have already created an event in AddEvent.
- You have already customized the look of the button or links you are using (if necessary).
- You have already opened the code editor or custom code block where the button or link code will be placed.
For Add to Calendar Links (Emails, Newsletters, and Campaigns)
Each code snippet will hide one option from the list of available options from your users.
Apple: <style> a[title="Apple"] {display:none!important;} </style>
Google: <style> a[title="Google"] {display:none!important;} </style>
Outlook.com (blue icon): <style> a[title="outlookcom"] {display:none!important;} </style>
Outlook Desktop (gold icon): <style> a[title="outlook"] {display:none!important;} </style>
Office 365 (red icon): <style> a[title="office365"] {display:none!important;} </style>
Yahoo: <style> a[title="Yahoo"] {display:none!important;} </style>
Editing the Links
To edit the Add to Calendar links' calendar options, follow the steps below.
-
Copy the relevant line of code from the above list that correlates with the calendar option (Office 365, Outlook.com, Yahoo, etc.) you want to hide from your Add to Calendar links.
-
Paste the line of code into the editor or code block where you will be pasting the Add to Calendar links code.
-
From the Dashboard, click on the desired event's title. You will then be directed to the Event details page.
-
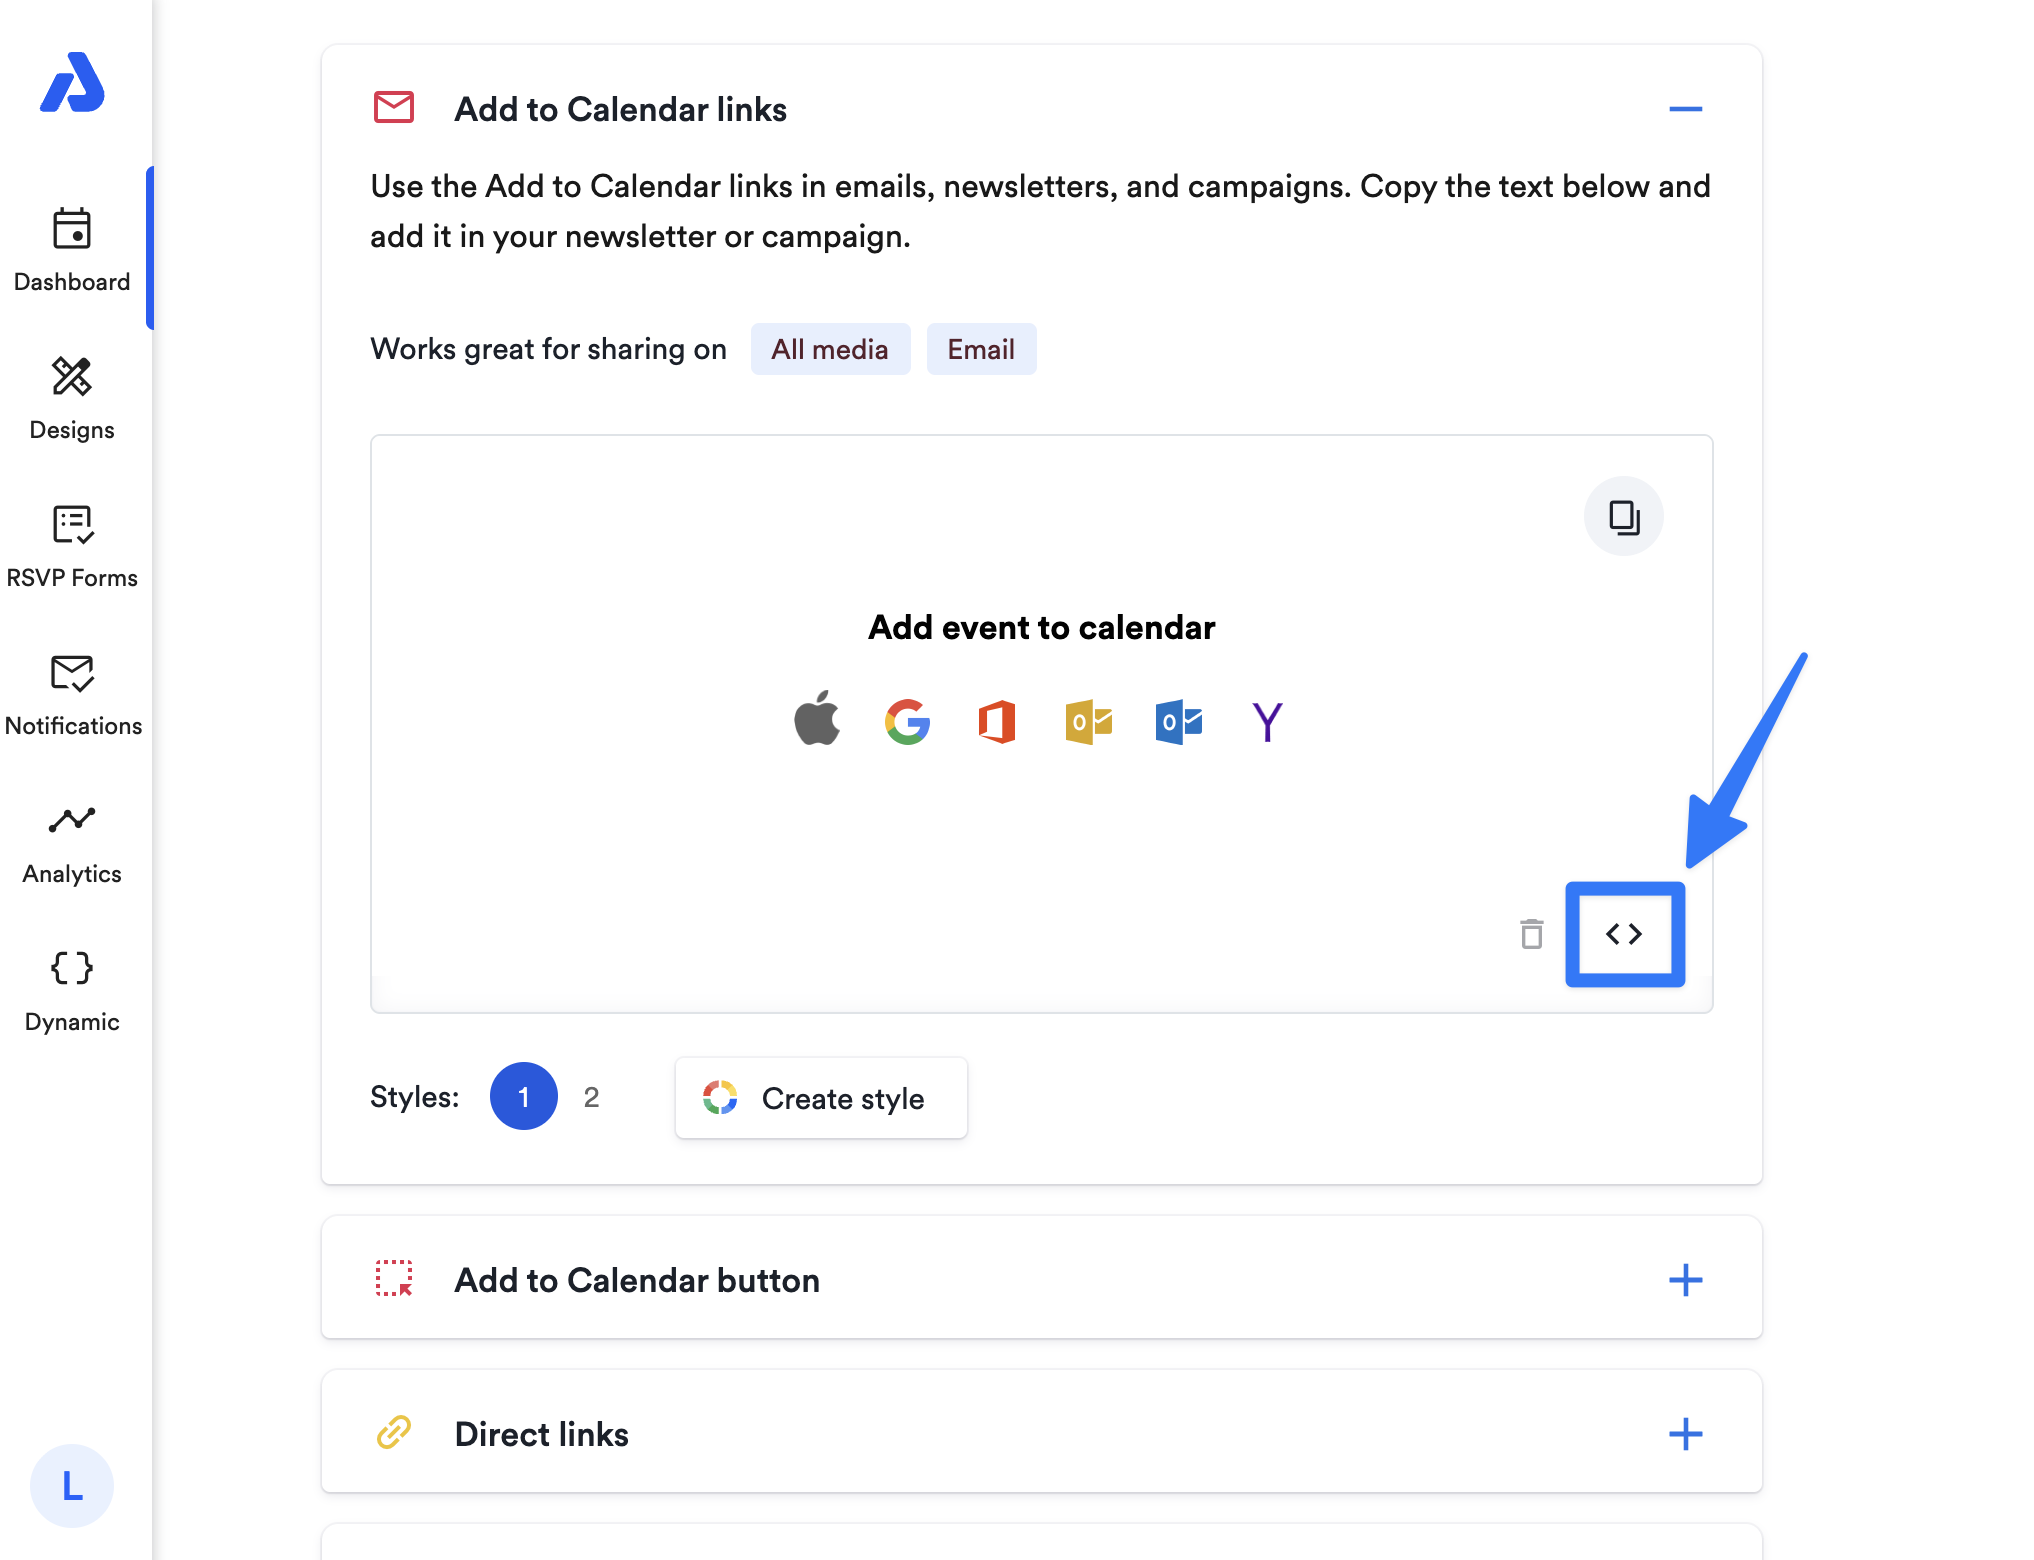
Scroll down to the Add to Calendar links section, and click the + icon to expand the section.
-
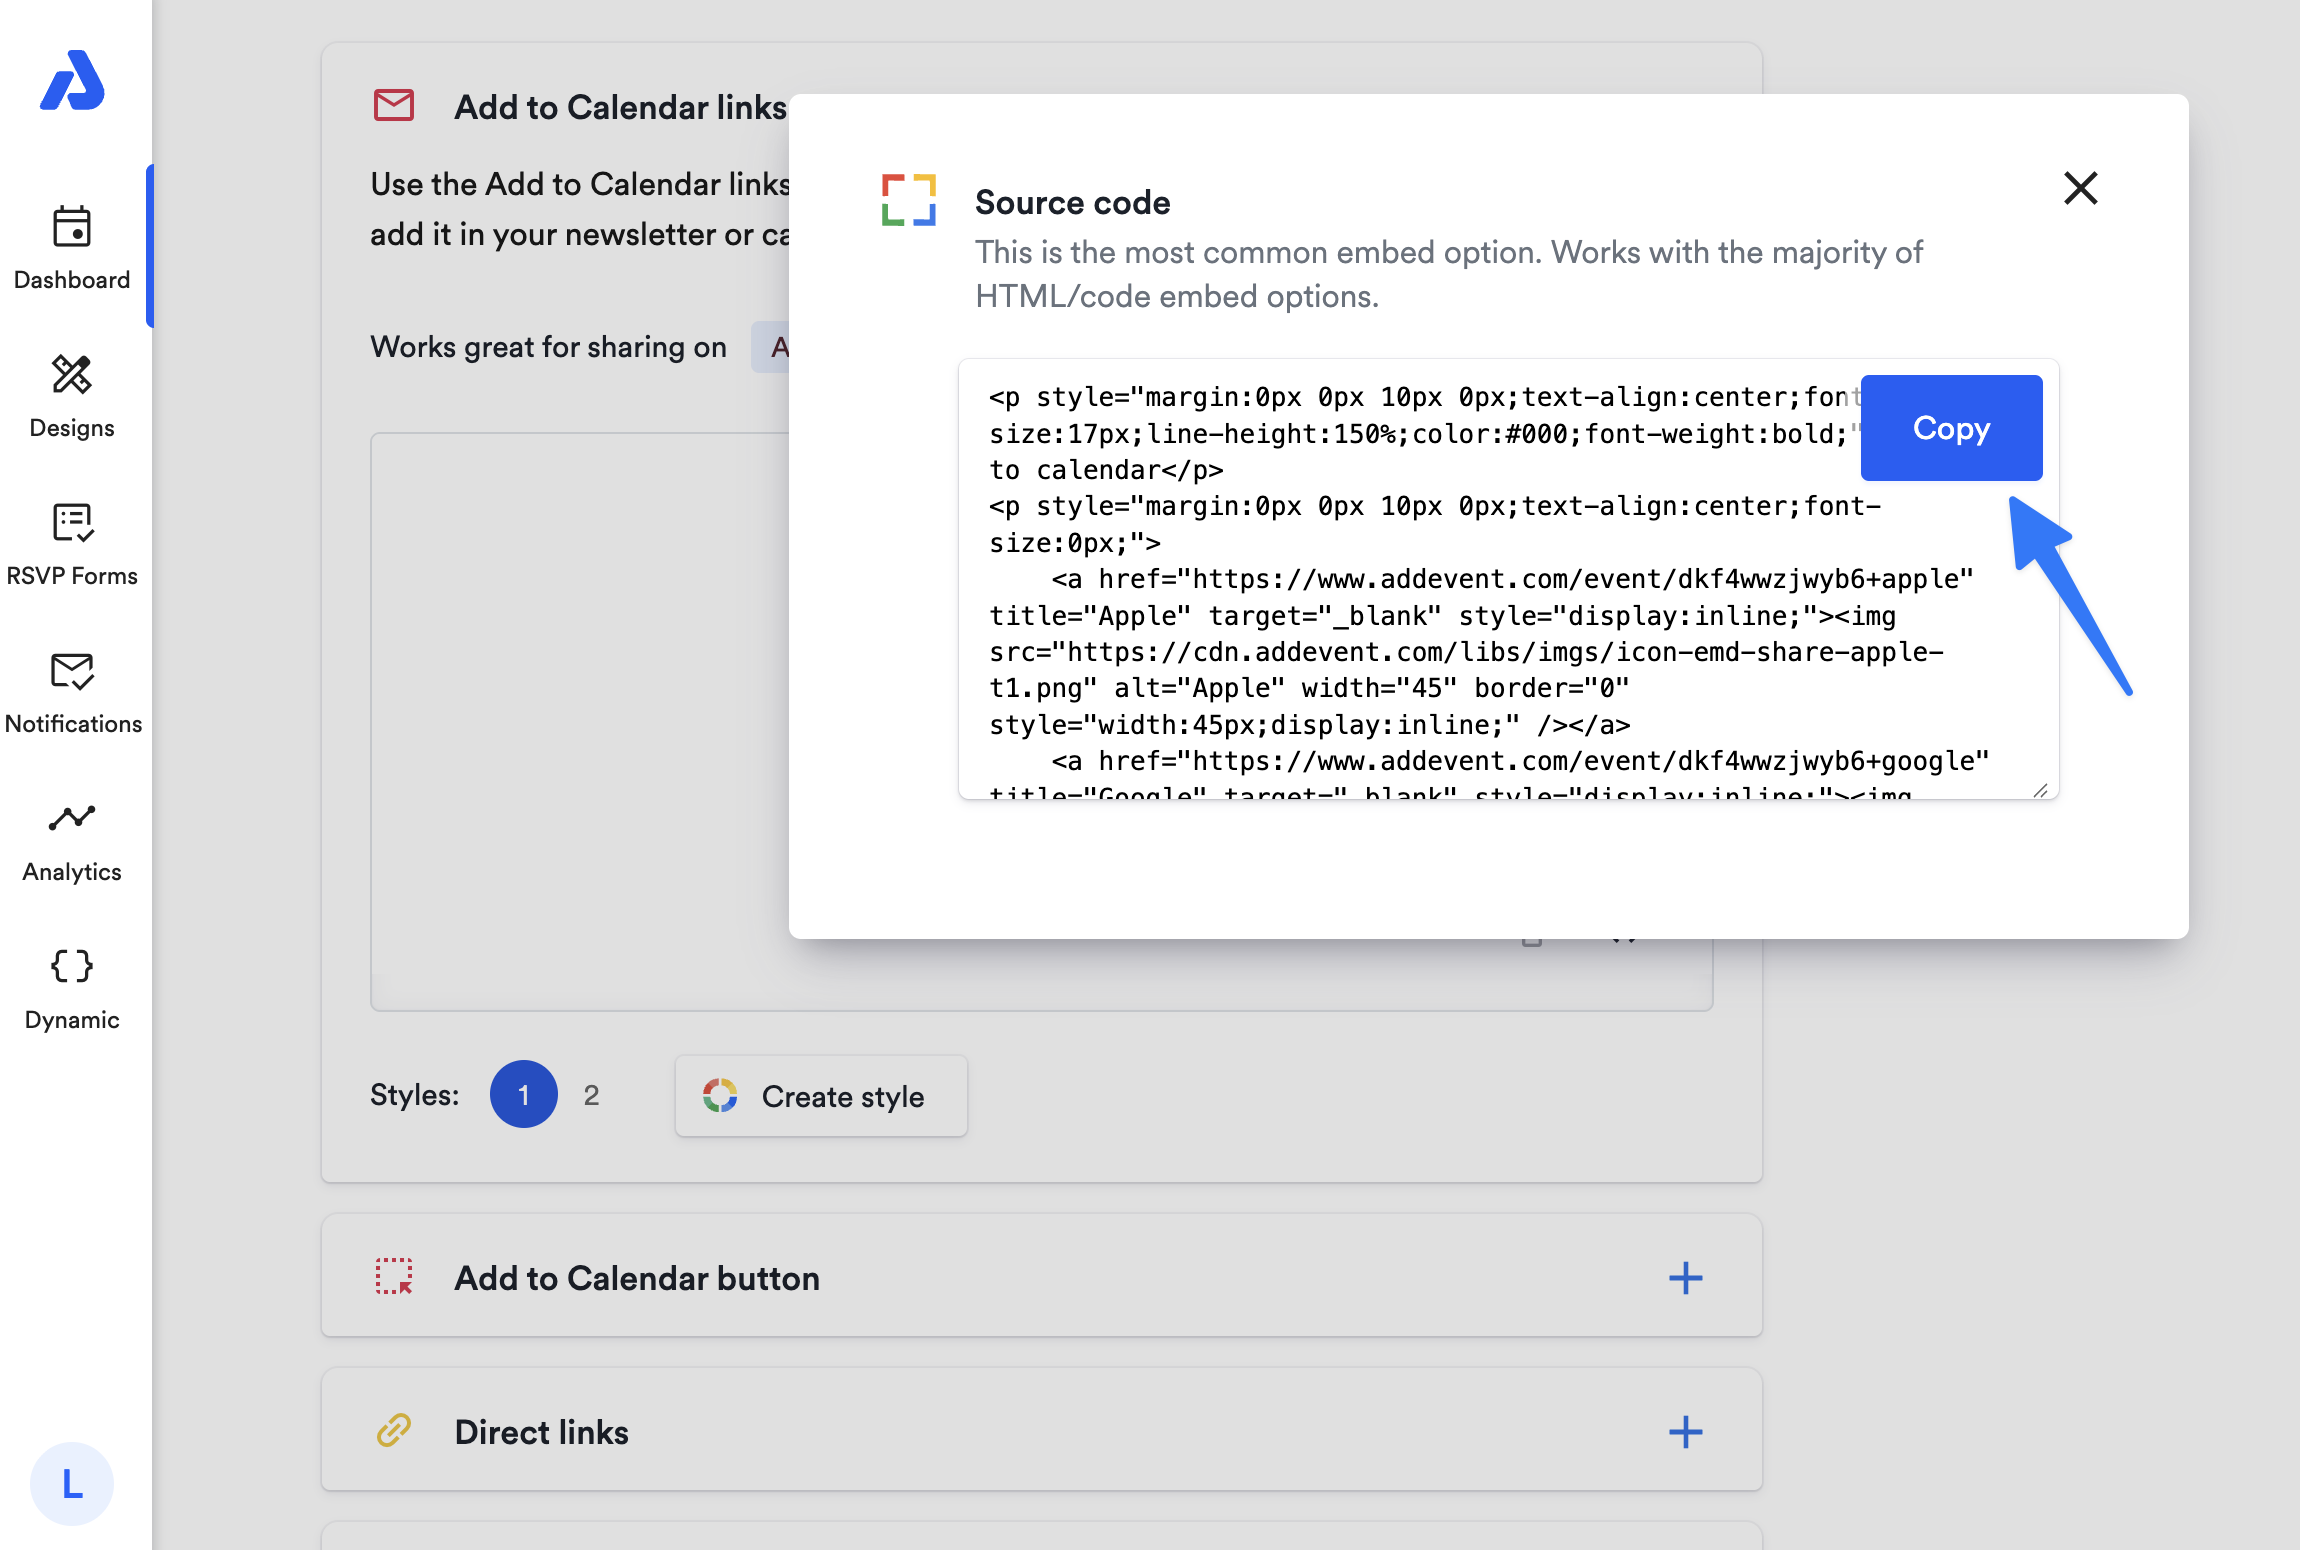
Click the < > icon, and copy the code from the following pop-up window.
-
Paste the source code immediately after the line of code that you pasted in step 2 above.
The result will be where you can see every calendar option except for the one you chose to remove using the first line of code in step 2.
If you want to remove multiple options, you can do so by:
- Pasting each choice you want to remove directly after the one you just pasted in (the order does not matter. For example:
<style> a[title="Apple"] {display:none!important;} </style><style> a[title="outlookcom"] {display:none!important;} </style><style> a[title="Yahoo"] {display:none!important;} </style>- Combing them into one line. This can be done by pasting in your first choice, then by copying everything between the
<style>tags of your next choice, and pasting that in directly between the } and the</style>at the end of your first choice. Again, order does not matter. For example, if you want to remove Google and Office 365, the resulting line of code would be this:<style>a[title="Google"] {display:none!important;} a[title="office365"] {display:none!important;}</style>
For Add to Calendar Buttons (Websites)
To edit the Add to Calendar button's calendar options, follow the steps below.
-
From the Dashboard, click on the desired event's title. You will be directed to the Event details page.
-
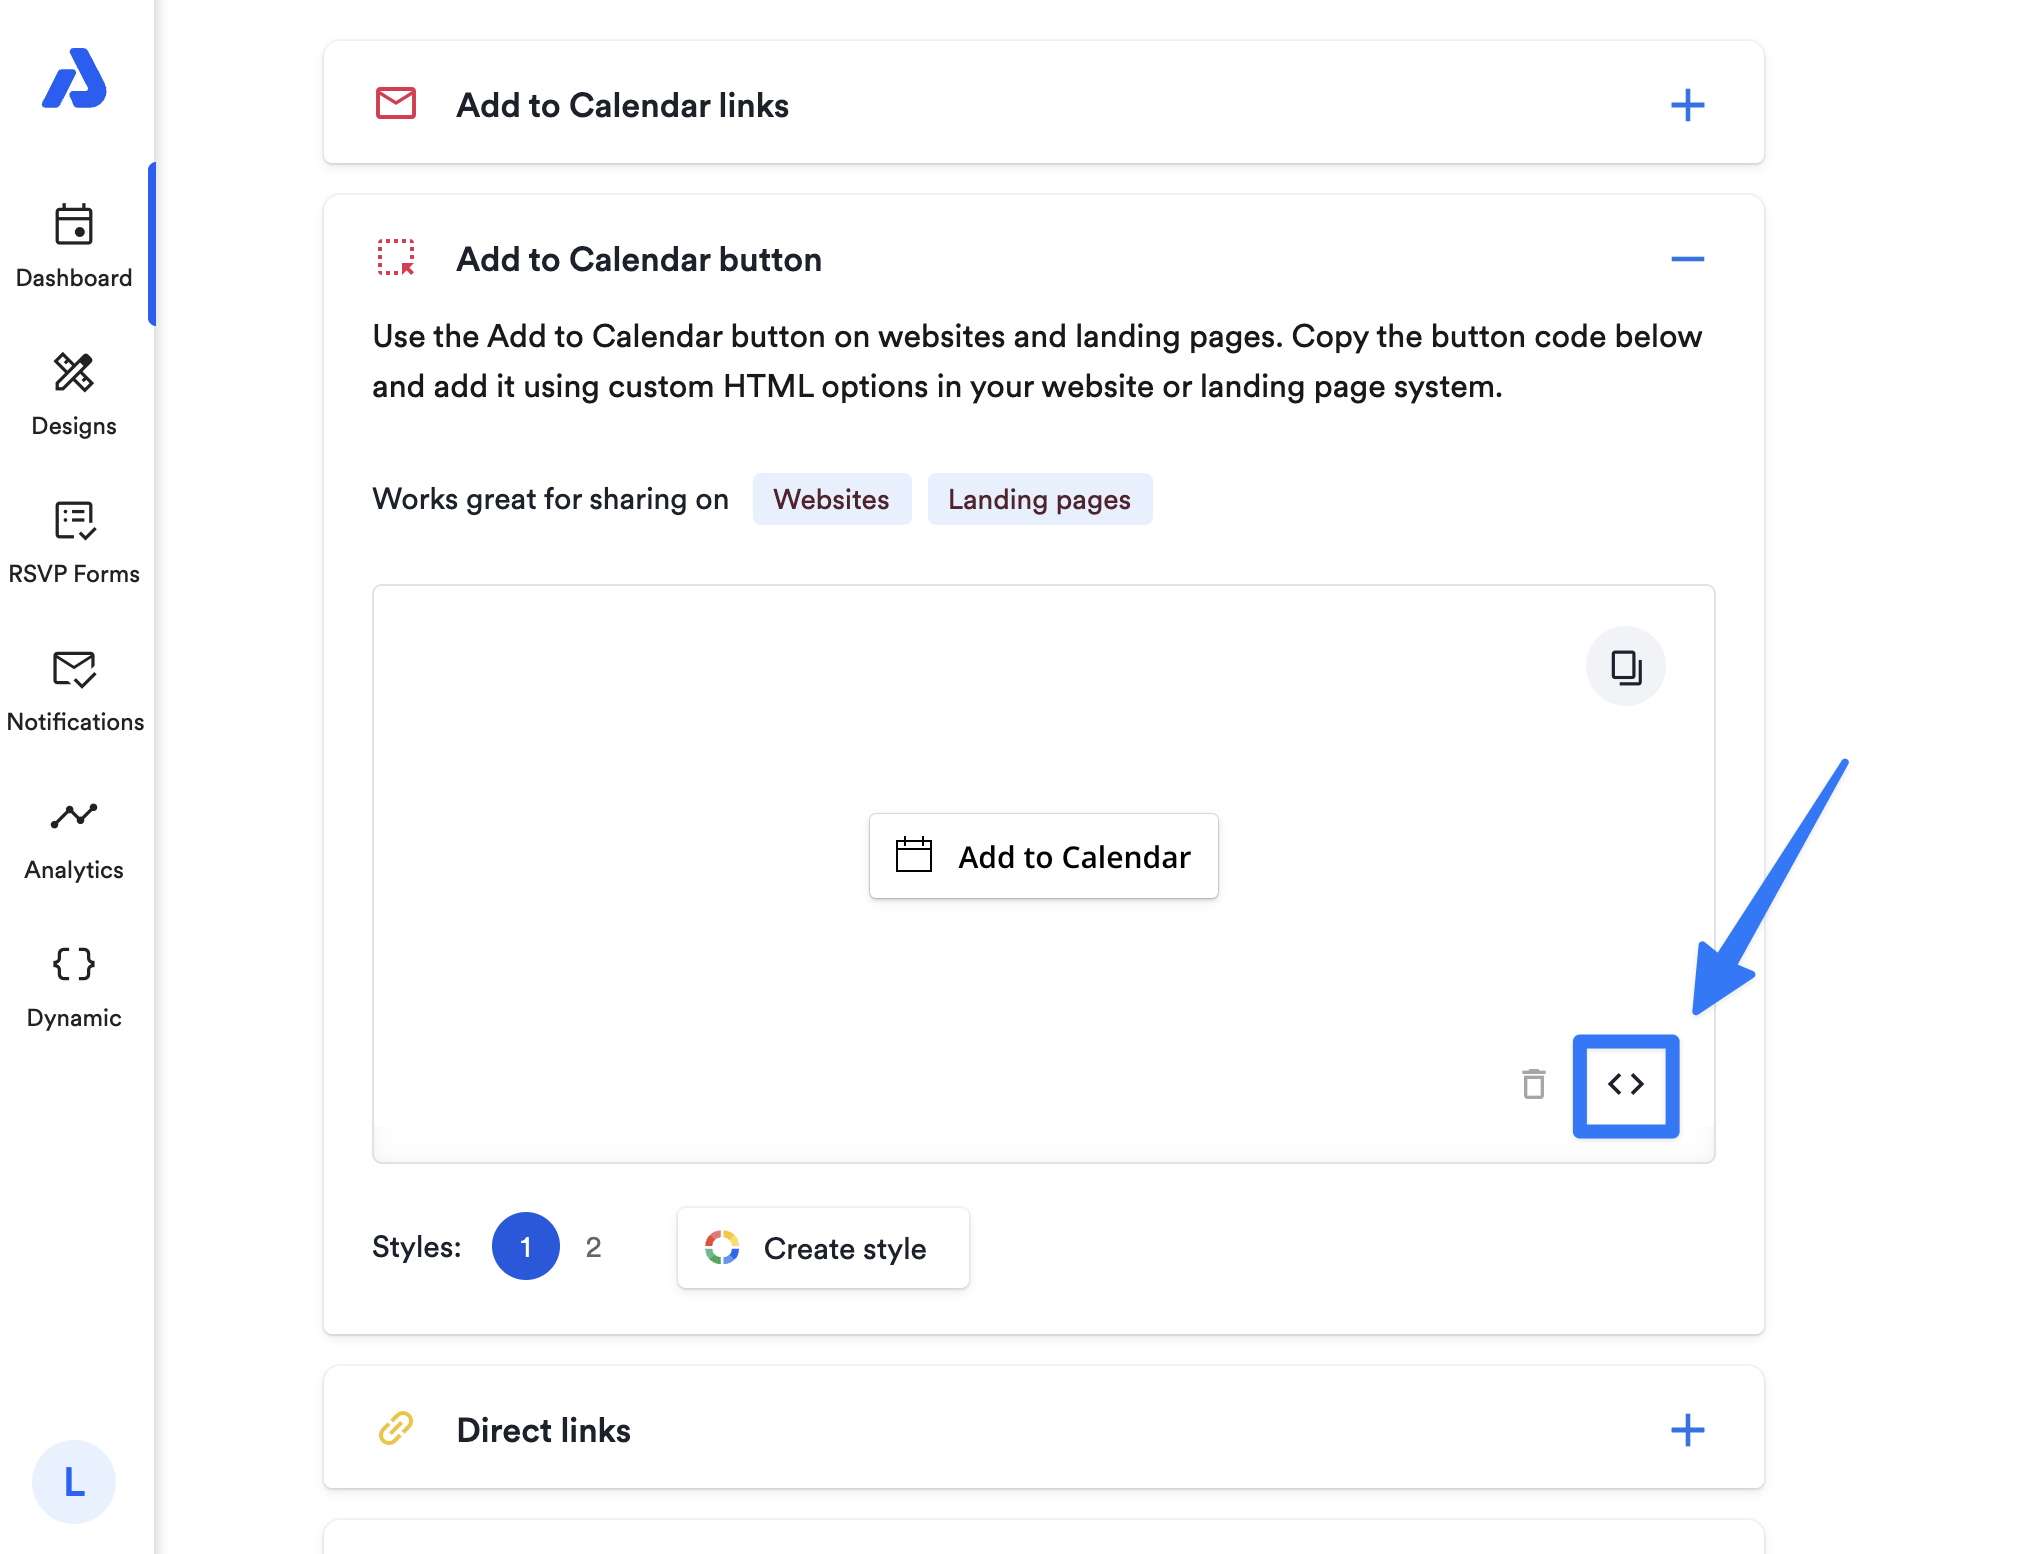
Scroll down to the Add to Calendar button section, and click the + icon to expand the section.
-
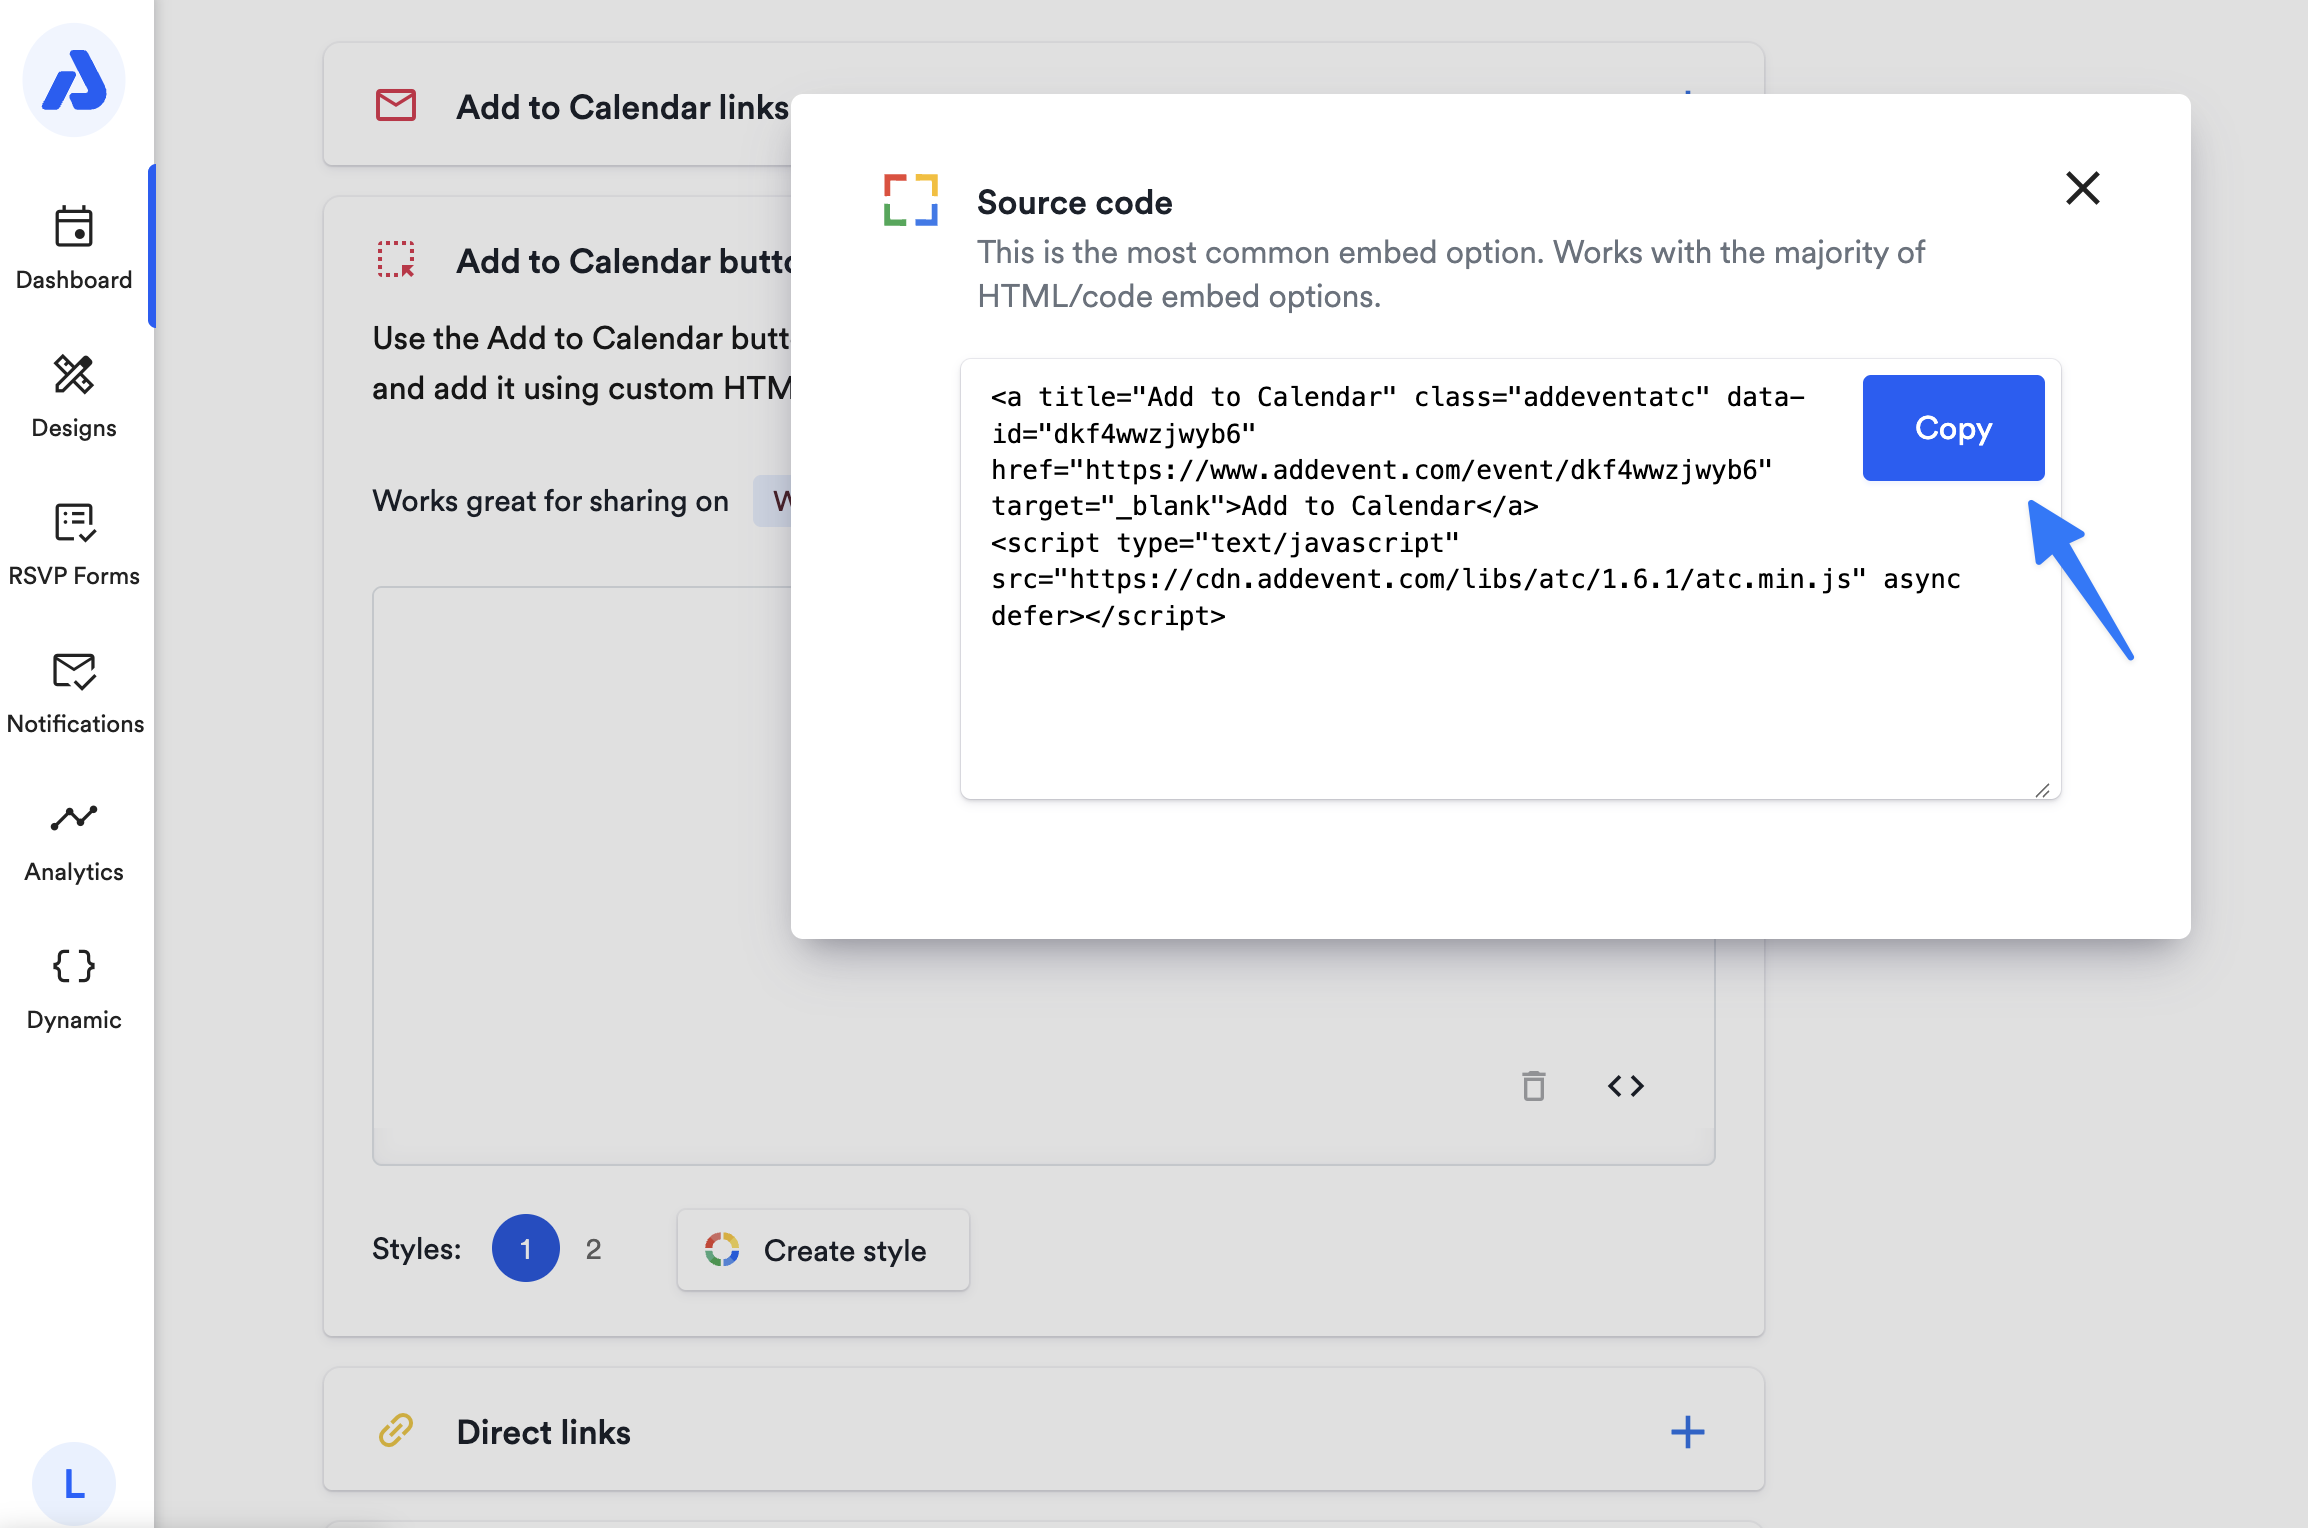
Click on the < > icon, and copy the code from the following pop-up window.
-
Paste the source code into the editor or code block where you will be sharing the Add to Calendar button.
-
Copy and paste the following code snippet directly above the button code in the editor or code block:
<!-- AddEvent Settings --> <script type="text/javascript"> window.addeventasync = function(){ addeventatc.settings({ appleical : {show:true, text:"Apple Calendar"}, google : {show:true, text:"Google <em>(online)</em>"}, office365 : {show:true, text:"Office 365 <em>(online)</em>"}, outlook : {show:true, text:"Outlook"}, outlookcom : {show:true, text:"Outlook.com <em>(online)</em>"}, yahoo : {show:true, text:"Yahoo <em>(online)</em>"} }); }; </script> -
Find the option(s) you want to hide on the Add to Calendar button, and change the "true" on each line of code to "false".
For example, the resulting line of code to remove the Outlook Desktop option would look like:
outlook: {show:false, text:"Outlook"}, -
Save the above code, and test the Add to Calendar button to confirm the option was hidden properly.
For Add to Calendar Buttons on Event Landing Pages
These steps are only possible if you are subscribed to the Professional or Enterprise plan. To learn about our plans and pricing, see our page here: Plans and Pricing
-
Create or edit an existing event landing page design template.
- To learn more about event landing page designs, see our help doc here.
-
Within the Design, select the Advanced tab.
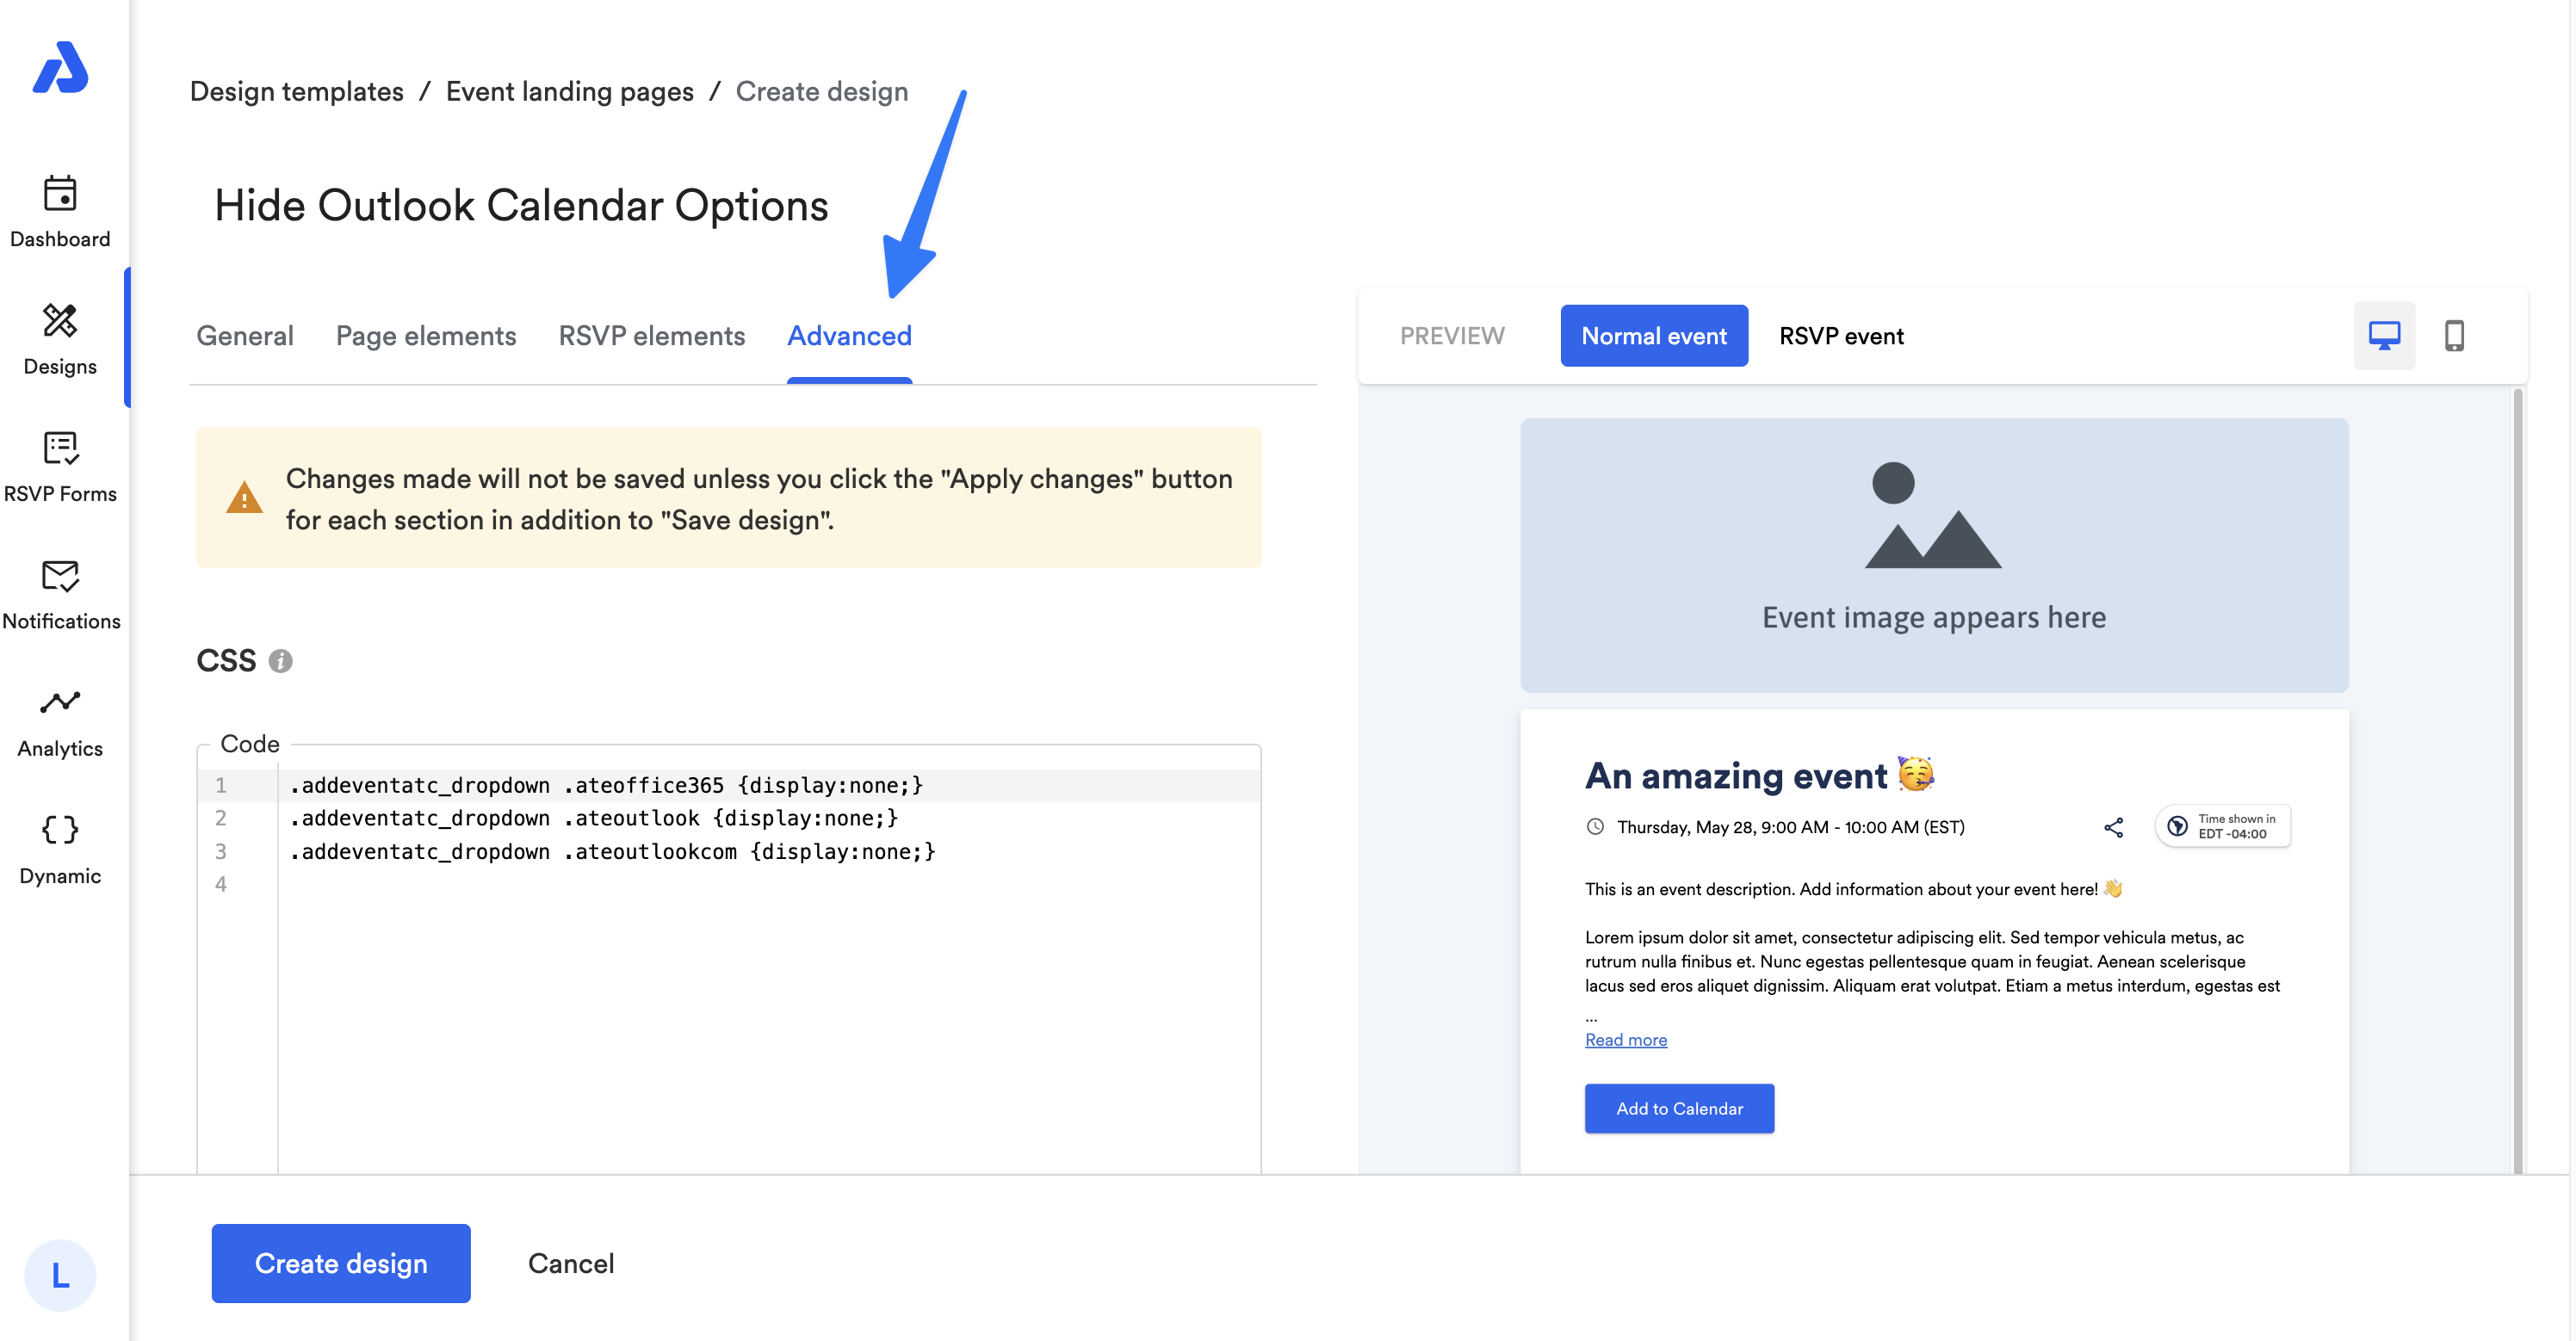
-
For event landing page designs, you can apply the following CSS, depending on which calendar options you would like to hide.
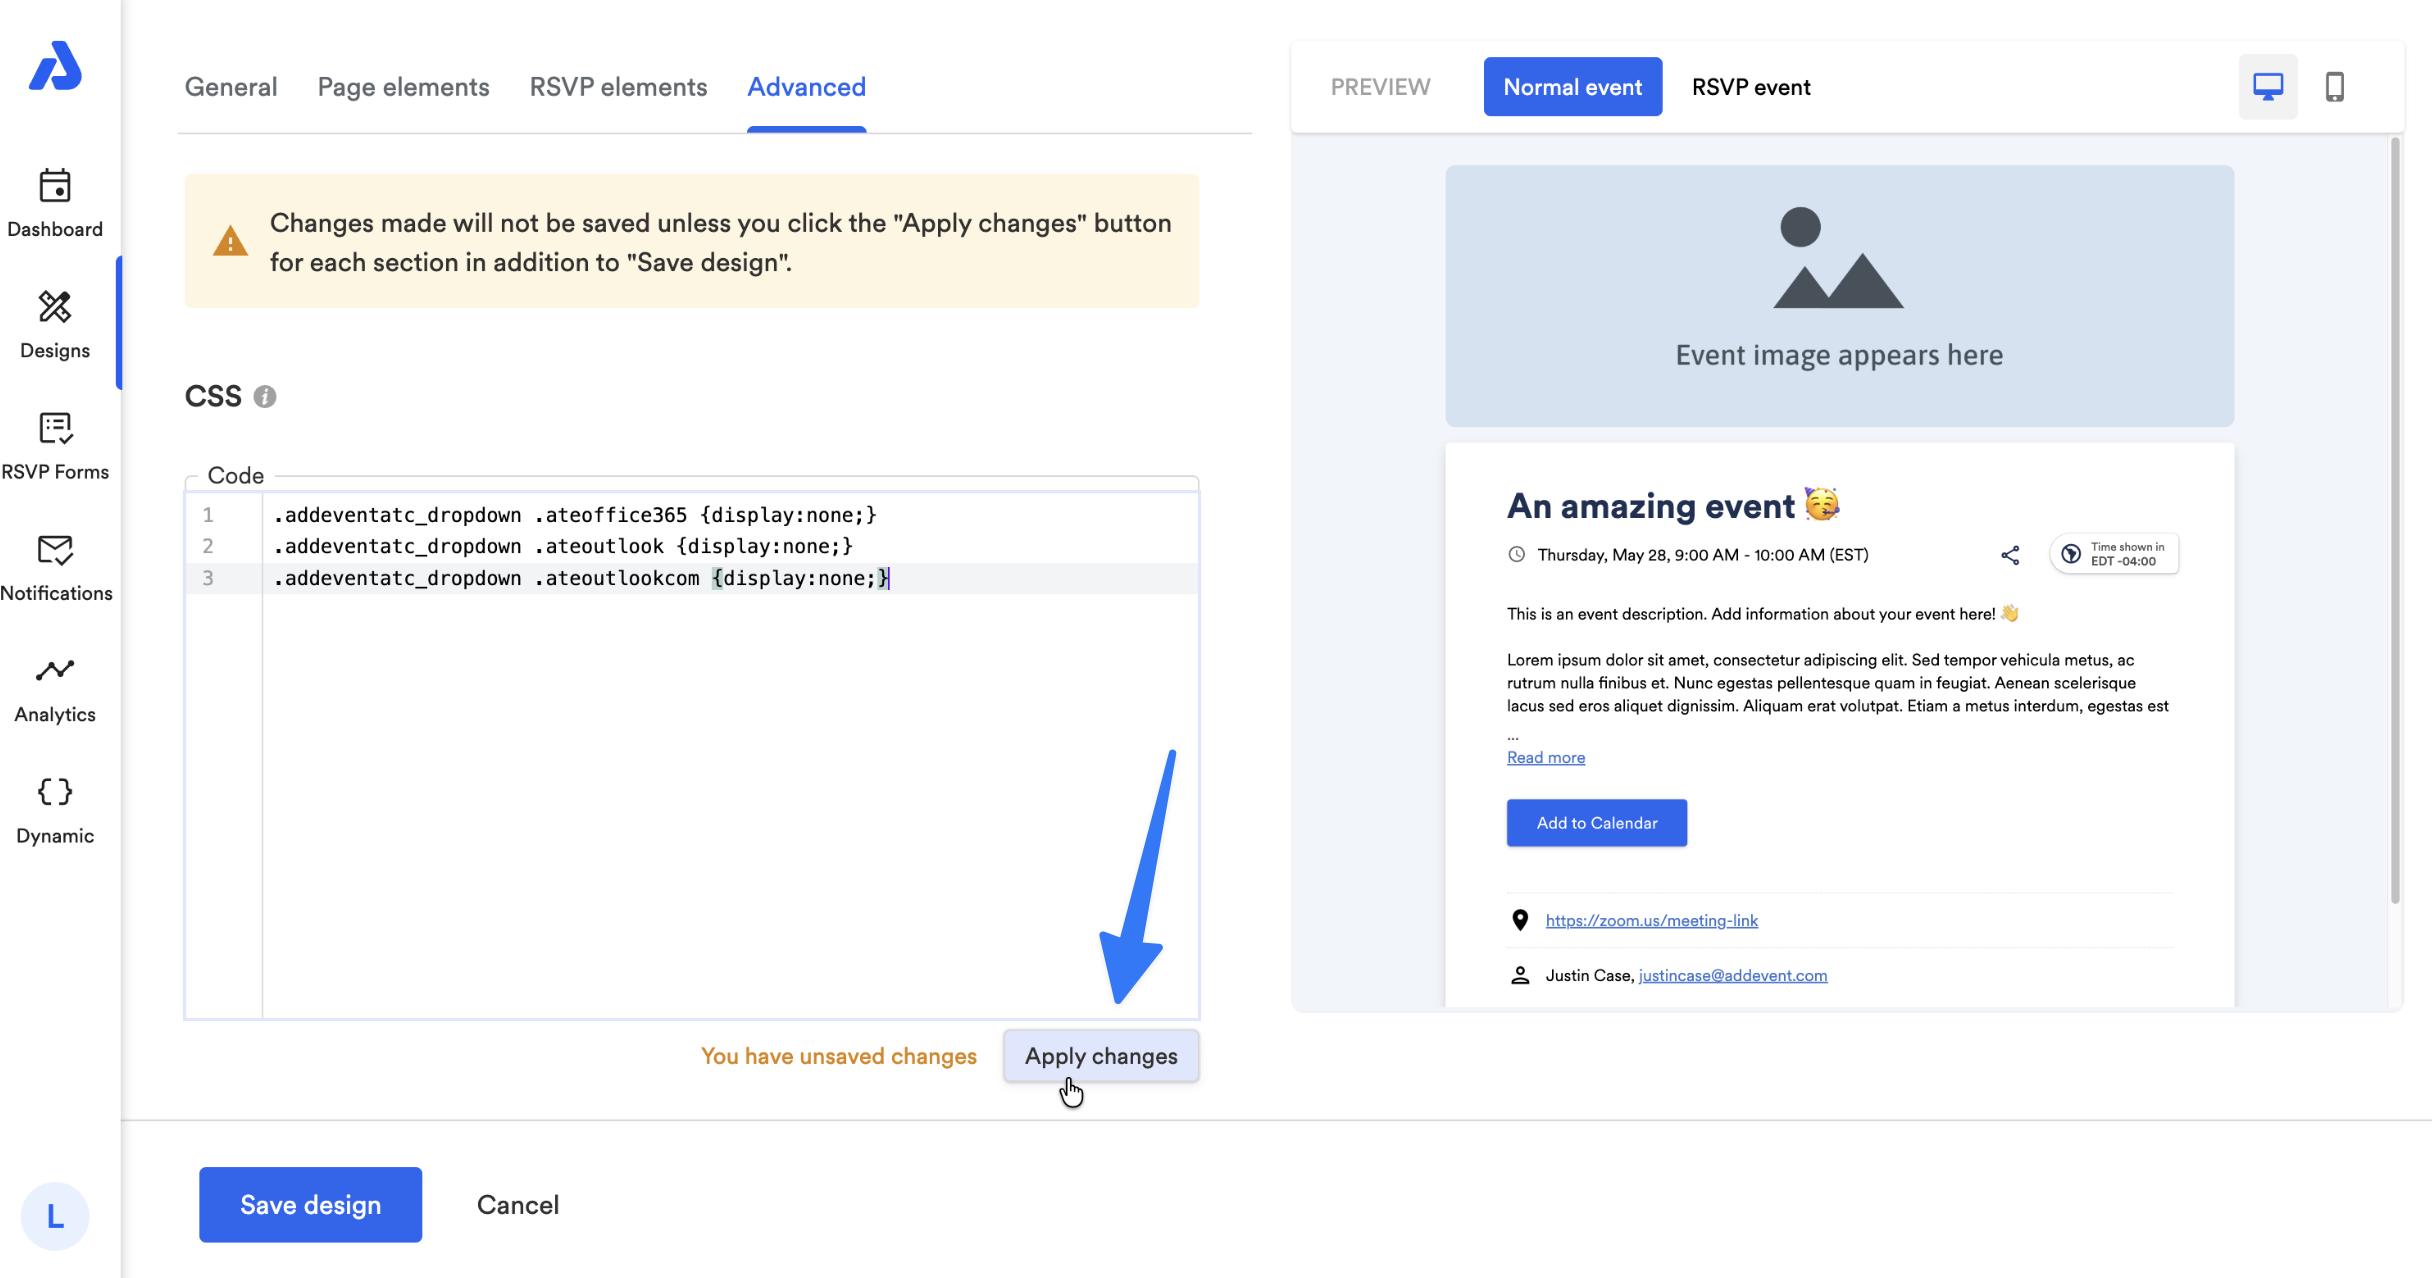
Example CSS: .addeventatc_dropdown .ateoffice365 {display:none;} .addeventatc_dropdown .ateoutlook {display:none;} .addeventatc_dropdown .ateoutlookcom {display:none;} The above snippet example will hide all three Outlook options from your Add to Calendar button on your event landing page. Below is the full list of calendar options you can hide. Apple: .addeventatc_dropdown .ateappleical {display:none;} Google: .addeventatc_dropdown .ategoogle {display:none;} Office 365: .addeventatc_dropdown .ateoffice365 {display:none;} Outlook (desktop app): .addeventatc_dropdown .ateoutlook {display:none;} Outlook.com (browser version): .addeventatc_dropdown .ateoutlookcom {display:none;} Yahoo: .addeventatc_dropdown .ateyahoo {display:none;} You can apply any of the above lines of CSS to the CSS section to hide the specific calendar option that each line applies to (Apple, Google, Office 365, Outlook (desktop app), Outlook.com, and Yahoo). -
Ensure you click the Apply changes button after applying the above CSS.
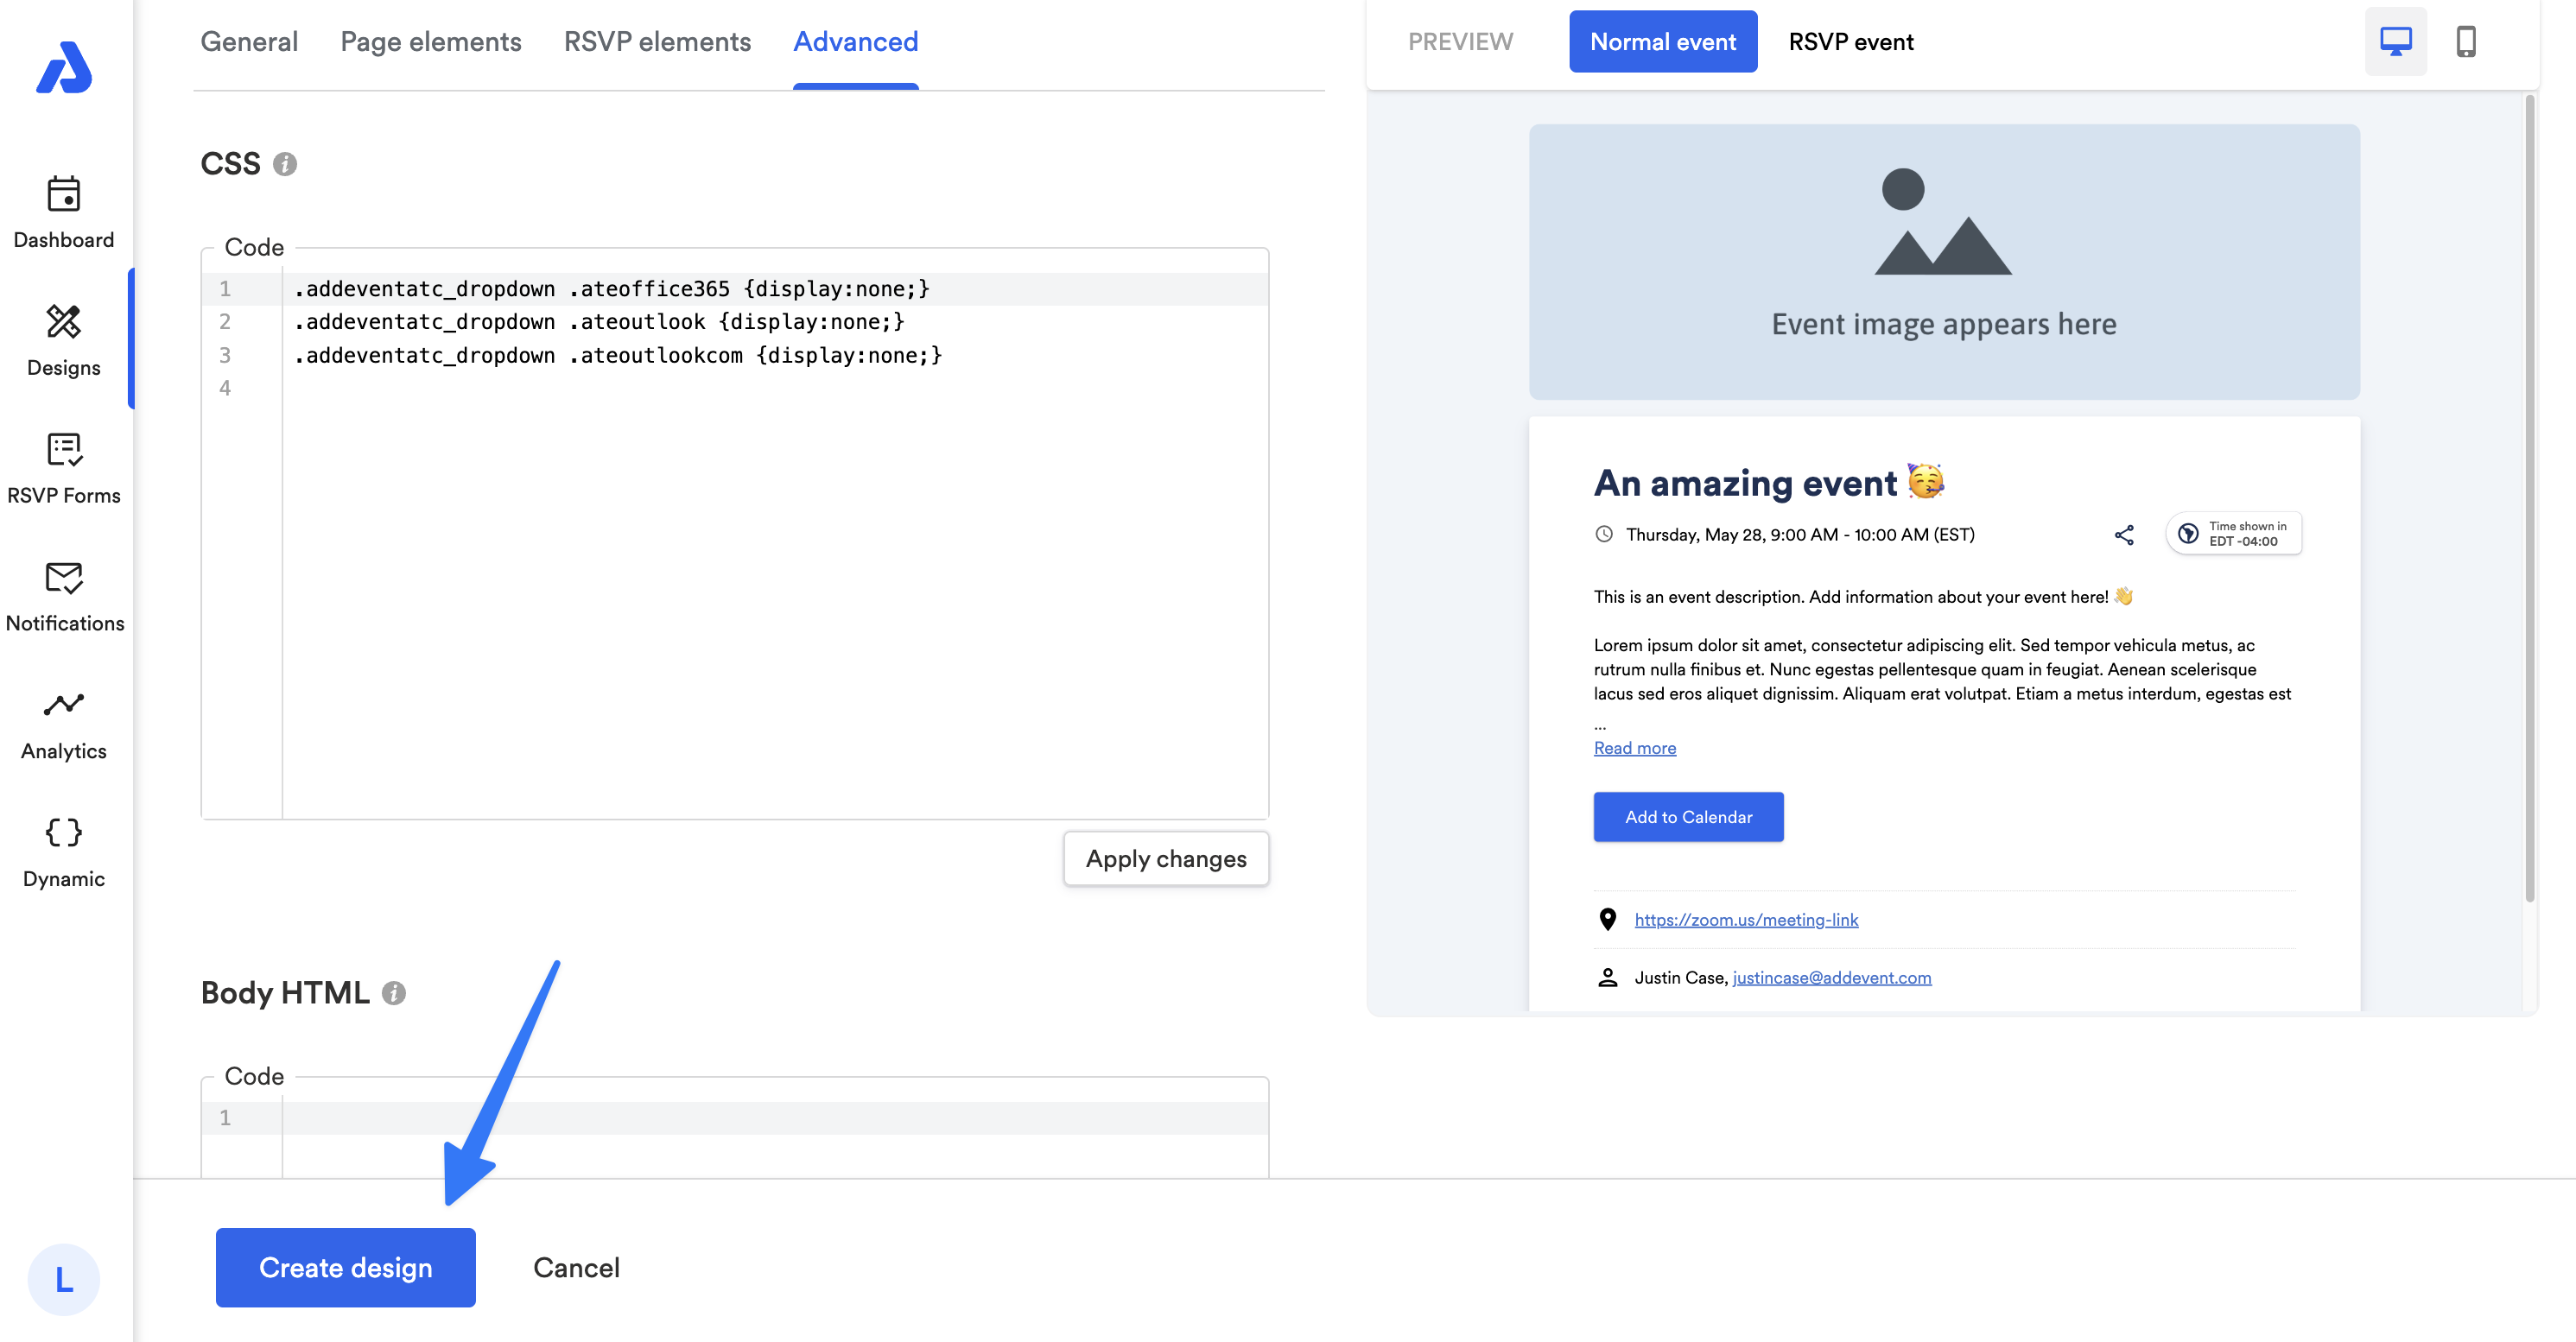
-
Click the Create design or Save design button on the bottom of the page:
-
Apply the event landing page design to your event.
- To learn how to apply a design to your event landing page, see our help doc here.
For Follow Calendar Buttons on Calendar Landing Pages
These steps are only possible if you are subscribed to the Professional or Enterprise plan. To learn about our plans and pricing, see our page here: Plans and Pricing
-
Create or edit an existing calendar landing page design template.
- To learn more about calendar landing page designs, see our help doc here.
-
Within the Design, select the Advanced tab.
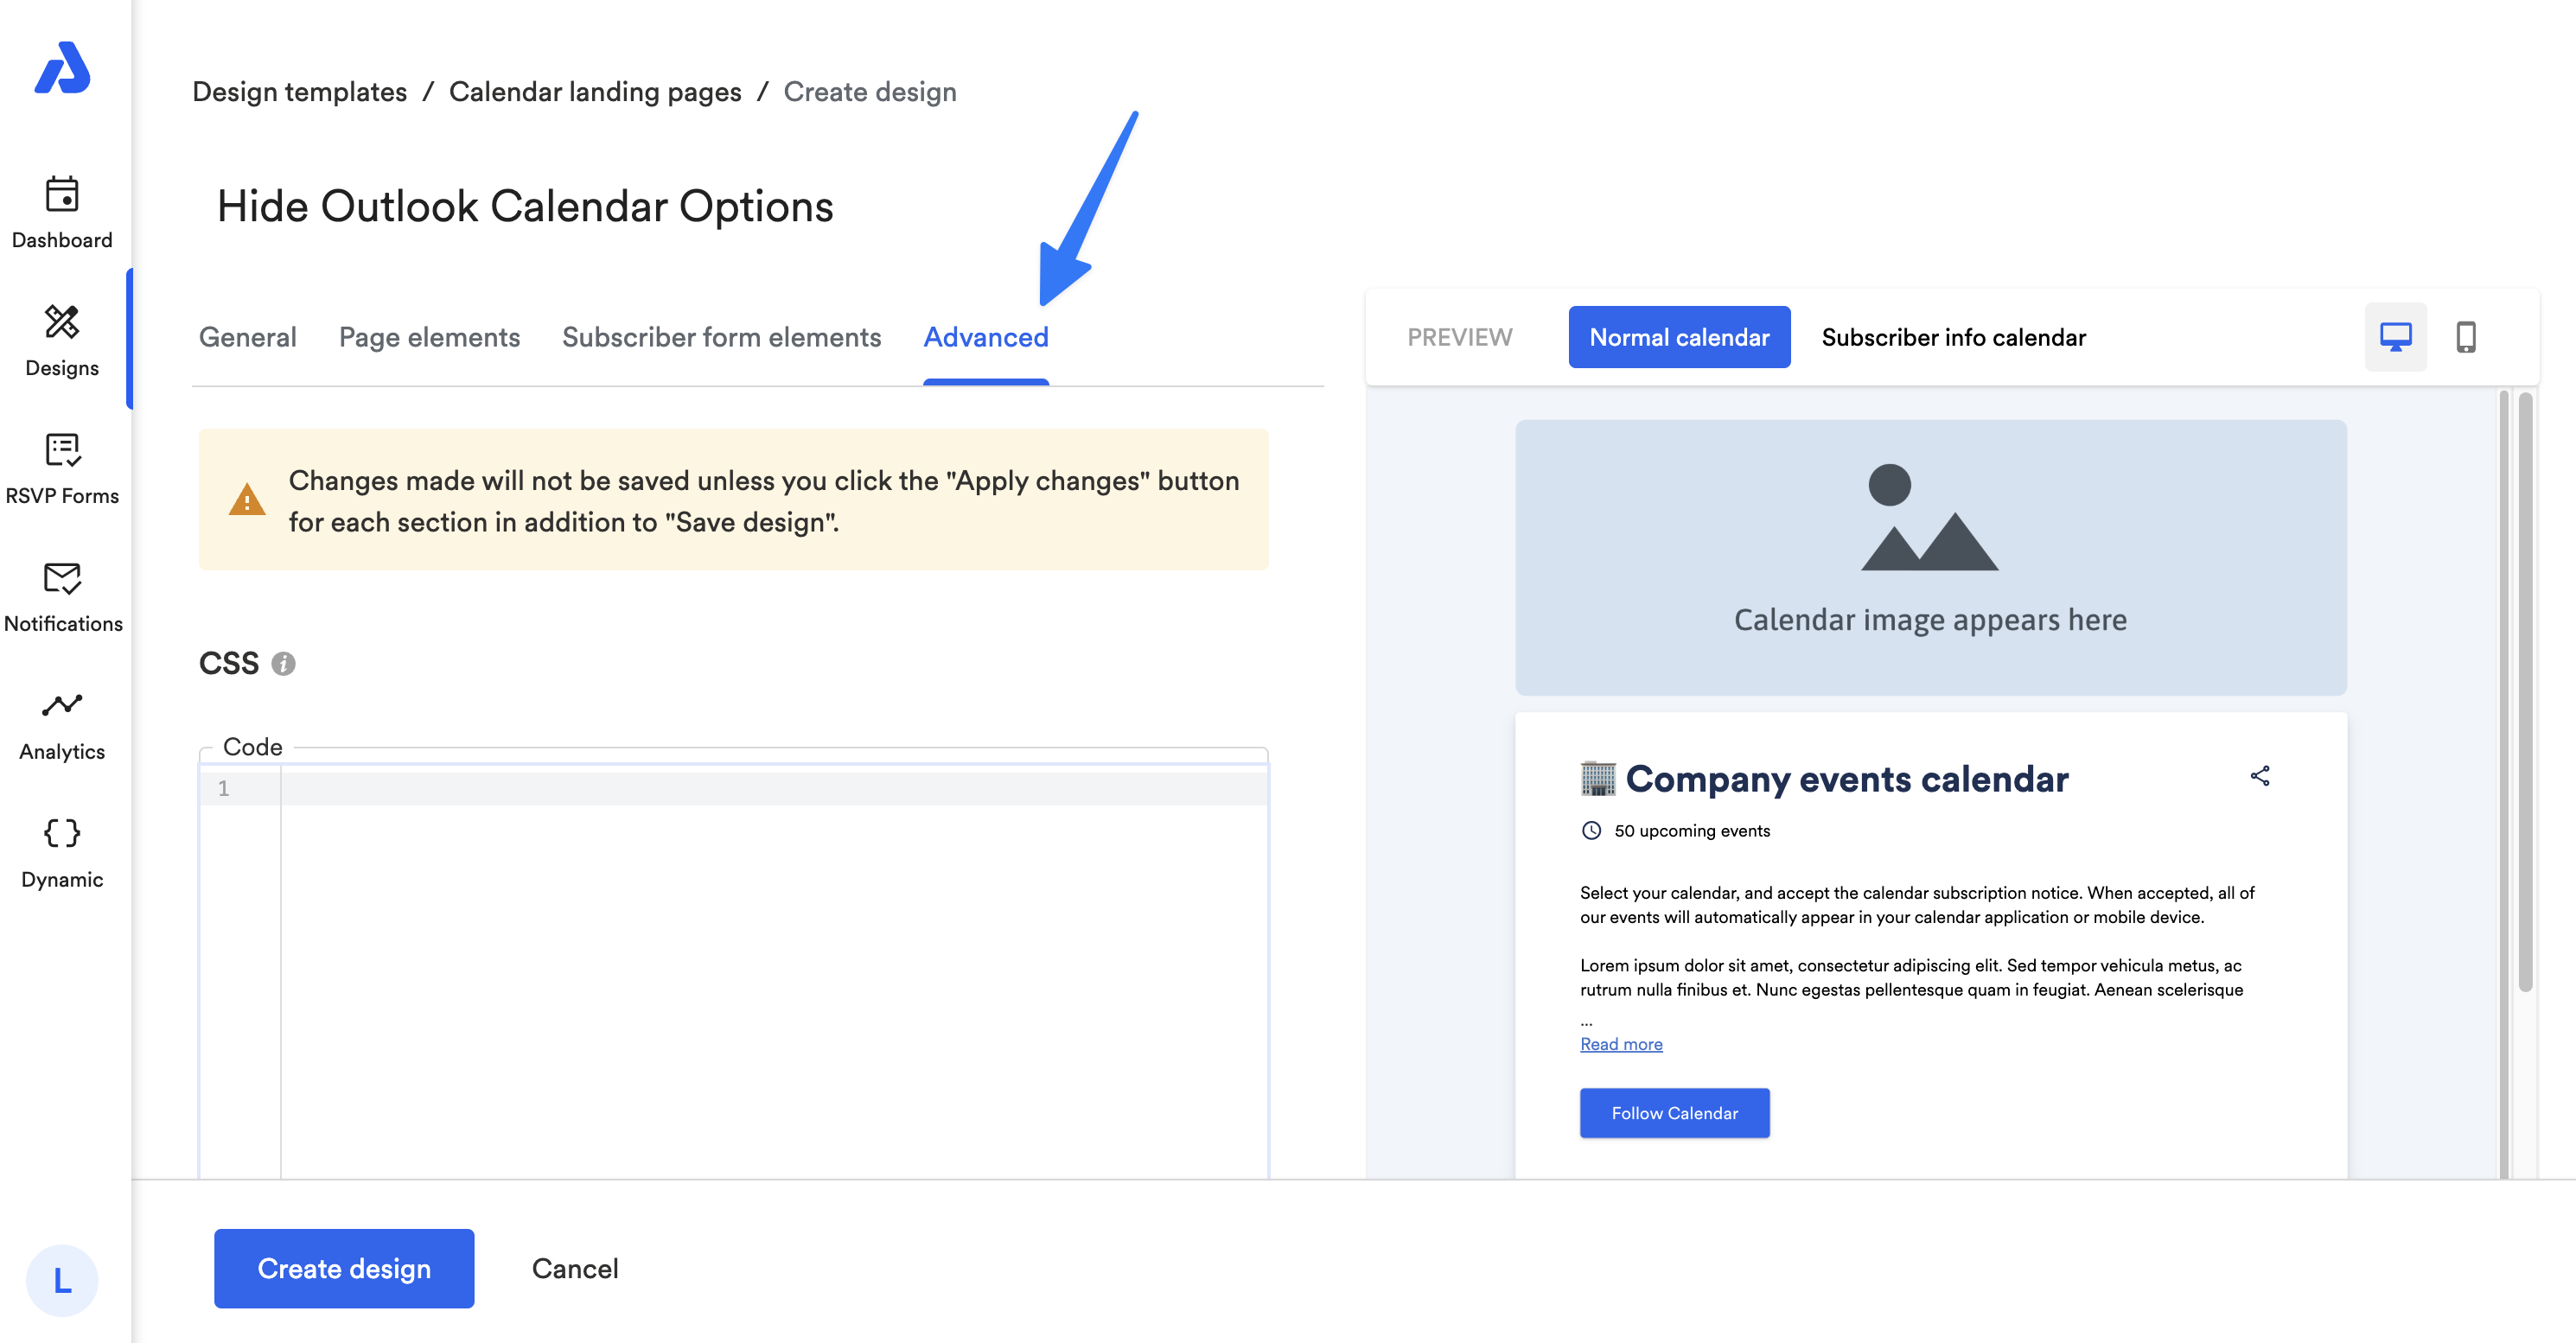
-
For calendar landing page designs, you can apply the following CSS, depending on which calendar options you would like to hide.
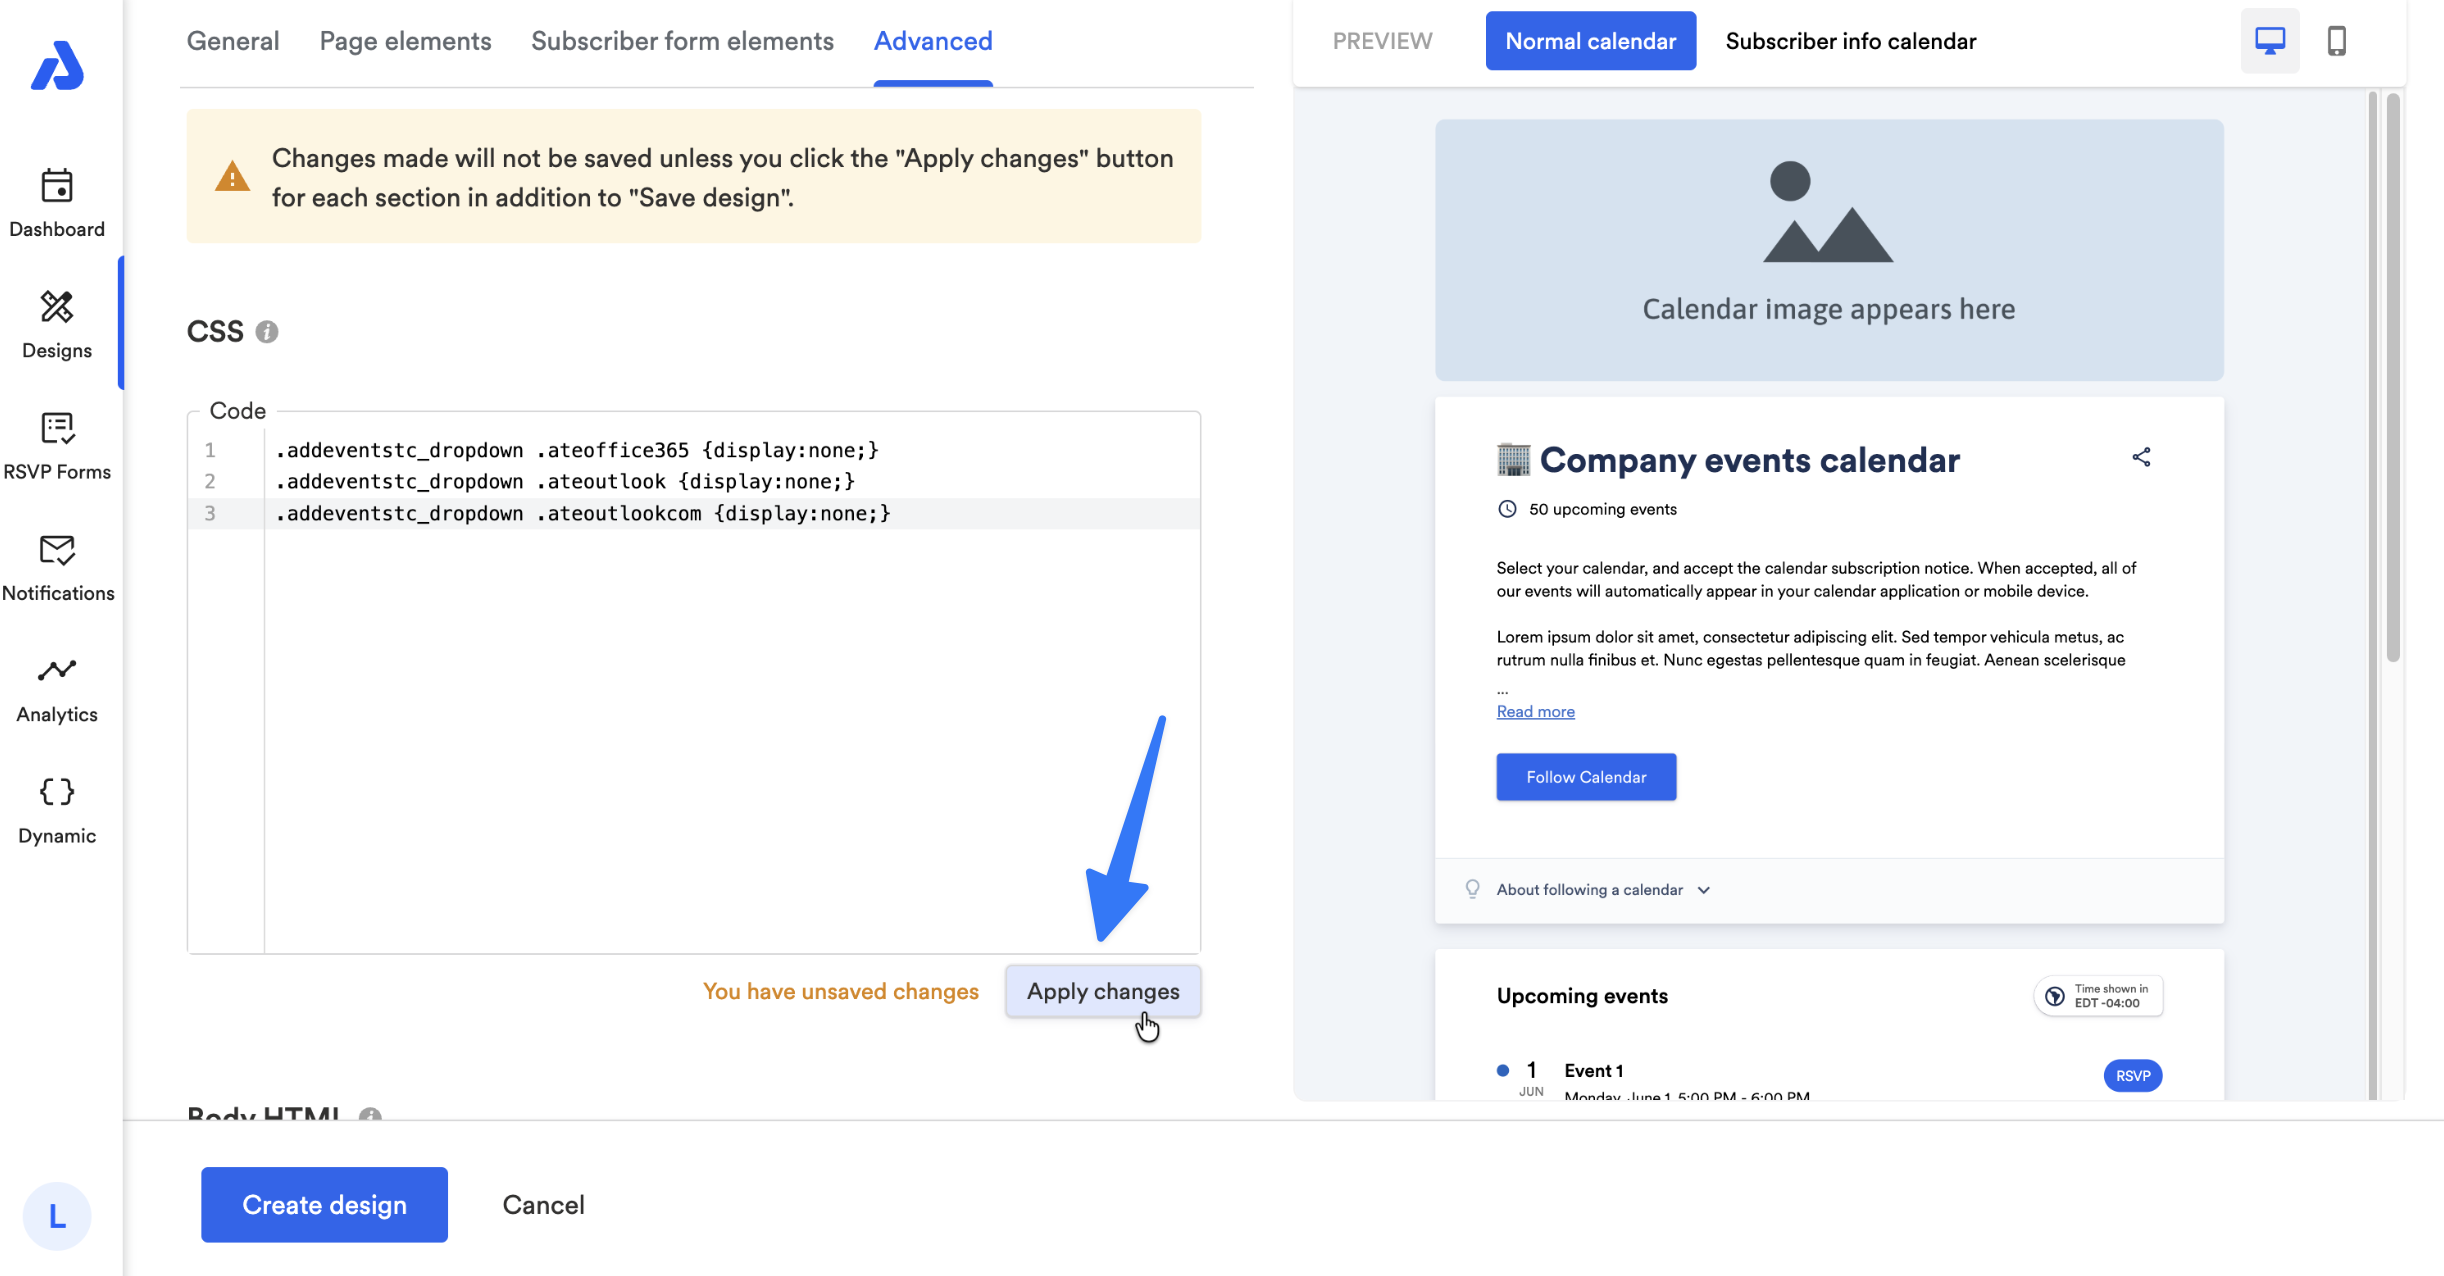
Example CSS: .addeventstc_dropdown .ateoffice365 {display:none;} .addeventstc_dropdown .ateoutlook {display:none;} .addeventstc_dropdown .ateoutlookcom {display:none;} The above snippet example will hide all three Outlook options from your Follow Calendar button on your calendar landing page. Below is the full list of calendar options you can hide. Apple: .addeventstc_dropdown .ateappleical {display:none;} Google: .addeventstc_dropdown .ategoogle {display:none;} Office 365: .addeventstc_dropdown .ateoffice365 {display:none;} Outlook (desktop app): .addeventstc_dropdown .ateoutlook {display:none;} Outlook.com (browser version): .addeventstc_dropdown .ateoutlookcom {display:none;} Yahoo: .addeventstc_dropdown .ateyahoo {display:none;} You can apply any of the above lines of CSS to the CSS section to hide the specific calendar option that each line applies to (Apple, Google, Office 365, Outlook (desktop app), Outlook.com, and Yahoo). -
Ensure you click the Apply changes button after pasting the CSS.
-
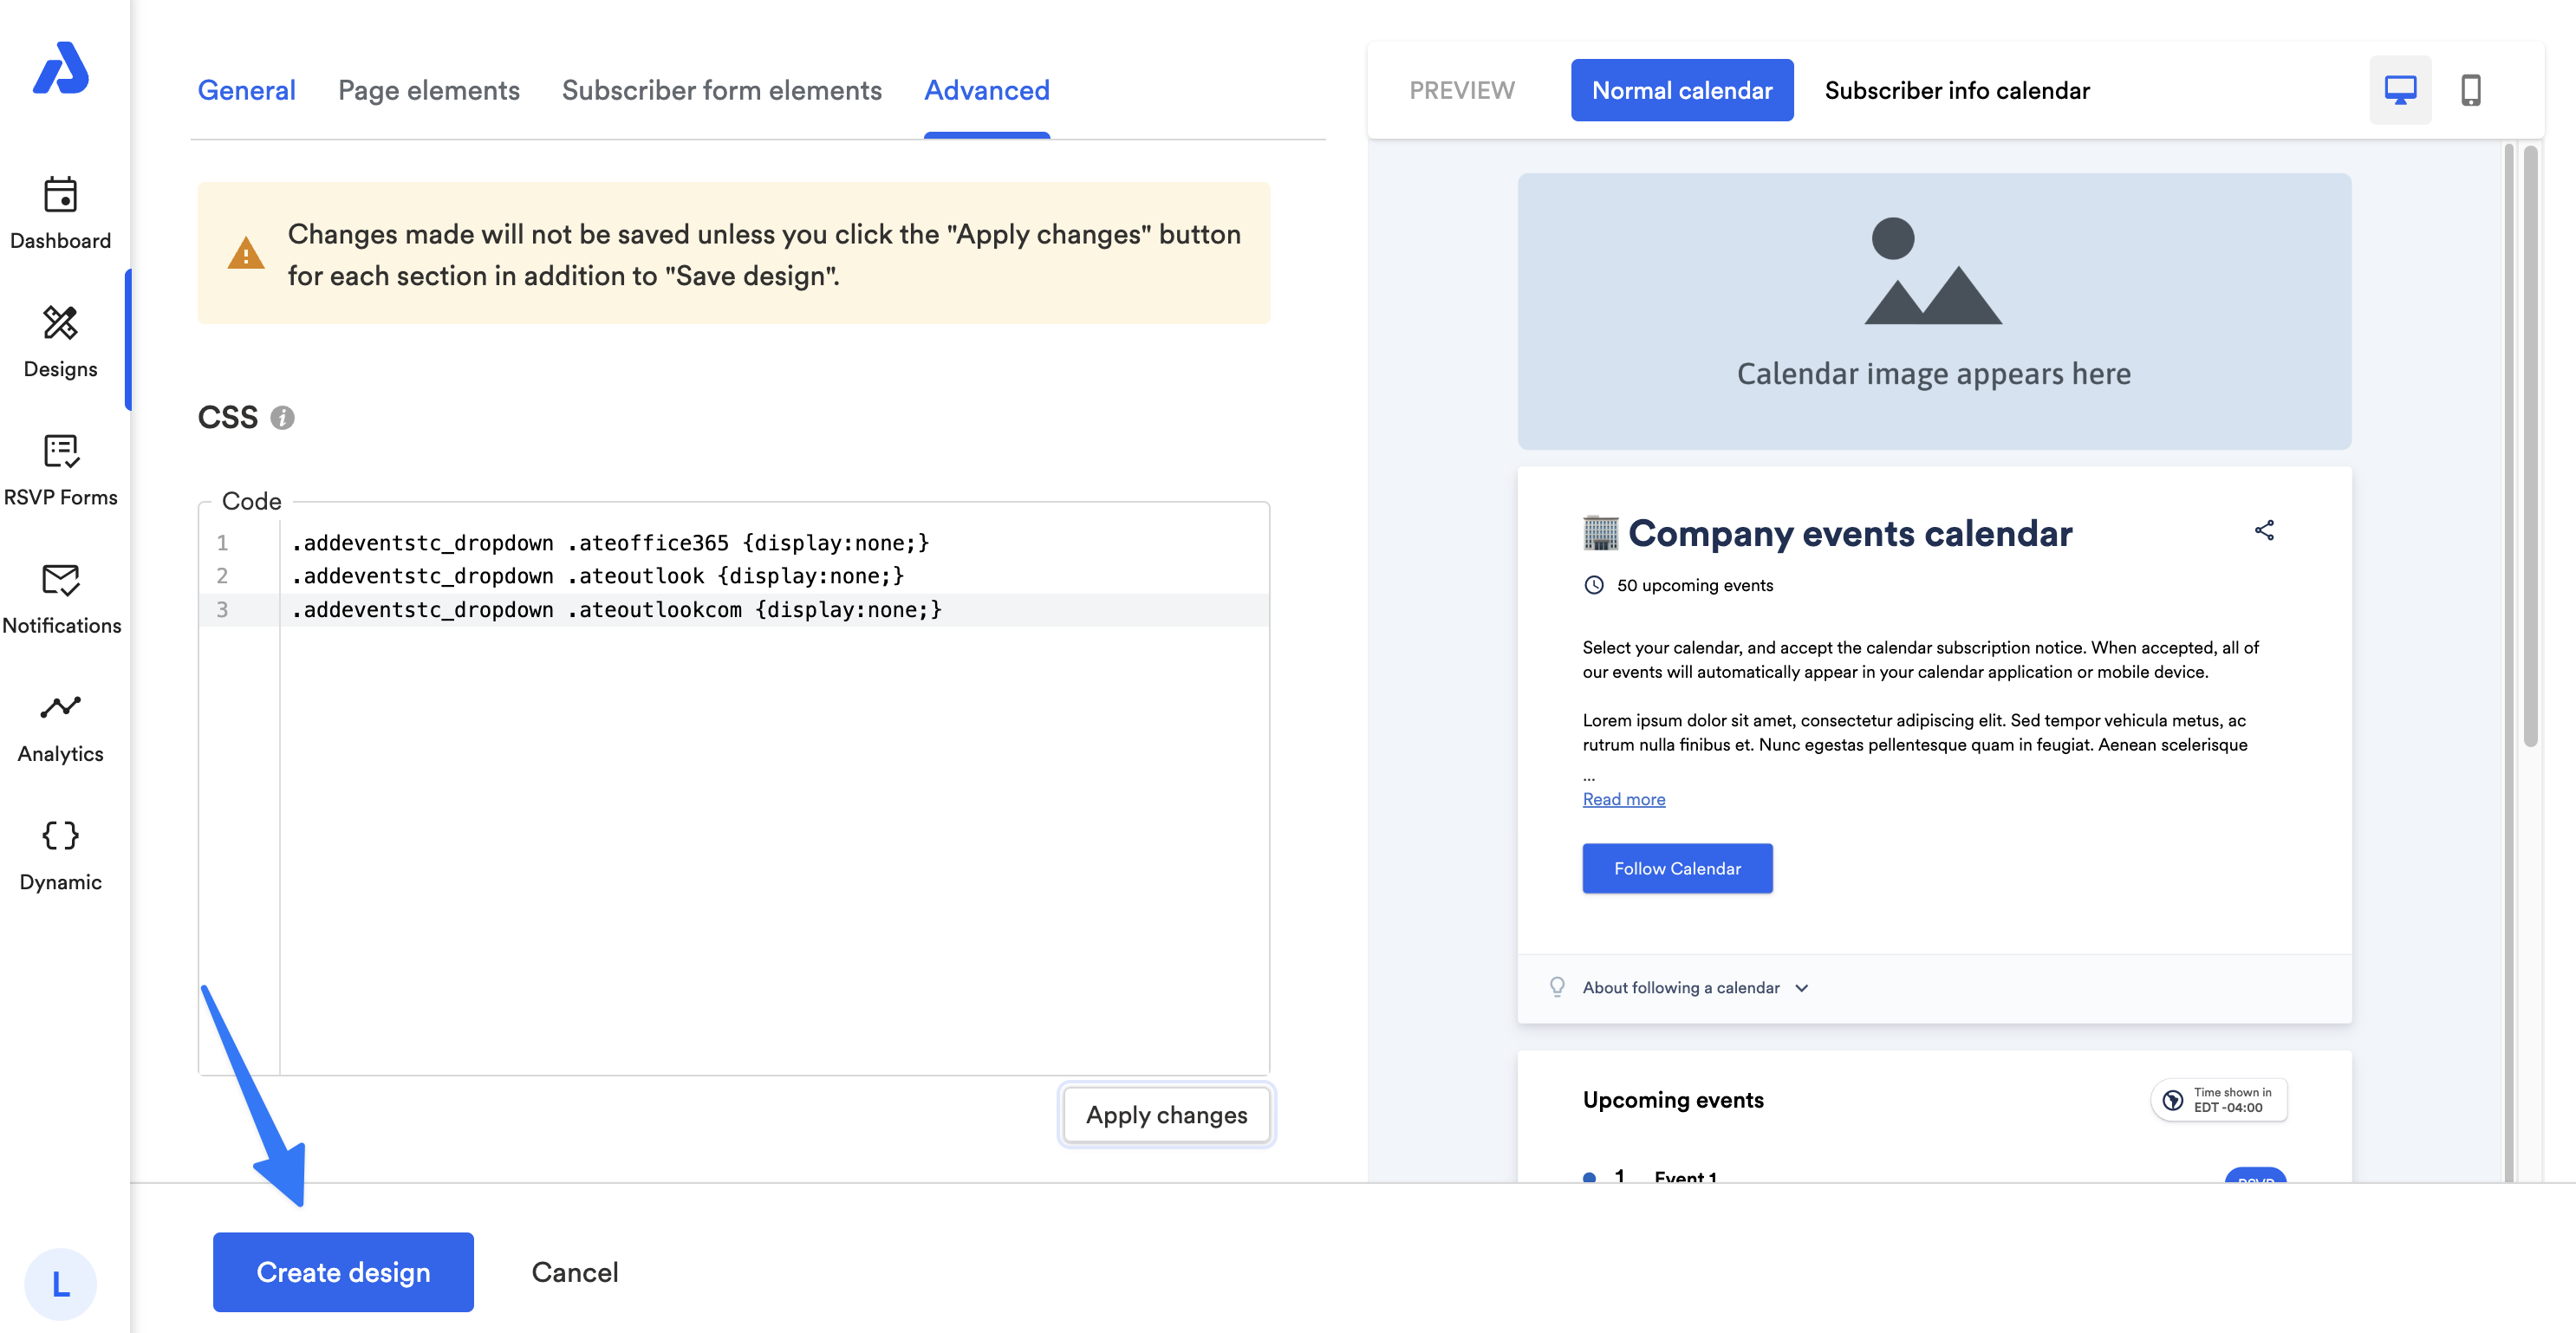
Click the Create design or Save design button on the bottom of the page:
-
Apply the calendar landing page design to your calendar.
- To learn how to apply a design to your calendar landing page, see our help doc here.
Updated 26 days ago