Free or Busy
This help doc explains how to mark your event as "Free" or "Busy" in your user's calendar.
Mark Your Event as "Free" or "Busy"
To set an existing event to Busy or Free, follow the steps below:
- From the Dashboard, click on the event's title. You will be directed to the Event details page.
- Click the three dots icon located to the right of the event's title, and then select the Edit option.
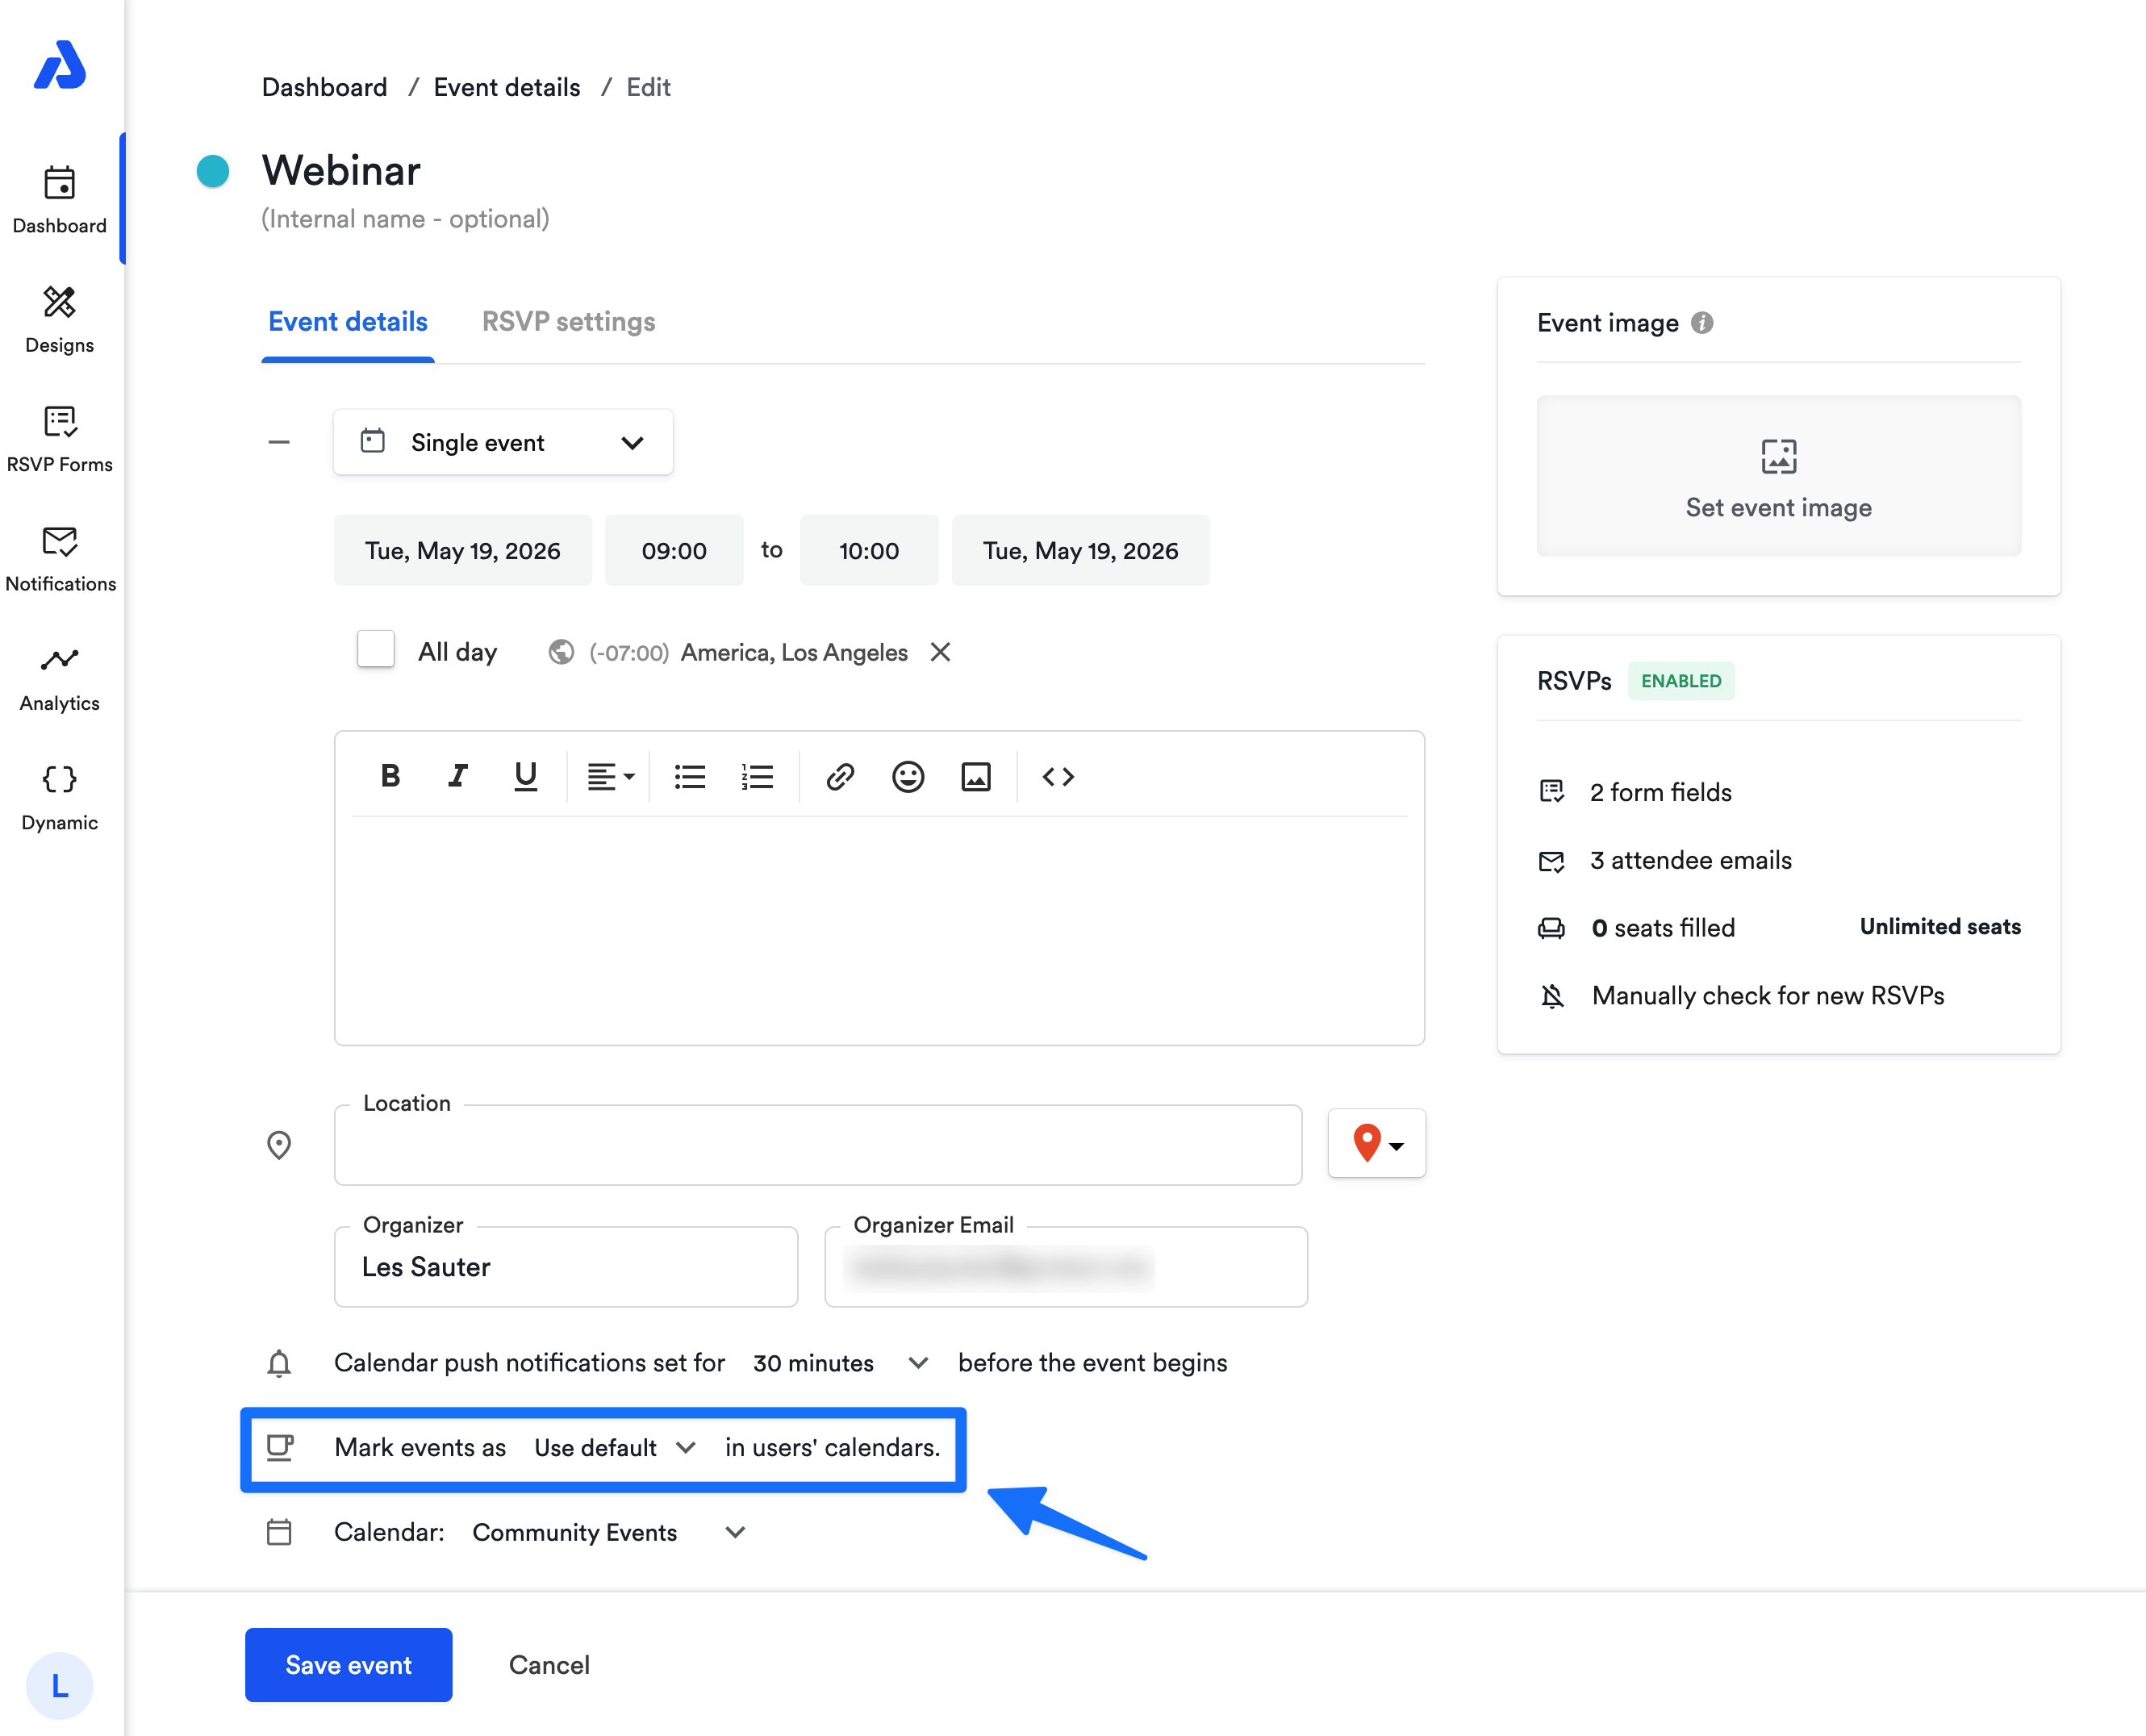
- With the "Mark event as" dropdown, select the status you want:
- Use default: Keeps your external calendar’s default availability setting.
- Free: Shows this time as free for scheduling on the attendees' calendar.
- Busy: Shows this time as unavailable for scheduling on the attendees' calendar.
- Click the Save event button to apply your changes.
If you’re unsure which setting to use, select the Use default option.
Note on Subscription Calendars:
For subscription calendars, updating an event's status won’t automatically sync to subscribers' calendars. To trigger a sync, make an additional edit to the event, such as adding a character to the title or description.
Updated about 2 months ago
Did this page help you?