Populate Data with URL Parameters
This help doc shares instructions on how to populate data into RSVP form/Subscriber form fields with URL parameters.
When sharing an RSVP event or a calendar that requires users to enter their information before registering/subscribing, you might already have that user's information. To improve the user experience and ensure that they don't have to re-enter that information when RSVPing to your event or subscribing to your calendar, you can pass that user information through to the event or calendar landing page so that the information is pre-filled when the user visits the landing page.
A common use case for this is when sending emails from a CRM/email marketing platform; you can use merge tags/personalization tokens to update the information for each user.
How to Populate RSVP Attendee Information Using URL Parameters
To pass information into an RSVP form field to automatically populate the user's information, you will need to format the URL in the following structure:
https://www.addevent.com/event/{{unique_key}}key1=value1&key2=value2
-
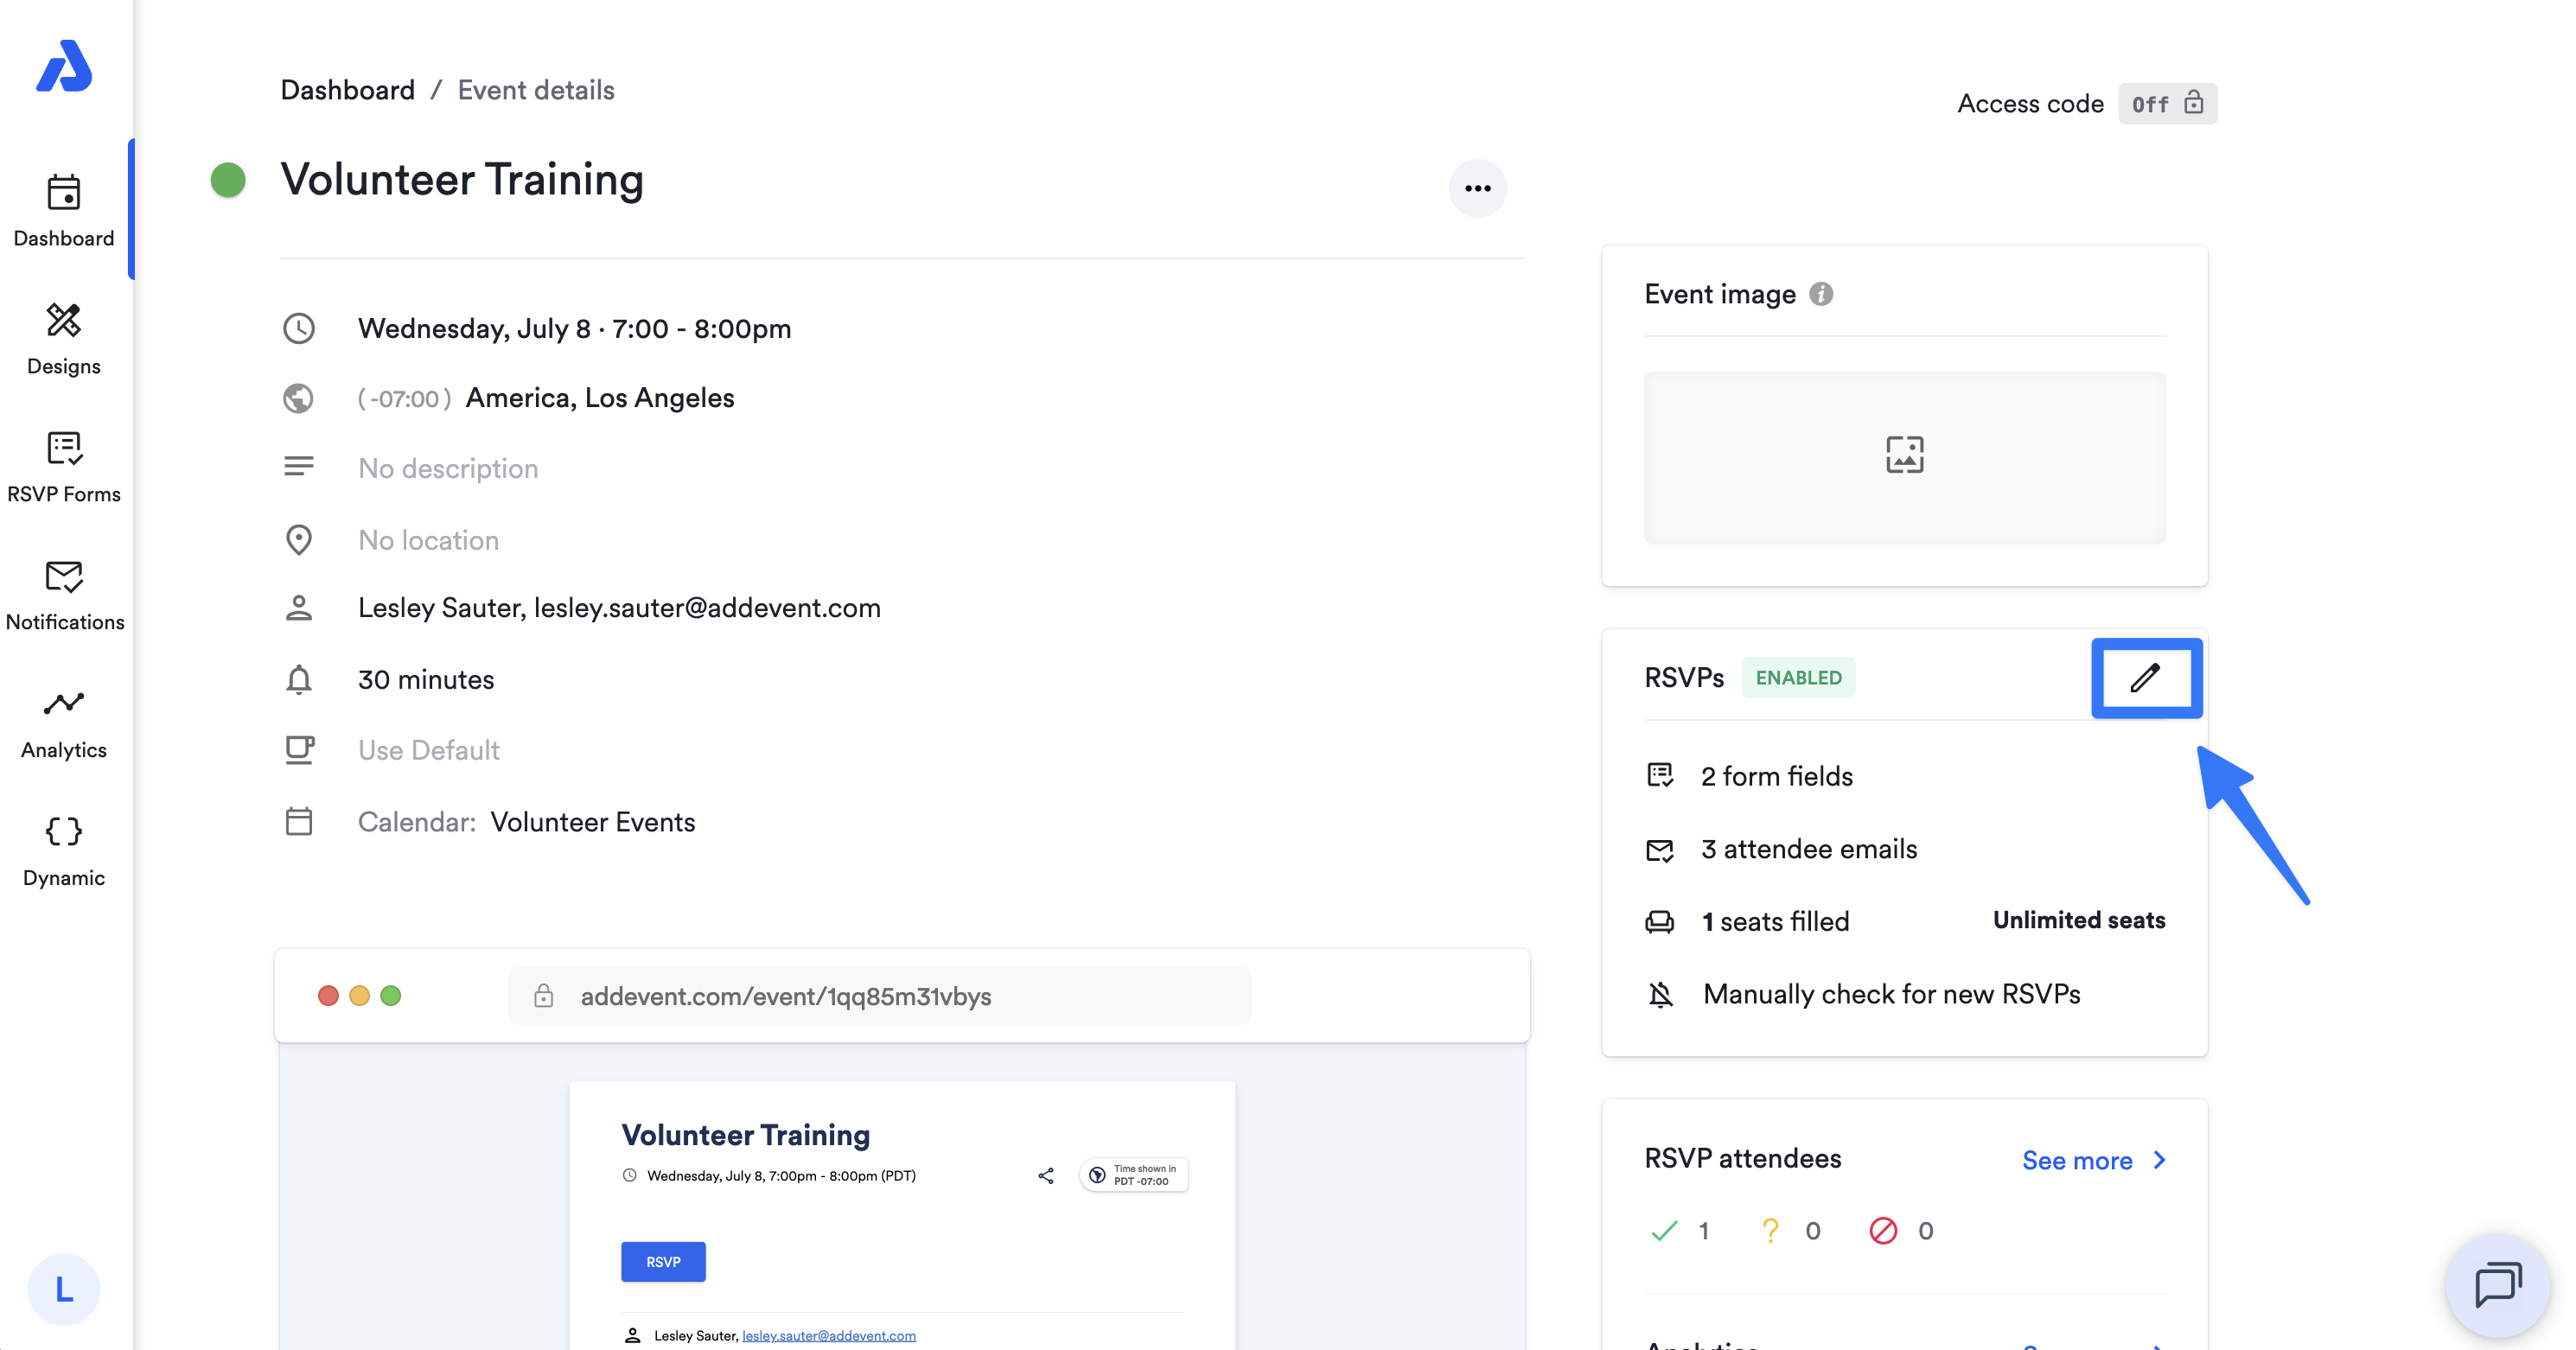
Create a new event with RSVP enabled (or edit an existing event with RSVP enabled). Choose which RSVP form that you wish to use for the event from the RSVP form dropdown within the RSVP settings tab.
-
From the Event details page, you can view the RSVP form that you are using for your event by clicking the pen icon located within the RSVPs section.
-
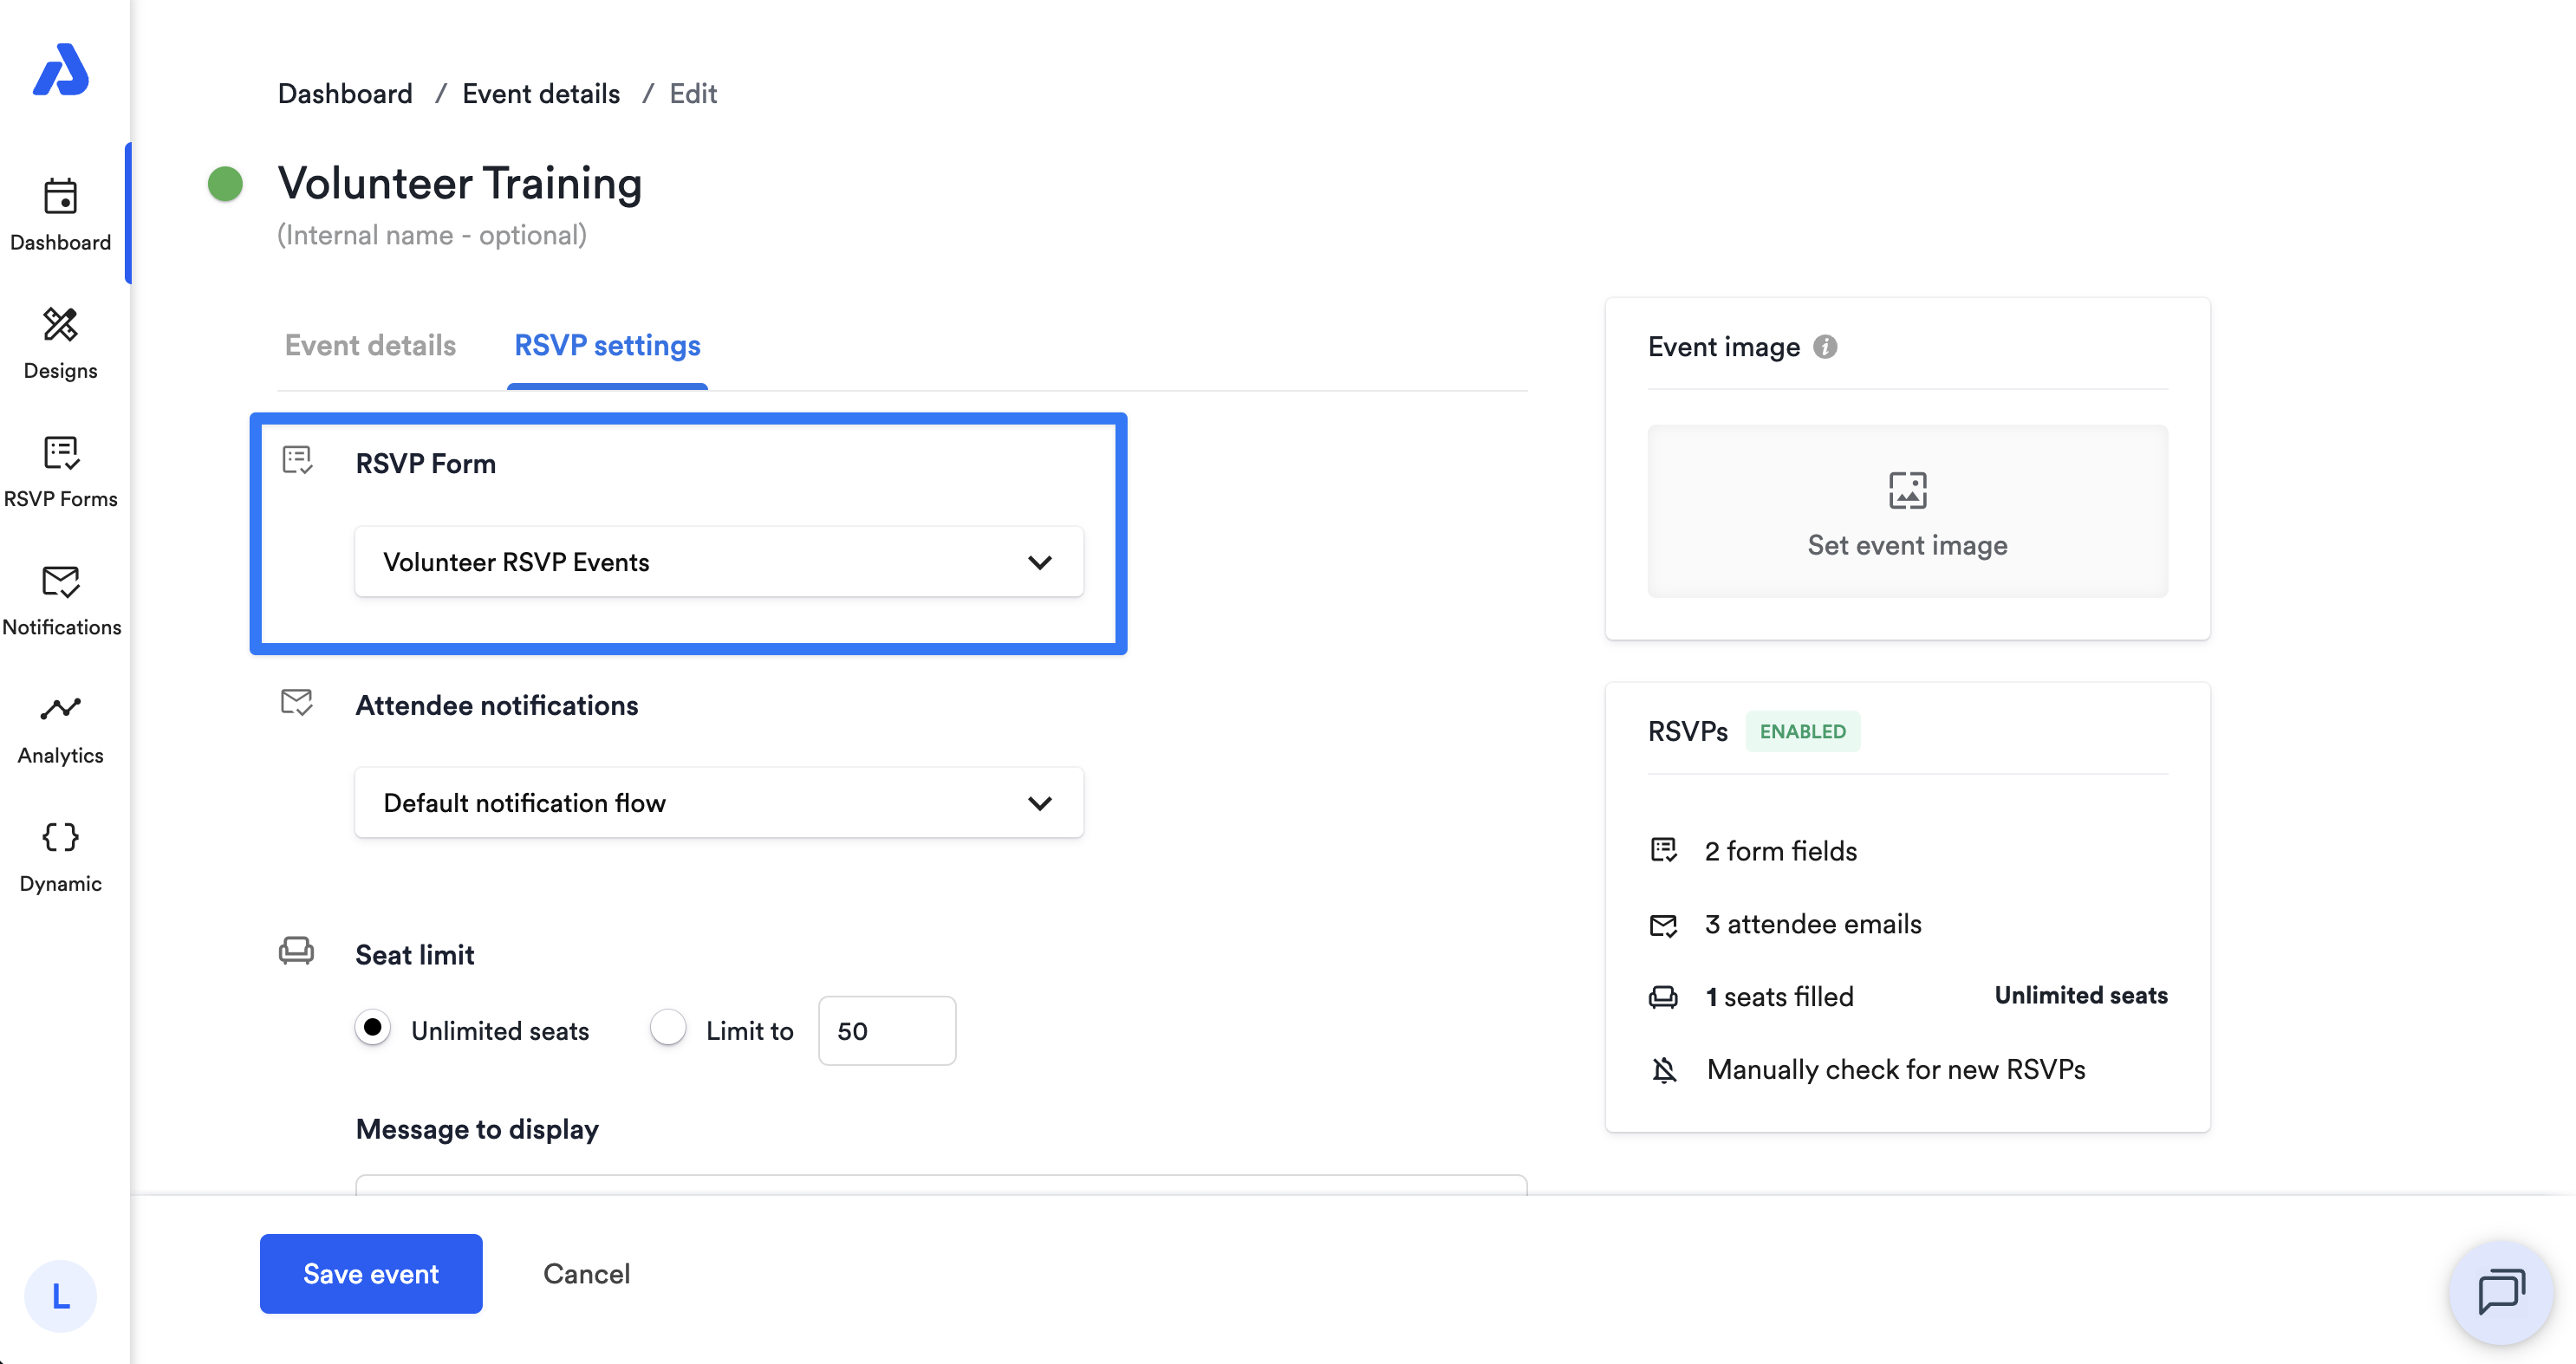
From the following RSVP settings tab, you'll find the RSVP Form dropdown at the top of the page:
-
Identify the parameter keys for the information that you wish to pass into your RSVP form fields. For the standard RSVP form template,
nameandemailare the two default keys. However, if you create a custom RSVP form, then you will need to use the key provided, which is referred to as a "slug" in the form (remove the{{/}}before using it as a parameter key in the URL). You can also create a special kind of field known as a "Query string" field, in which you can define a custom variable name as the parameter key in the URL.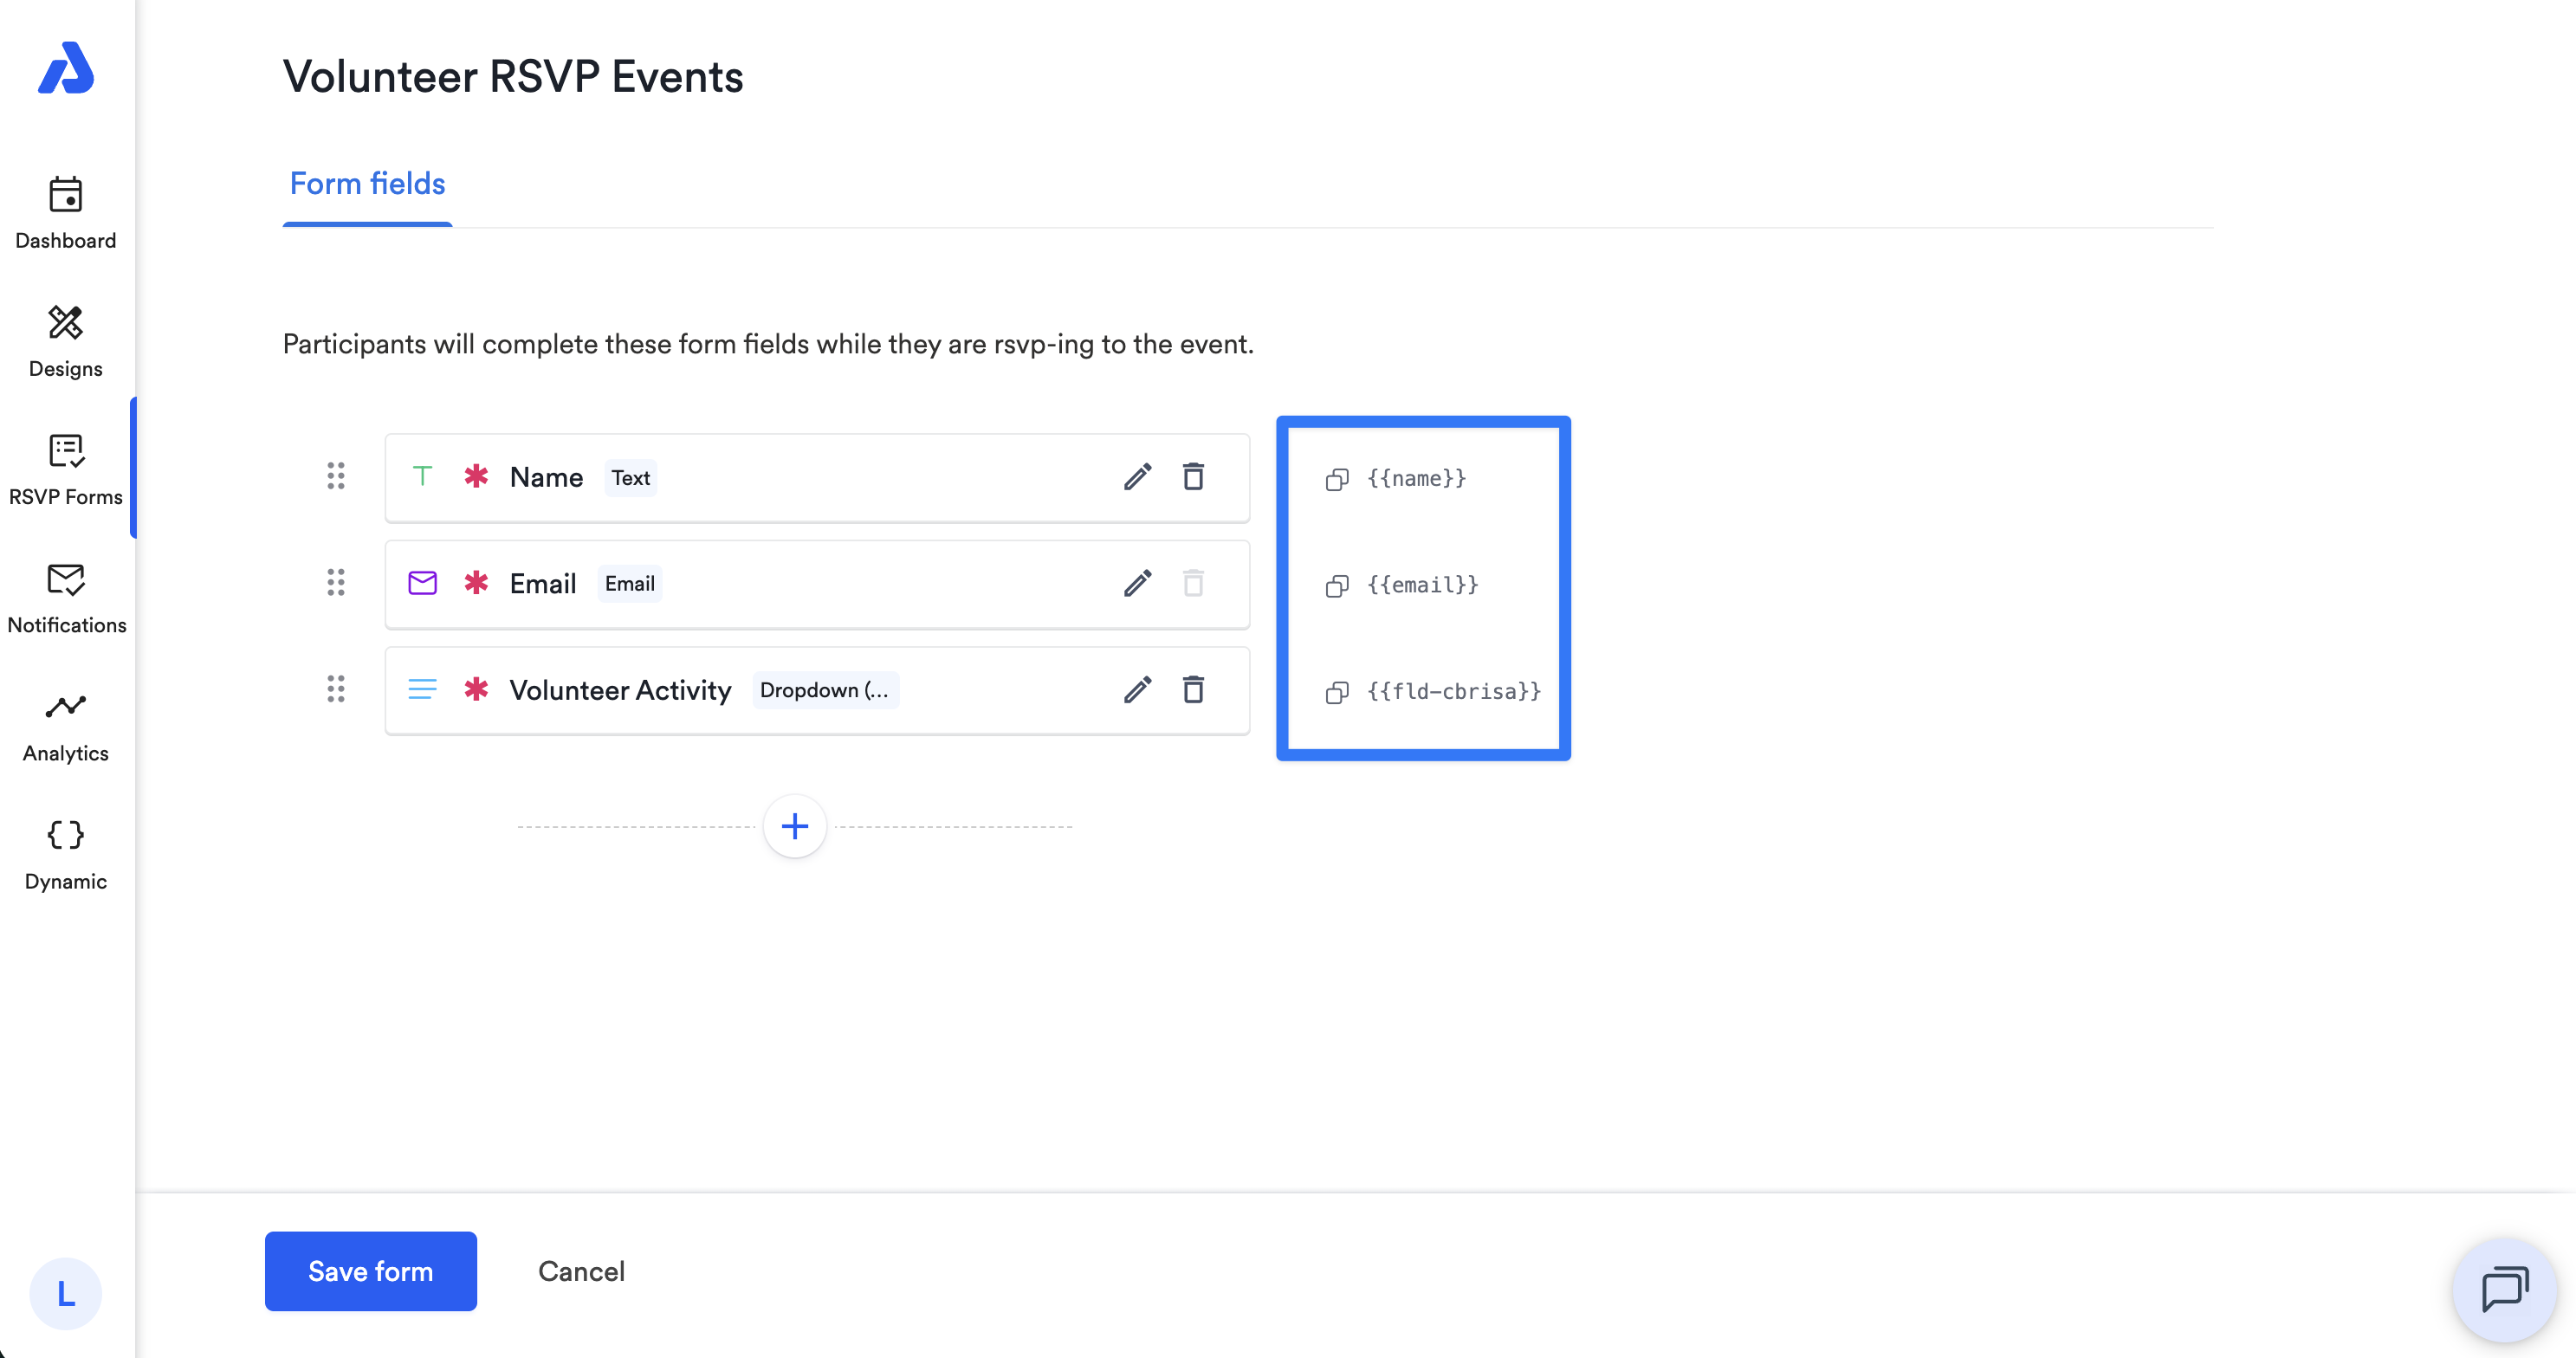
-
From the Event details page, copy the link to the RSVP event landing page, which will be in the following format:
https://www.addevent.com/event/{{unique_key}} -
Add the key value pairs to the end of the URL, starting with a
?at the end of the RSVP landing page link, separating each subsequent pair of keys and values by a&, and placing a=between the key and the value. For example:https://www.addevent.com/event/{{unique_key}}?name=Jon+Snow&[email protected] -
Replace the values with the merge tags/personalization tokens that are used in your CRM/email marketing tool. There should be help docs available from the service you use on how to do that.
How to Pre-fill Calendar Subscriber Information Using URL Parameters
To pass information into a calendar subscription form to pre-fill the user's information, you will need to format the URL in the following structure:
https://www.addevent.com/calendar/{{unique_key}}?key1=value1&key2=value2
- Create a new calendar with collecting subscriber information enabled (or edit an existing calendar to enable the collection of subscriber information). Choose which information you would like to collect by editing the input fields on the form.
-
Identify the parameter keys for the information that you wish to pass in by. By default, "name" and "email" are the two default keys. However, if you add a custom field, then you will need to use the key provided, which is referred to as a "slug" in the form (remove the
{{/}}before using it as a parameter key in the URL). You can view the key name (slug) by clicking the edit icon (pencil) next to any of the fields and looking in the bottom left-hand corner of the pop-up. You can also create a special kind of field known as a "Query string" field, in which you can define a custom variable name as the parameter key in the URL.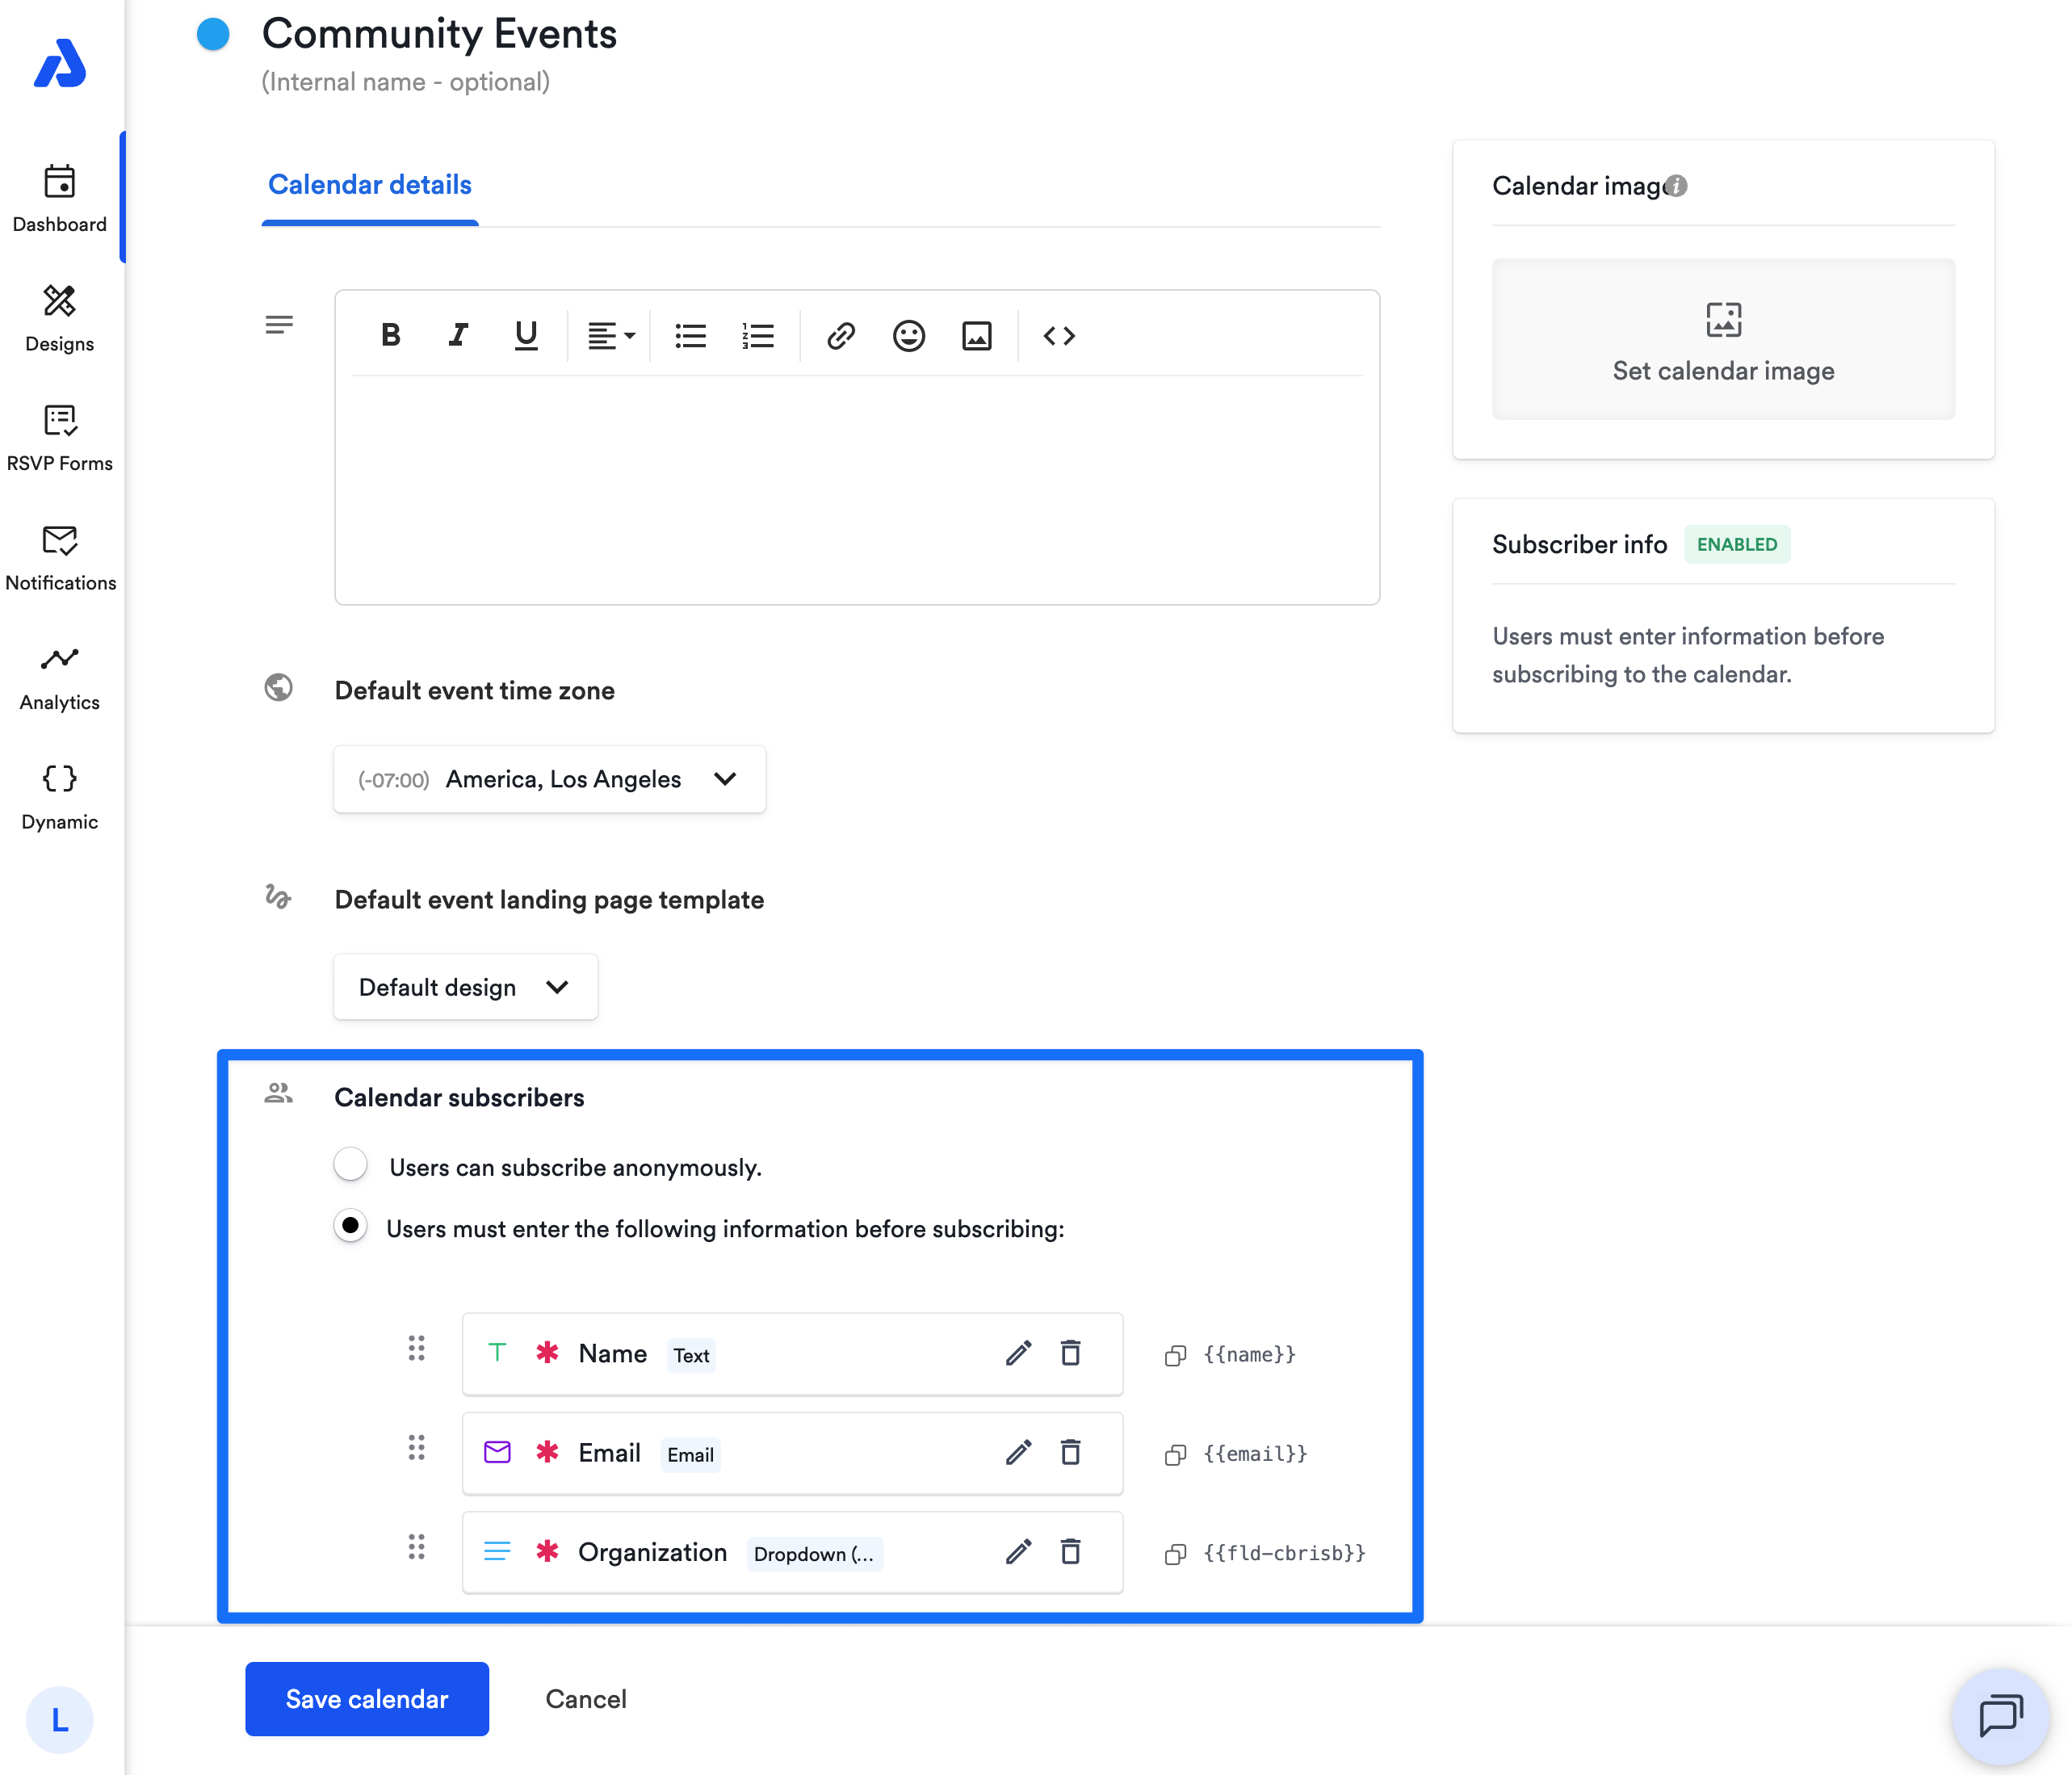
-
Copy the link to the RSVP landing page, which will be in the following format:
https://www.addevent.com/calendar/{{unique_key}} -
Add the key value pairs to the end of the URL, starting with a "?" at the end of the RSVP landing page link, separating each subsequent pair of keys and values by a "&", and placing a "=" between the key and the value. For example:
https://www.addevent.com/calendar/{{unique_key}}?name=Jon+Snow&[email protected] -
Replace the values with the merge tags/personalization tokens that are used in your CRM/email marketing tool. There should be help docs available from the service you use on how to do that.
Updated 5 days ago