Change the Language of a Calendar Landing Page
Custom templates enable you to tailor your calendar to your needs, such as translating the calendar landing page into a different language. This guide will walk you through creating a custom template and translating the relevant text strings into the desired language.
New and Improved Feature!
Custom Templates are no longer available in AddEvent 2.0. This is because we've built design templates. Design templates are a no-code feature allowing you to customize your event landing pages, calendar landing pages, and embeddable calendar. Please check out the Design Template help section for details.
Step 1: Creating a Template
-
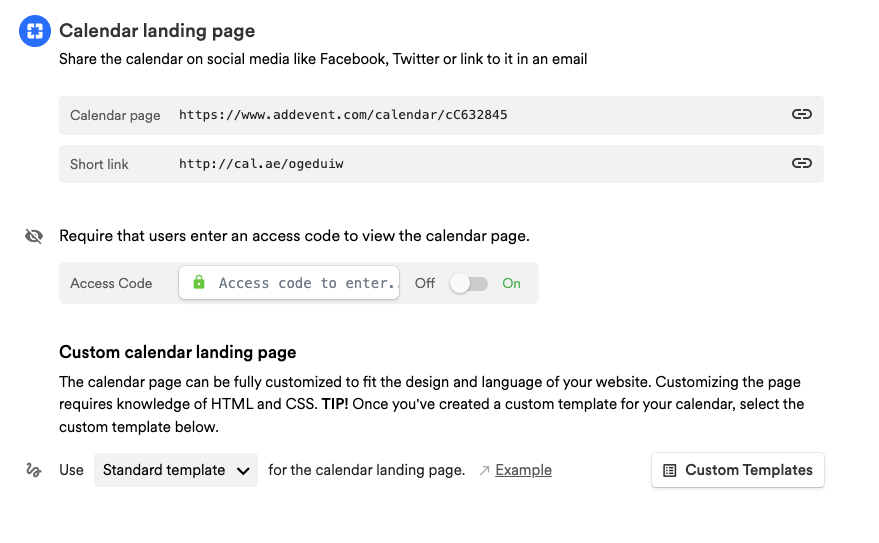
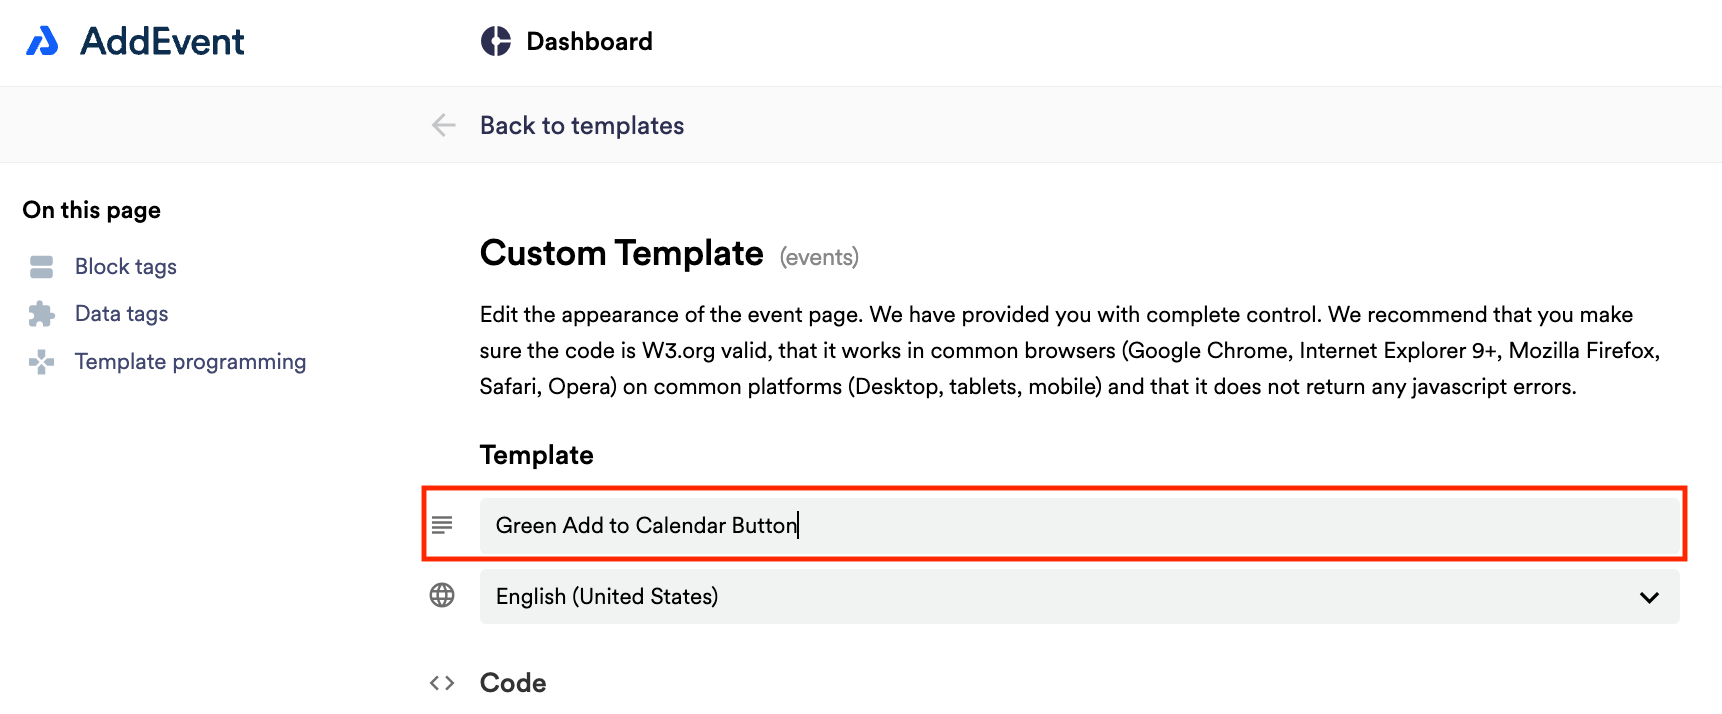
Scroll down to the first sharing method, Calendar landing page. Create a custom event landing page template by clicking Custom Templates in the app and clicking + New Template. Add a name for the template.
Step 2: Change the Language
In the code section of the page, we need to replace some block tags with the corresponding code sections and translate all the relevant strings in the code.
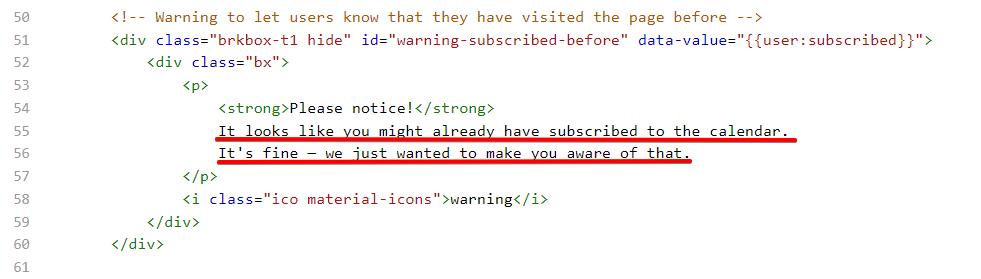
The first string to translate is already in the Code section by default. Please translate this section of the template code:
The next changes will require you to find a block tag in the code and replace it with the corresponding code sections from the Block Tags section.
First block tag {{block:upcoming-01}}
{{block:upcoming-01}}Please follow these steps:
-
Please find the block tag
{{block:upcoming-01}}in the Block tags section of the page, and copy the code presented to the right of this block tag. In the example below, it's the code you can see on the screenshot on the right side:<!-- Upcoming events count. Block will be hidden in case there are 0 upcoming events. --> <div class="row upcom-t1"> <div class="ico"> <i class="material-icons">schedule</i> </div> <div class="txt"> <p><em>{{events-upcoming-count}} upcoming {{events-upcoming-label}}</em></p> </div> </div> -
Once the tag code is copied, scroll back to section with the template code and replace
{{block:upcoming-01}with the code you've copied: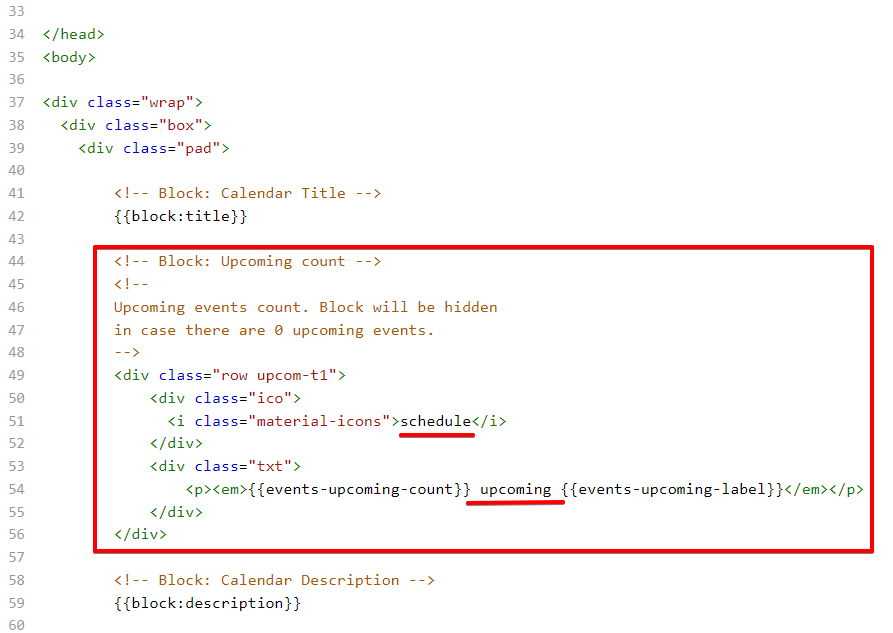
-
Once the code is replaced, you need to translate the text underlined on the screenshot. The same steps need to be repeated for the other block tags.
The rest of the block tags
-
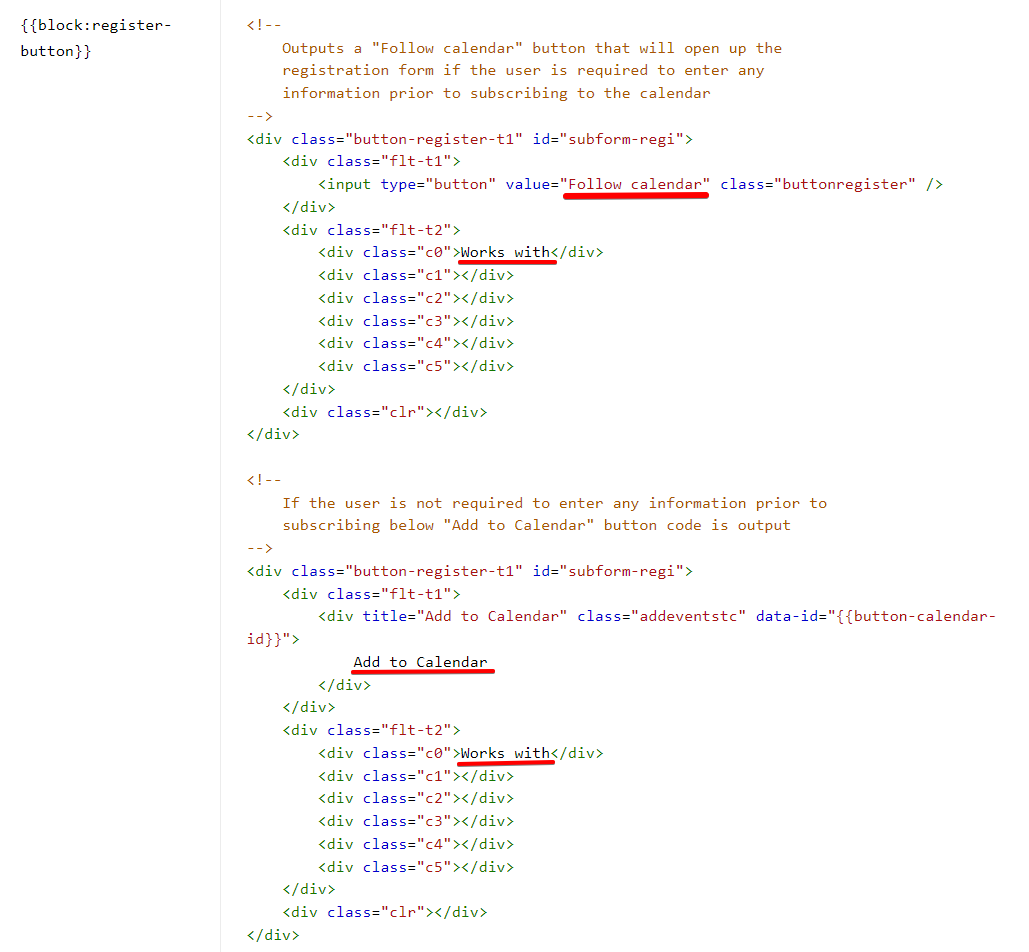
Block tag
{{block:register-button}}<!-- Outputs a "Follow calendar" button that will open up the registration form if the user is required to enter any information prior to subscribing to the calendar --> <div class="button-register-t1" id="subform-regi"> <div class="flt-t1"> <input type="button" value="Follow calendar" class="buttonregister" /> </div> <div class="flt-t2"> <div class="c0">Works with</div> <div class="c1"></div> <div class="c2"></div> <div class="c3"></div> <div class="c4"></div> <div class="c5"></div> </div> <div class="clr"></div> </div> <!-- If the user is not required to enter any information prior to subscribing below "Add to Calendar" button code is output --> <div class="button-register-t1" id="subform-regi"> <div class="flt-t1"> <div title="Add to Calendar" class="addeventstc" data-id="{{button-calendar-id}}"> Add to Calendar </div> </div> <div class="flt-t2"> <div class="c0">Works with</div> <div class="c1"></div> <div class="c2"></div> <div class="c3"></div> <div class="c4"></div> <div class="c5"></div> </div> <div class="clr"></div> </div>Once the block tag is replaced with the code, translate the underlined text:
-
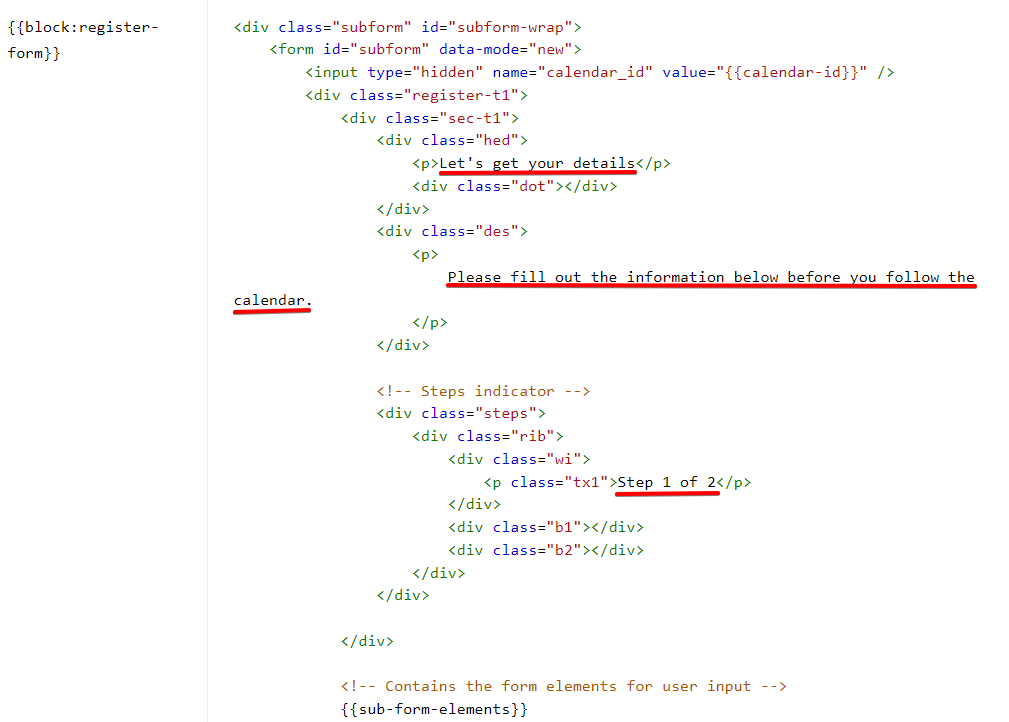
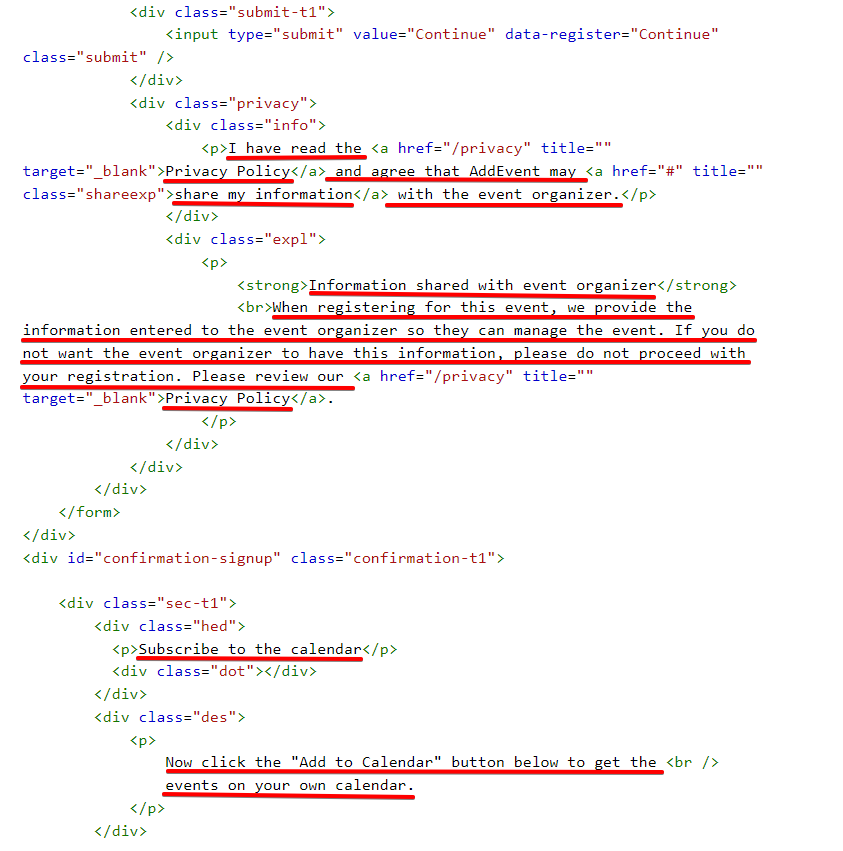
Block tag
{{block:register-form}}<div class="subform" id="subform-wrap"> <form id="subform" data-mode="new"> <input type="hidden" name="calendar_id" value="{{calendar-id}}" /> <div class="register-t1"> <div class="sec-t1"> <div class="hed"> <p>Let's get your details</p> <div class="dot"></div> </div> <div class="des"> <p> Please fill out the information below before you follow the calendar. </p> </div> <!-- Steps indicator --> <div class="steps"> <div class="rib"> <div class="wi"> <p class="tx1">Step 1 of 2</p> </div> <div class="b1"></div> <div class="b2"></div> </div> </div> </div> <!-- Contains the form elements for user input --> {{sub-form-elements}} <div class="submit-t1"> <input type="submit" value="Continue" data-register="Continue" class="submit" /> </div> <div class="privacy"> <div class="info"> <p>I have read the <a href="/privacy" title="" target="_blank">Privacy Policy</a> and agree that AddEvent may <a href="#" title="" class="shareexp">share my information</a> with the event organizer.</p> </div> <div class="expl"> <p> <strong>Information shared with event organizer</strong> <br>When registering for this event, we provide the information entered to the event organizer so they can manage the event. If you do not want the event organizer to have this information, please do not proceed with your registration. Please review our <a href="/privacy" title="" target="_blank">Privacy Policy</a>. </p> </div> </div> </div> </form> </div> <div id="confirmation-signup" class="confirmation-t1"> <div class="sec-t1"> <div class="hed"> <p>Subscribe to the calendar</p> <div class="dot"></div> </div> <div class="des"> <p> Now click the "Add to Calendar" button below to get the <br /> events on your own calendar. </p> </div> <!-- Steps indicator --> <div class="steps"> <div class="rib"> <div class="wi"> <p class="tx1">Step 2 of 2</p> </div> <div class="b1"></div> <div class="b2"></div> </div> </div> </div> {{block:download-button}} </div>Once the block tag is replaced with the code, translate the underlined text:

-
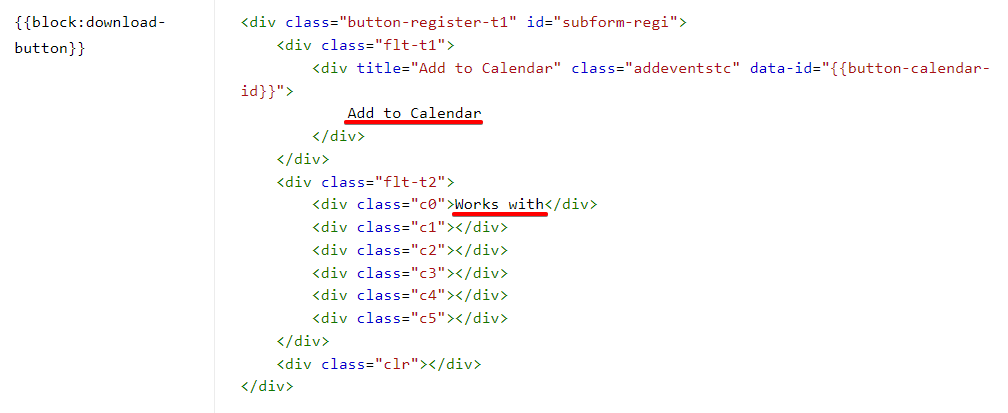
Block tag
{{block:download-button}}<div class="button-register-t1" id="subform-regi"> <div class="flt-t1"> <div title="Add to Calendar" class="addeventstc" data-id="{{button-calendar-id}}"> Add to Calendar </div> </div> <div class="flt-t2"> <div class="c0">Works with</div> <div class="c1"></div> <div class="c2"></div> <div class="c3"></div> <div class="c4"></div> <div class="c5"></div> </div> <div class="clr"></div> </div>Once the block tag is replaced with the code, translate the underlined text:
-
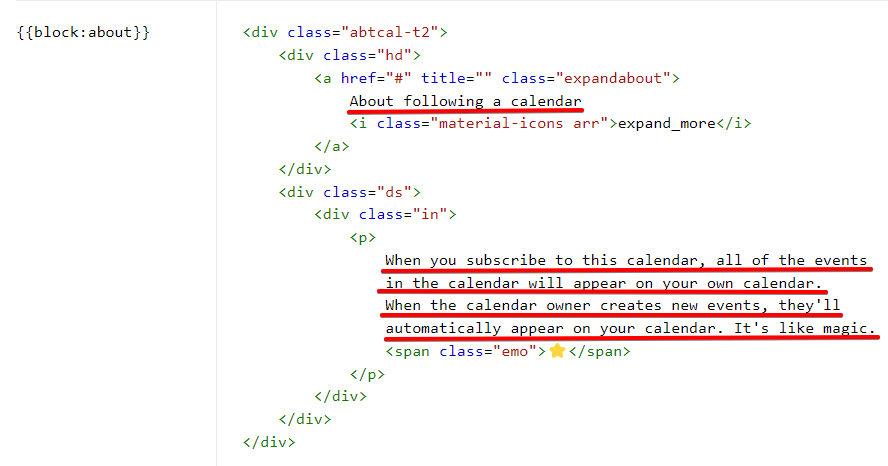
Block tag
{{block:about}}<div class="abtcal-t2"> <div class="hd"> <a href="#" title="" class="expandabout"> About following a calendar <i class="material-icons arr">expand_more</i> </a> </div> <div class="ds"> <div class="in"> <p> When you subscribe to this calendar, all of the events in the calendar will appear on your own calendar. When the calendar owner creates new events, they'll automatically appear on your calendar. It's like magic. <span class="emo">⭐</span> </p> </div> </div> </div>Once the block tag is replaced with the code, translate the underlined text:
-
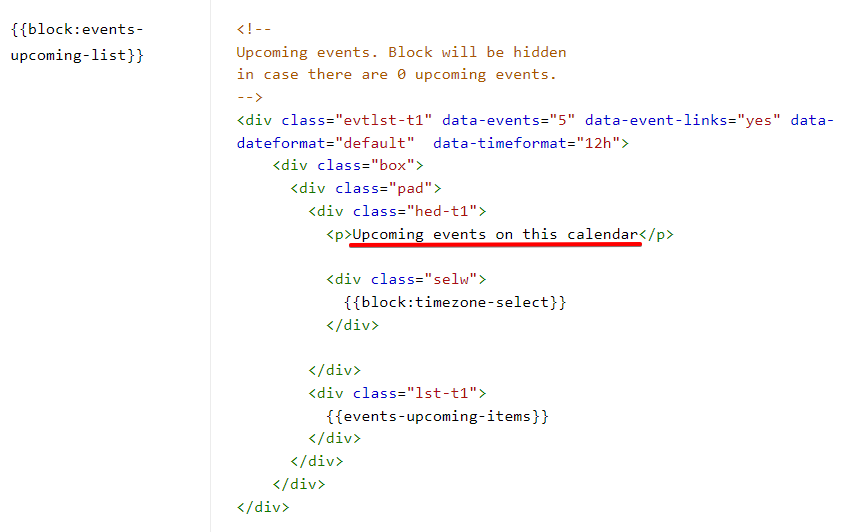
Block tag
{{block:events-upcoming-list}}<!-- Upcoming events. Block will be hidden in case there are 0 upcoming events. --> <div class="evtlst-t1" data-events="5" data-event-links="yes" data-dateformat="default" data-timeformat="12h"> <div class="box"> <div class="pad"> <div class="hed-t1"> <p>Upcoming events on this calendar</p> <div class="selw"> {{block:timezone-select}} </div> </div> <div class="lst-t1"> {{events-upcoming-items}} </div> </div> </div> </div>Once the block tag is replaced with the code, translate the underlined text:
Step 3: Save and Apply the Template
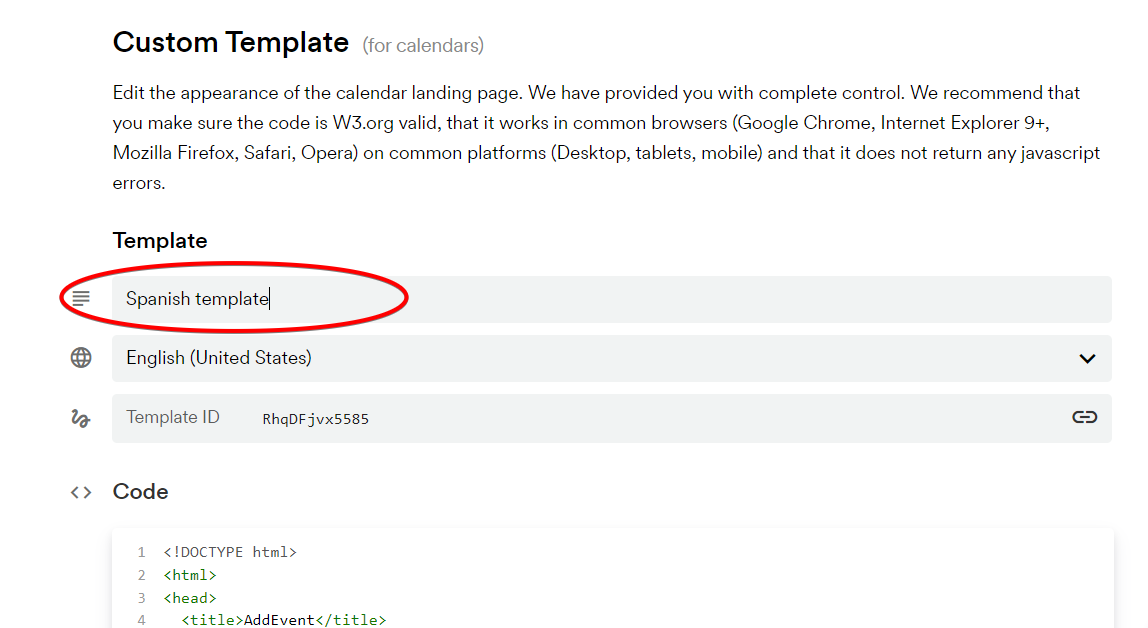
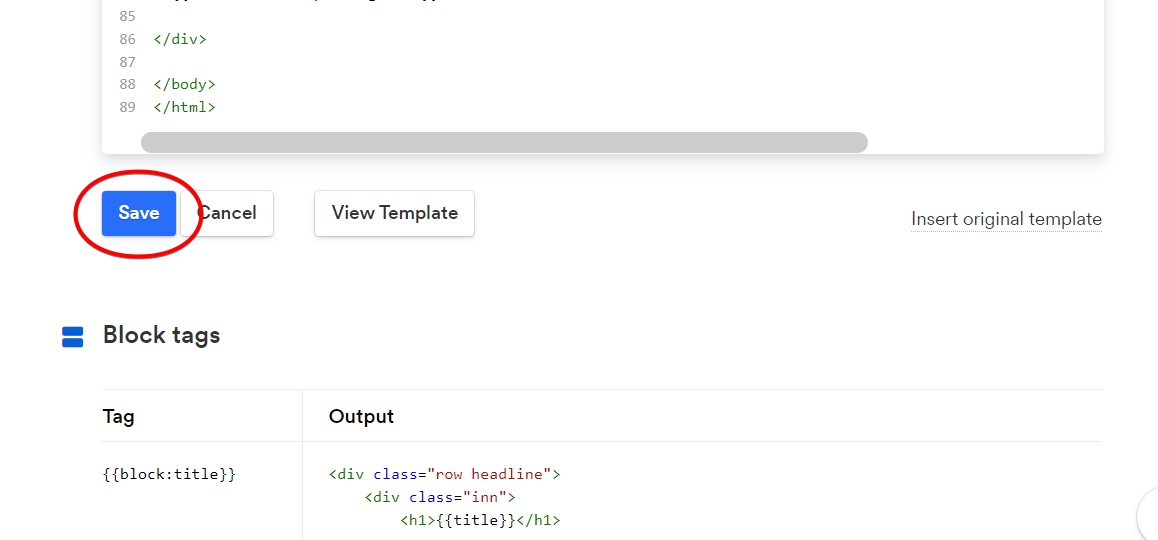
Once we've finished all the edits, we need to give the template a name and click Save.
-
-
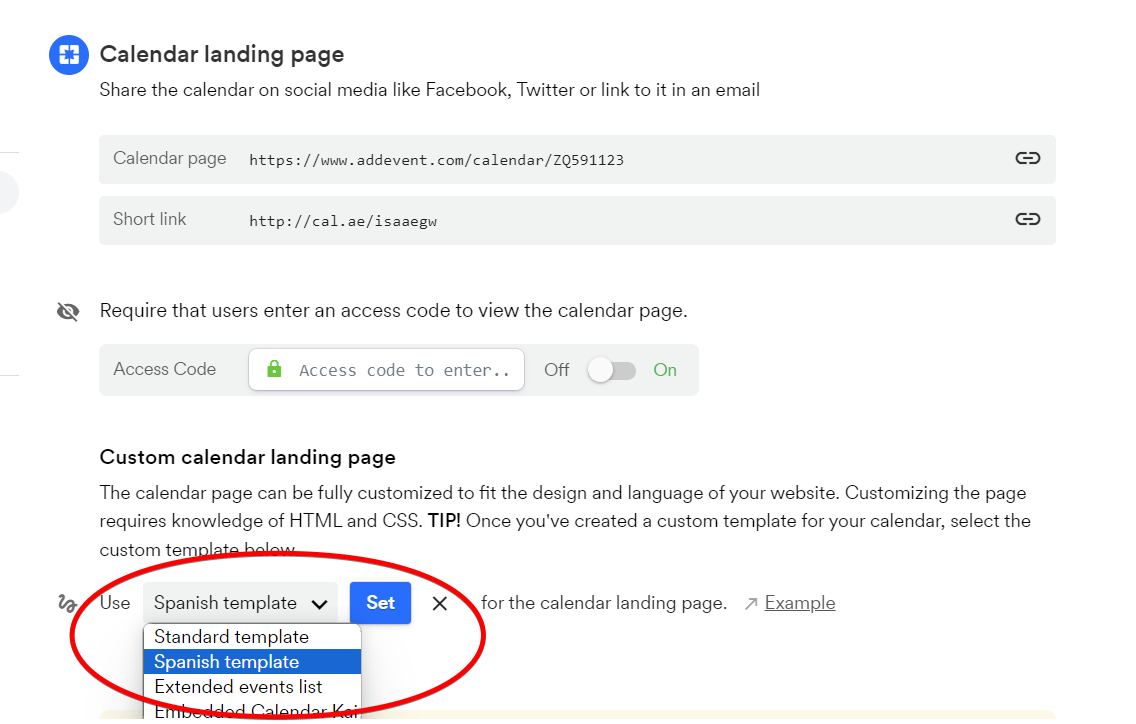
Once the template is saved, please navigate back to your calendar page. Here, you need to set this template to be used on your calendar landing. Please scroll down to the Custom Calendar landing page section, select your new template from the dropdown, and click Set.
Well done! Now, your calendar landing will be presented in the needed language.
Watch this tutorial!
Updated 7 months ago