RSVP Settings
This help doc explains the functions available when creating and managing RSVP-enabled events. With RSVP events, you can easily track attendees, manage their statuses, and communicate updates. To begin, access your event’s RSVP Settings.
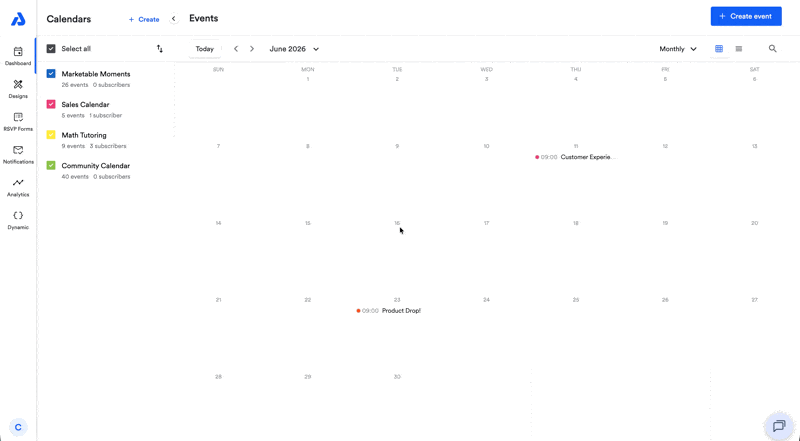
Accessing RSVP Settings
- Navigate to the calendar that holds your event.
- Select the event. Click the 3 dots in the upper-right corner, and then click Edit Event.
- Click the RSVP Settings tab.
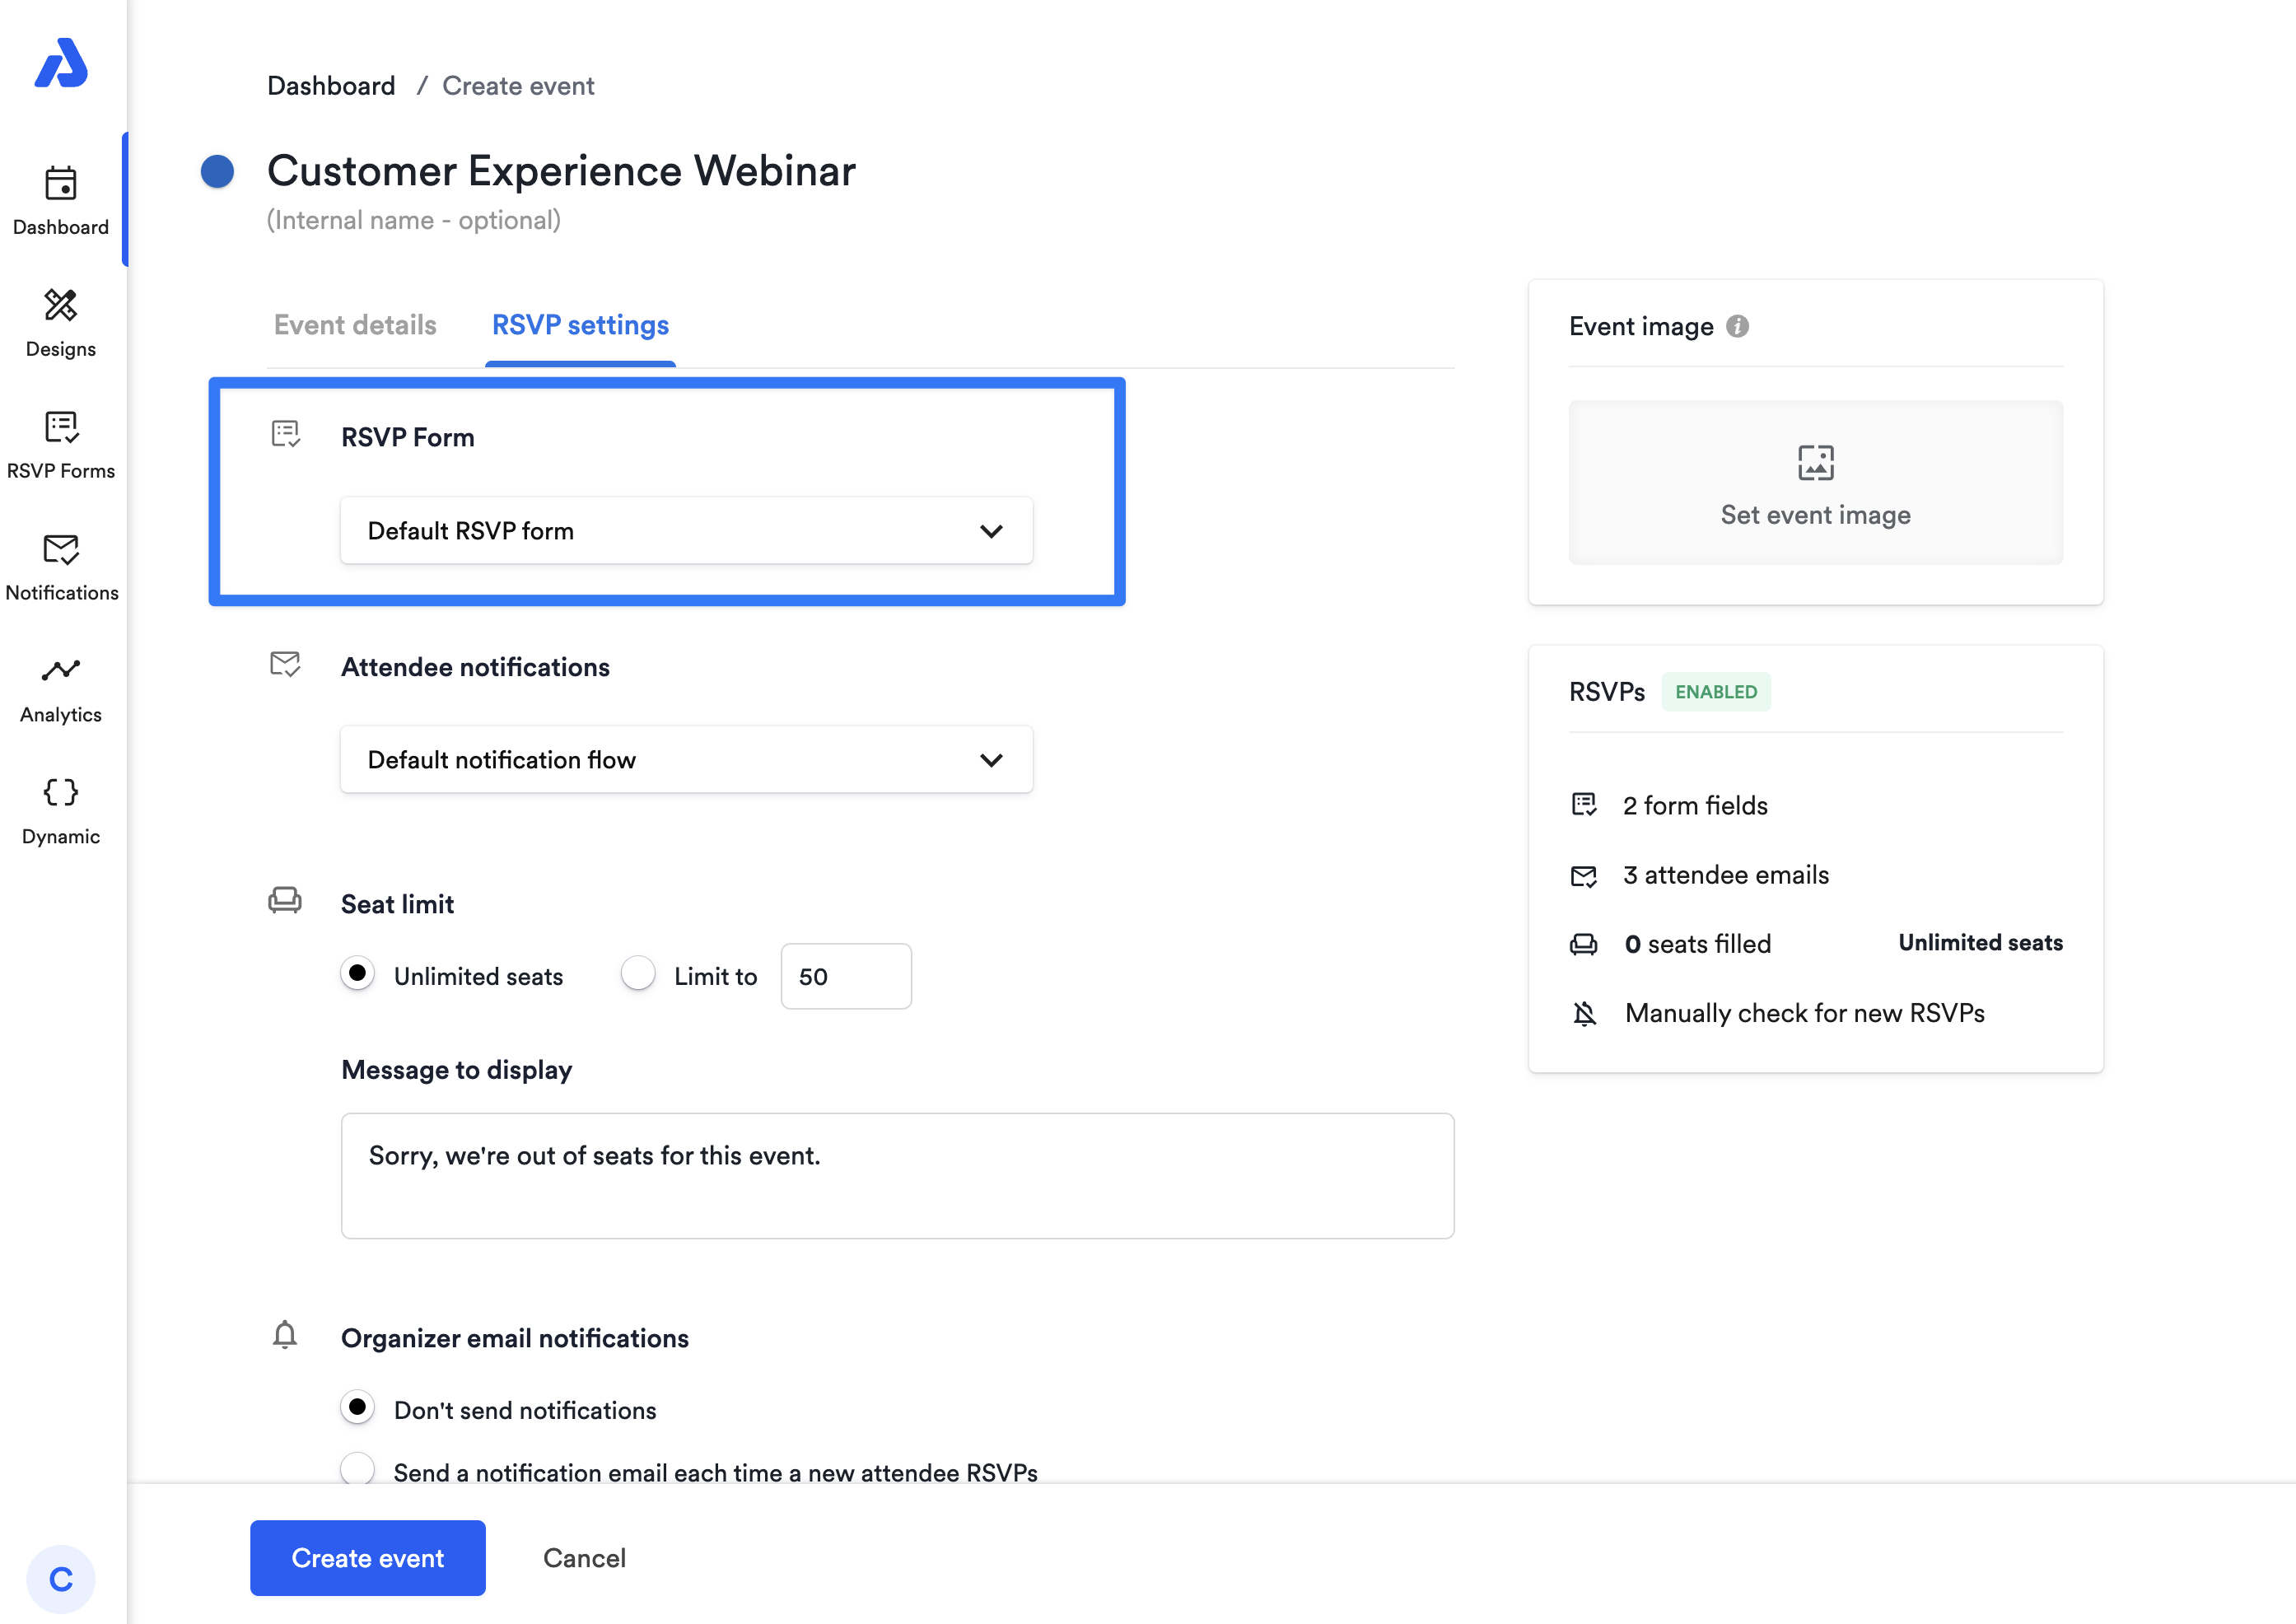
RSVP Settings
This is where you will find the different settings you can use to customize the behavior of your event, such as RSVP availability, seat limits, and organizer notifications. These settings are found by clicking into the RSVP event and editing the event.
RSVP Form
Set the RSVP form you want applied to the event. Learn more about RSVP forms here.
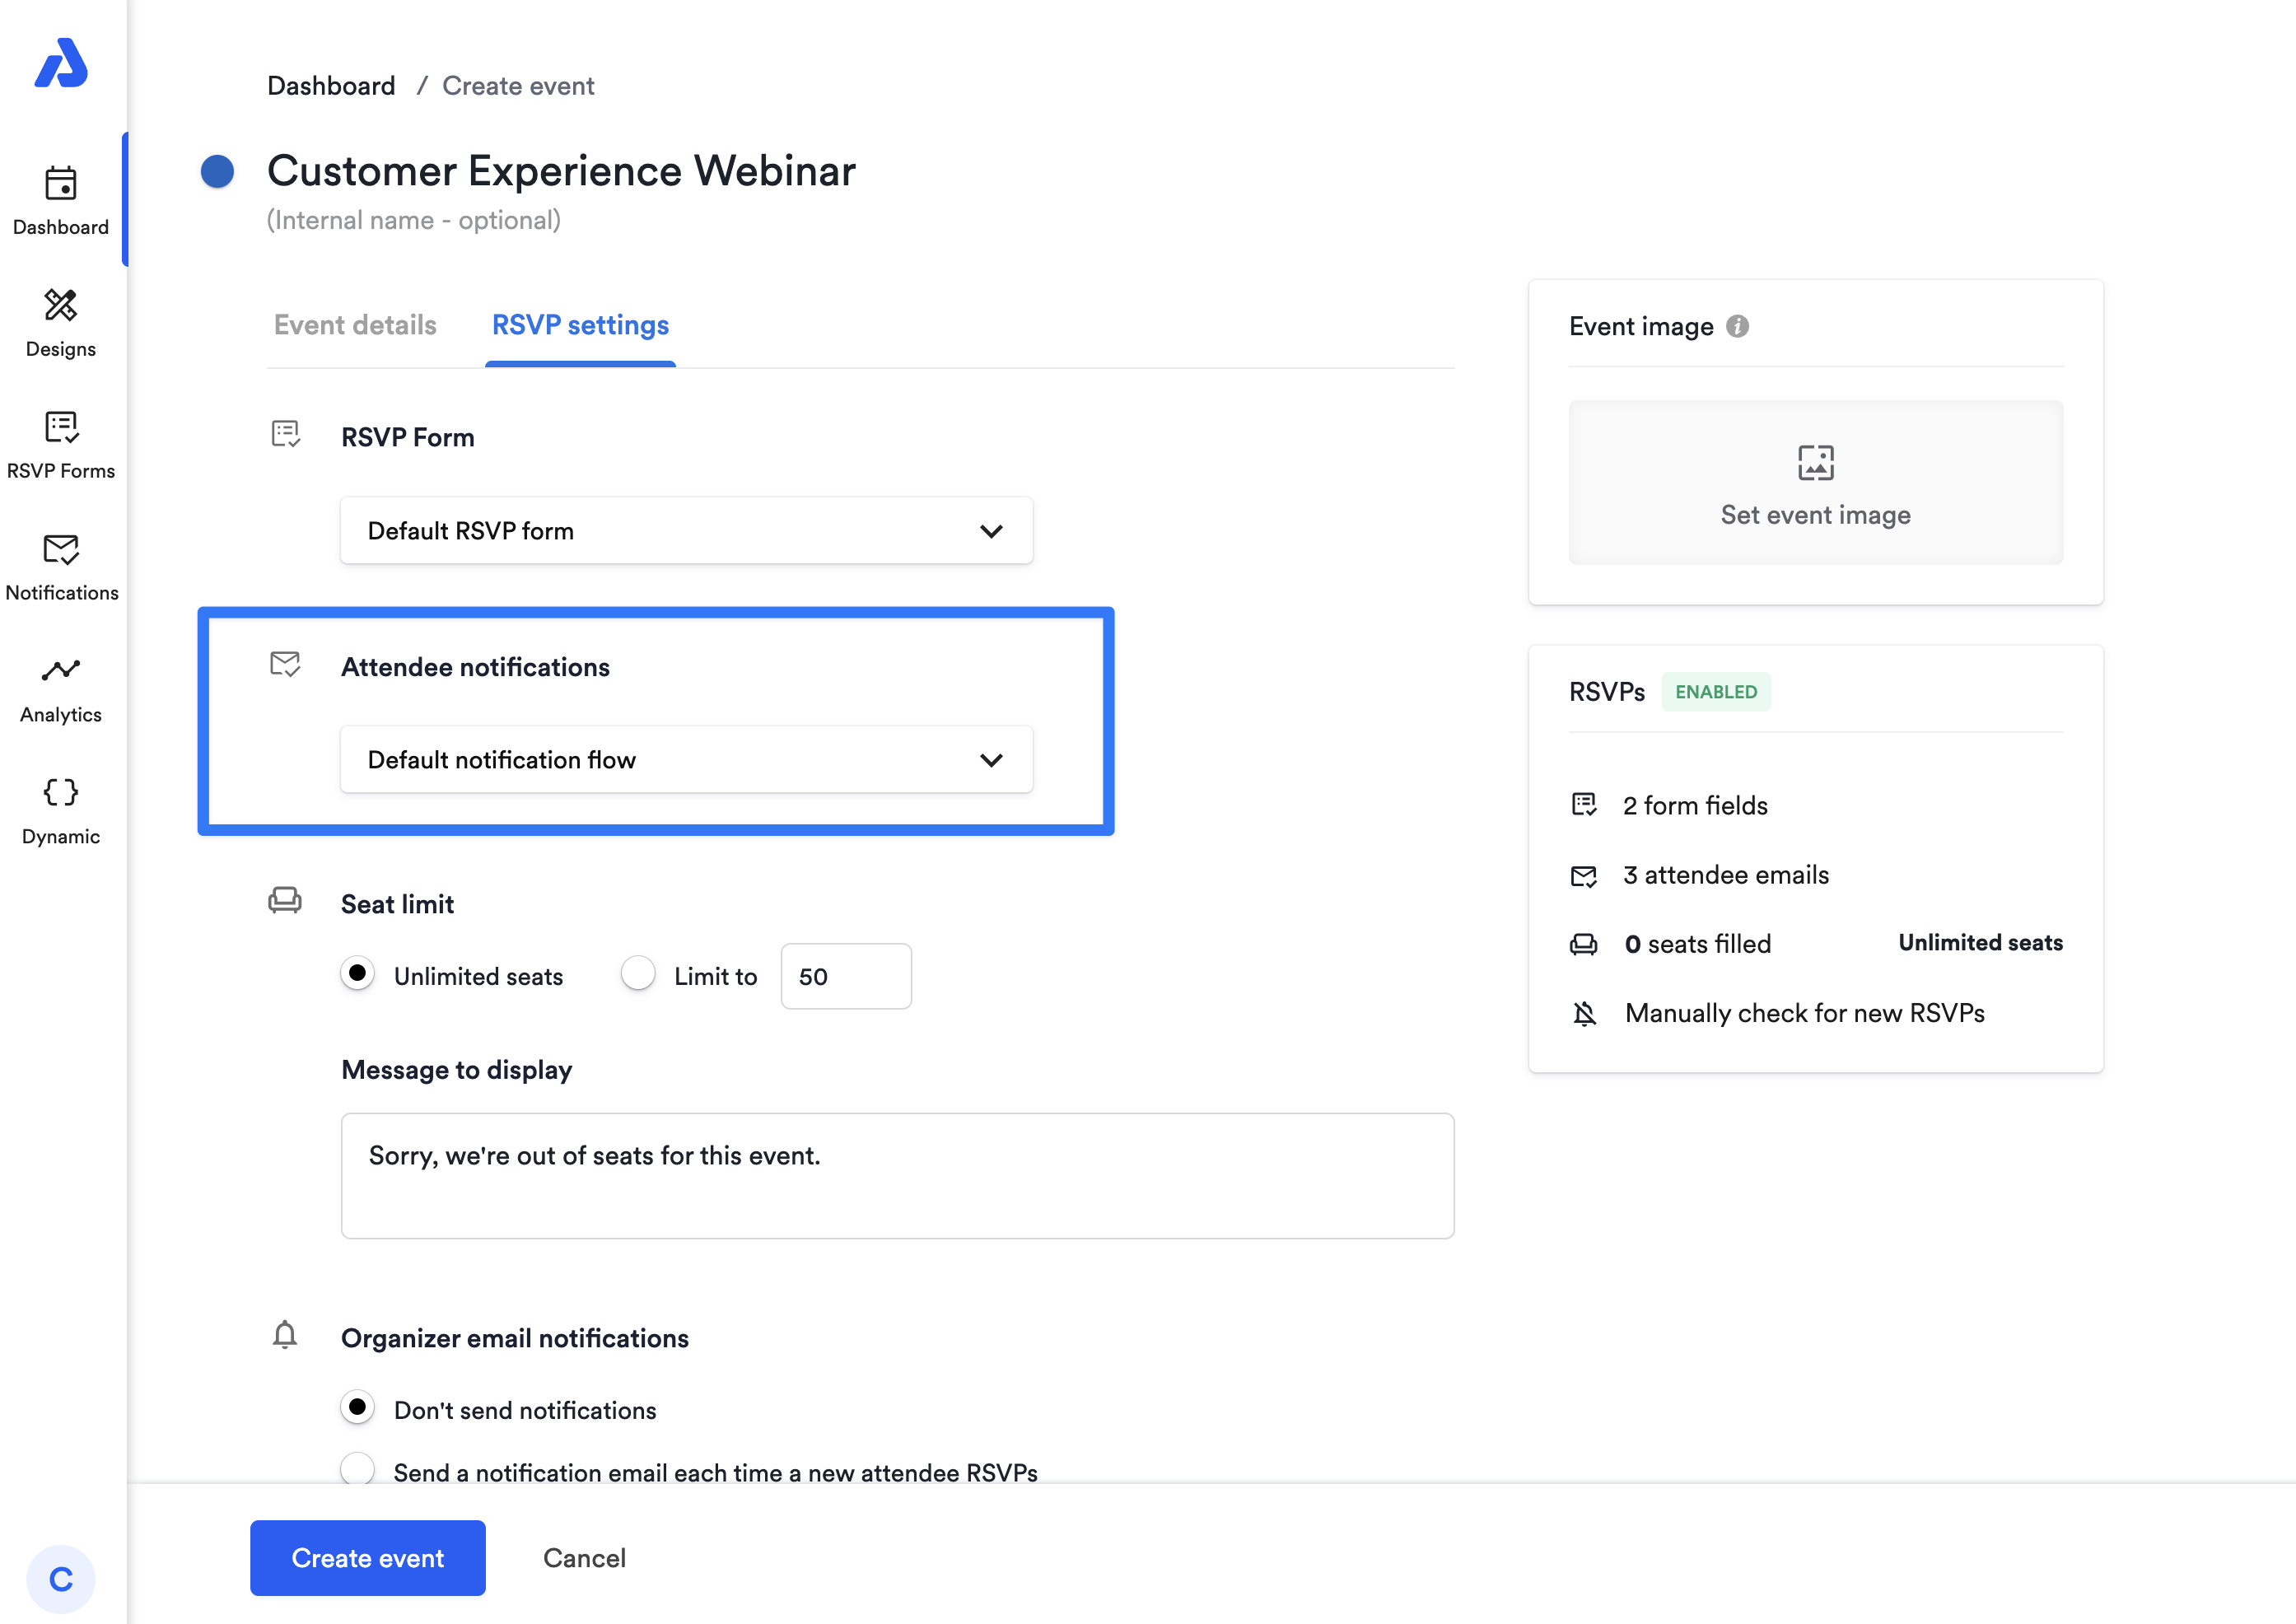
Attendee Notifications
Set the Notification flow you want applied to the event. Learn more about Notifications here.
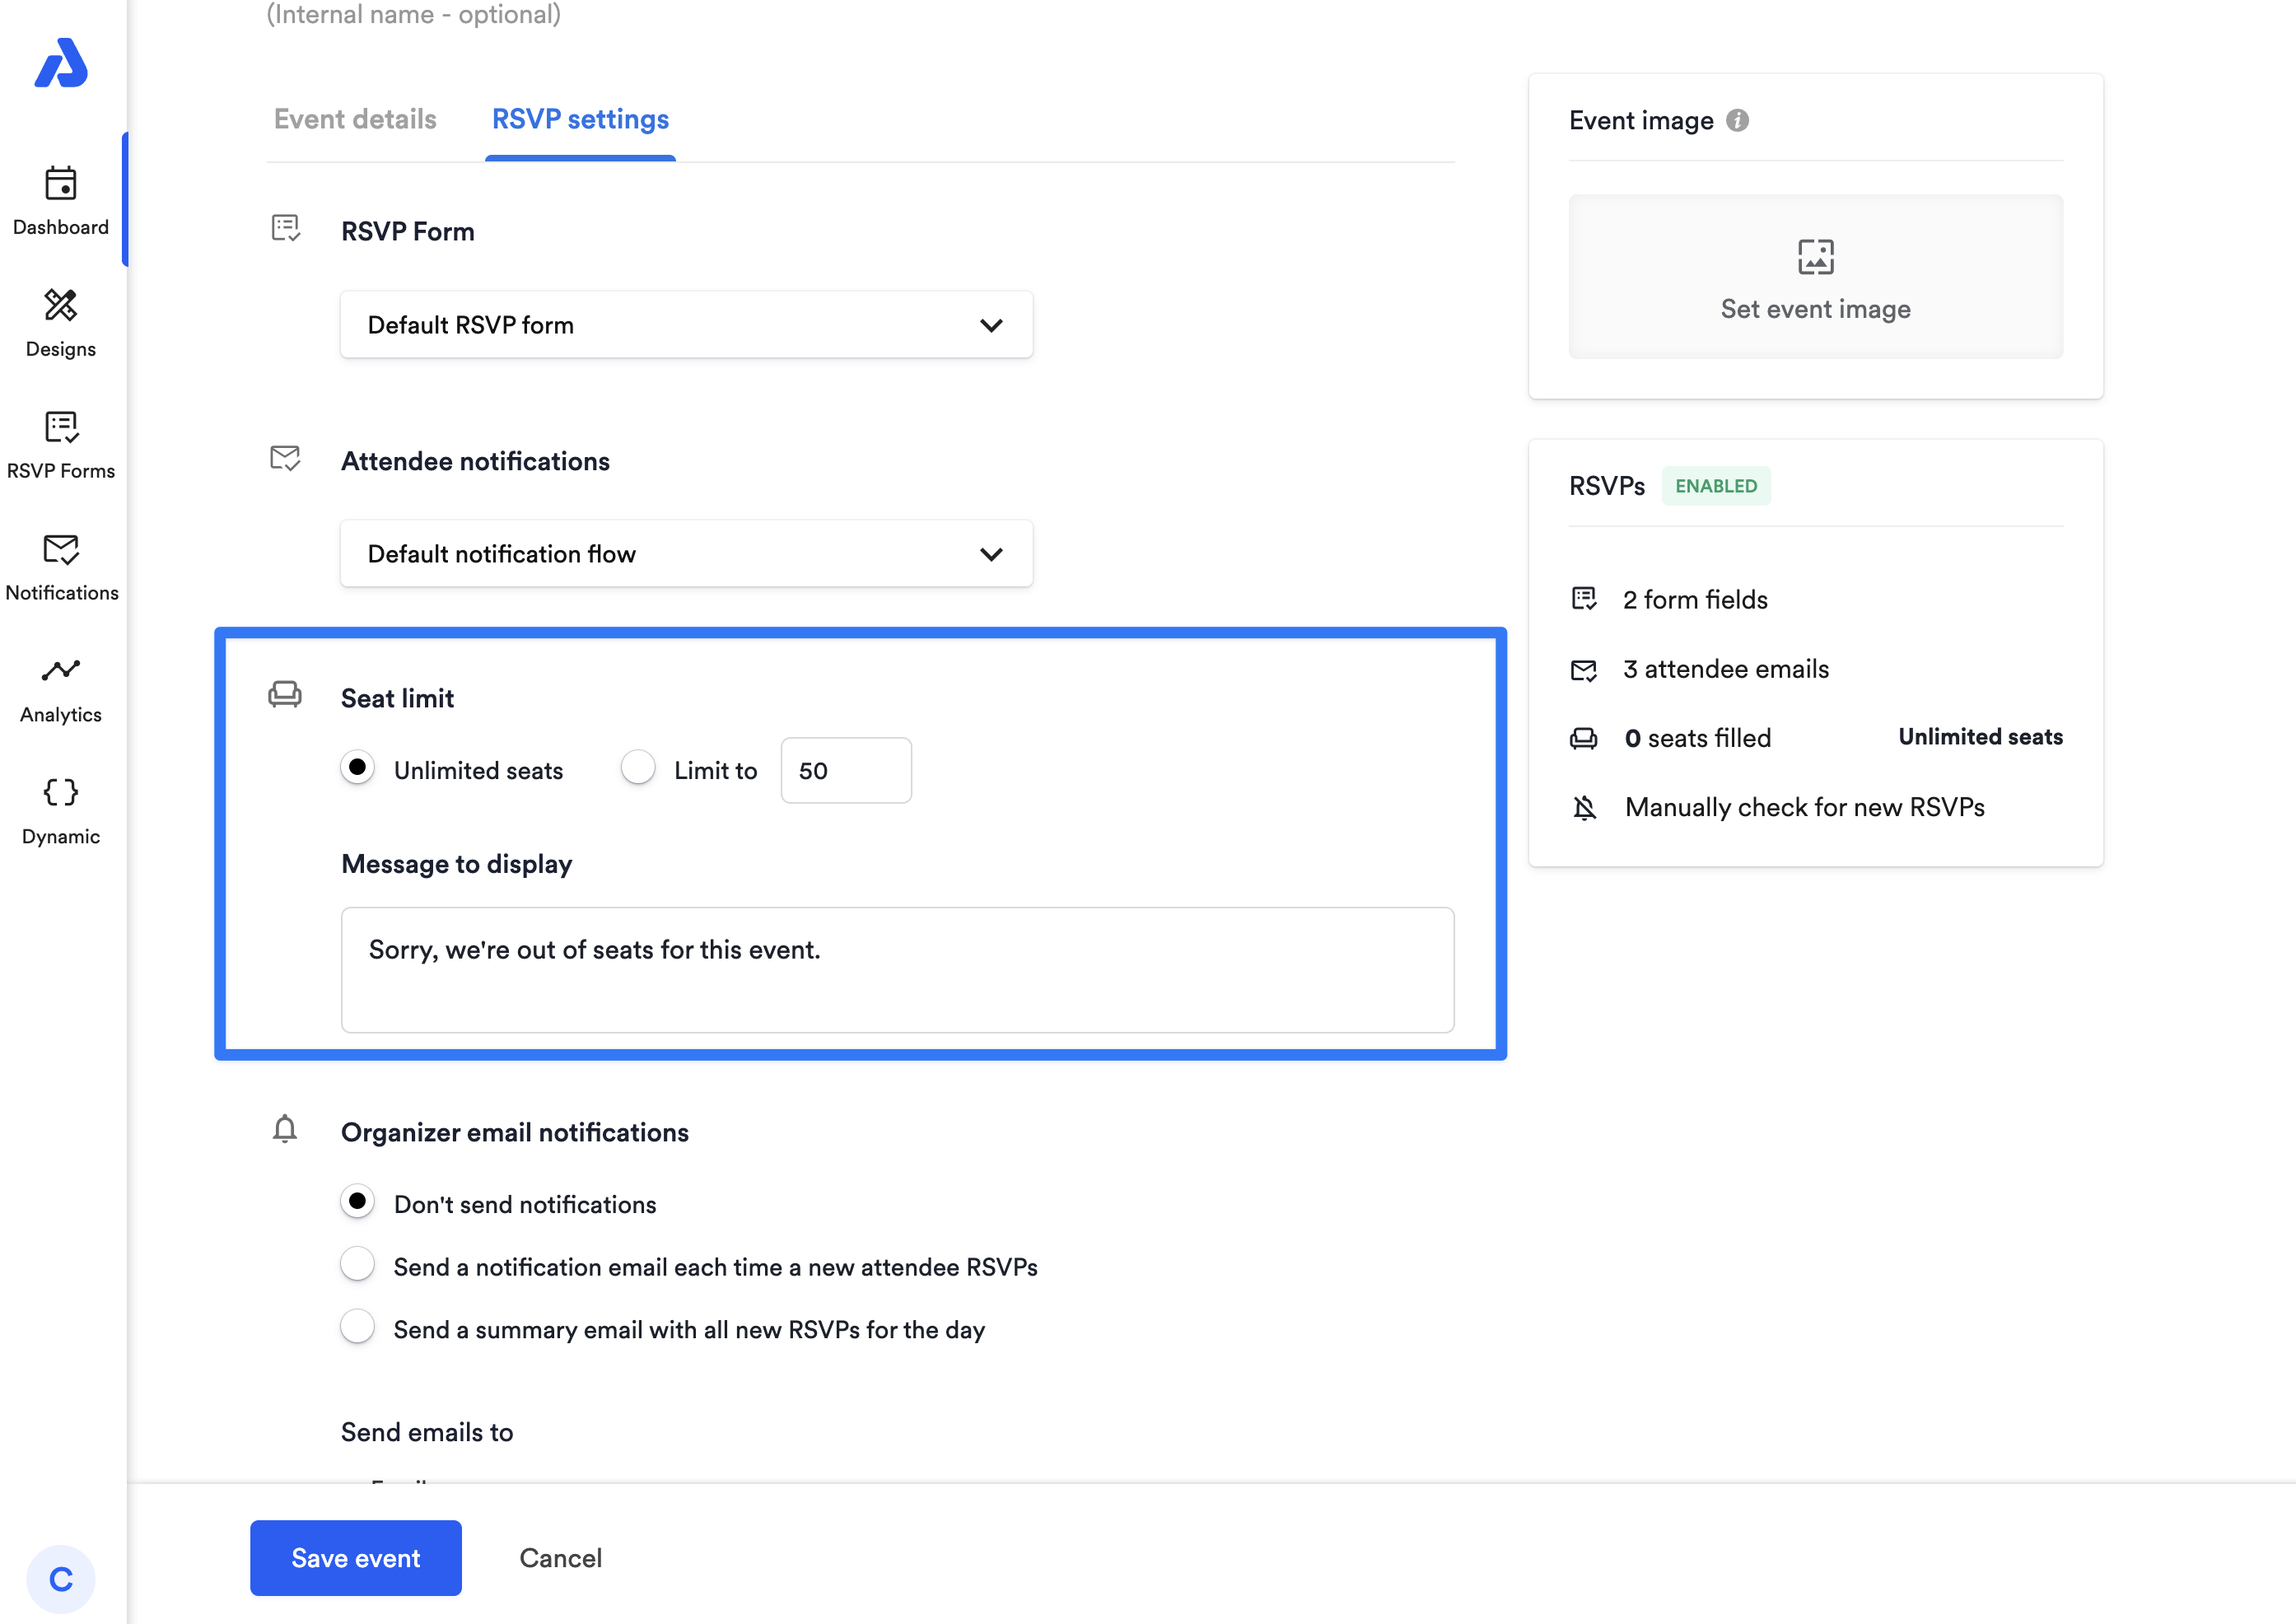
Seat Limits
For events with limited capacity, enable the Seat limit feature to cap RSVPs:
- Set the maximum number of attendees.
- Customize the message displayed to anyone who attempts to RSVP after reaching the limit.
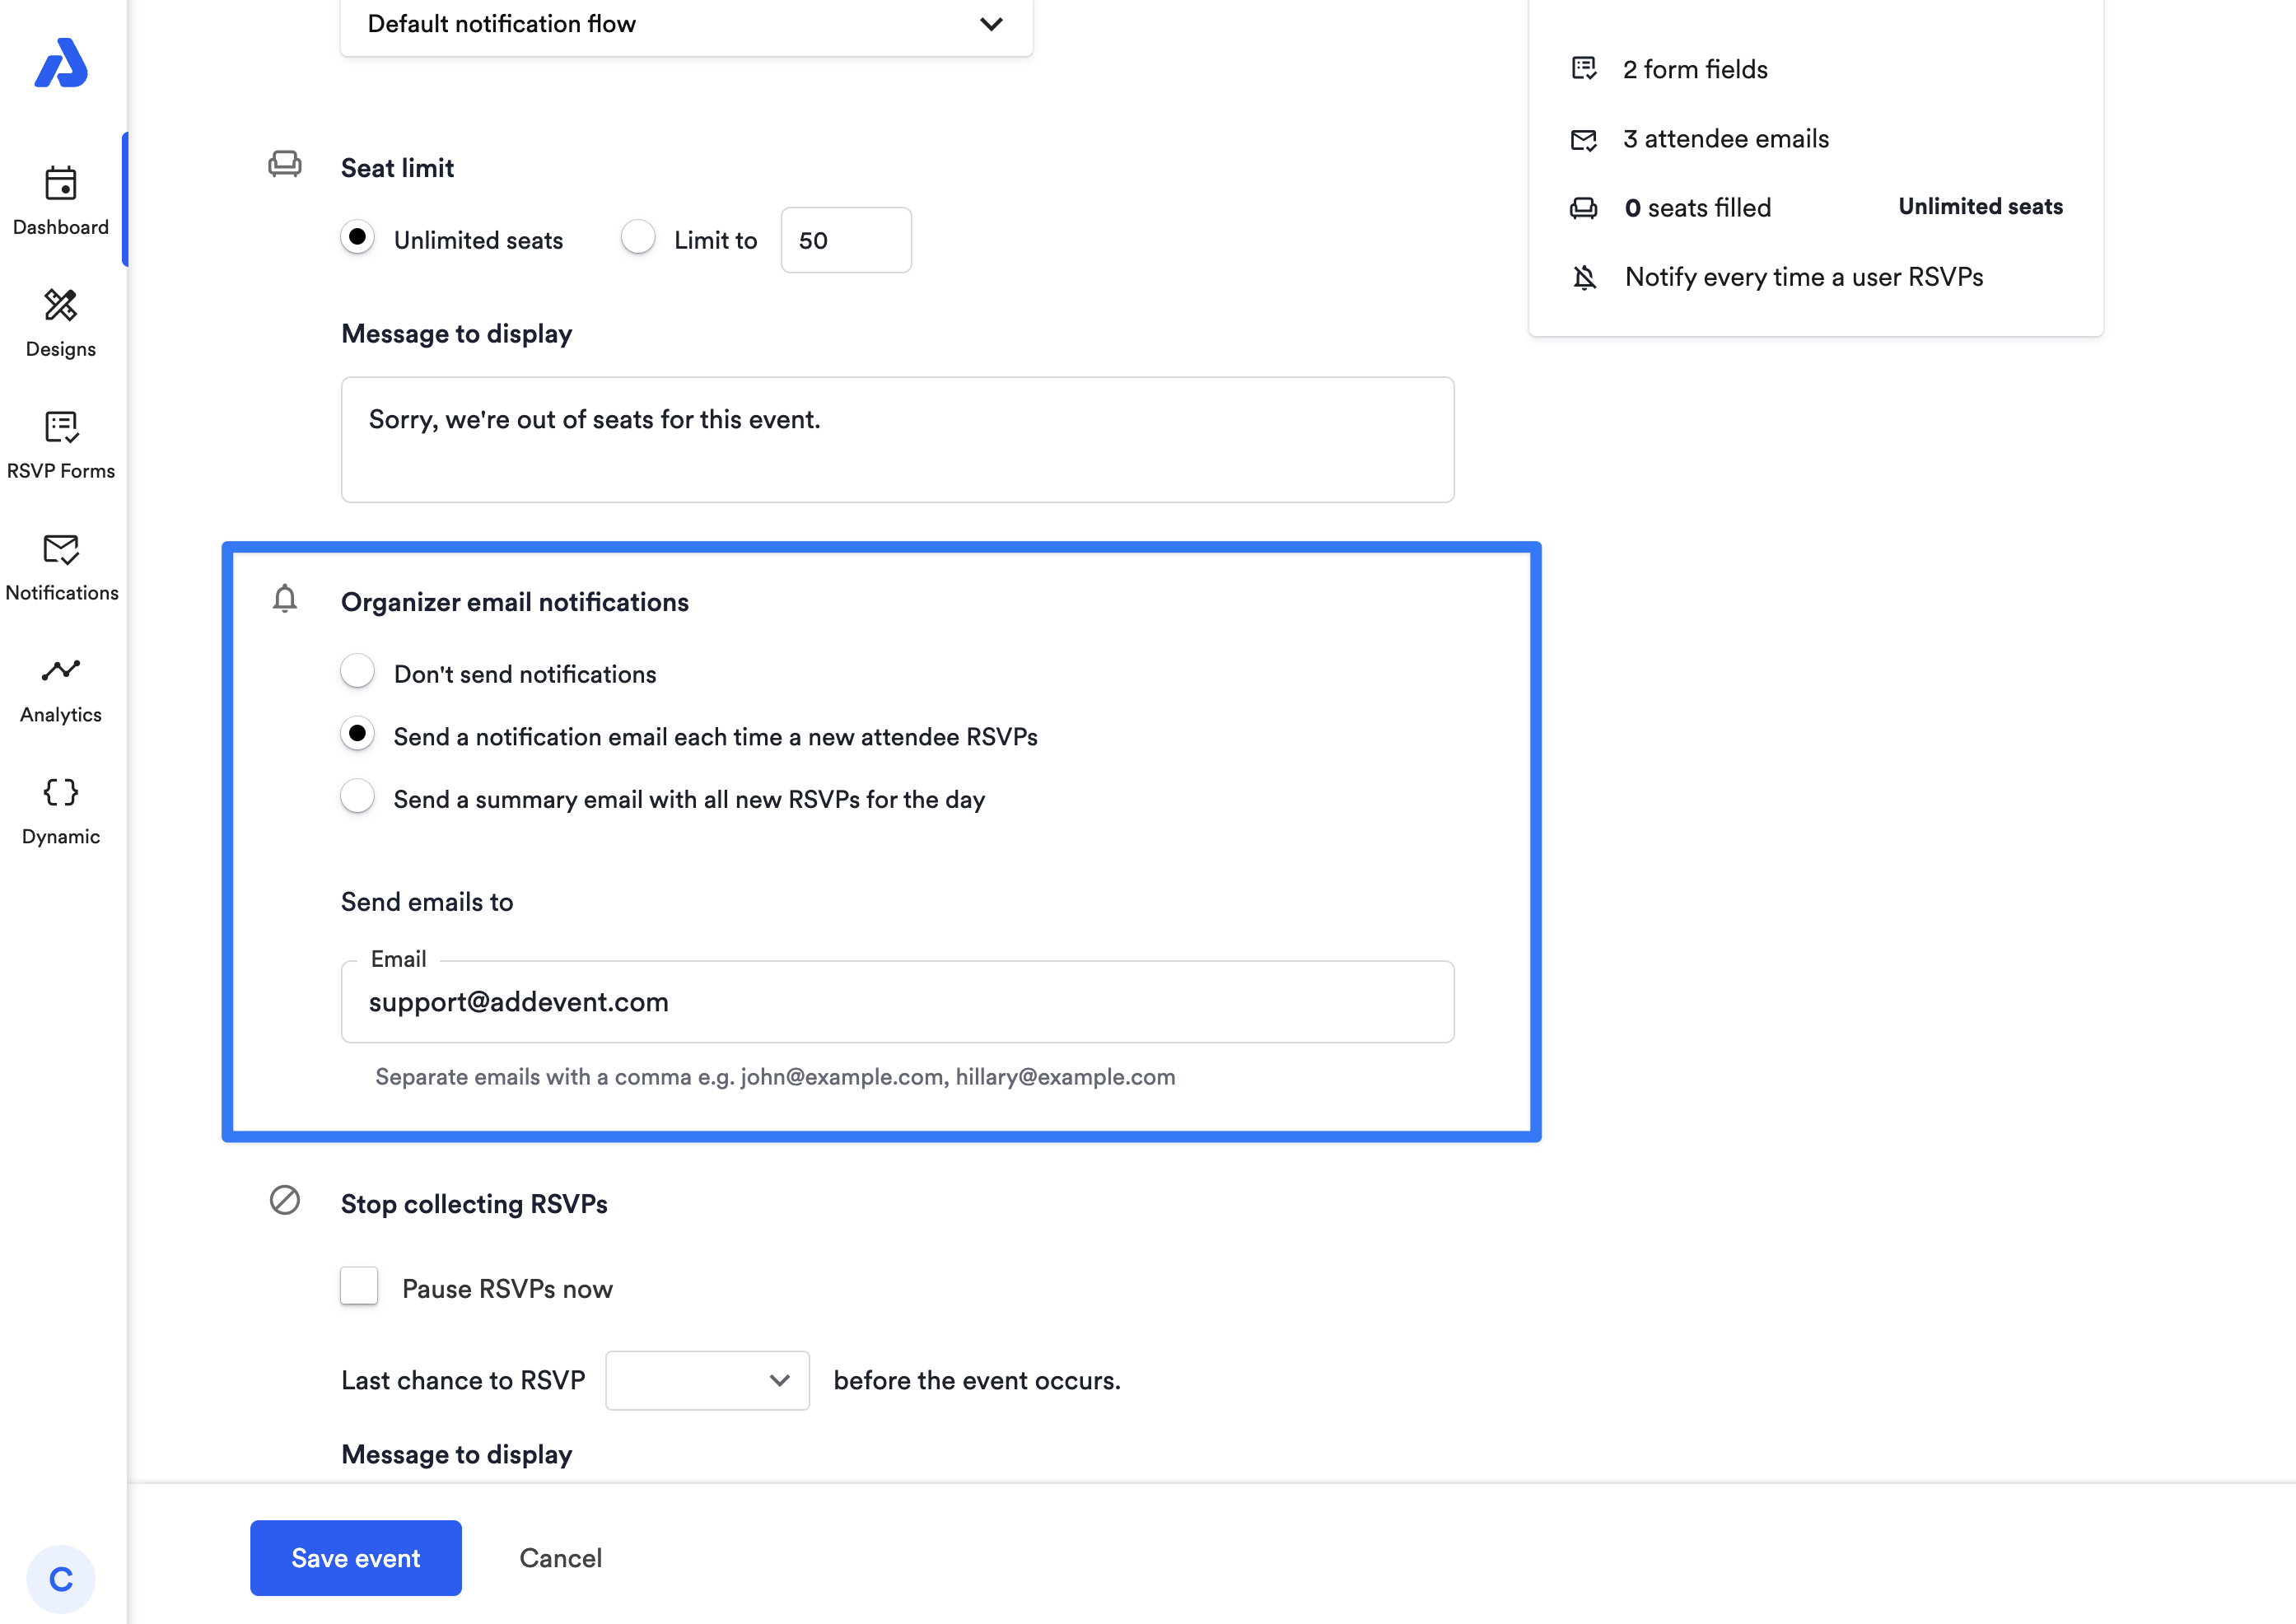
Organizer Email Notifications
Selecting Organizer Notification Options
There are 3 notification options for the event organizer to choose from:
- No thanks, I'll check manually
- Choose this option if you prefer to check RSVPs manually. You can view them anytime in the RSVP and Settings section of your event page. This is the default setting.
- Each time a new user RSVP's to an event
- Select this option to receive an individual email notification every time someone RSVPs for your event.
- Summarize all new RSVP's for the day
- Select this option to receive a daily summary email listing all new RSVPs received that day.
Adding Email Recipients for Notifications
If you select Each time a new user RSVP's to an event or Summarize all new RSVP's for the day notifications, you’ll need to enter at least one email address in the Send notification to section to receive these emails. You can enter multiple email addresses, separating them with commas.
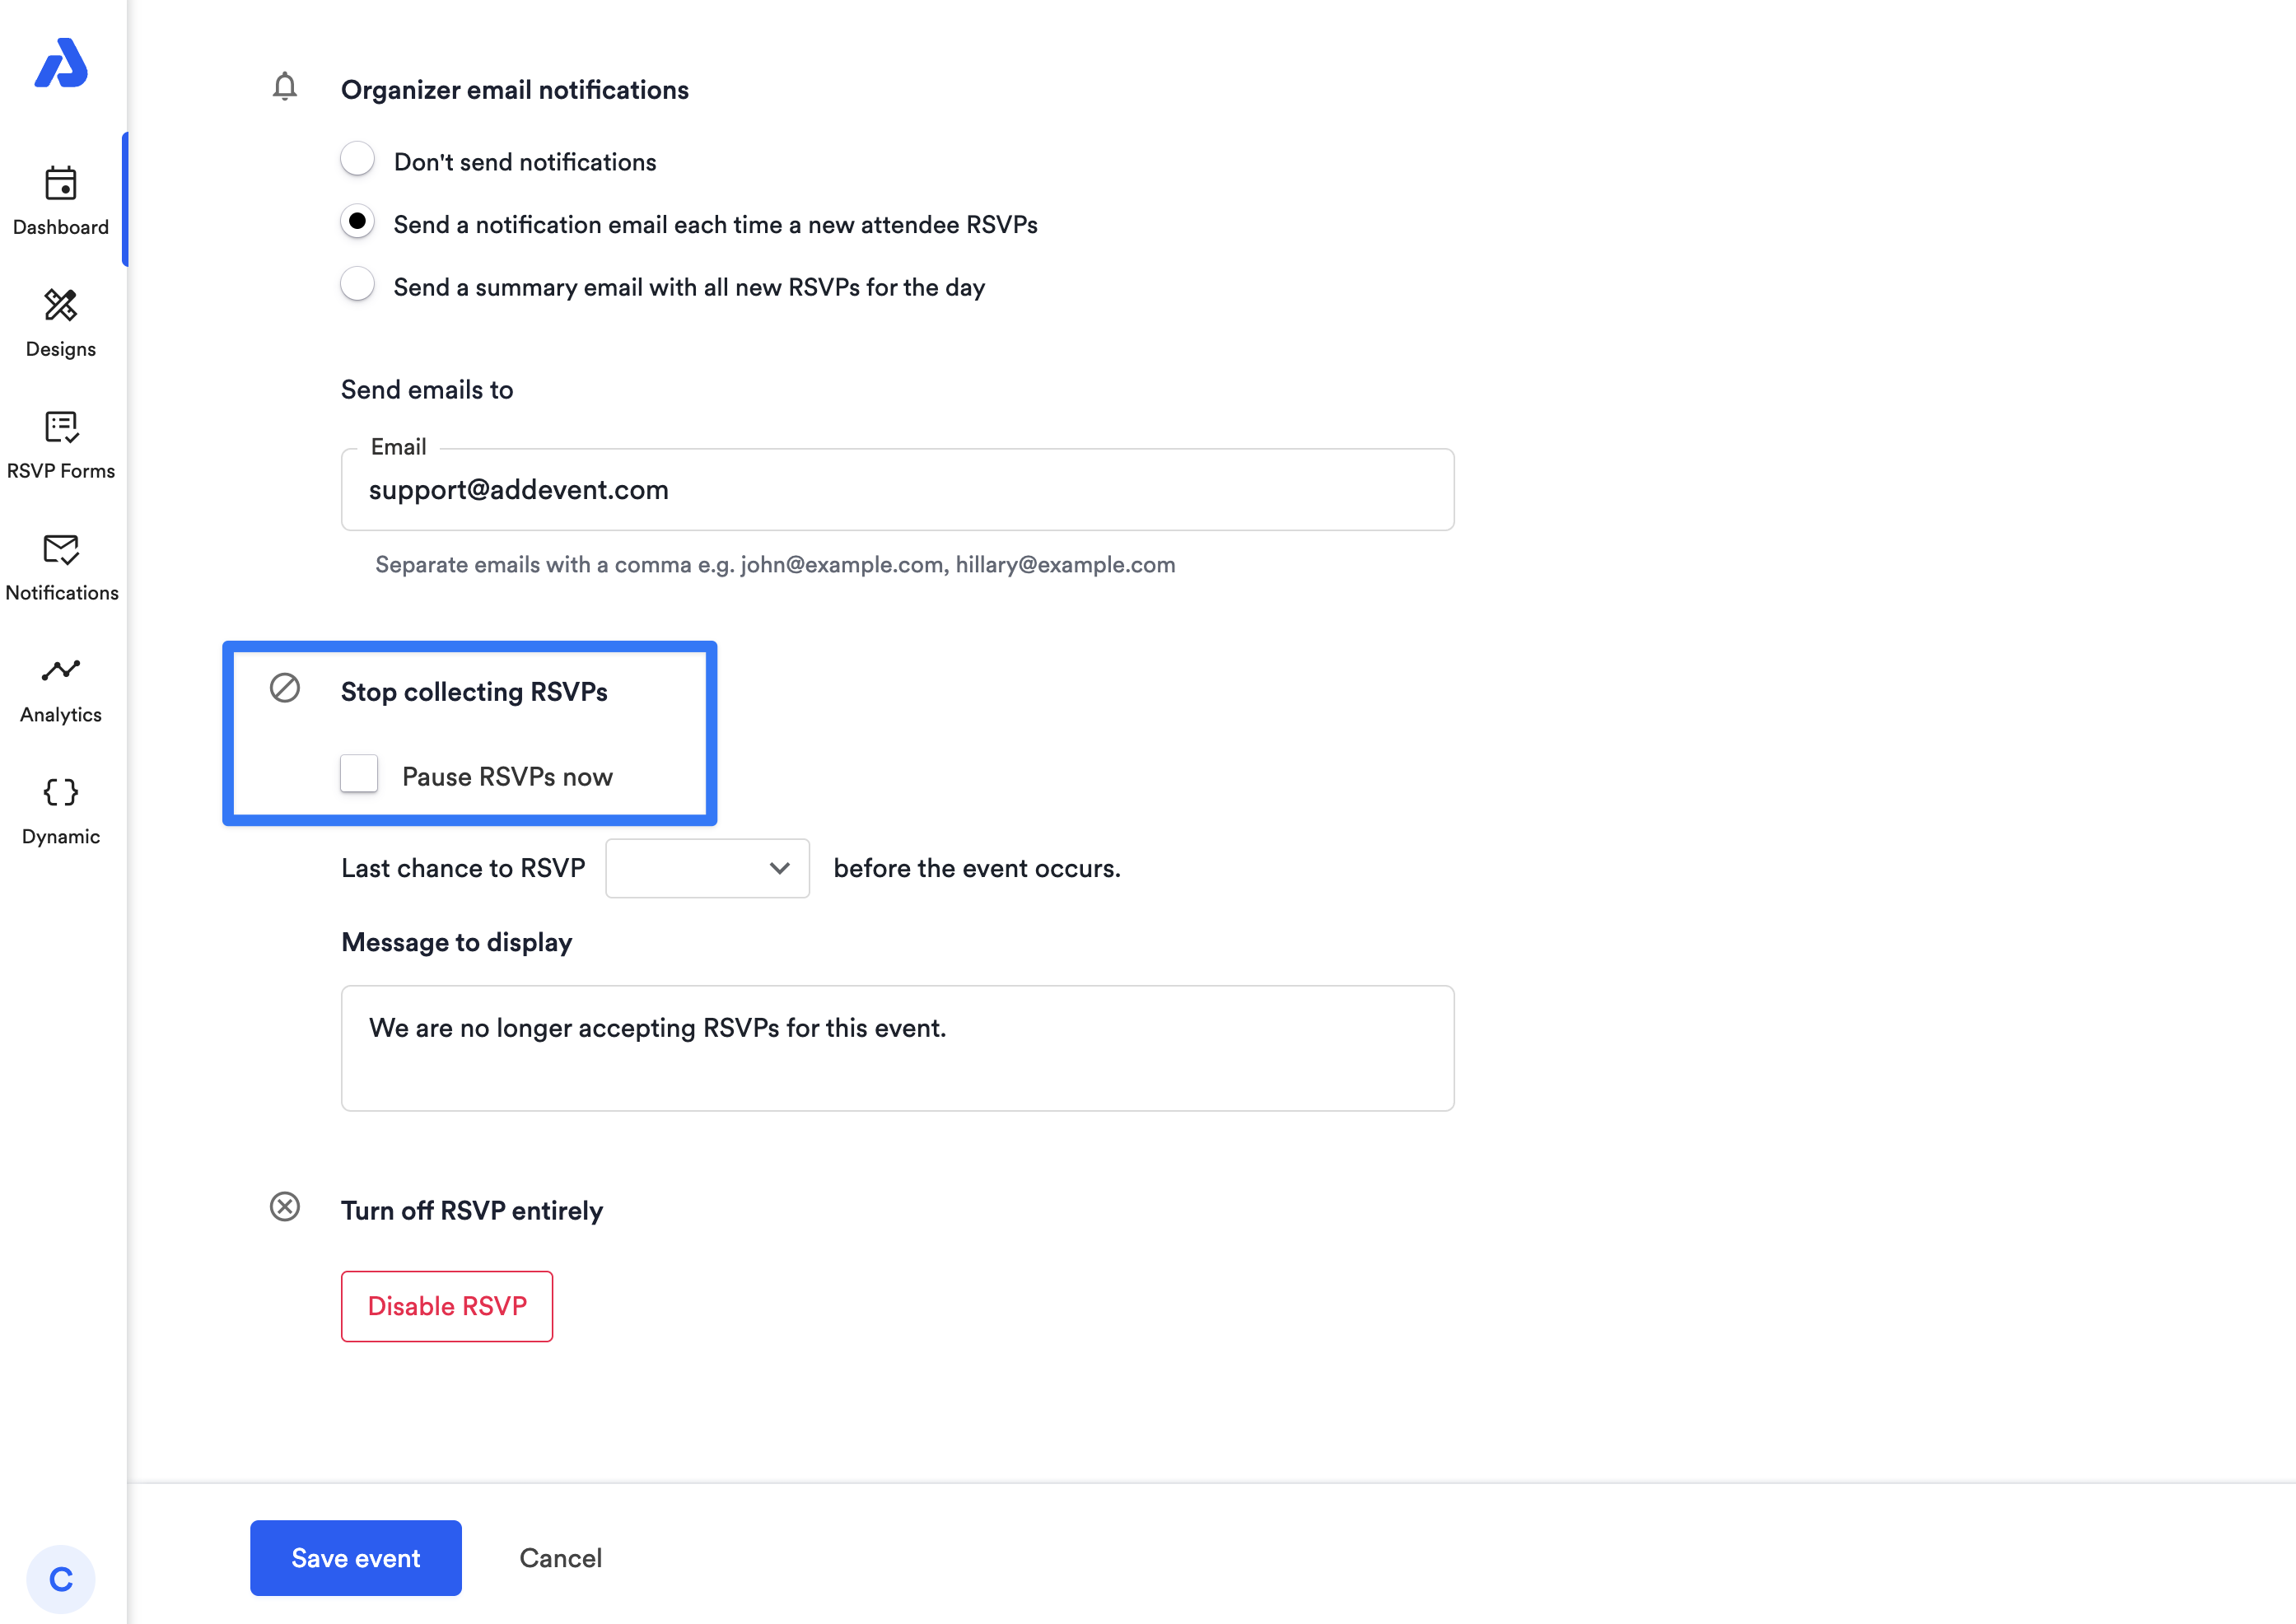
RSVP Management Settings
Stop Collecting RSVPs
To pause RSVPs immediately, Navigate to the event and select the "RSVP Settings" tab. Then, check the Pause RSVPs now box to stop accepting new RSVPs:
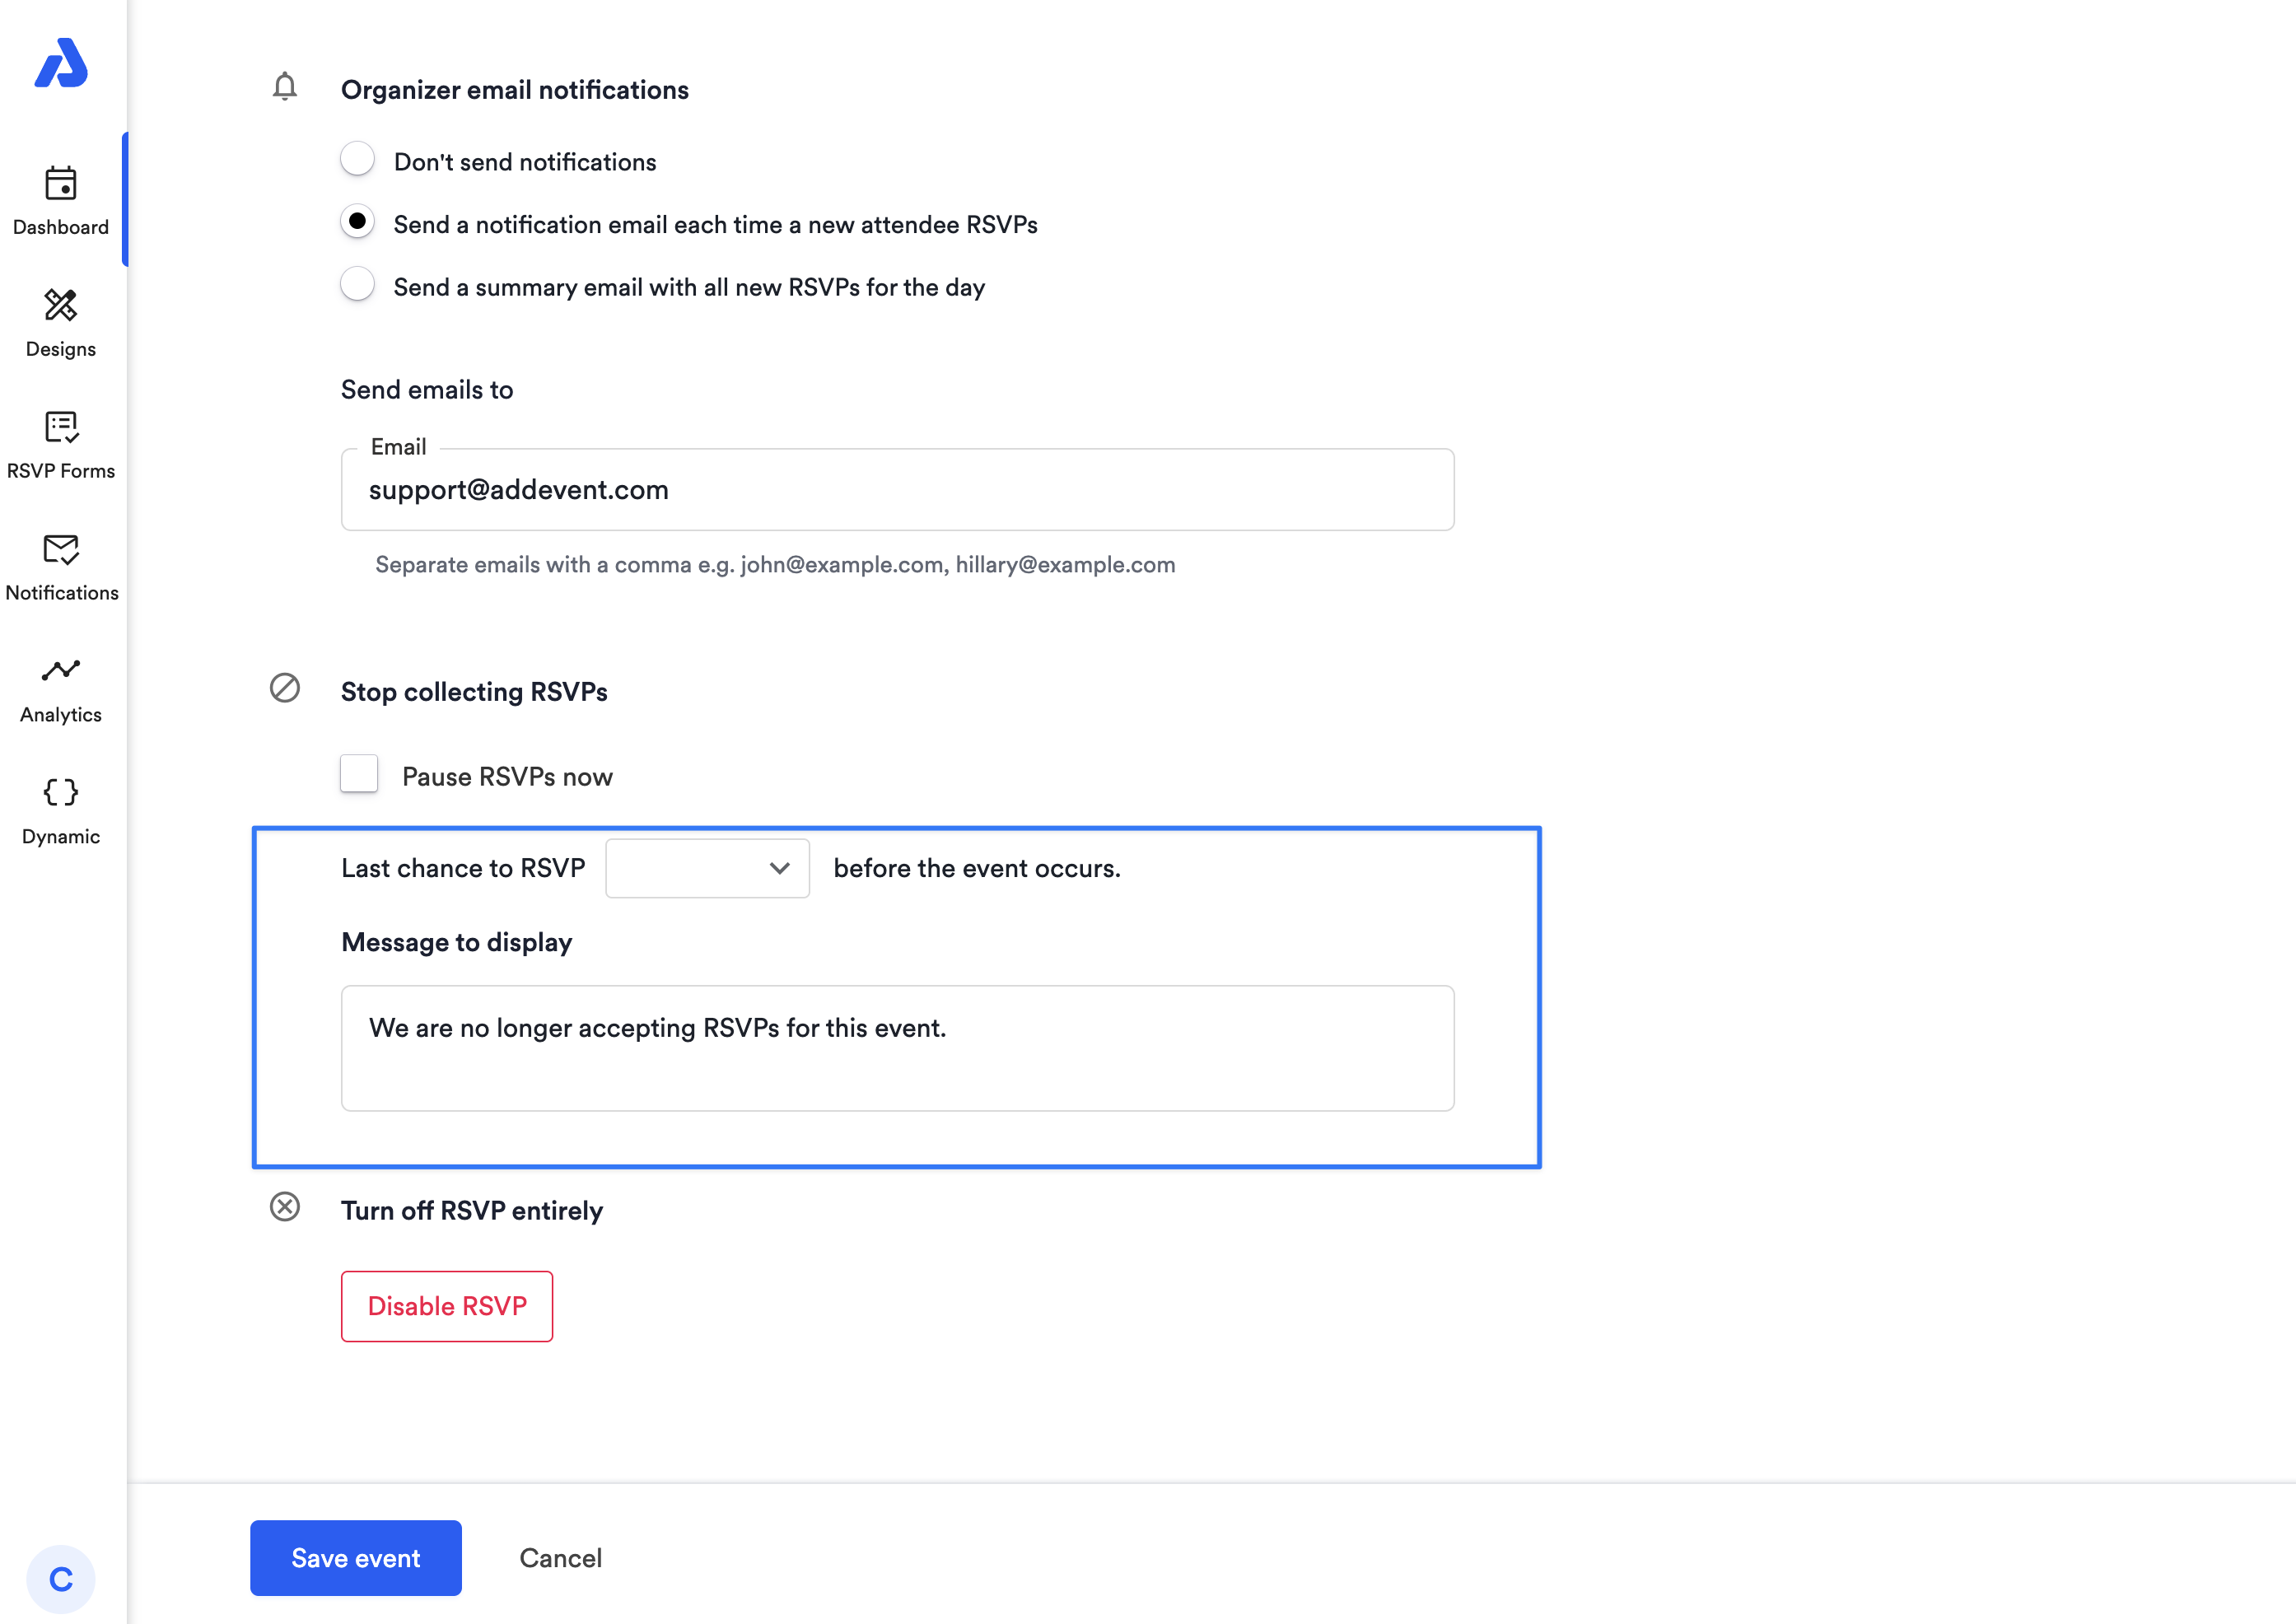
Last Chance to RSVP
To stop RSVPs at a set time before your event, click the dropdown menu and select a timeframe between 0 minutes and 14 days before the event’s start time. This will automatically close RSVPs, allowing you to prepare with an accurate attendee count..
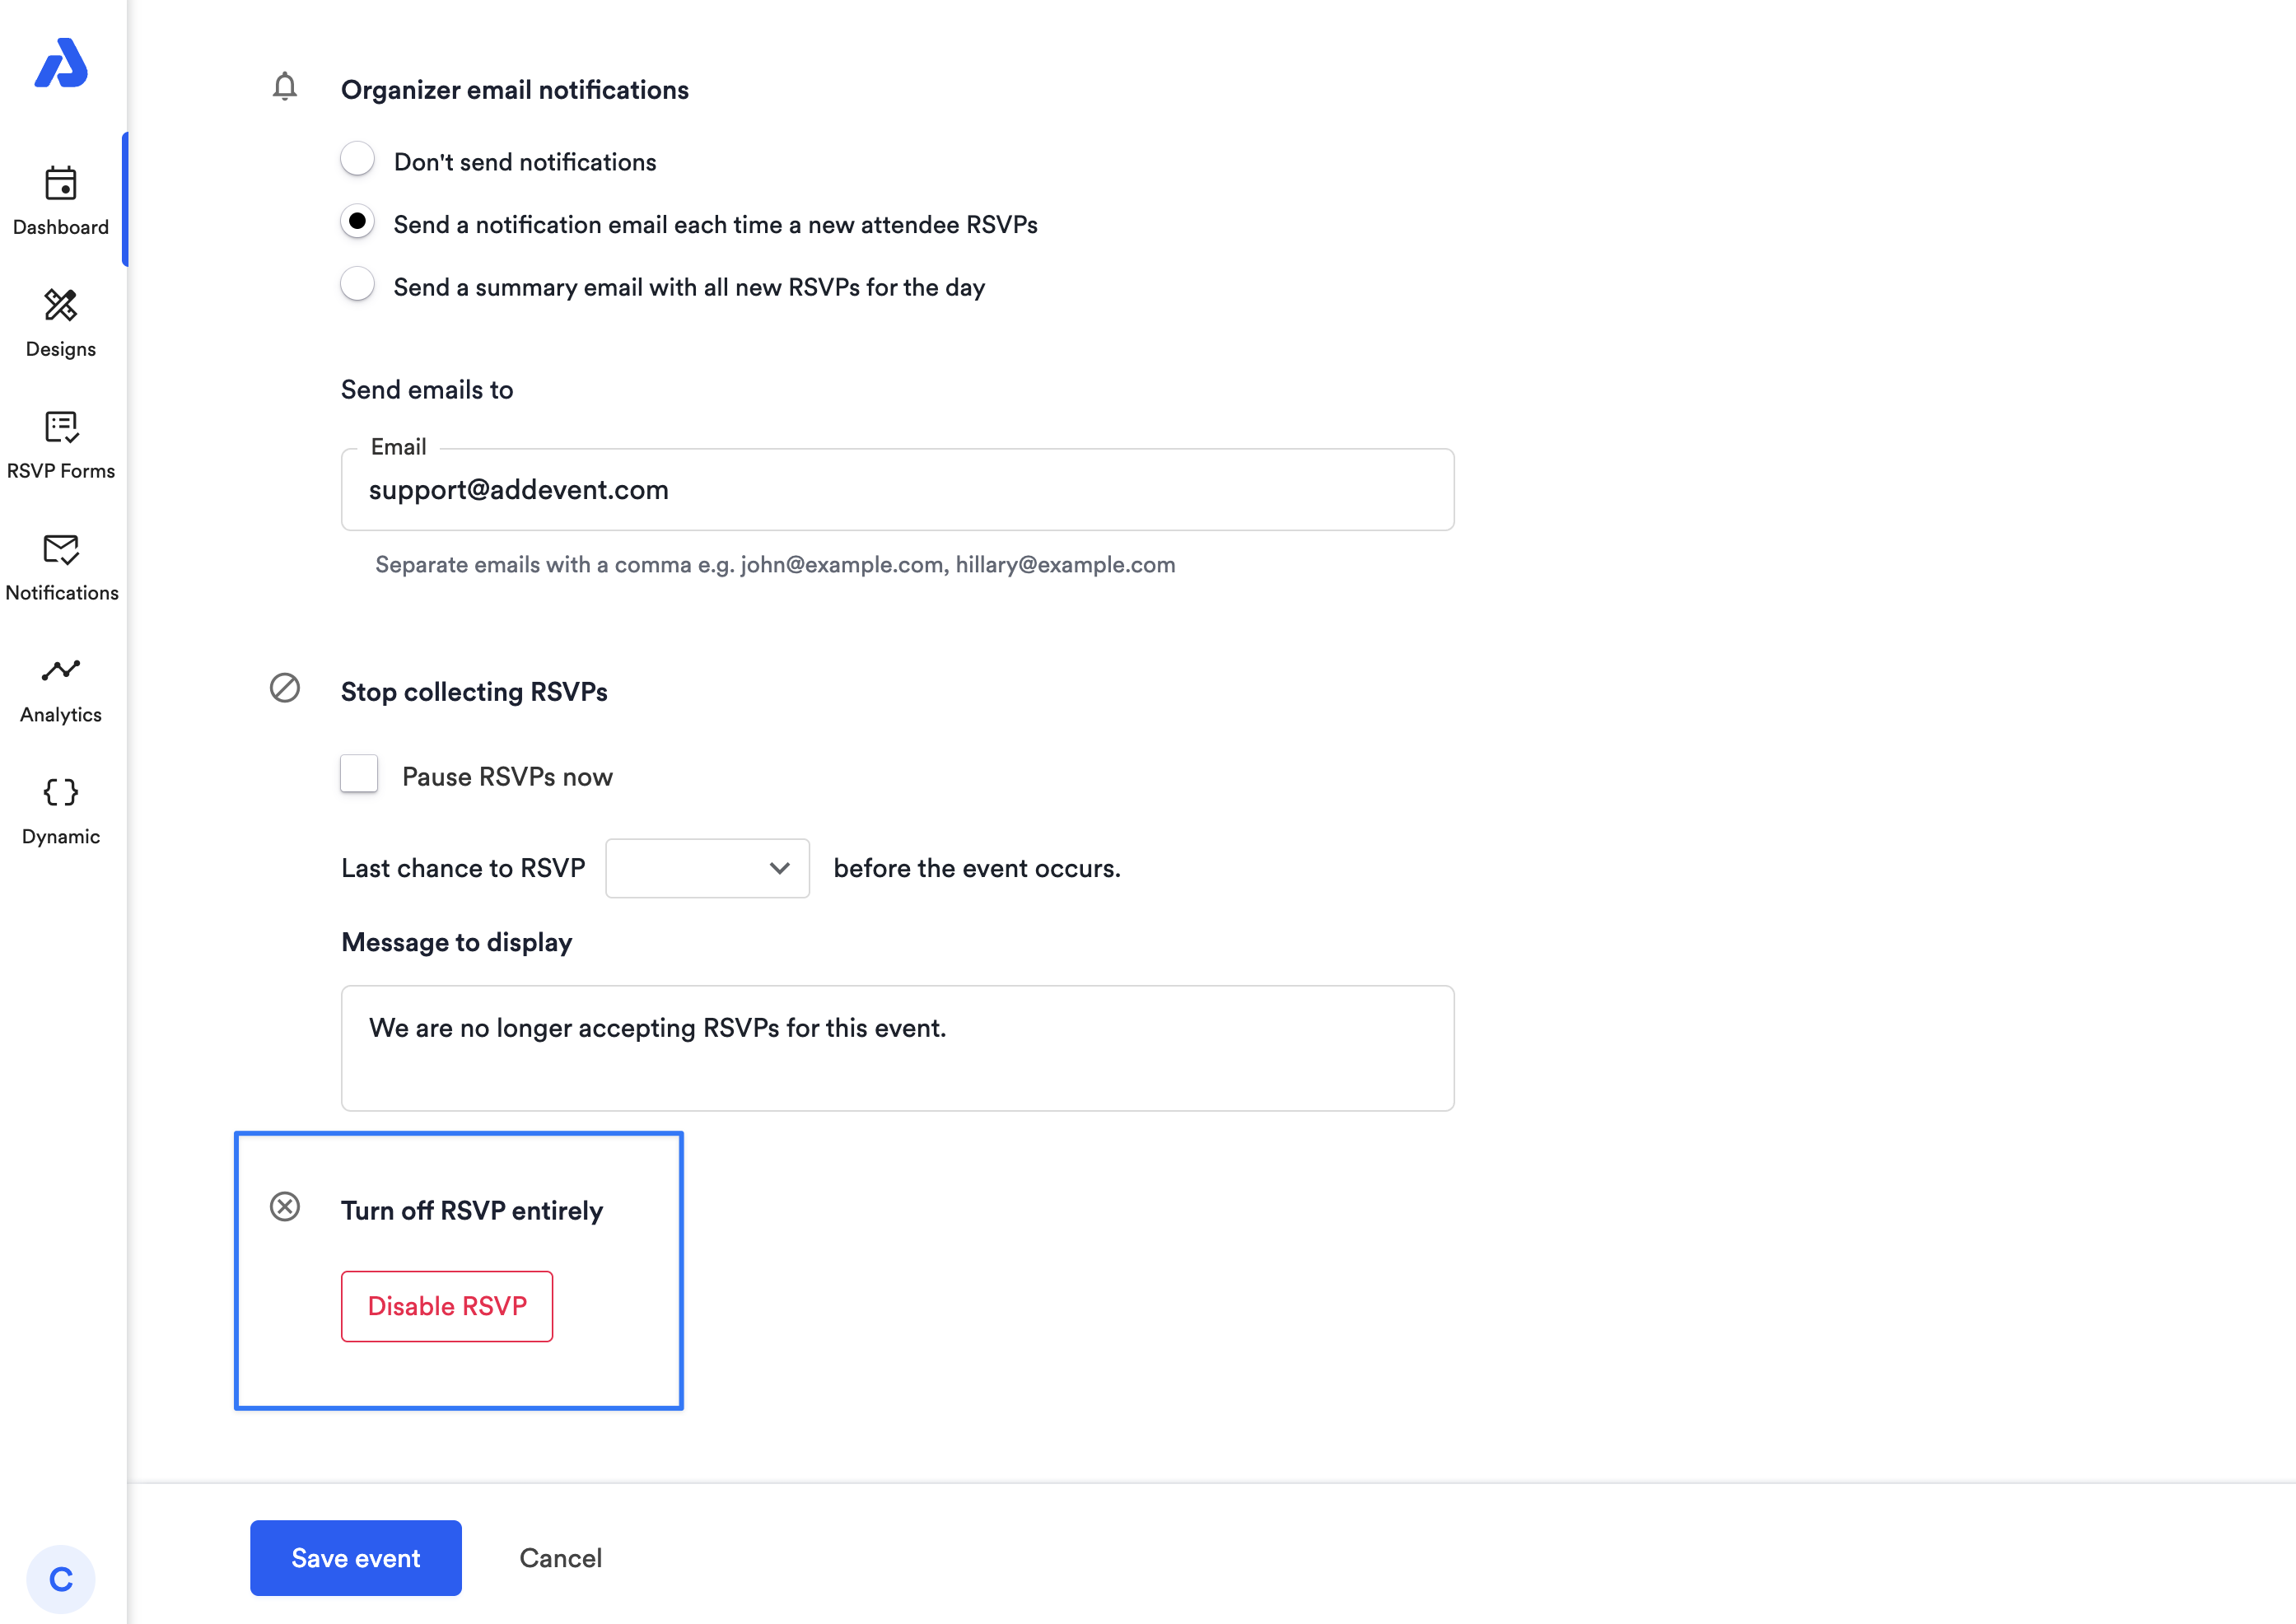
Disable RSVPs to an Event
To disable RSVPs to an event entirely, you can select the Disable RSVP button at the bottom of the RSVP
When selecting the Disable RSVP button, you will see a pop-up appear that informs you that when disabling RSVP to an event, you will lose access to all attendees and the RSVP form data that you have collected. Additionally, all attendees will no longer receive reminder emails about the event.
Updated about 2 months ago