Create and Share Your First RSVP Event
Now that you've created and shared an event, you can try AddEvent's RSVP feature to unlock even more value! Here are a few things about RSVP events before we get started.
RSVP events allow you to collect attendance responses from your users. With RSVP enabled, you can track the number of attendees, collect customized information from your audience, and send automated reminders.
AddEvent requests the email addresses of your registrants, allowing you to send them confirmation emails, reminder emails, follow-up emails, and event update emails. Creating Custom RSVP forms is available if you want to collect specific information from your audience.
Now, let's go through the steps of creating an RSVP event! Feel free to open a new window so you can follow along with the below video or follow the steps in this doc to create an RSVP event.
Creating an RSVP Event
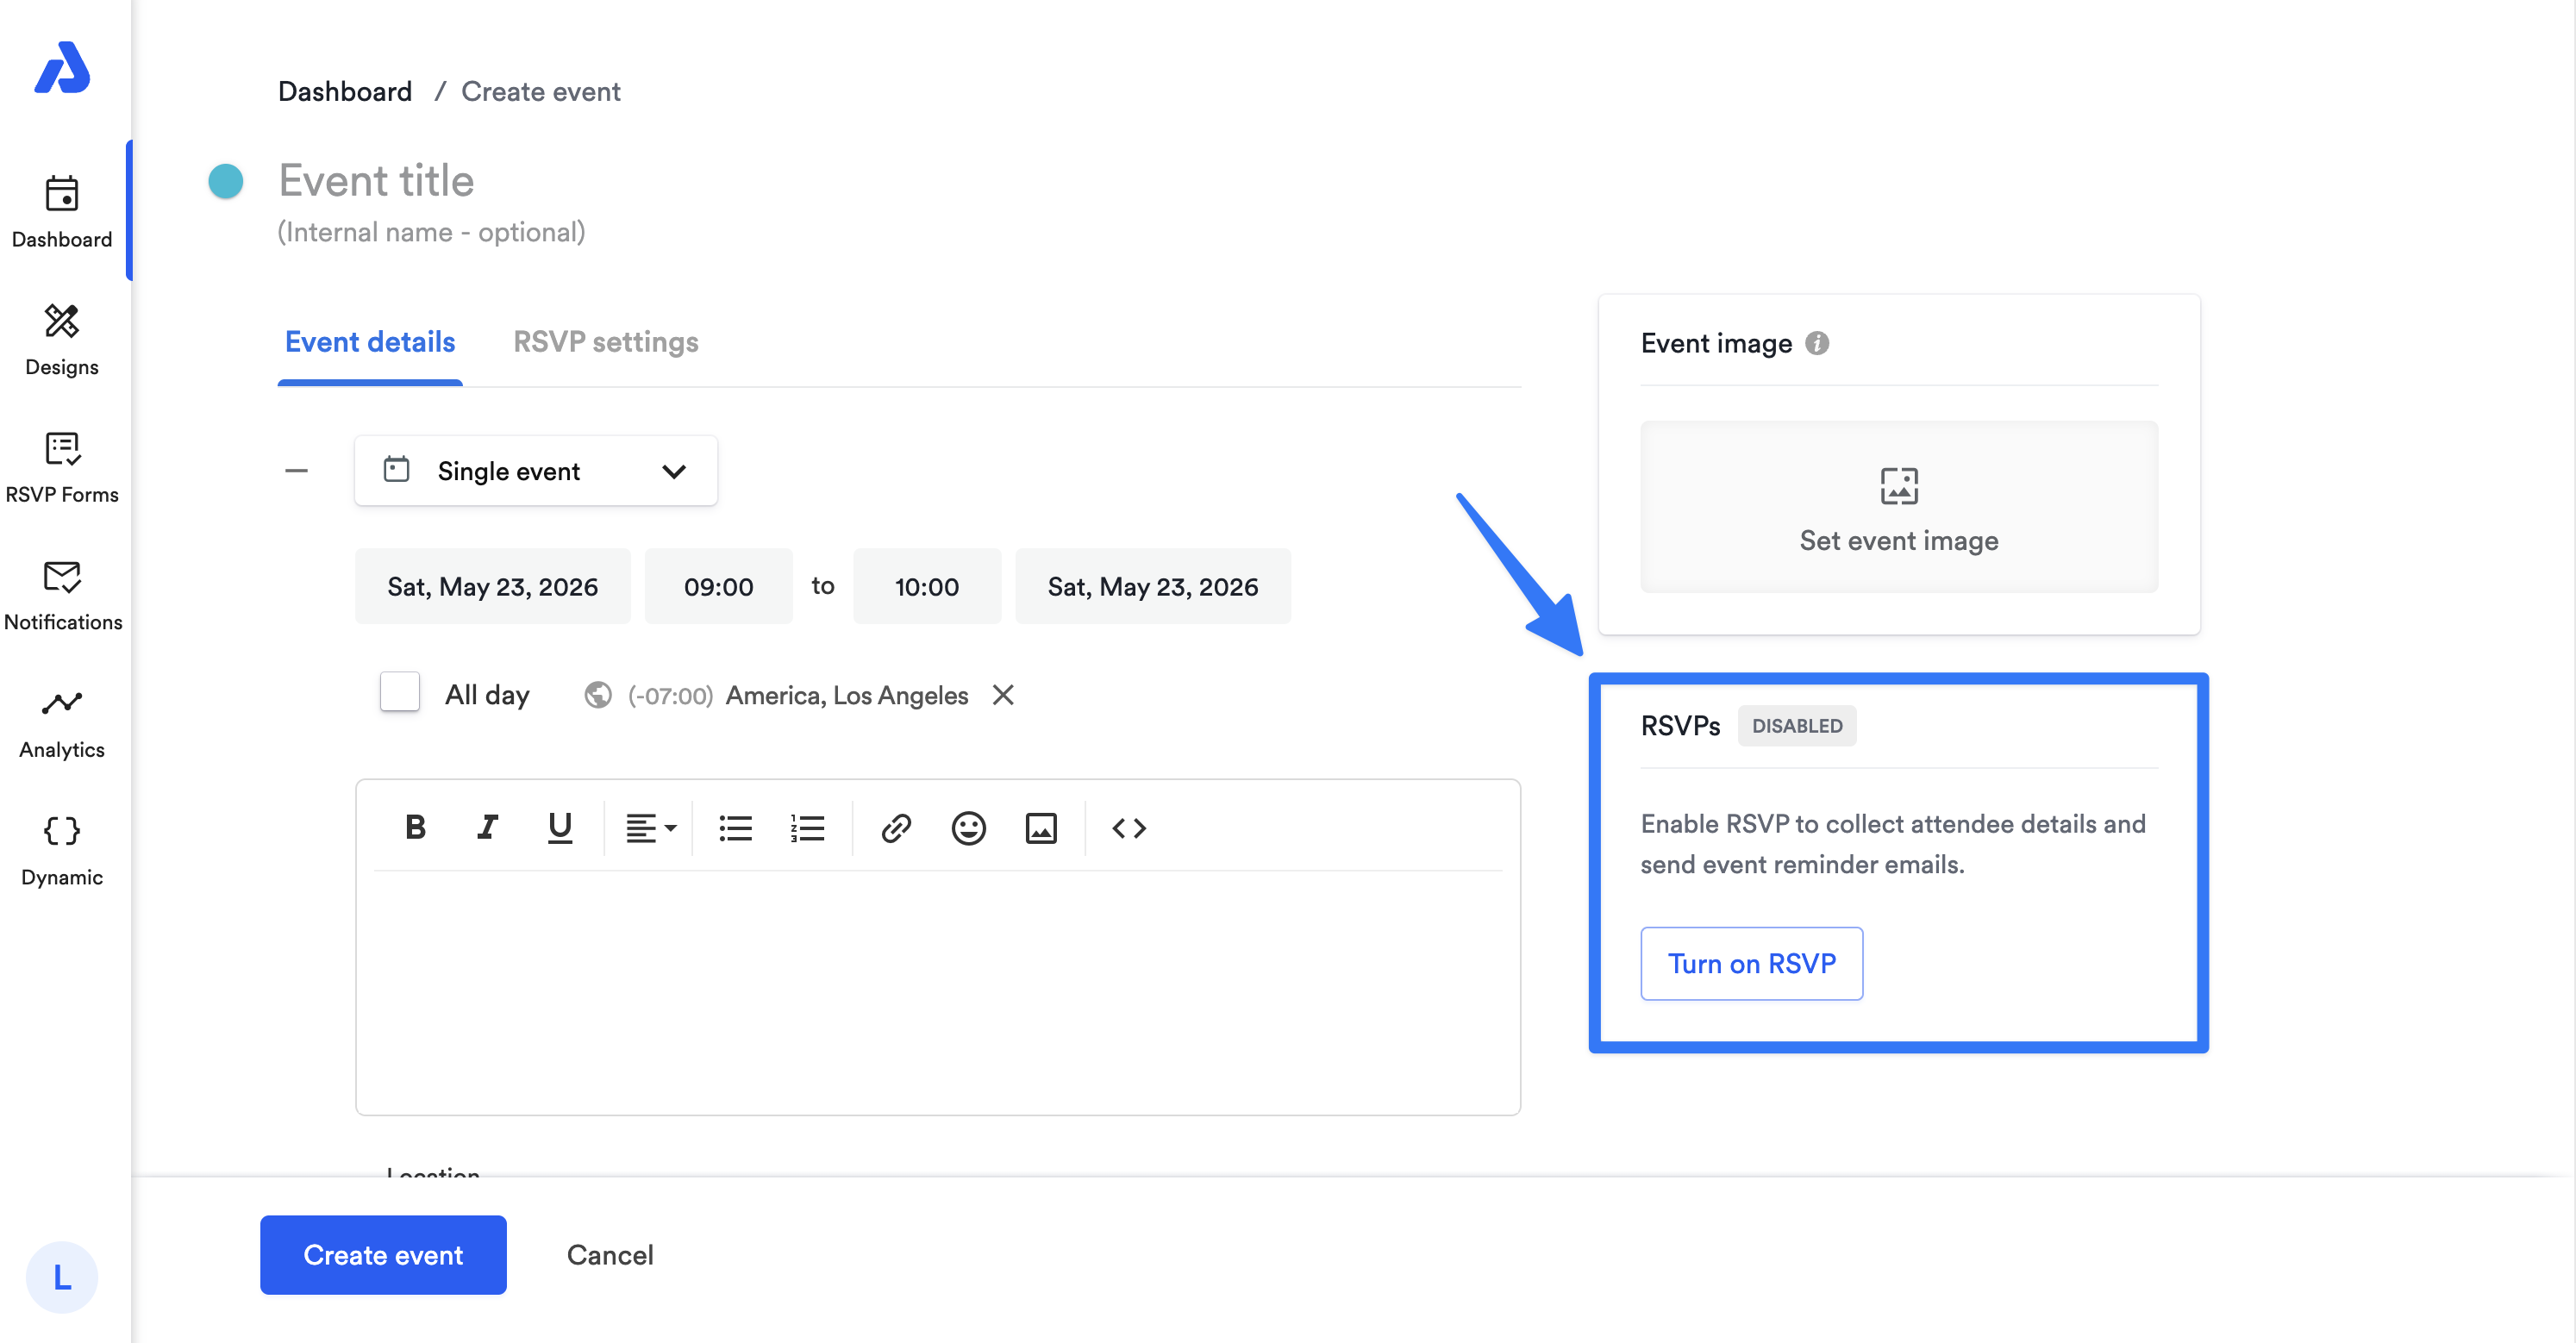
Now that you know how to create an event, the next step is to learn how to enable the RSVP functionality.
From your event creation page, you can enable RSVP by clicking the Turn on RSVP button. Then, the RSVP settings tab will automatically open.
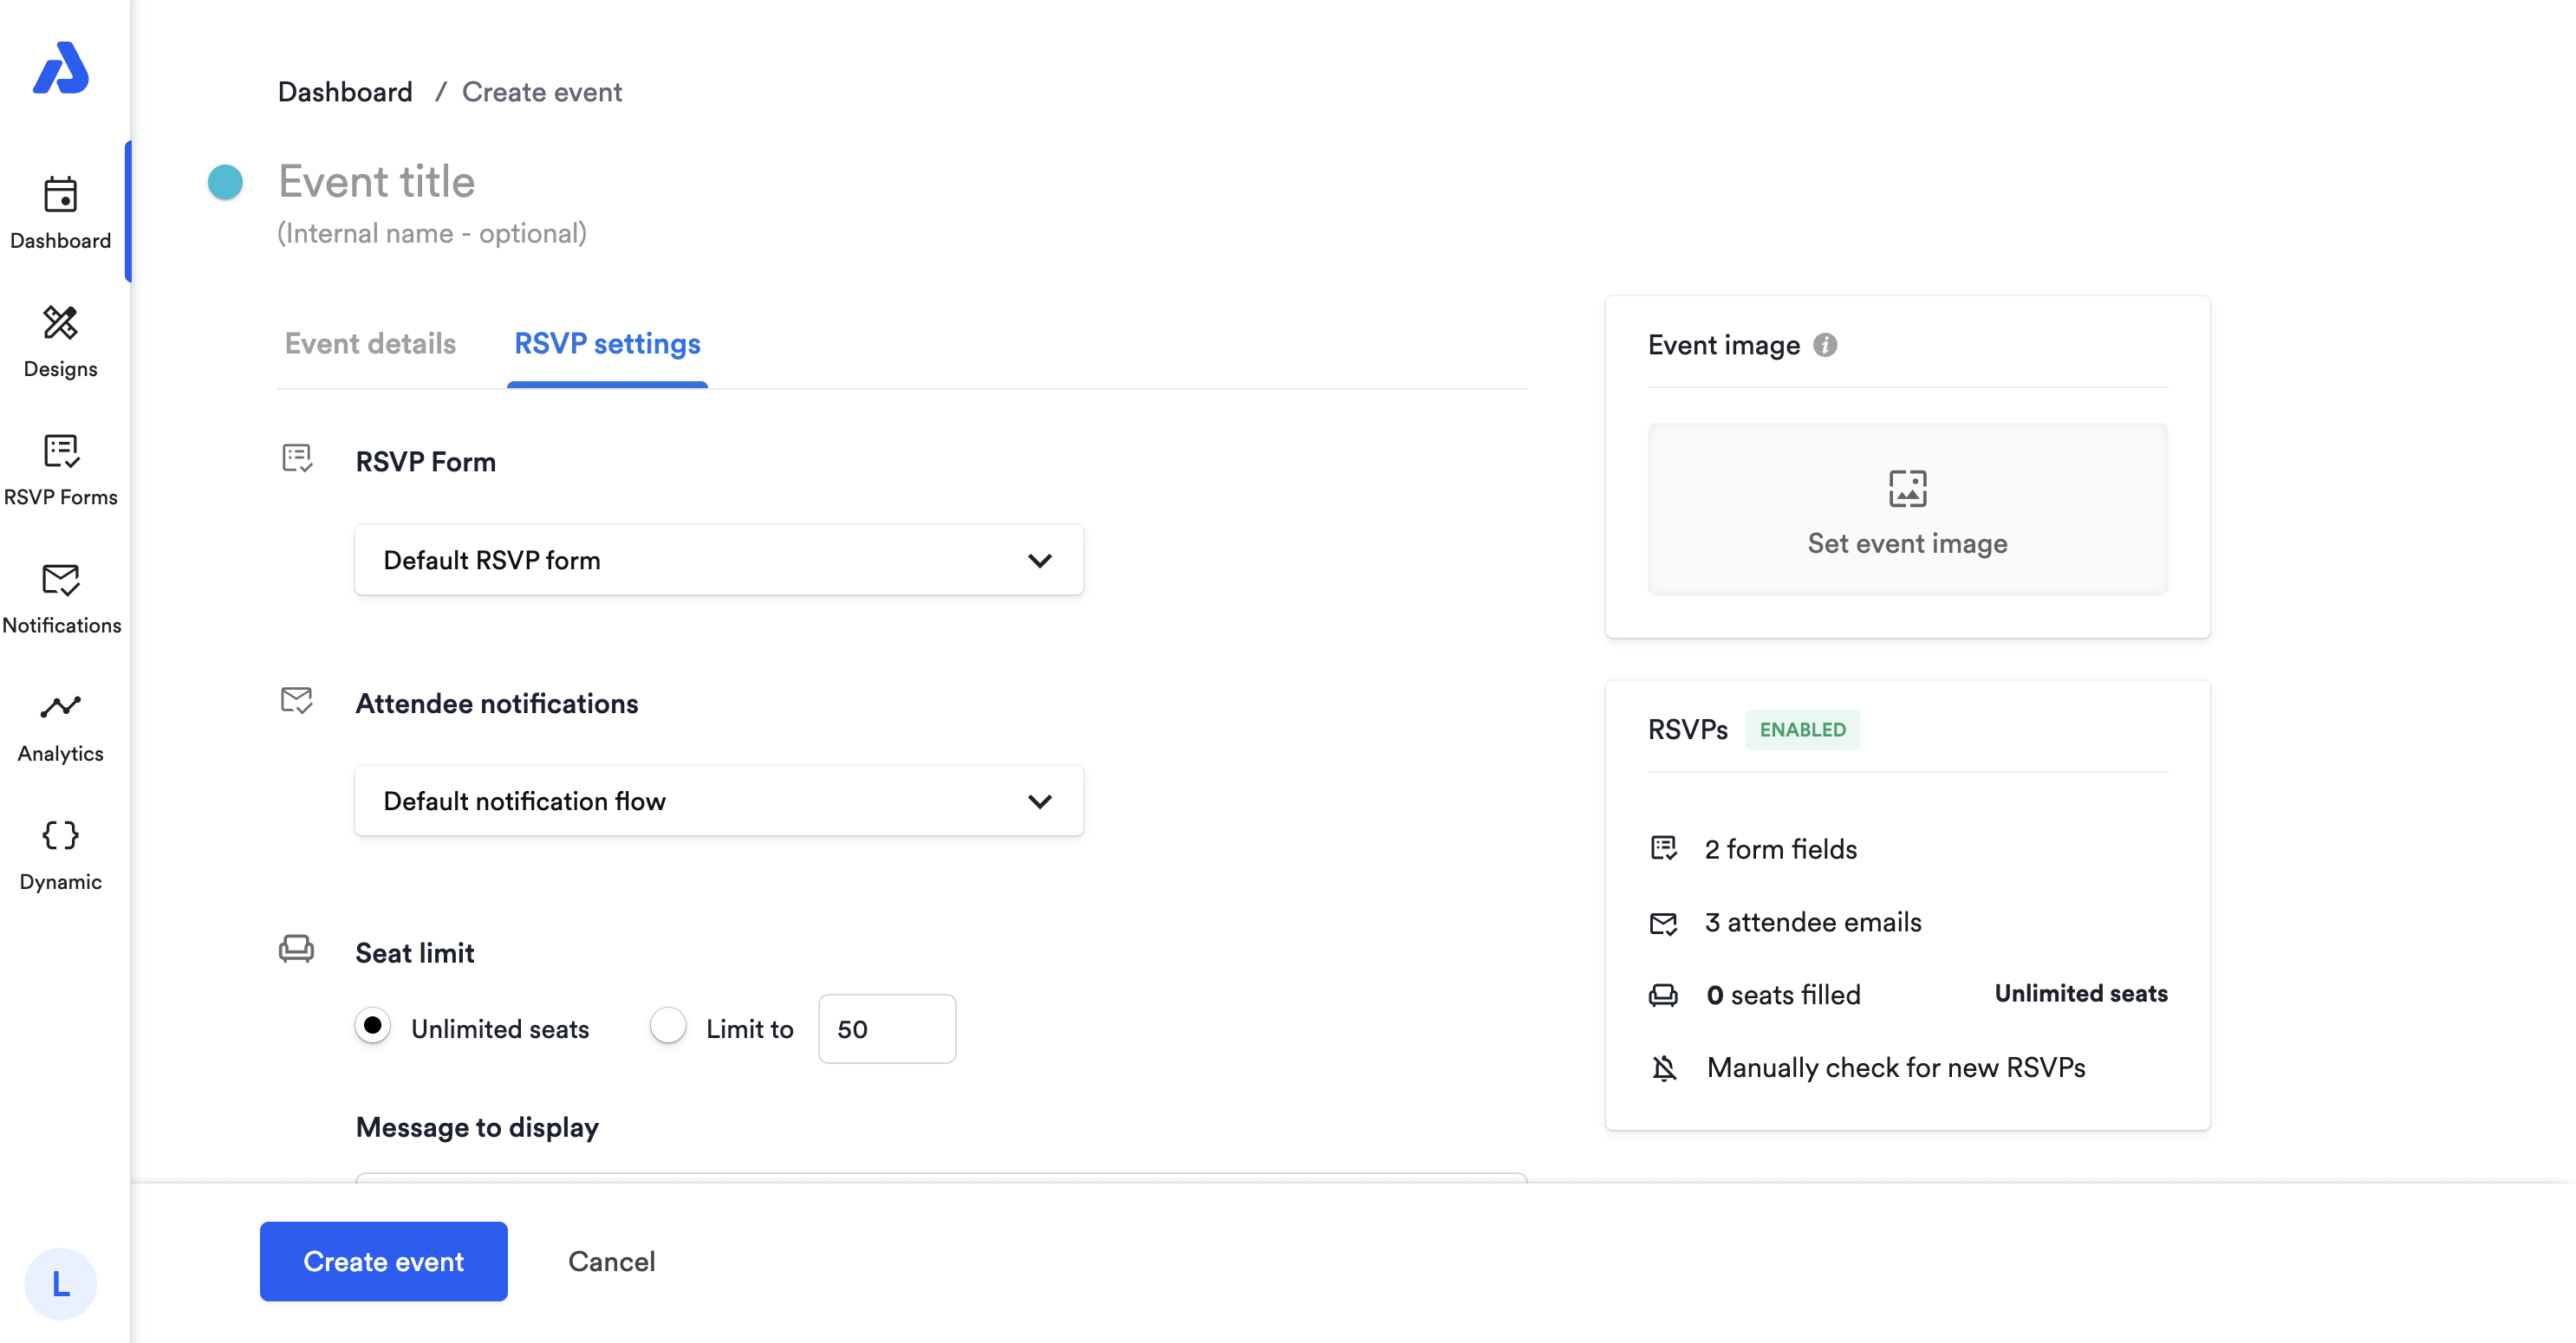
Once the required event details and RSVP settings are filled out, click the Create event button to save your event, and you will be directed to the event details page.
Sharing the RSVP Event
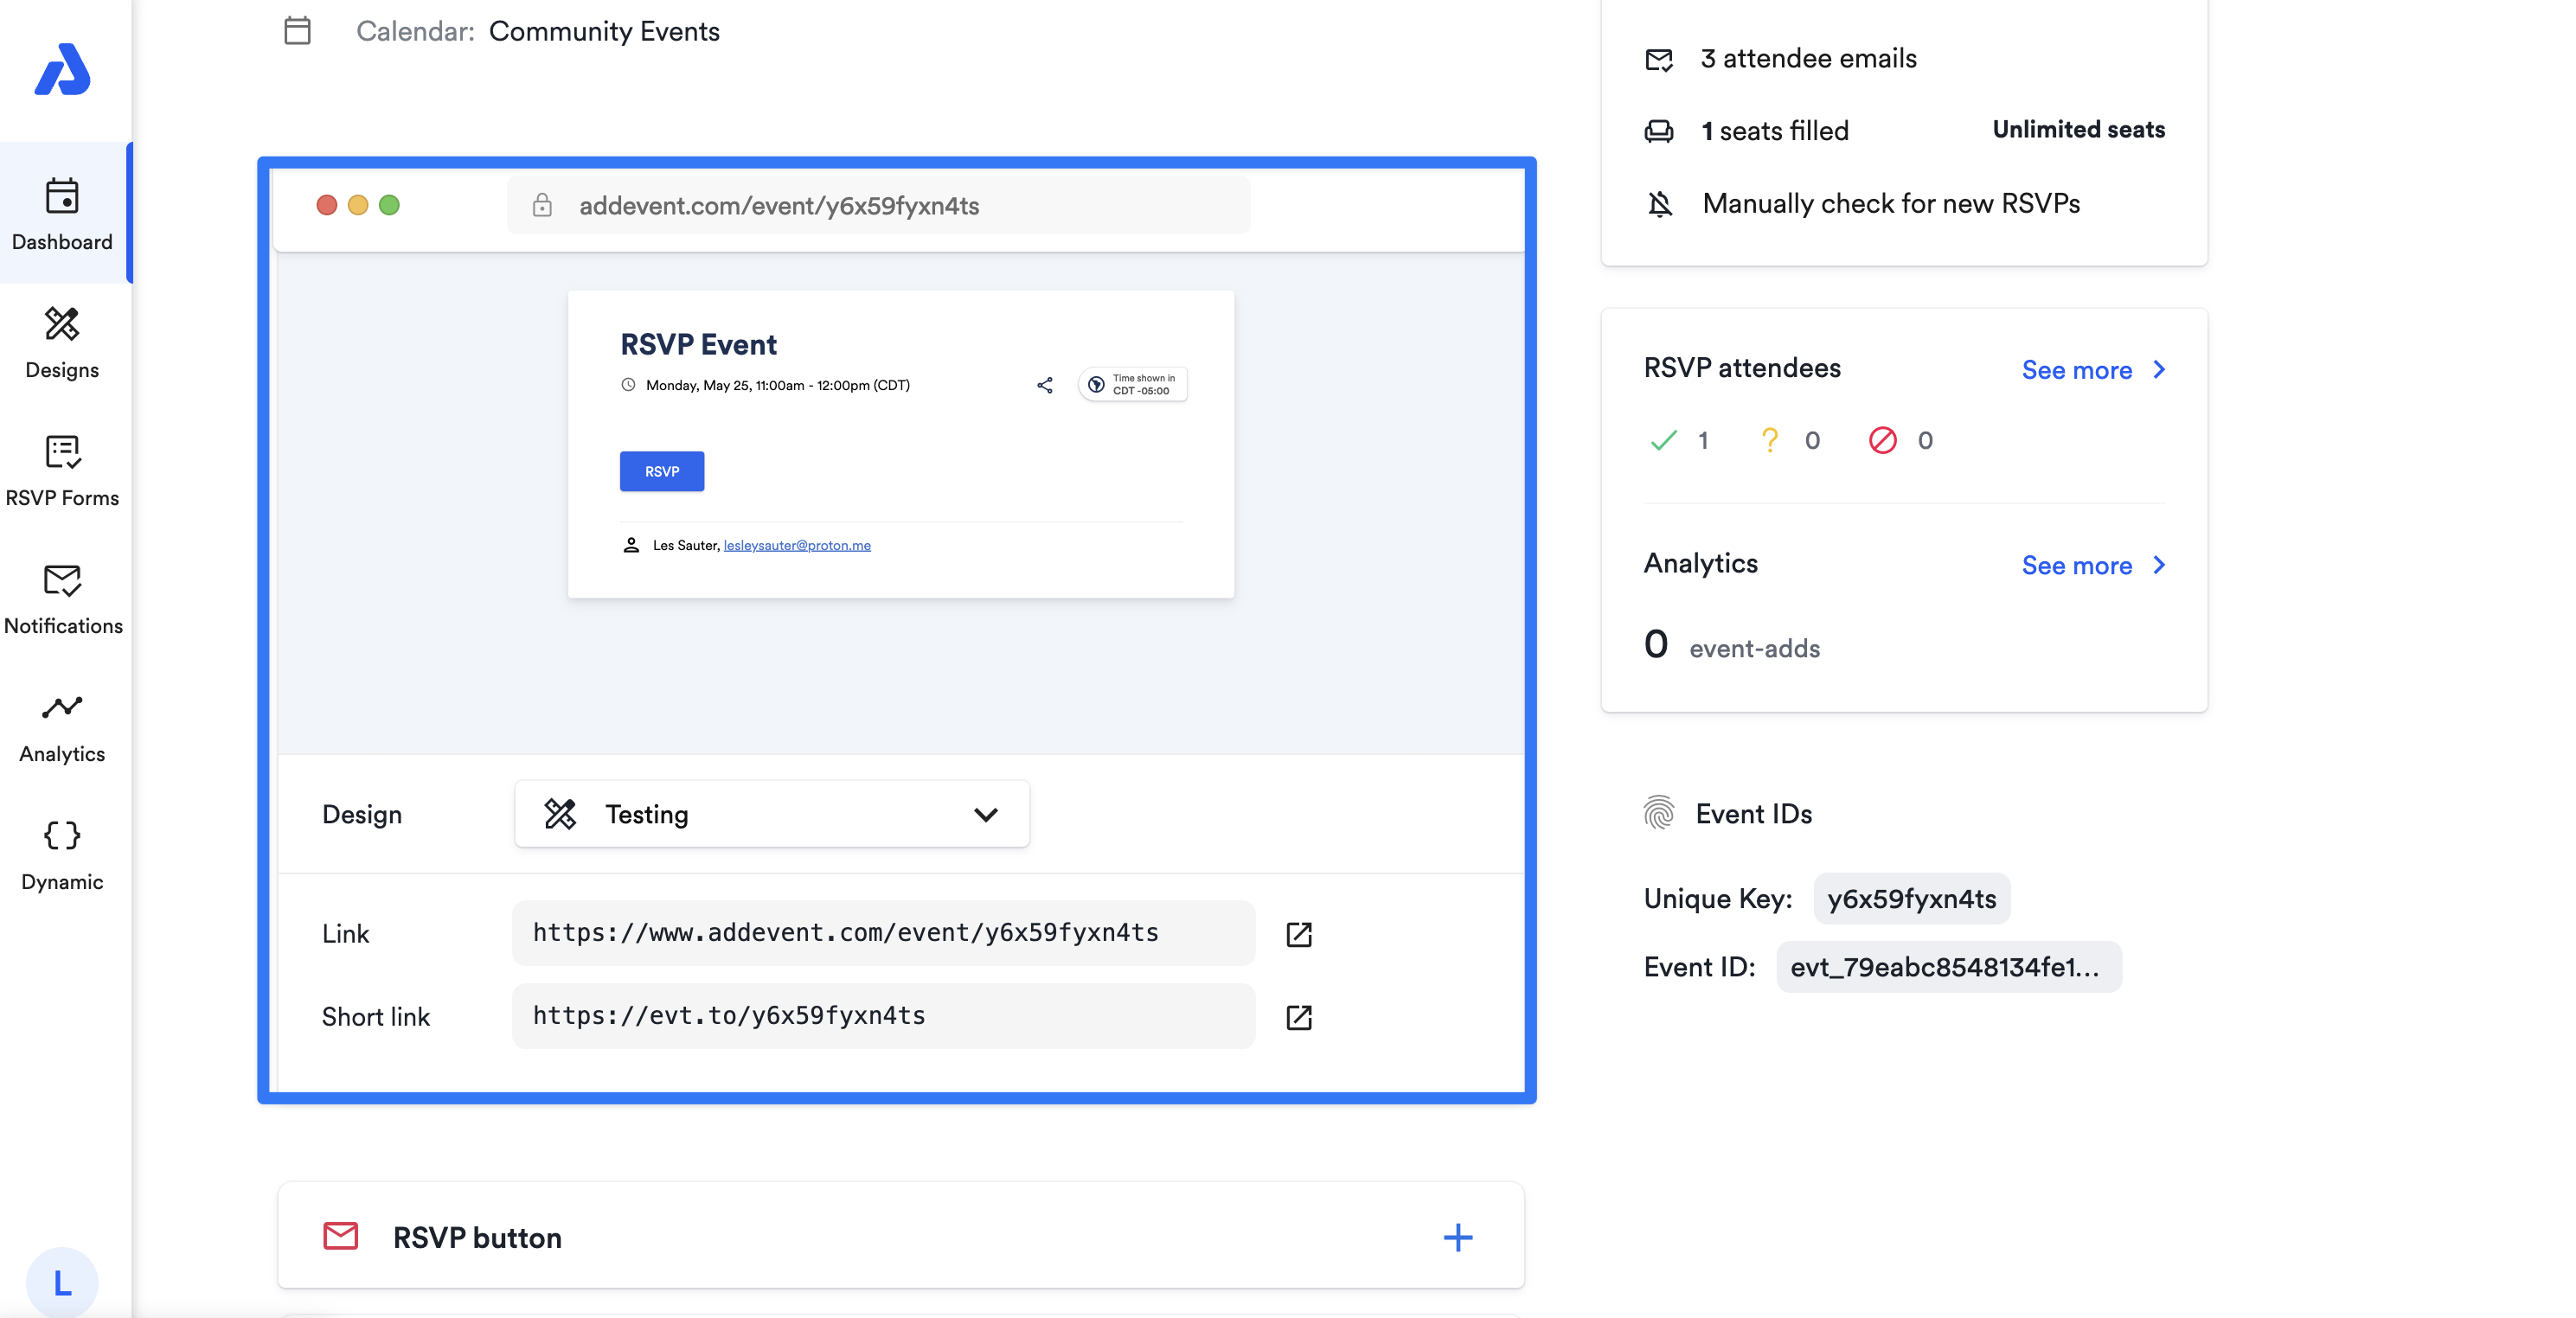
You will see the first method of sharing your event on the Event details page, just below the event landing page design preview and links.
Let's go through the available sharing methods together:
Event Landing Page
A unique landing page link is automatically generated when the event is created. The event landing page link will direct your end-users to the landing page to view the event's details and register for your event.
You can paste the link in an email, text message, Twitter, Facebook, or even hyperlink text in a PDF file. To share the event landing page, copy and paste the event landing page link.
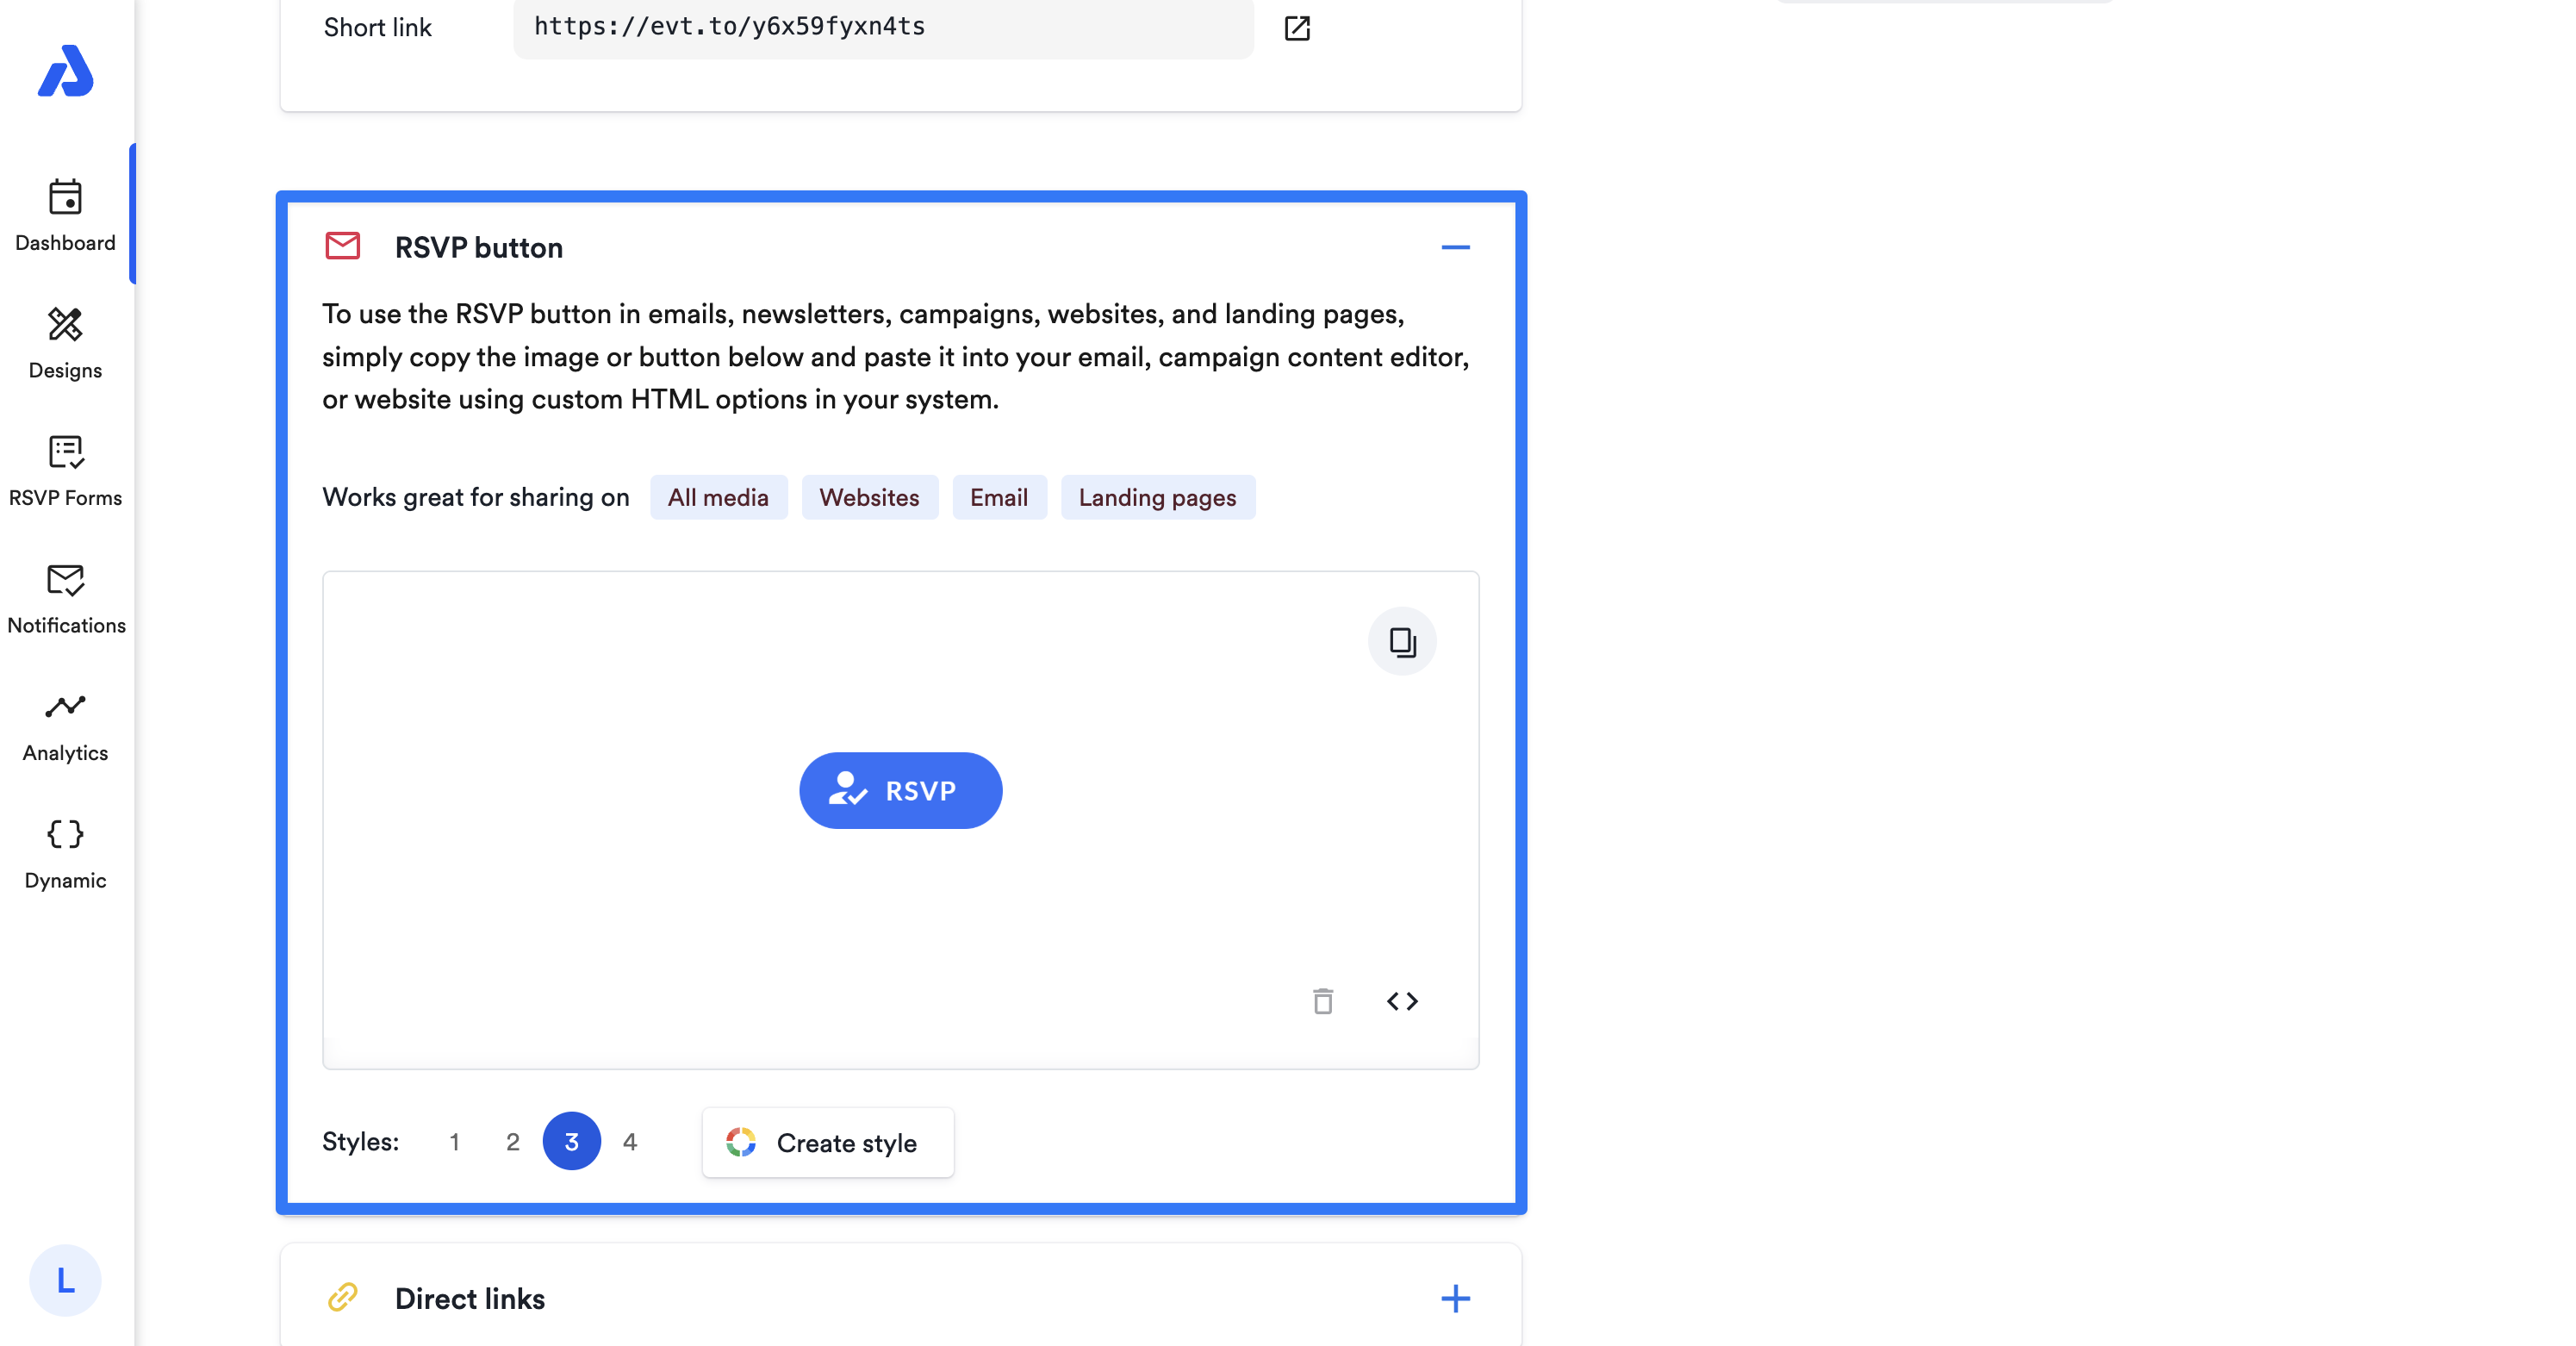
RSVP Button
The RSVP button can be copied and pasted into emails, newsletters, campaigns, and websites!
There is only one button/link option (as opposed to both Add to Calendar links and an Add to Calendar button) for RSVP events because, regardless of where your end-users click the RSVP button from (e.g., website or email), they will be directed to the event landing page to register for your event.
Once attendees submit the RSVP form, there will be an Add to Calendar button available within the confirmation message.
To learn more about RSVP buttons, see our help doc here.
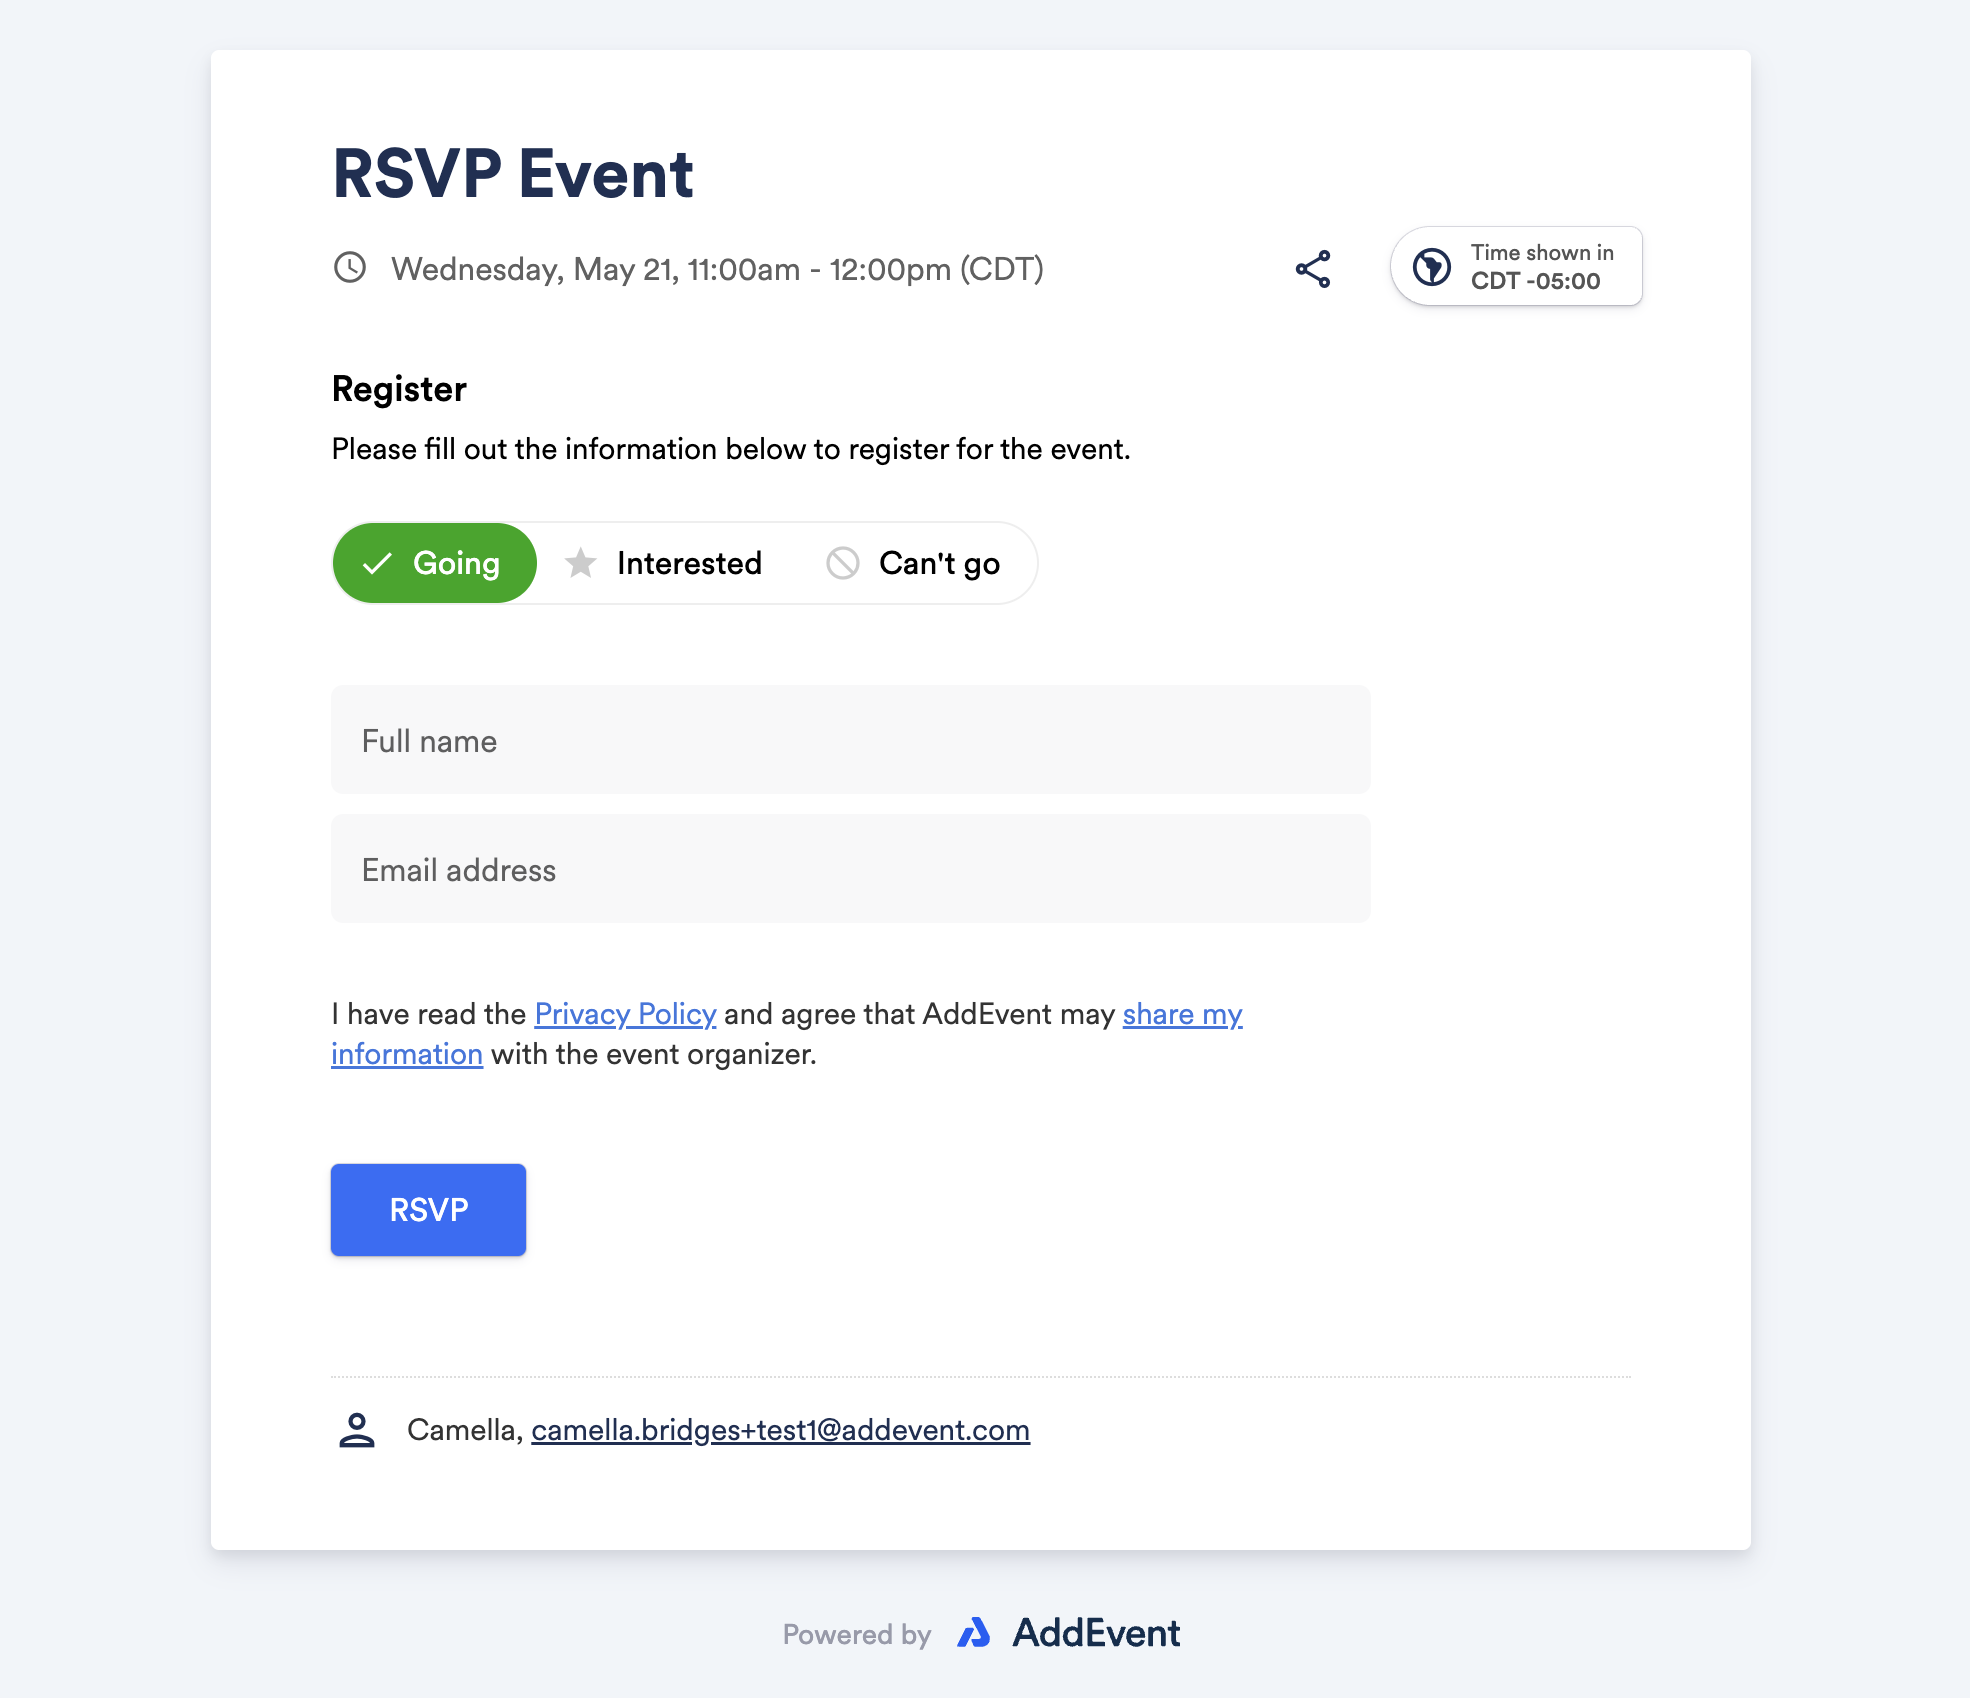
Registering for the Event
Here, we will briefly review the RSVP process from the attendee's perspective. Once a user clicks on the RSVP button and is redirected to your event landing page, they are presented with the event details.
To register for your event, your end-users will do the following:
- Click the RSVP button to load the registration form.
- The event attendees can fill out the form and click the RSVP button to submit their response.
- They will then be presented with an Add to Calendar button to allow them to add your event to their calendar.
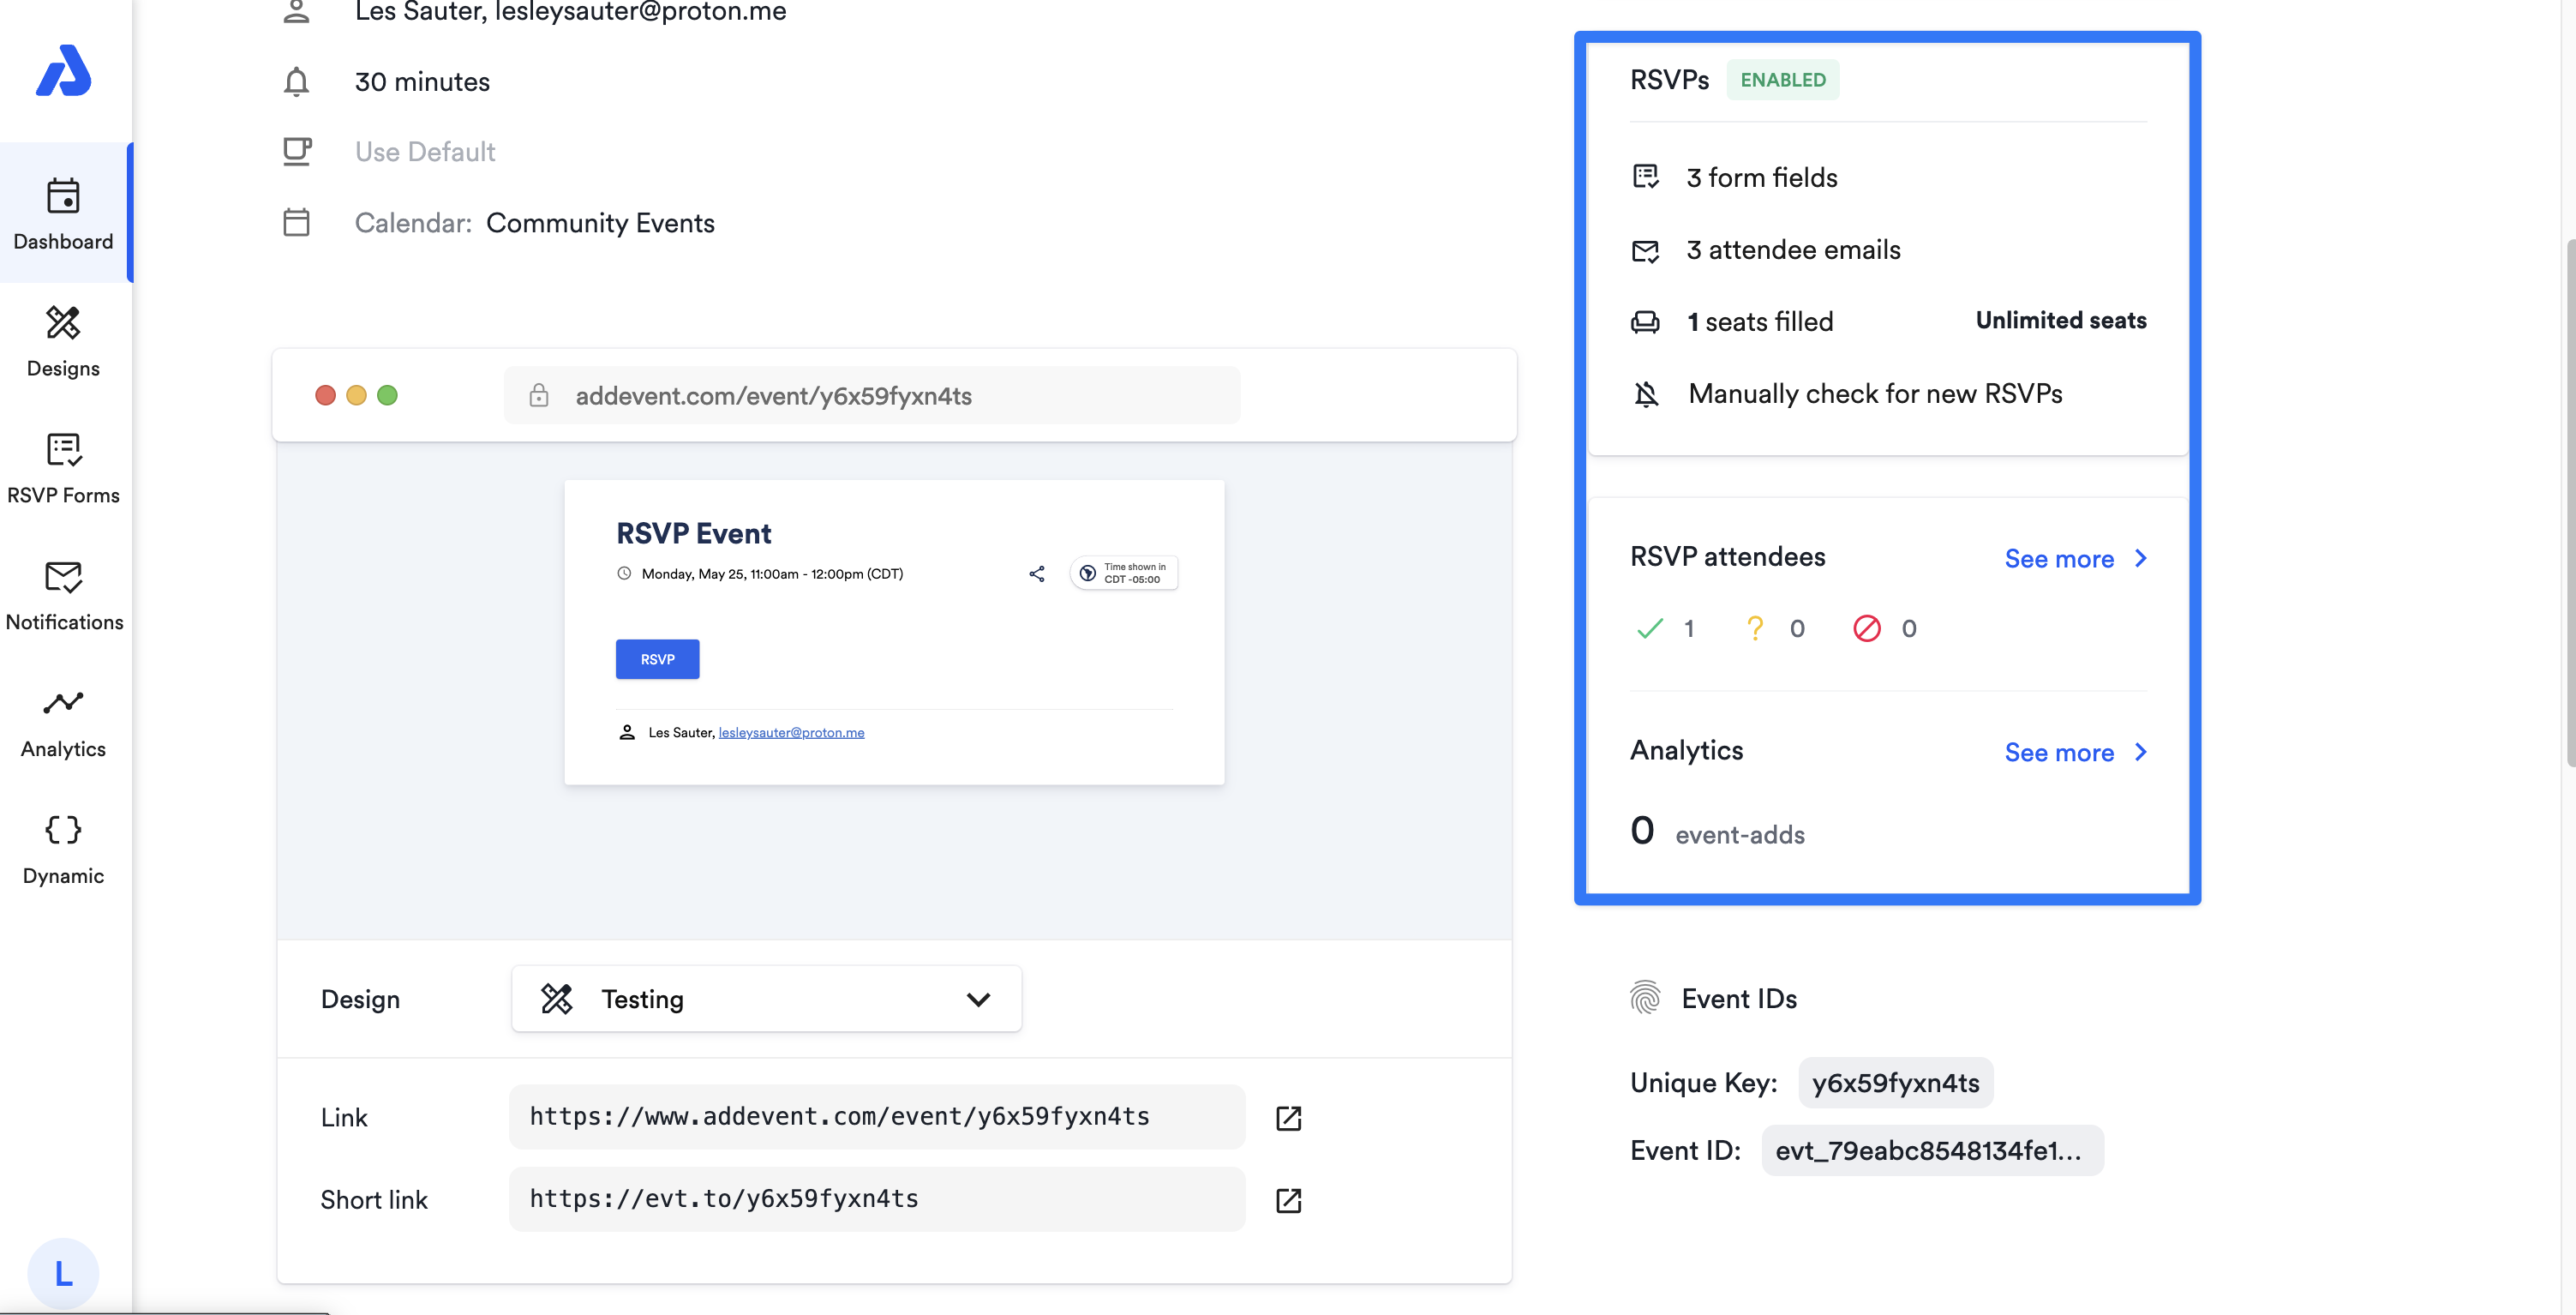
Track Your Event's Attendance and More
Now that you have shared your event, you will begin collecting RSVP responses from your attendees.
You can check the RSVP attendee page to:
-
Review your list of attendee responses
-
Send update emails to your RSVP attendees
-
Download a .CSV file of your attendee list
-
Delete registered attendees or update attendee responses on their behalf
-
View the event's analytics
Watch this Tutorial!
There is much more that could be done with your RSVP event. Take a look at our RSVP Events help doc to check out all of the other RSVP event possibilities!
Updated 2 months ago