What to Expect with AddEvent 2.0
Welcome to AddEvent 2.0! We’ve redesigned the platform to make it faster, more intuitive, and easier to customize your events and calendars. This guide will walk you through the new interface and features.
New Navigation Experience
We’ve redesigned navigation in AddEvent 2.0 to make it faster and easier to find what you need.
From Top to the Left-Hand Side of the Screen
In AddEvent 1.0, navigation lived at the top of the screen. In 2.0, it’s been moved to the left-hand side, giving you more space to work while keeping key features within easy reach.
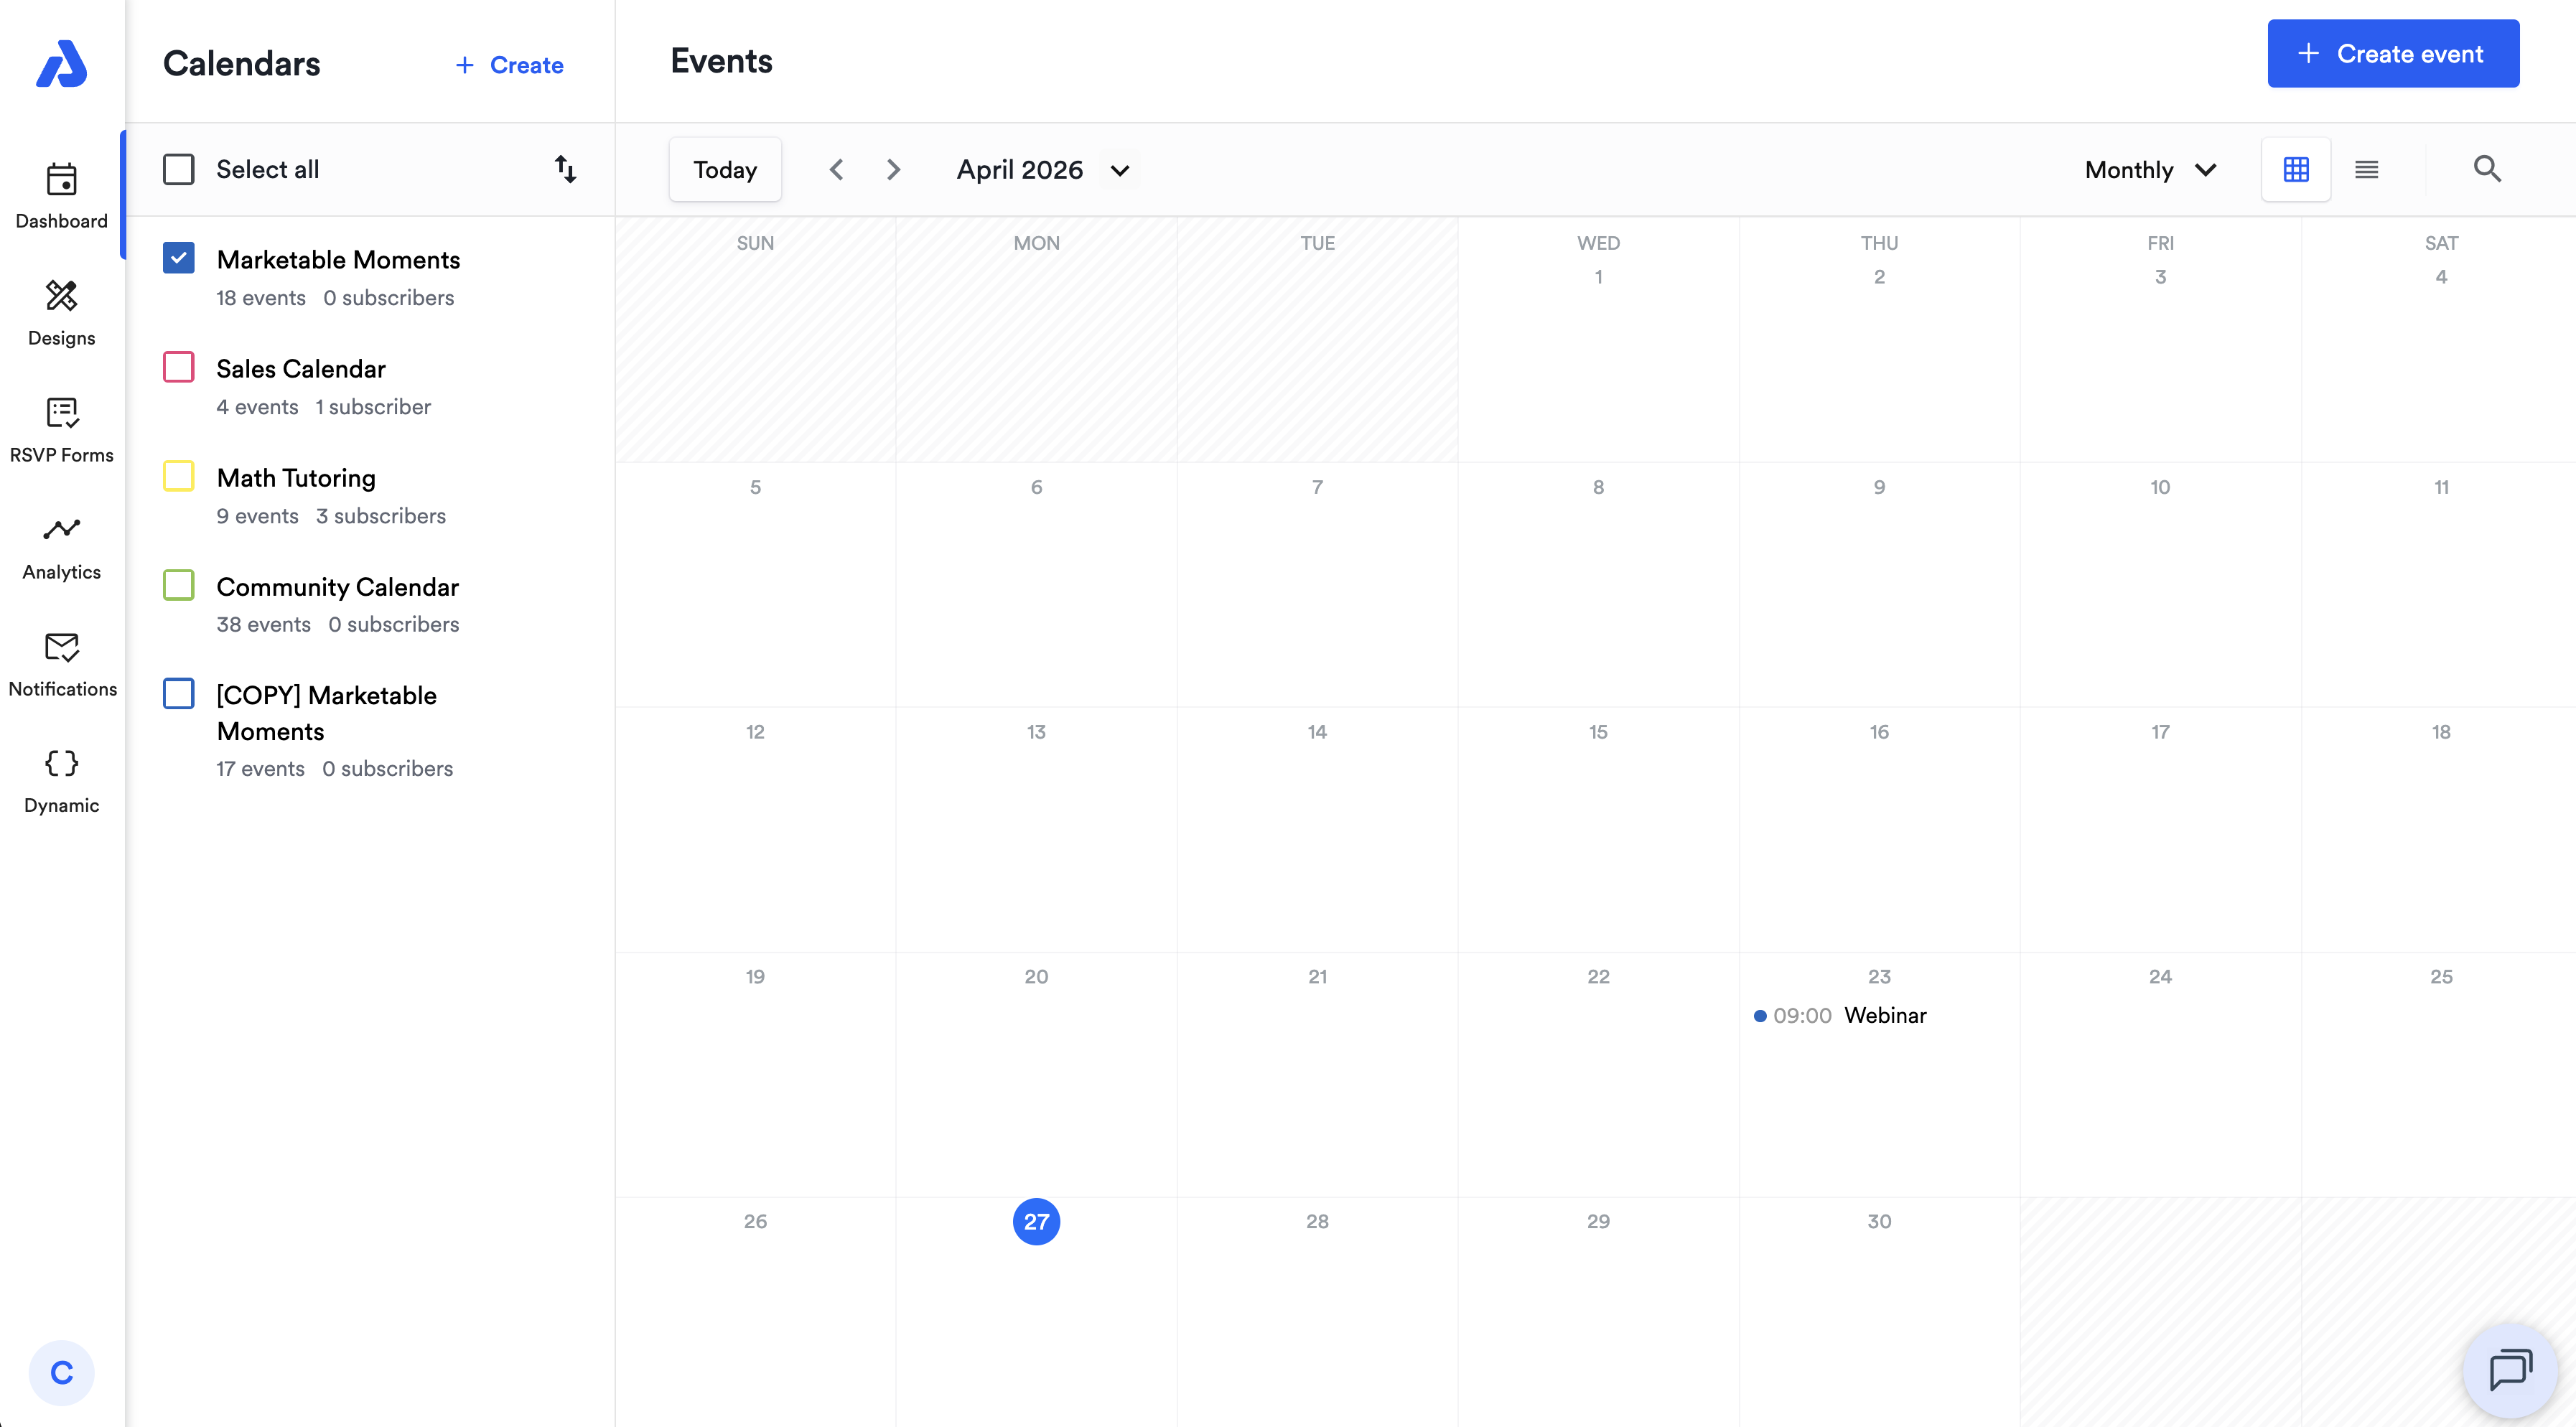
Quick Access Navigation
At the top of the new navigation bar, you’ll see four tabs that provide direct access to the most-used areas of AddEvent:
- Dashboard: Manage your calendars and events
- Designs: Add your branding to your event landing pages, calendar landing pages, and embeddable calendar with no-code design templates
- RSVP Forms: Build and manage RSVP forms and automated emails notifications for RSVP events
- Real-Time Analytics: Track calendar and event performance in real-time
- Dynamic Add to Calendar: Create personalized calendar events on the fly from your system's data
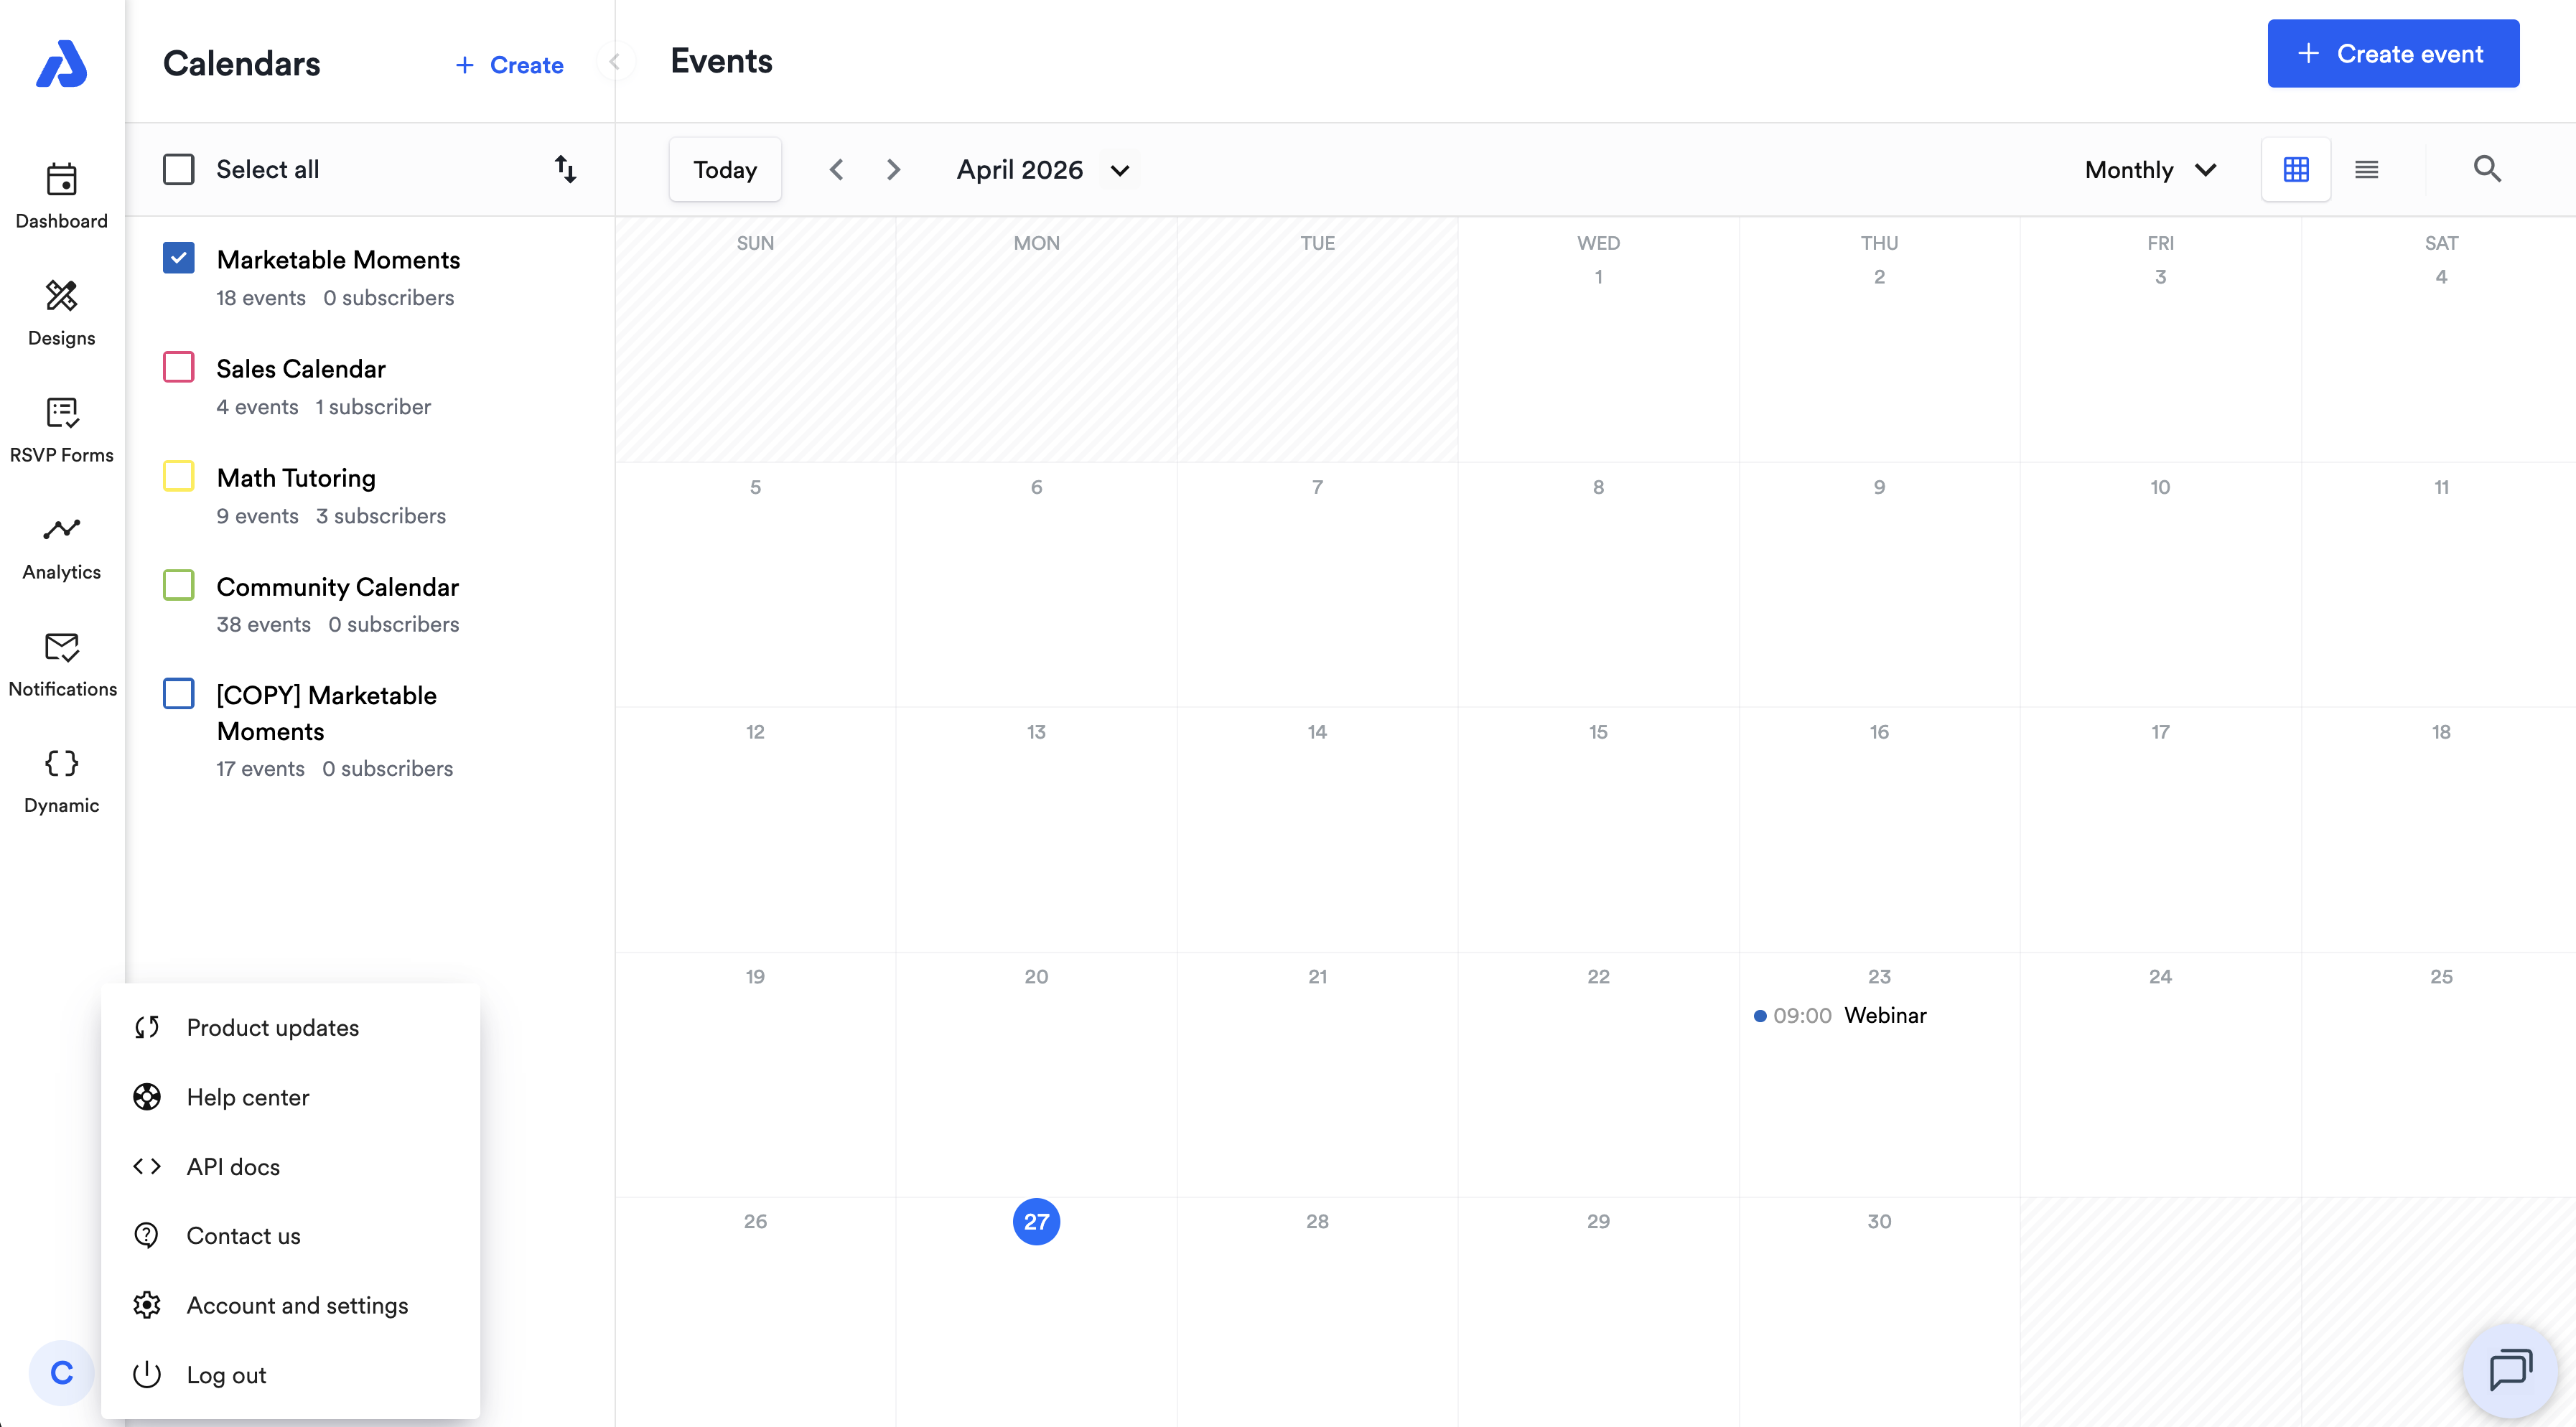
New Menu
At the bottom of the navigation bar, you’ll find a streamlined menu with everything else you might need including links to product updates, help docs, API docs, as well as links to contact support and to manage your account & billing related questions.
AddEvent 2.0 Dashboard
Here are some new (or moved) things you’ll find in your AddEvent 2.0 Dashboard.
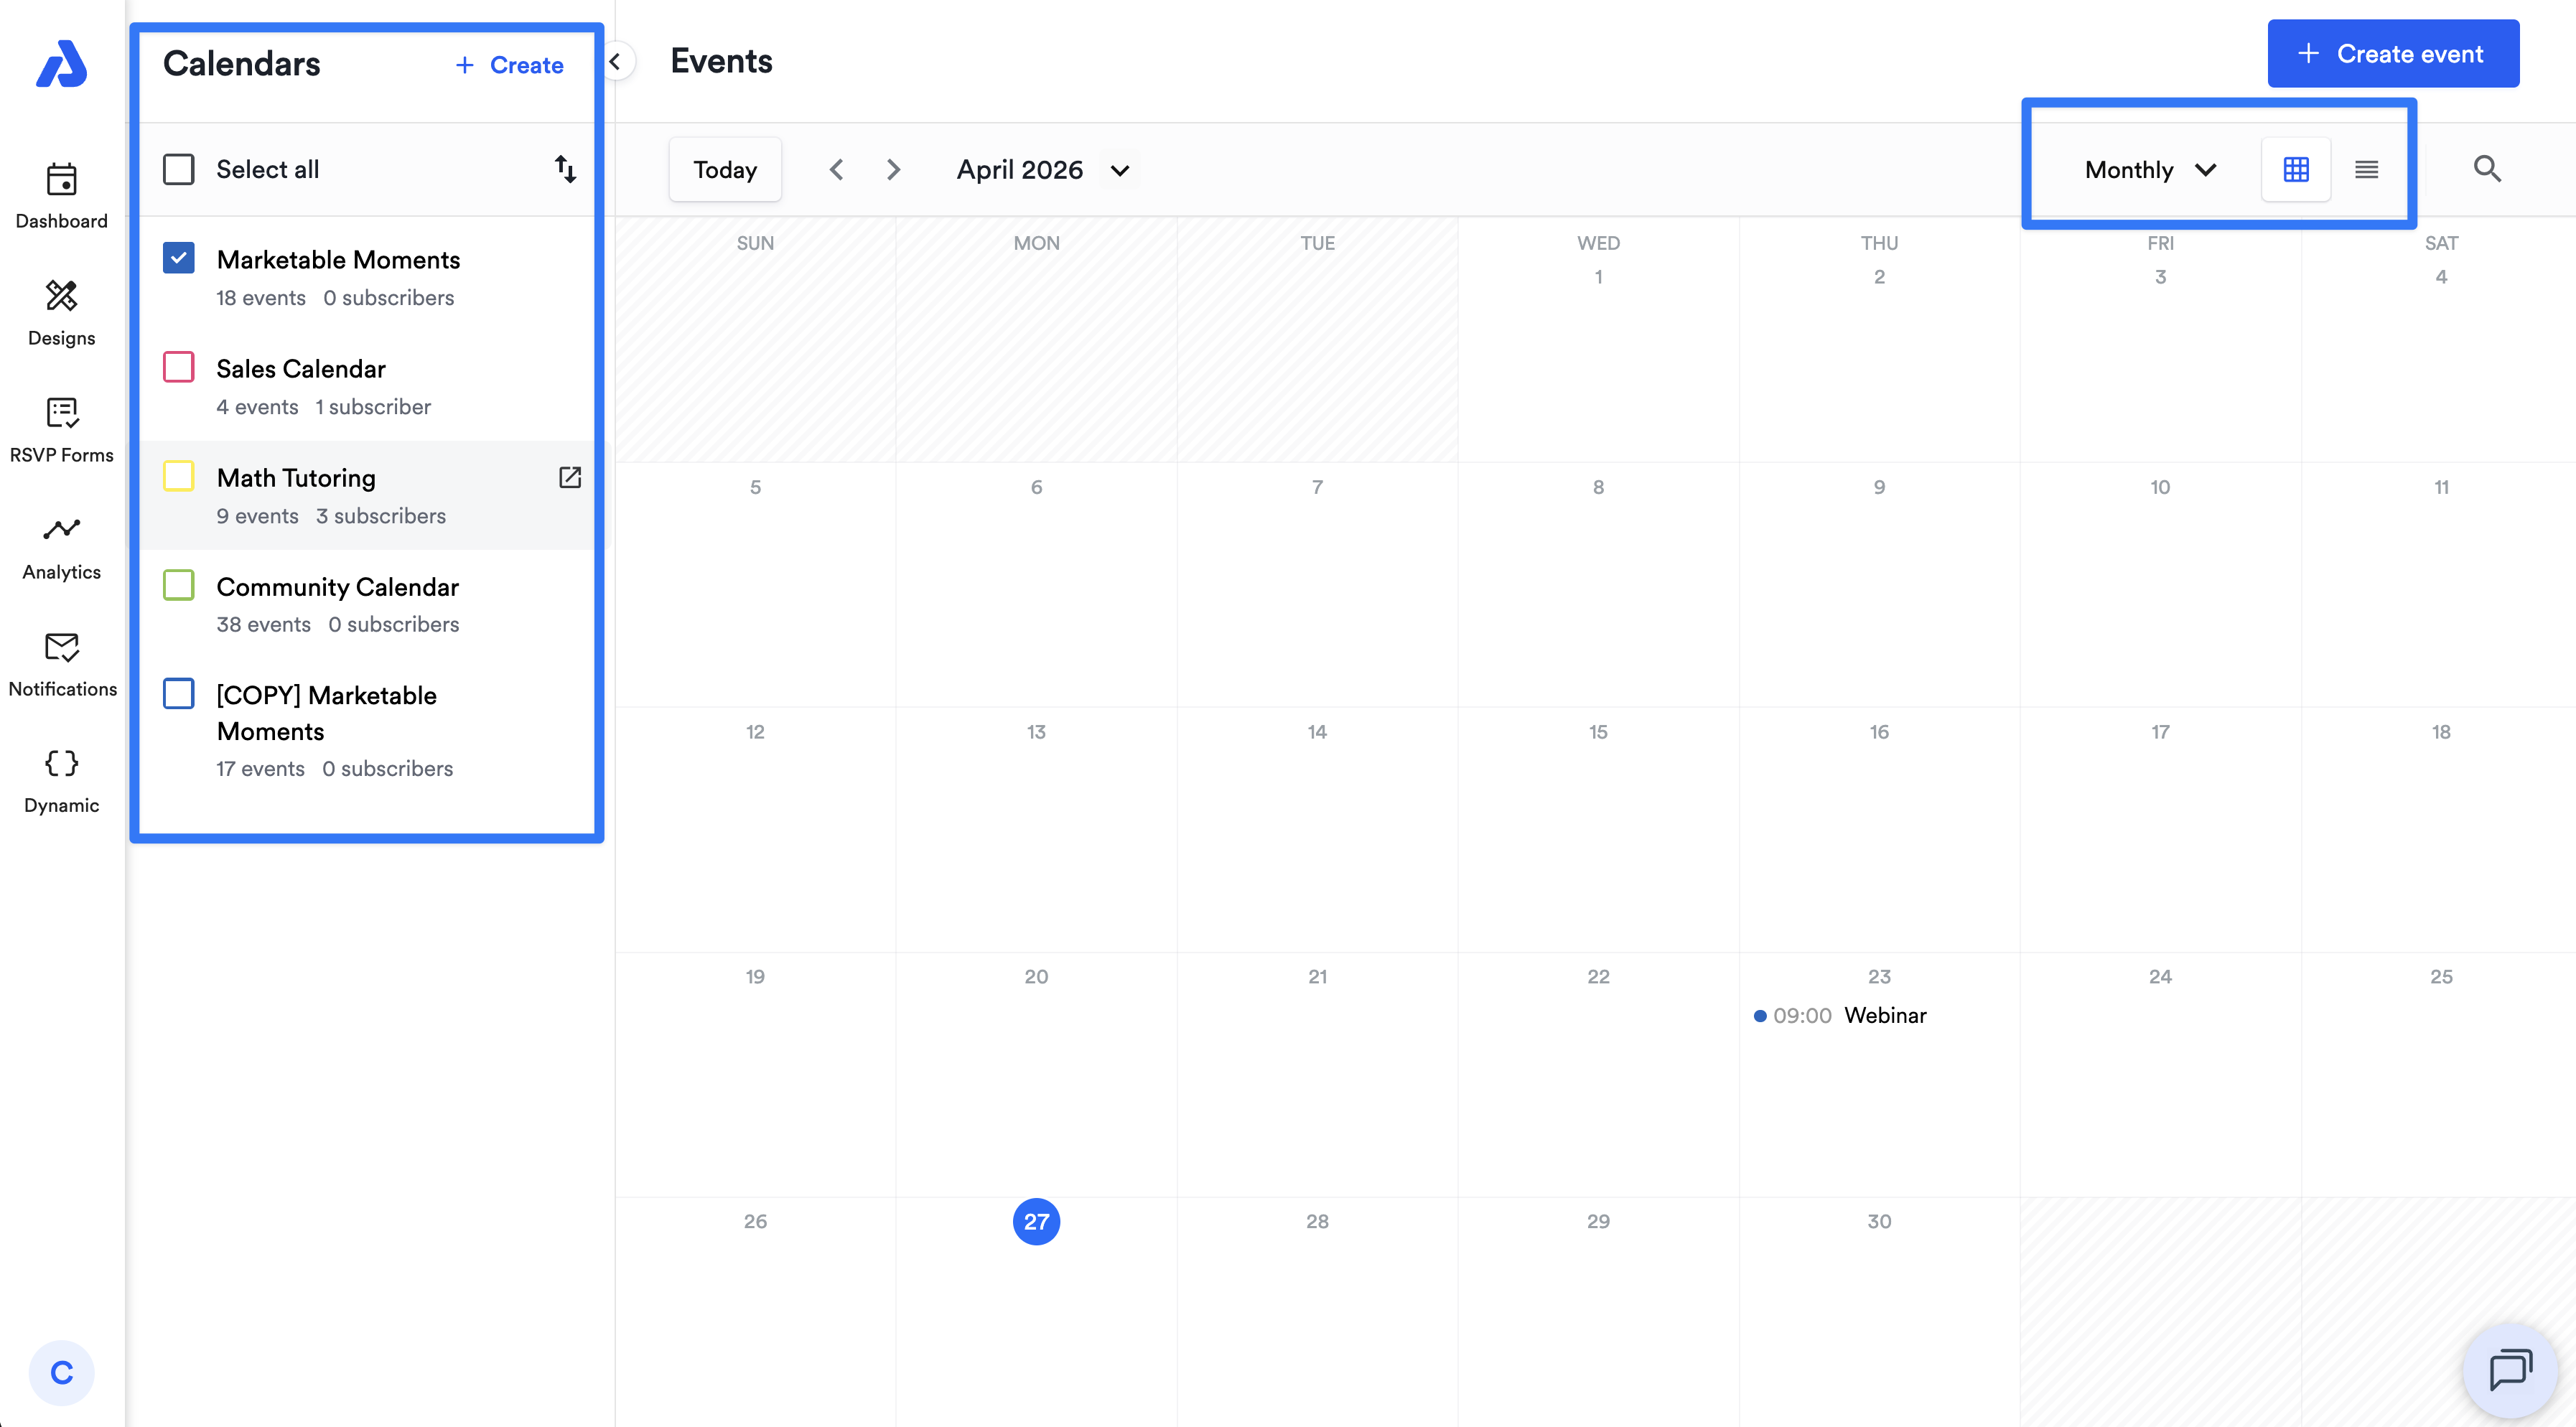
Calendars
- View events on multiple calendars at a time.
- Easily discover and share calendars via the public calendar landing page’s quick links.
- Easily view the number of events and subscribers on each calendar at a glance.
- Custom color palettes are now available for calendars and their events and colors can be set at the account level in your Account Settings.
- You’ll find additional sorting options for your calendars in the Dashboard.
- You may also notice a refreshed monthly view design, as well as a new weekly view option.
Events
You’ll also notice updated icons and labels for recurring events, event series, and RSVP events.
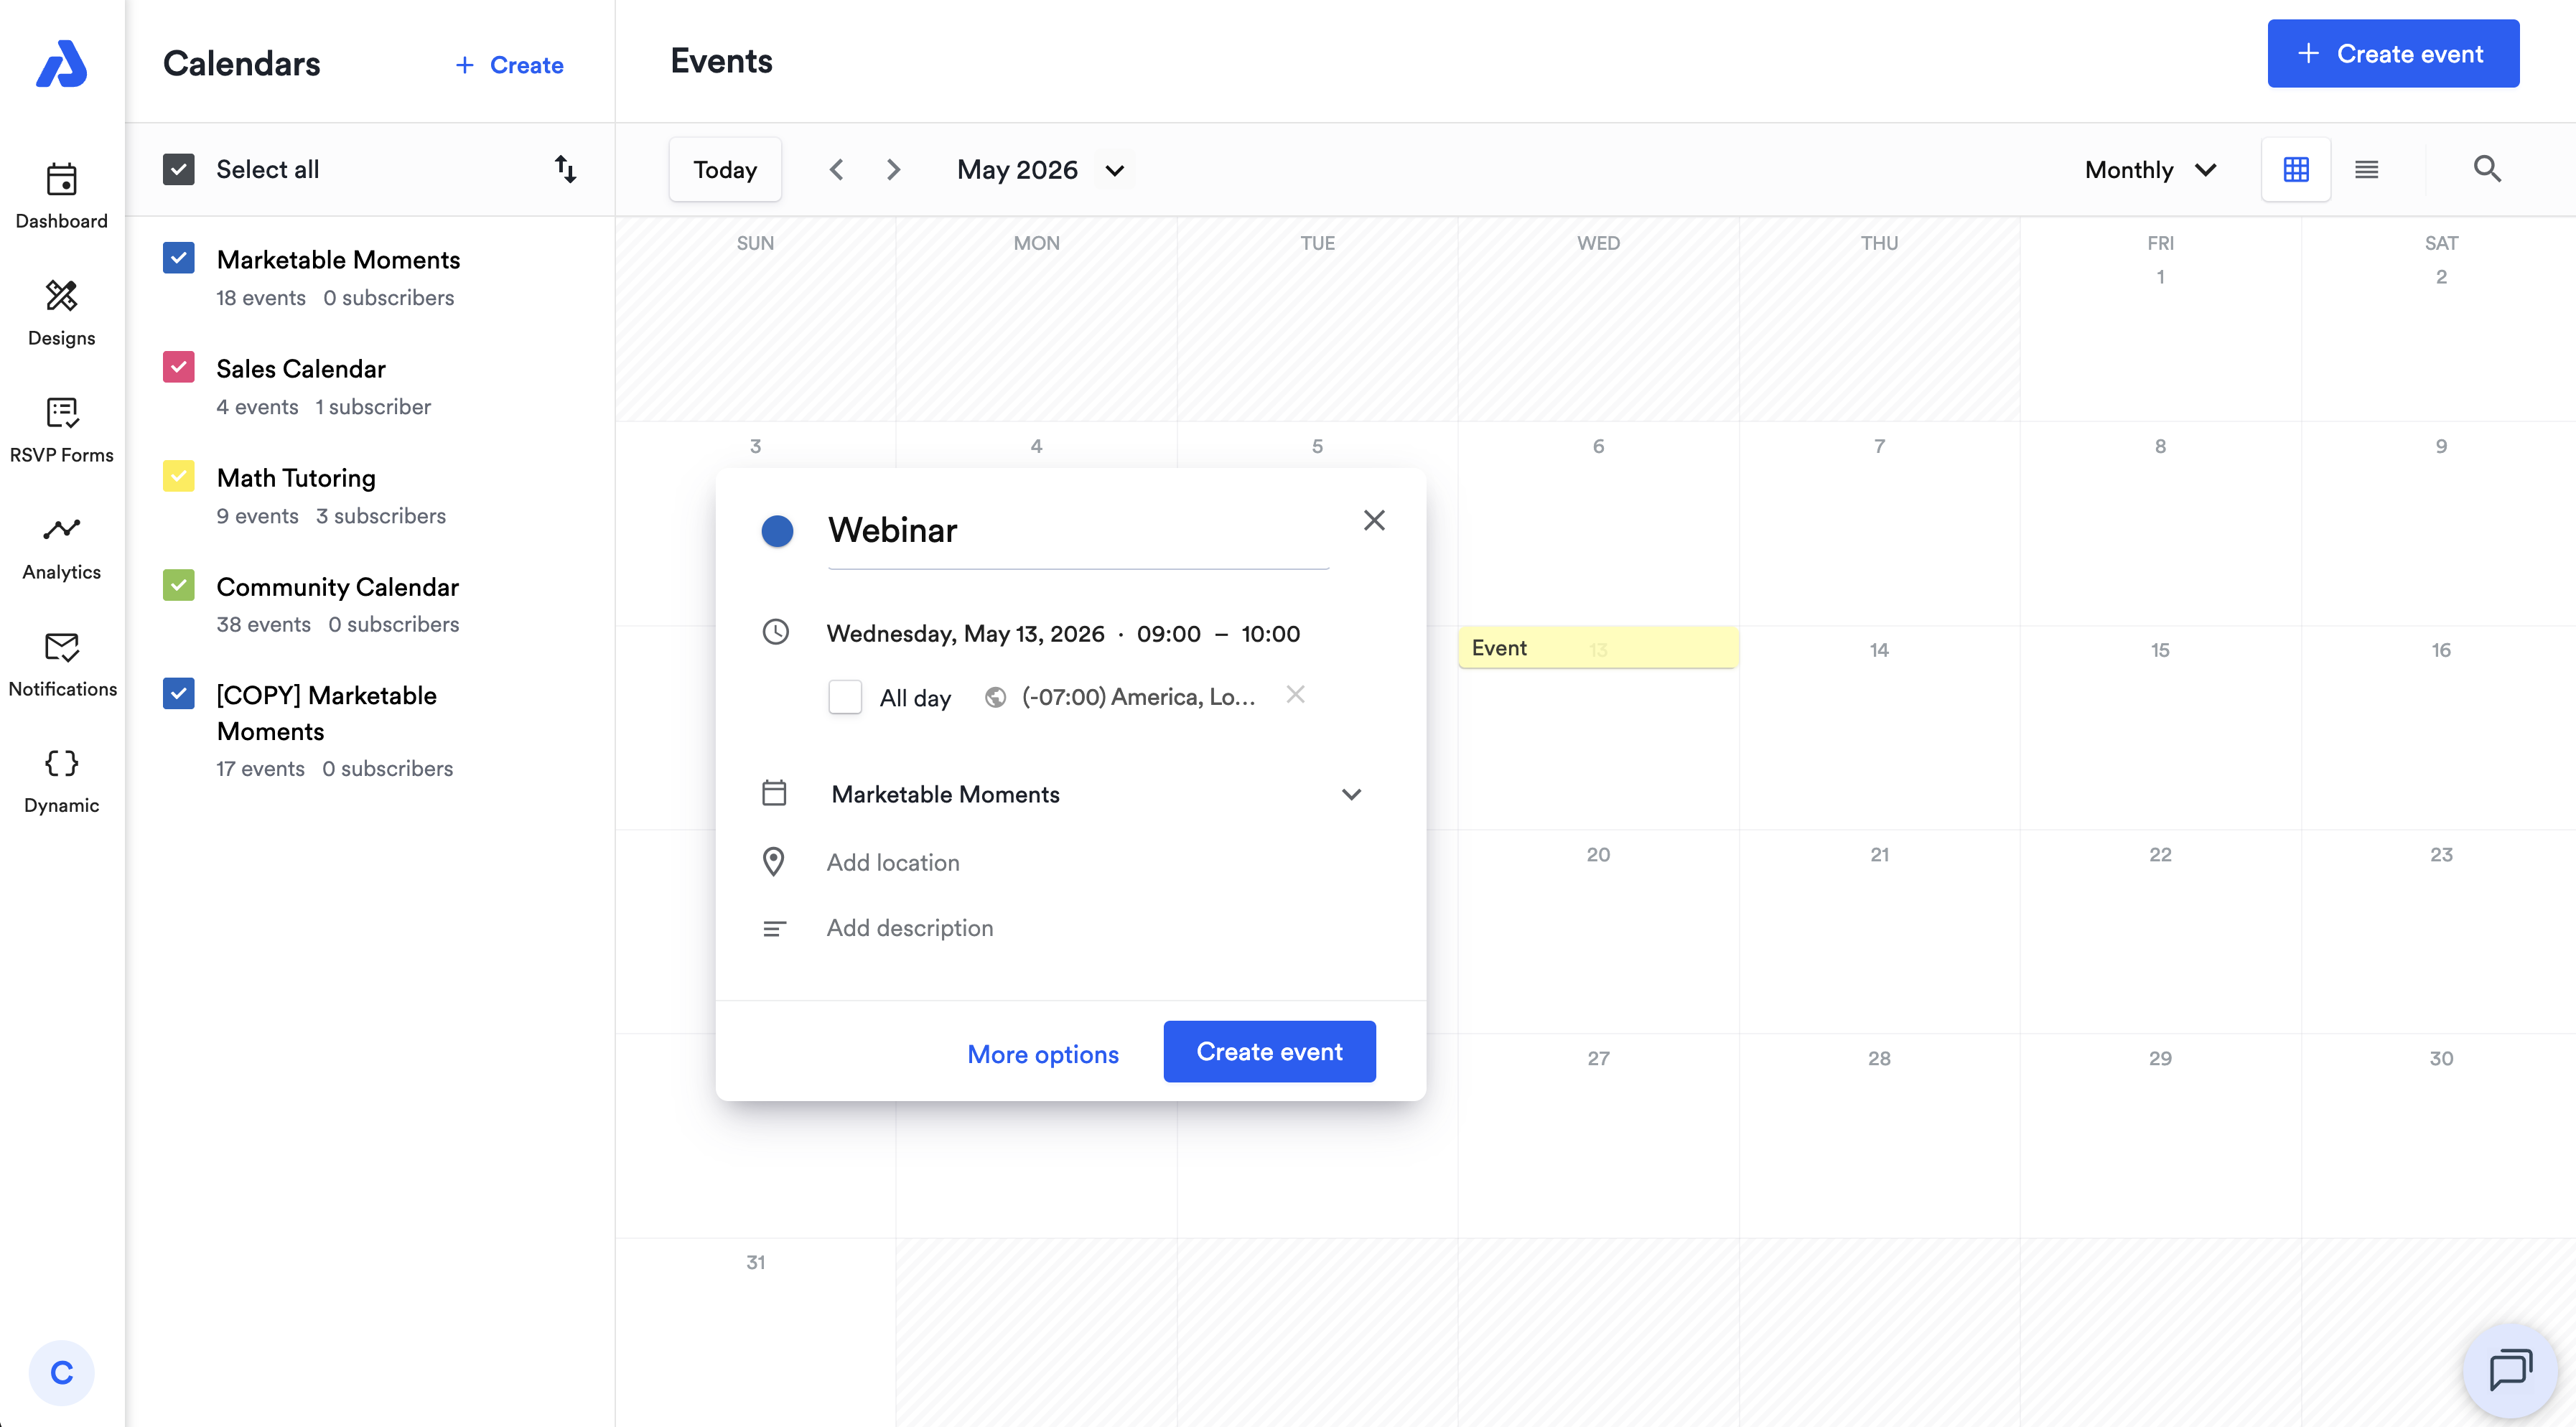
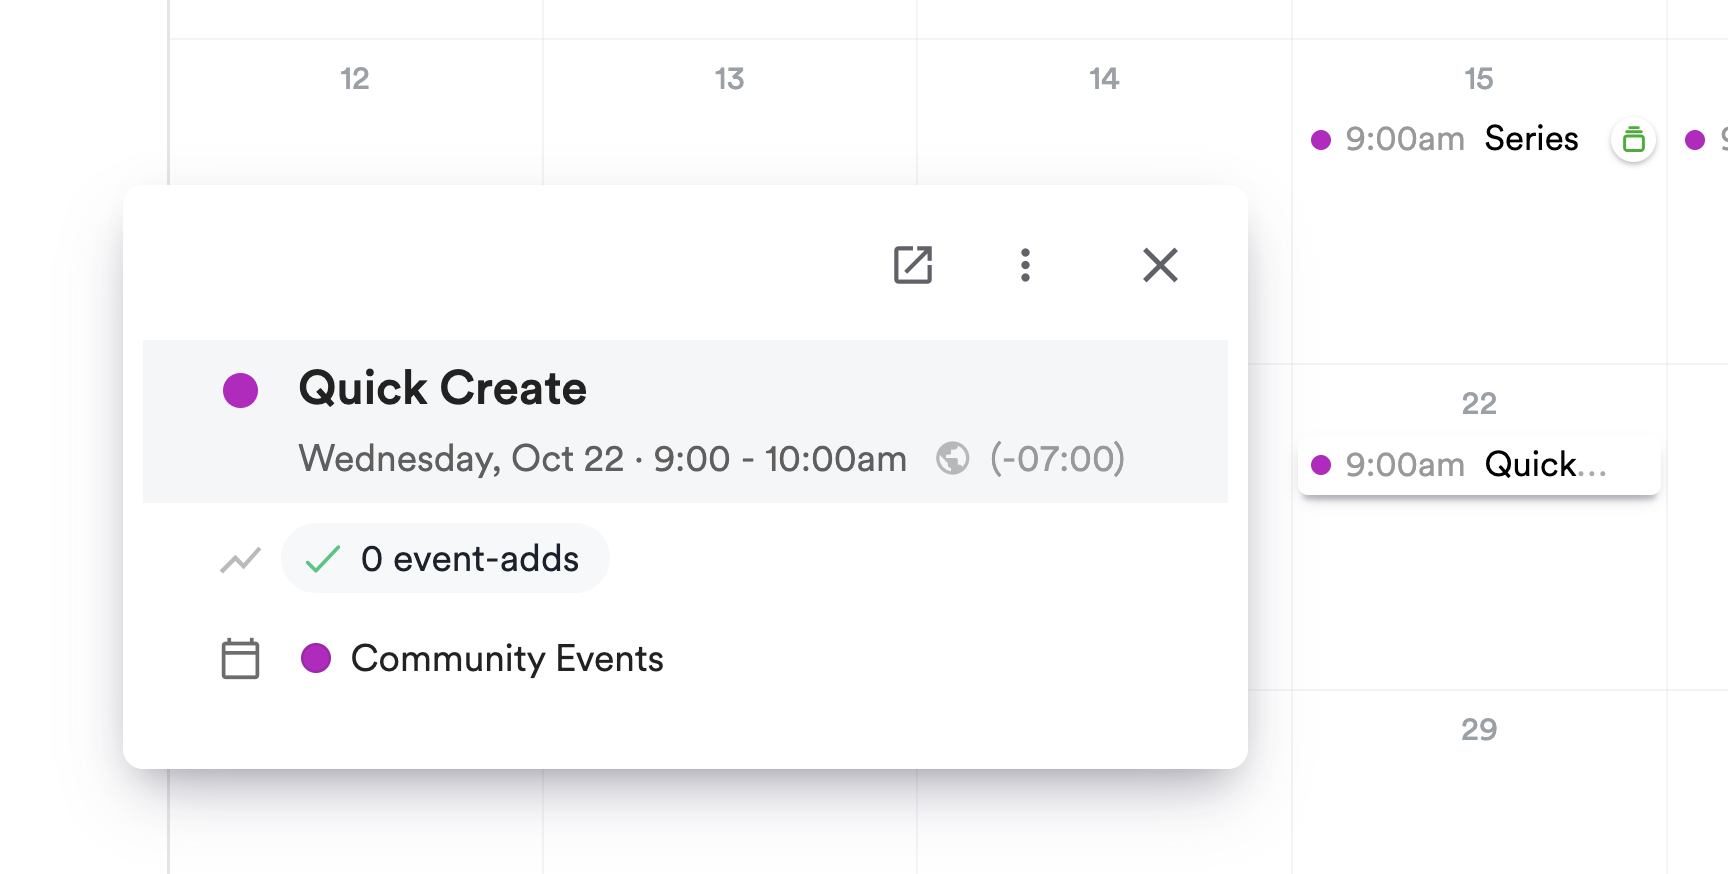
Quick Create
You can create events even faster from the calendar view on the Dashboard with new fields available such as timezone, description, and location.
Event Modals & Event Details Page
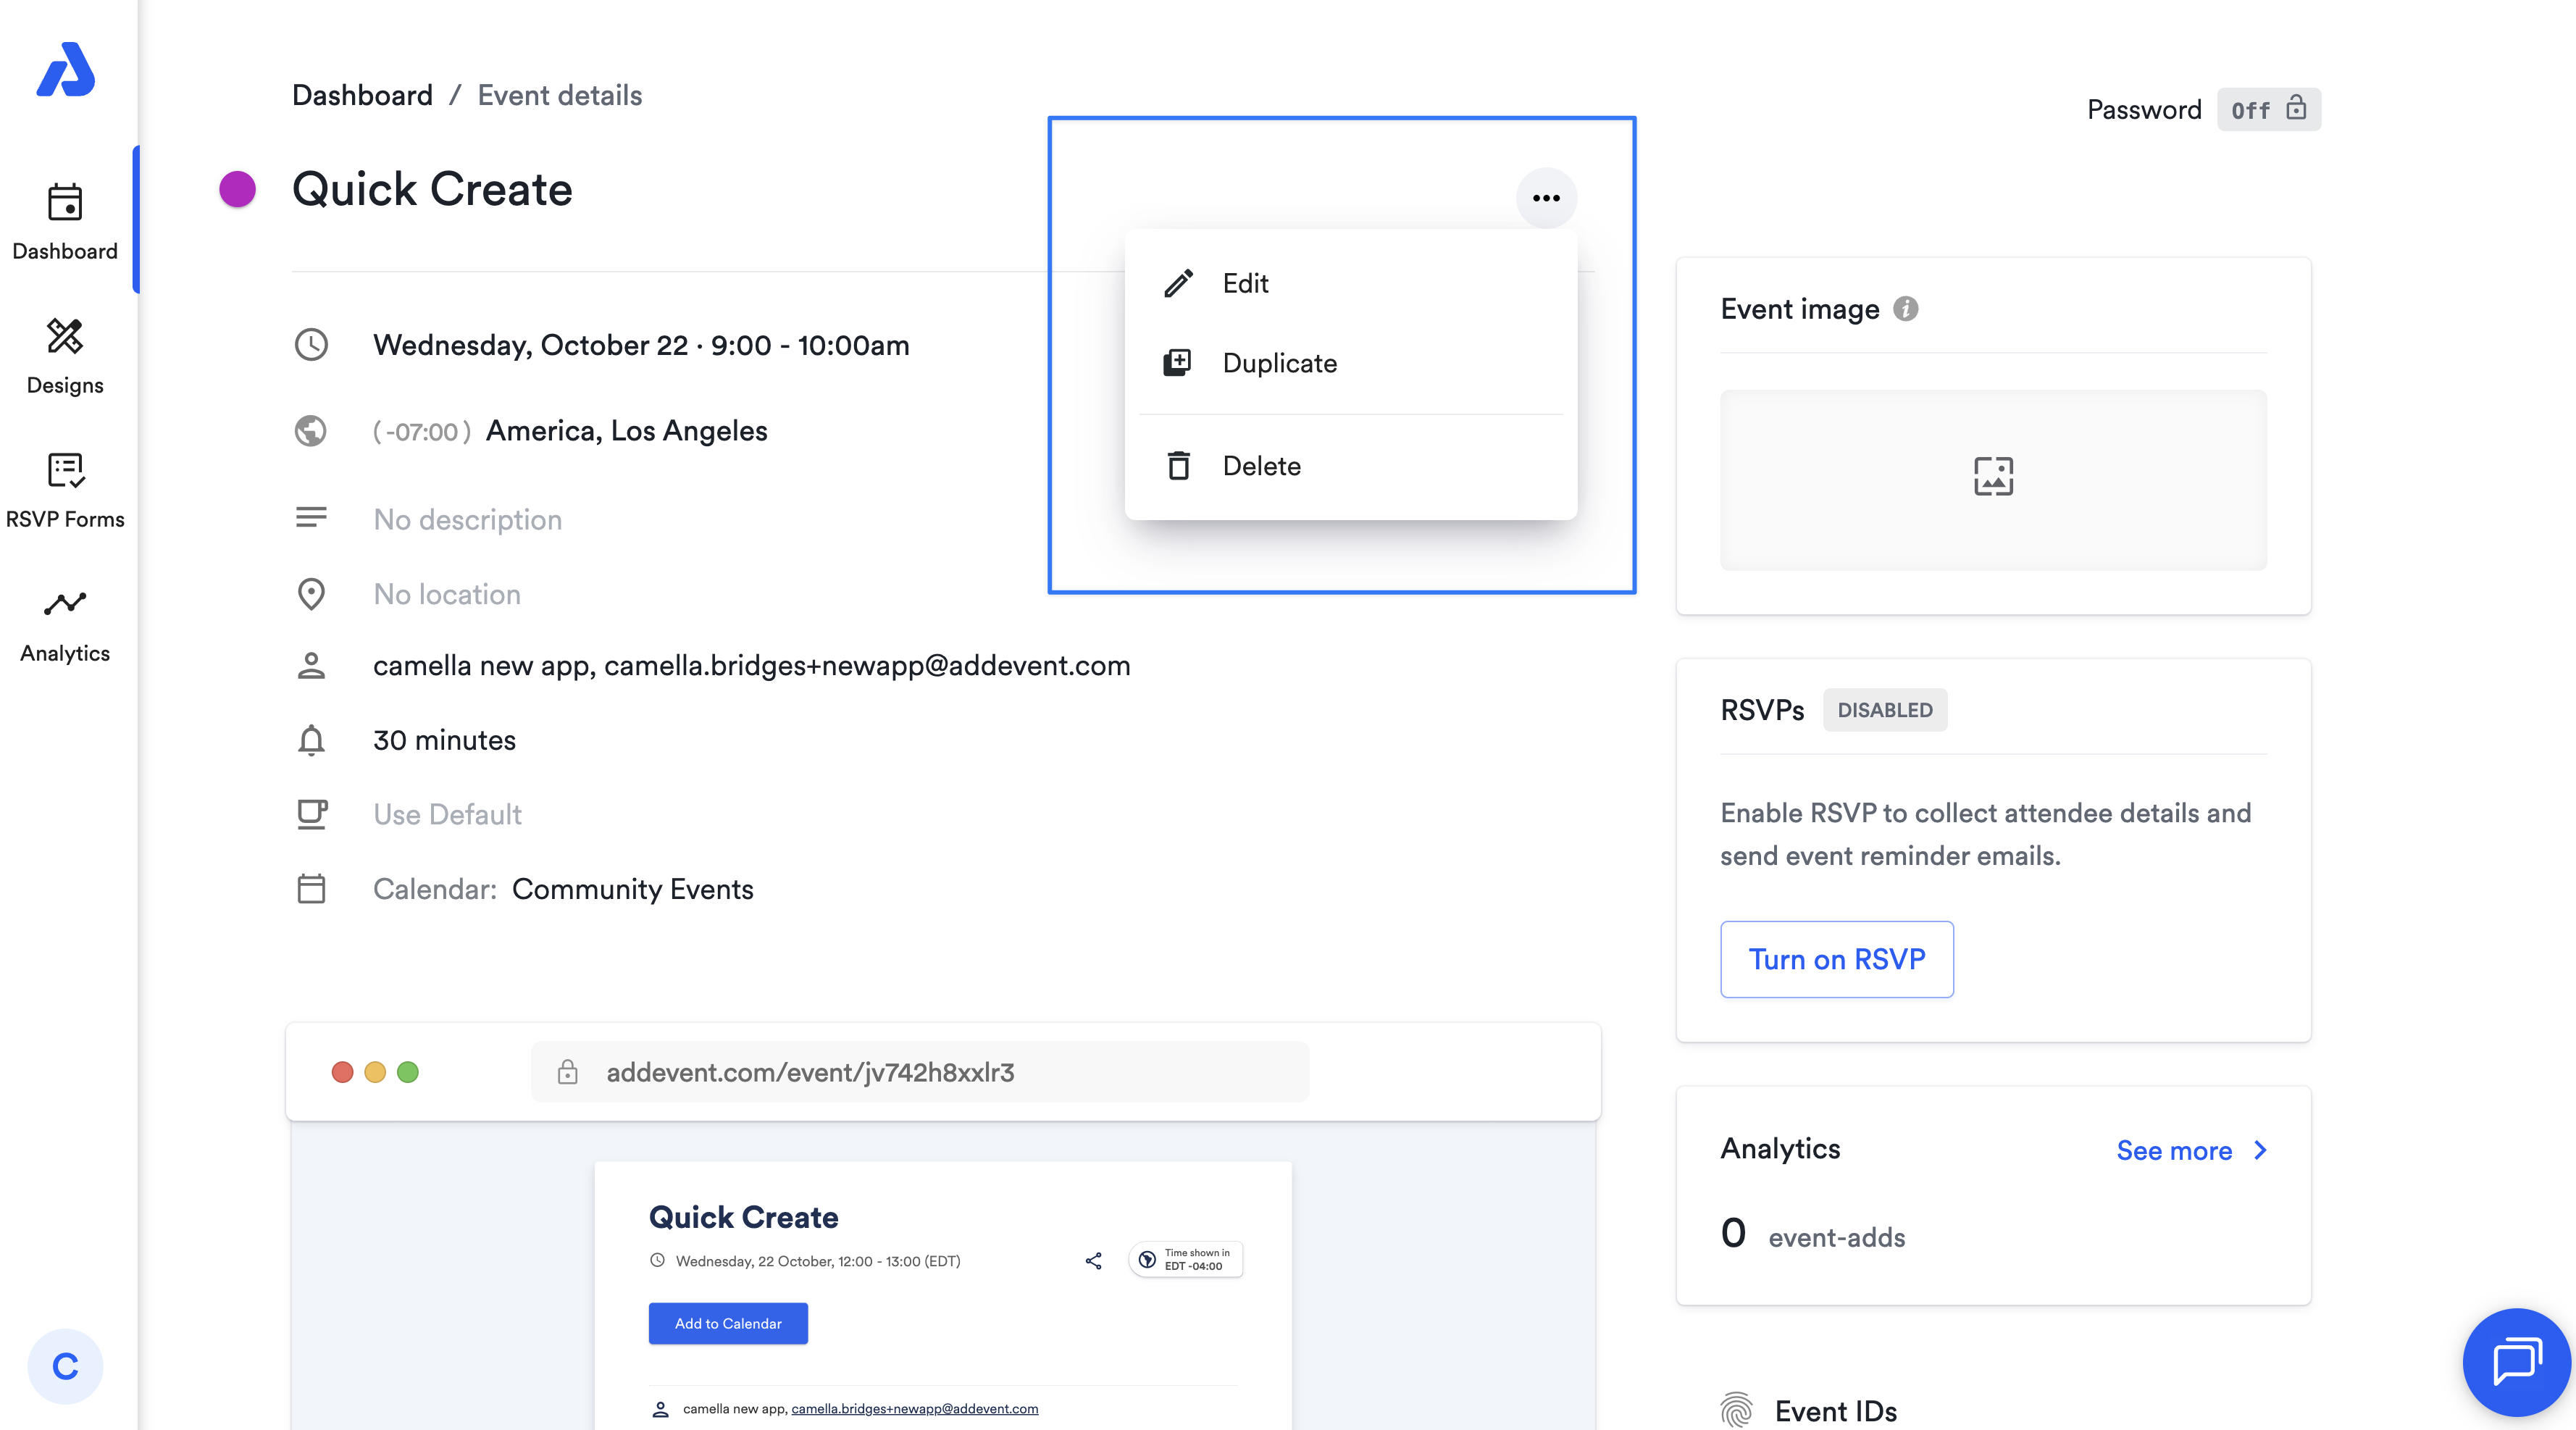
To open the event details page, you can click on the event's title.
In the event modal on the Dashboard, you’ll see a link to the public event landing page, as well as three menu items to Edit, Duplicate, or Delete the event.
Also, quick access to the public event landing page links are now only a click away.
List View
AddEvent 2.0 has combined the Schedule and All events views into one view: List view.
List view lets you easily show:
- Upcoming or past events
- Events from any particular month
- You can now set a custom date range to view events

Calendars & Subscribers
Calendars are one of AddEvent’s most powerful features, and in 2.0, they’re even easier to discover and use!
Calendar Creation & Calendar Details Page
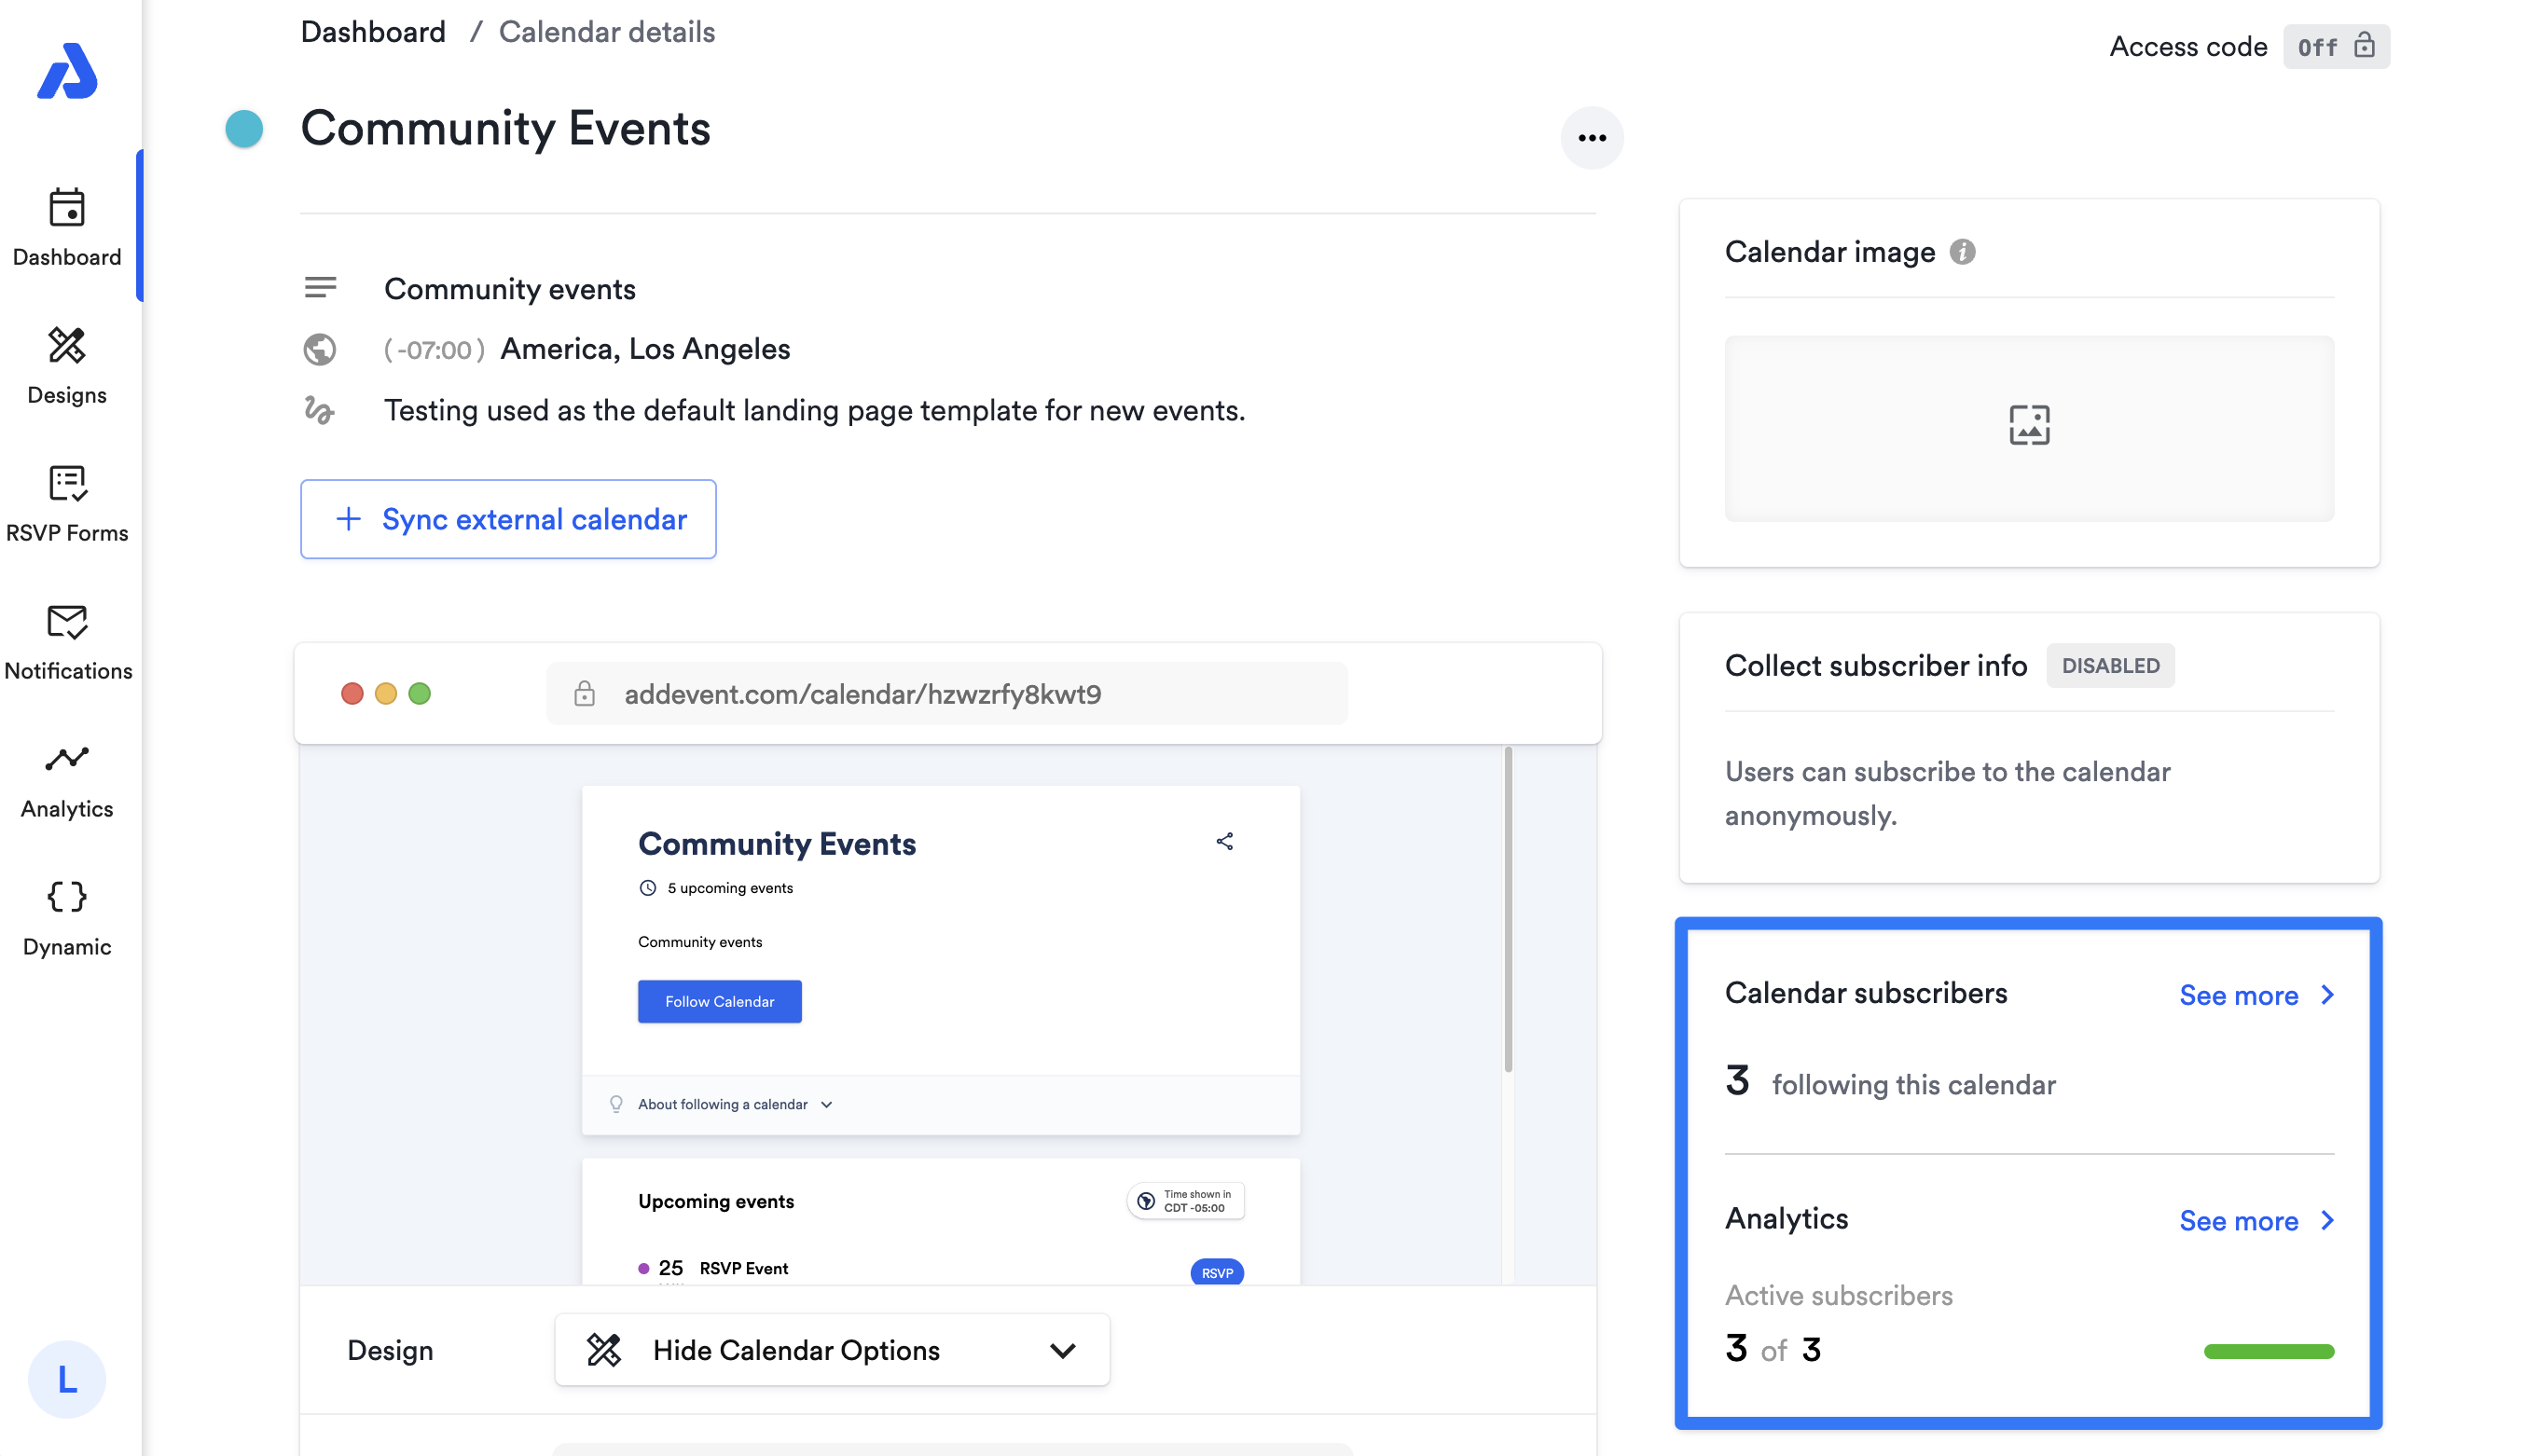
Clicking on a calendar name in the Dashboard will open its dedicated calendar details page, where you can review sharing options.
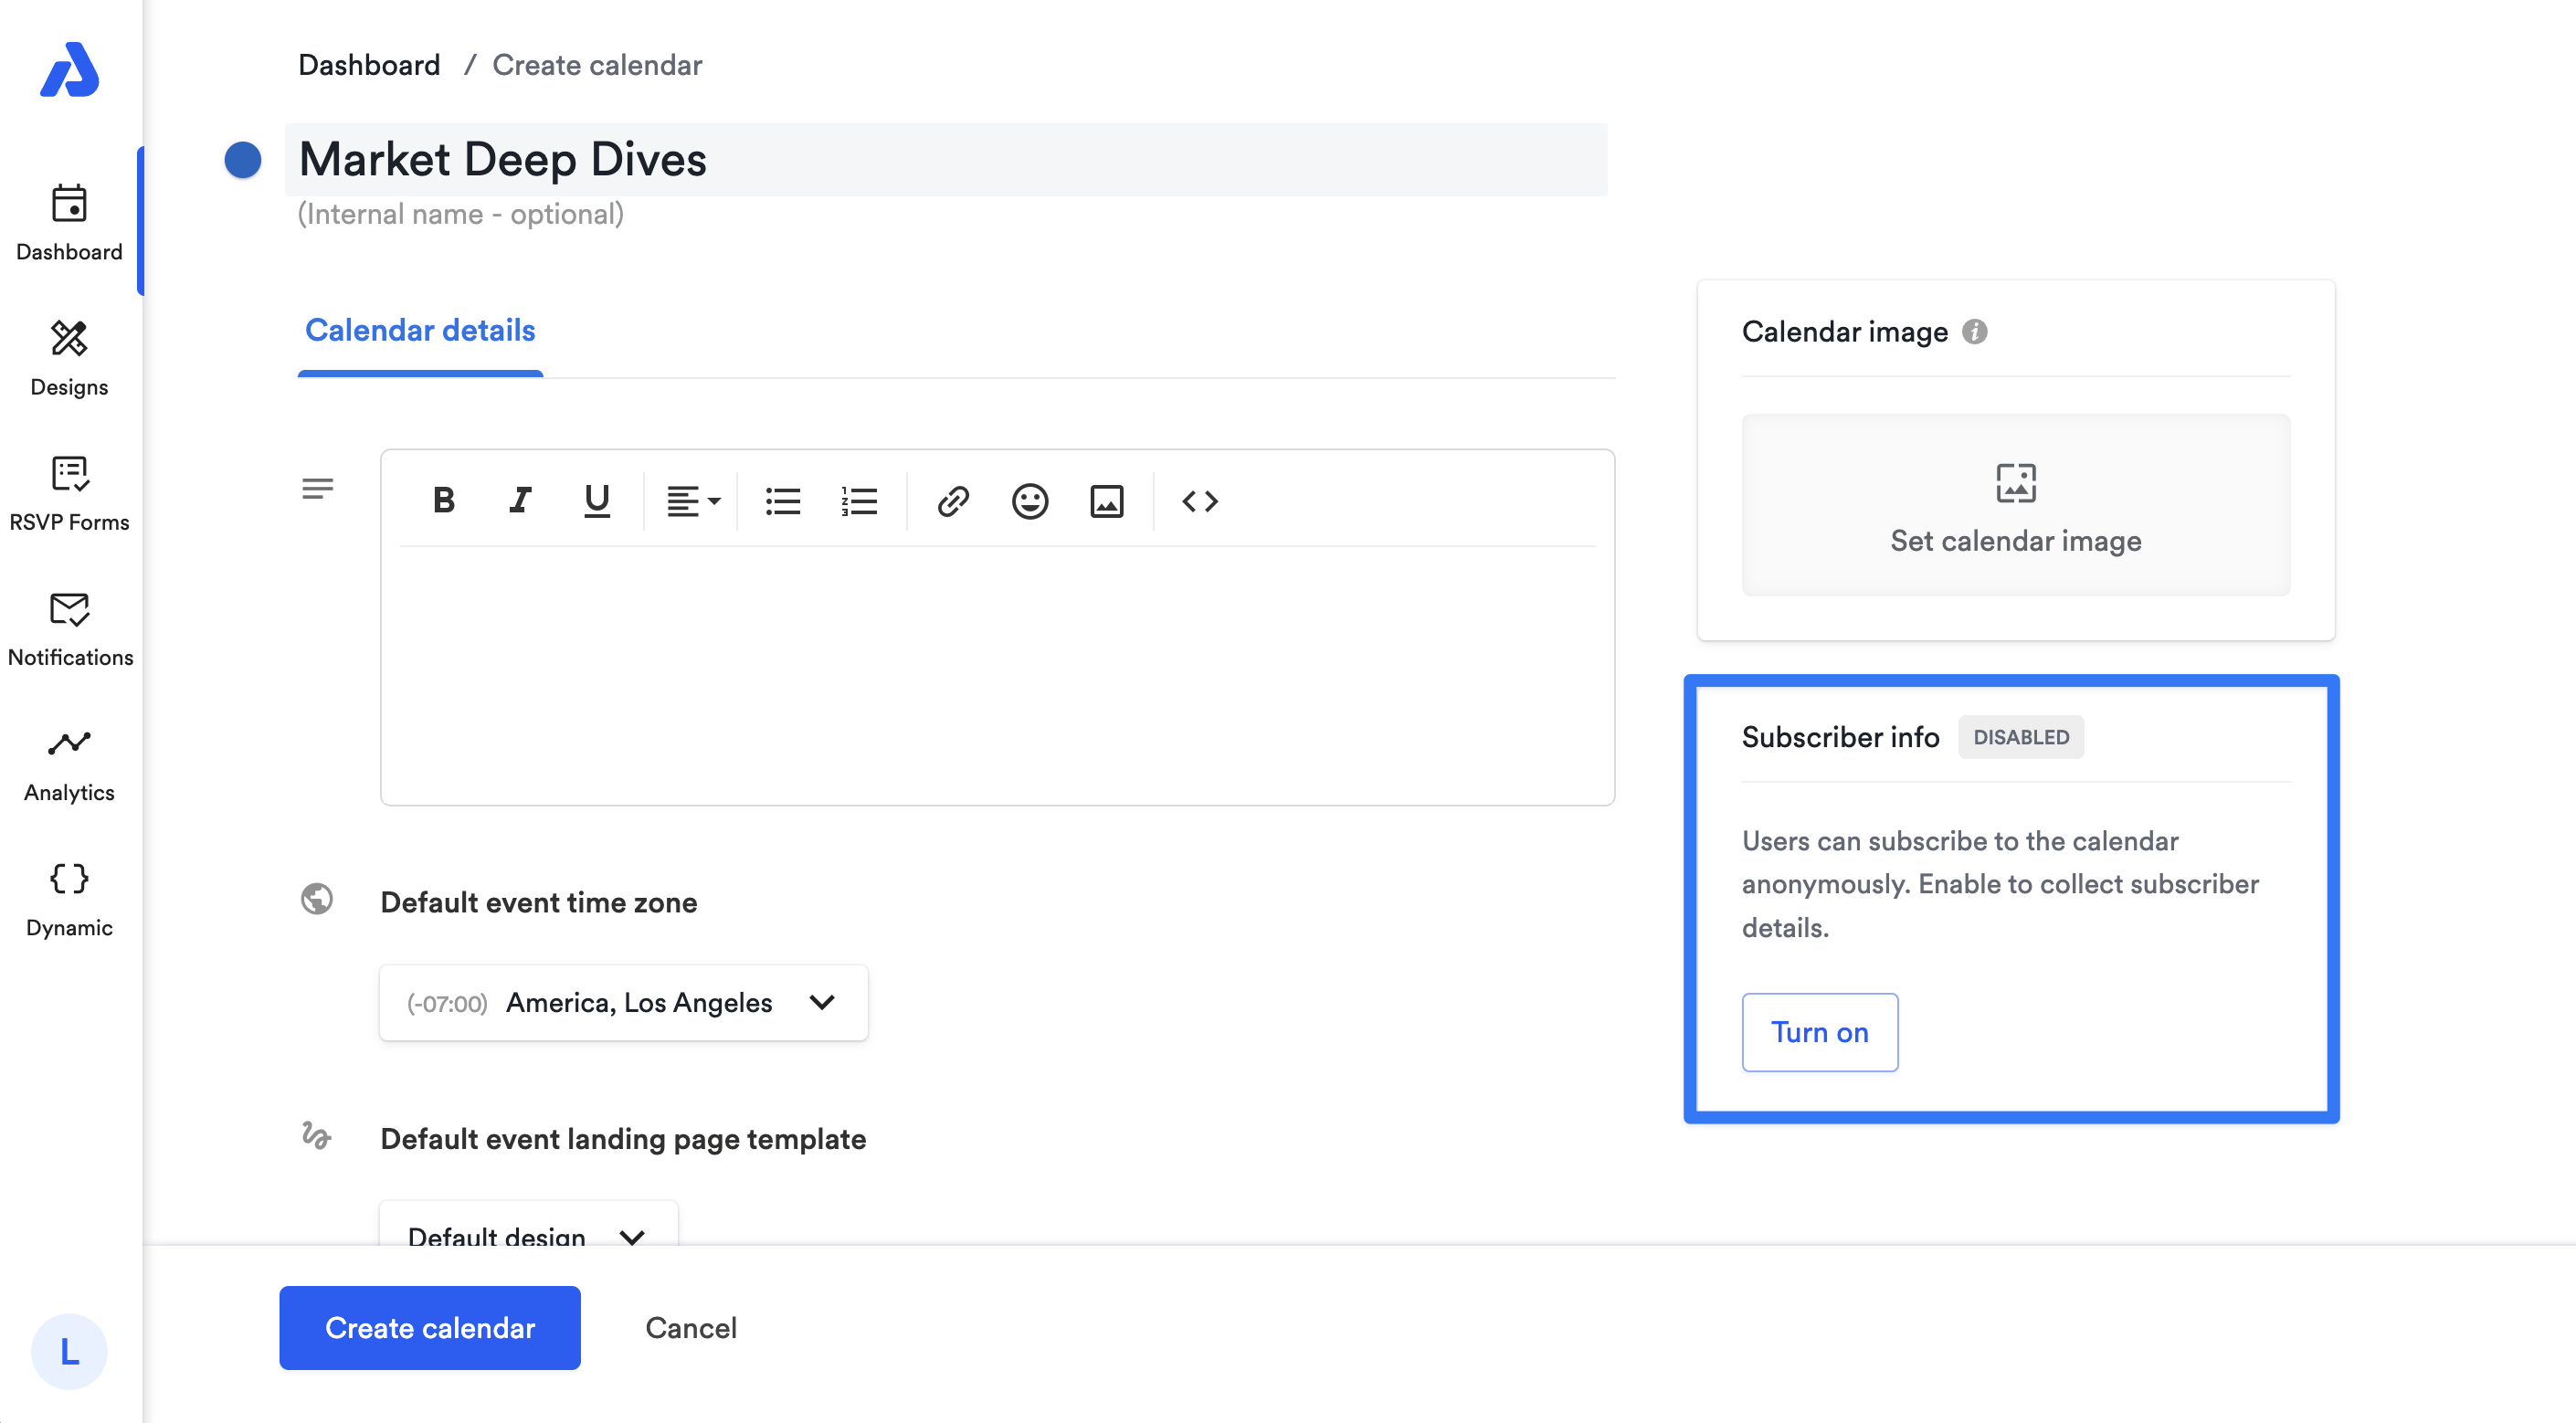
While creating and editing calendars is similar in AddEvent 1.0, there’s now a more prominent option to turn on collecting Subscriber info in the right-hand sidebar.
Analytics are located right below the Subscriber Info section on the calendar details page. Clicking into Analytics from the details page provides direct access to a calendar’s detailed analytics, removing the need to open the Analytics tab, and then select your calendar from the list.
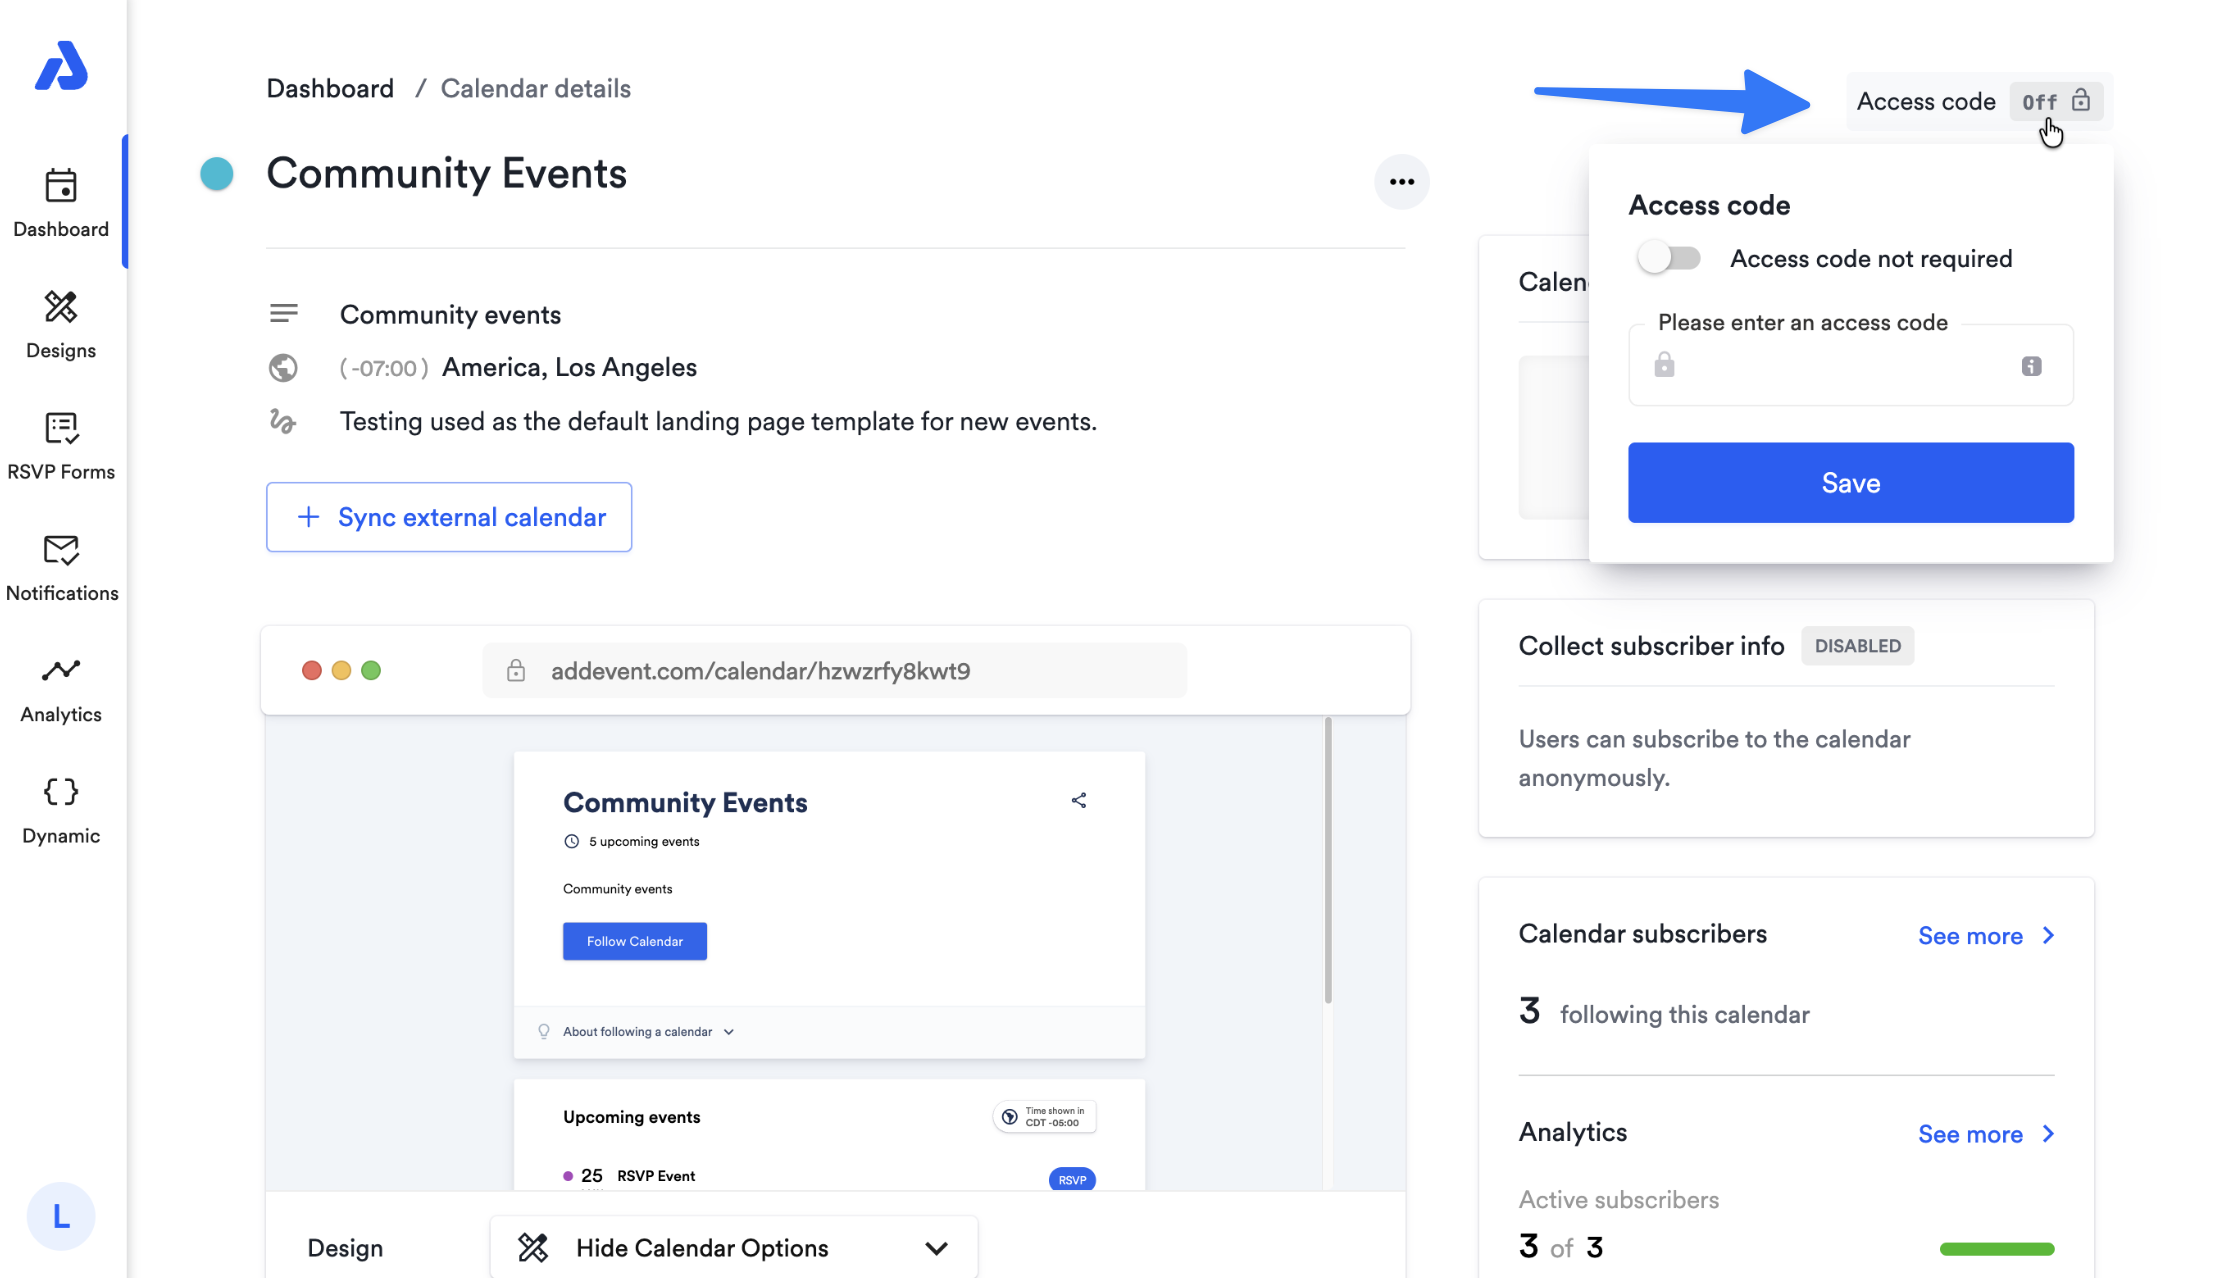
Access codes for the calendar’s public landing page and embeddable calendar are now located in the top-right corner:
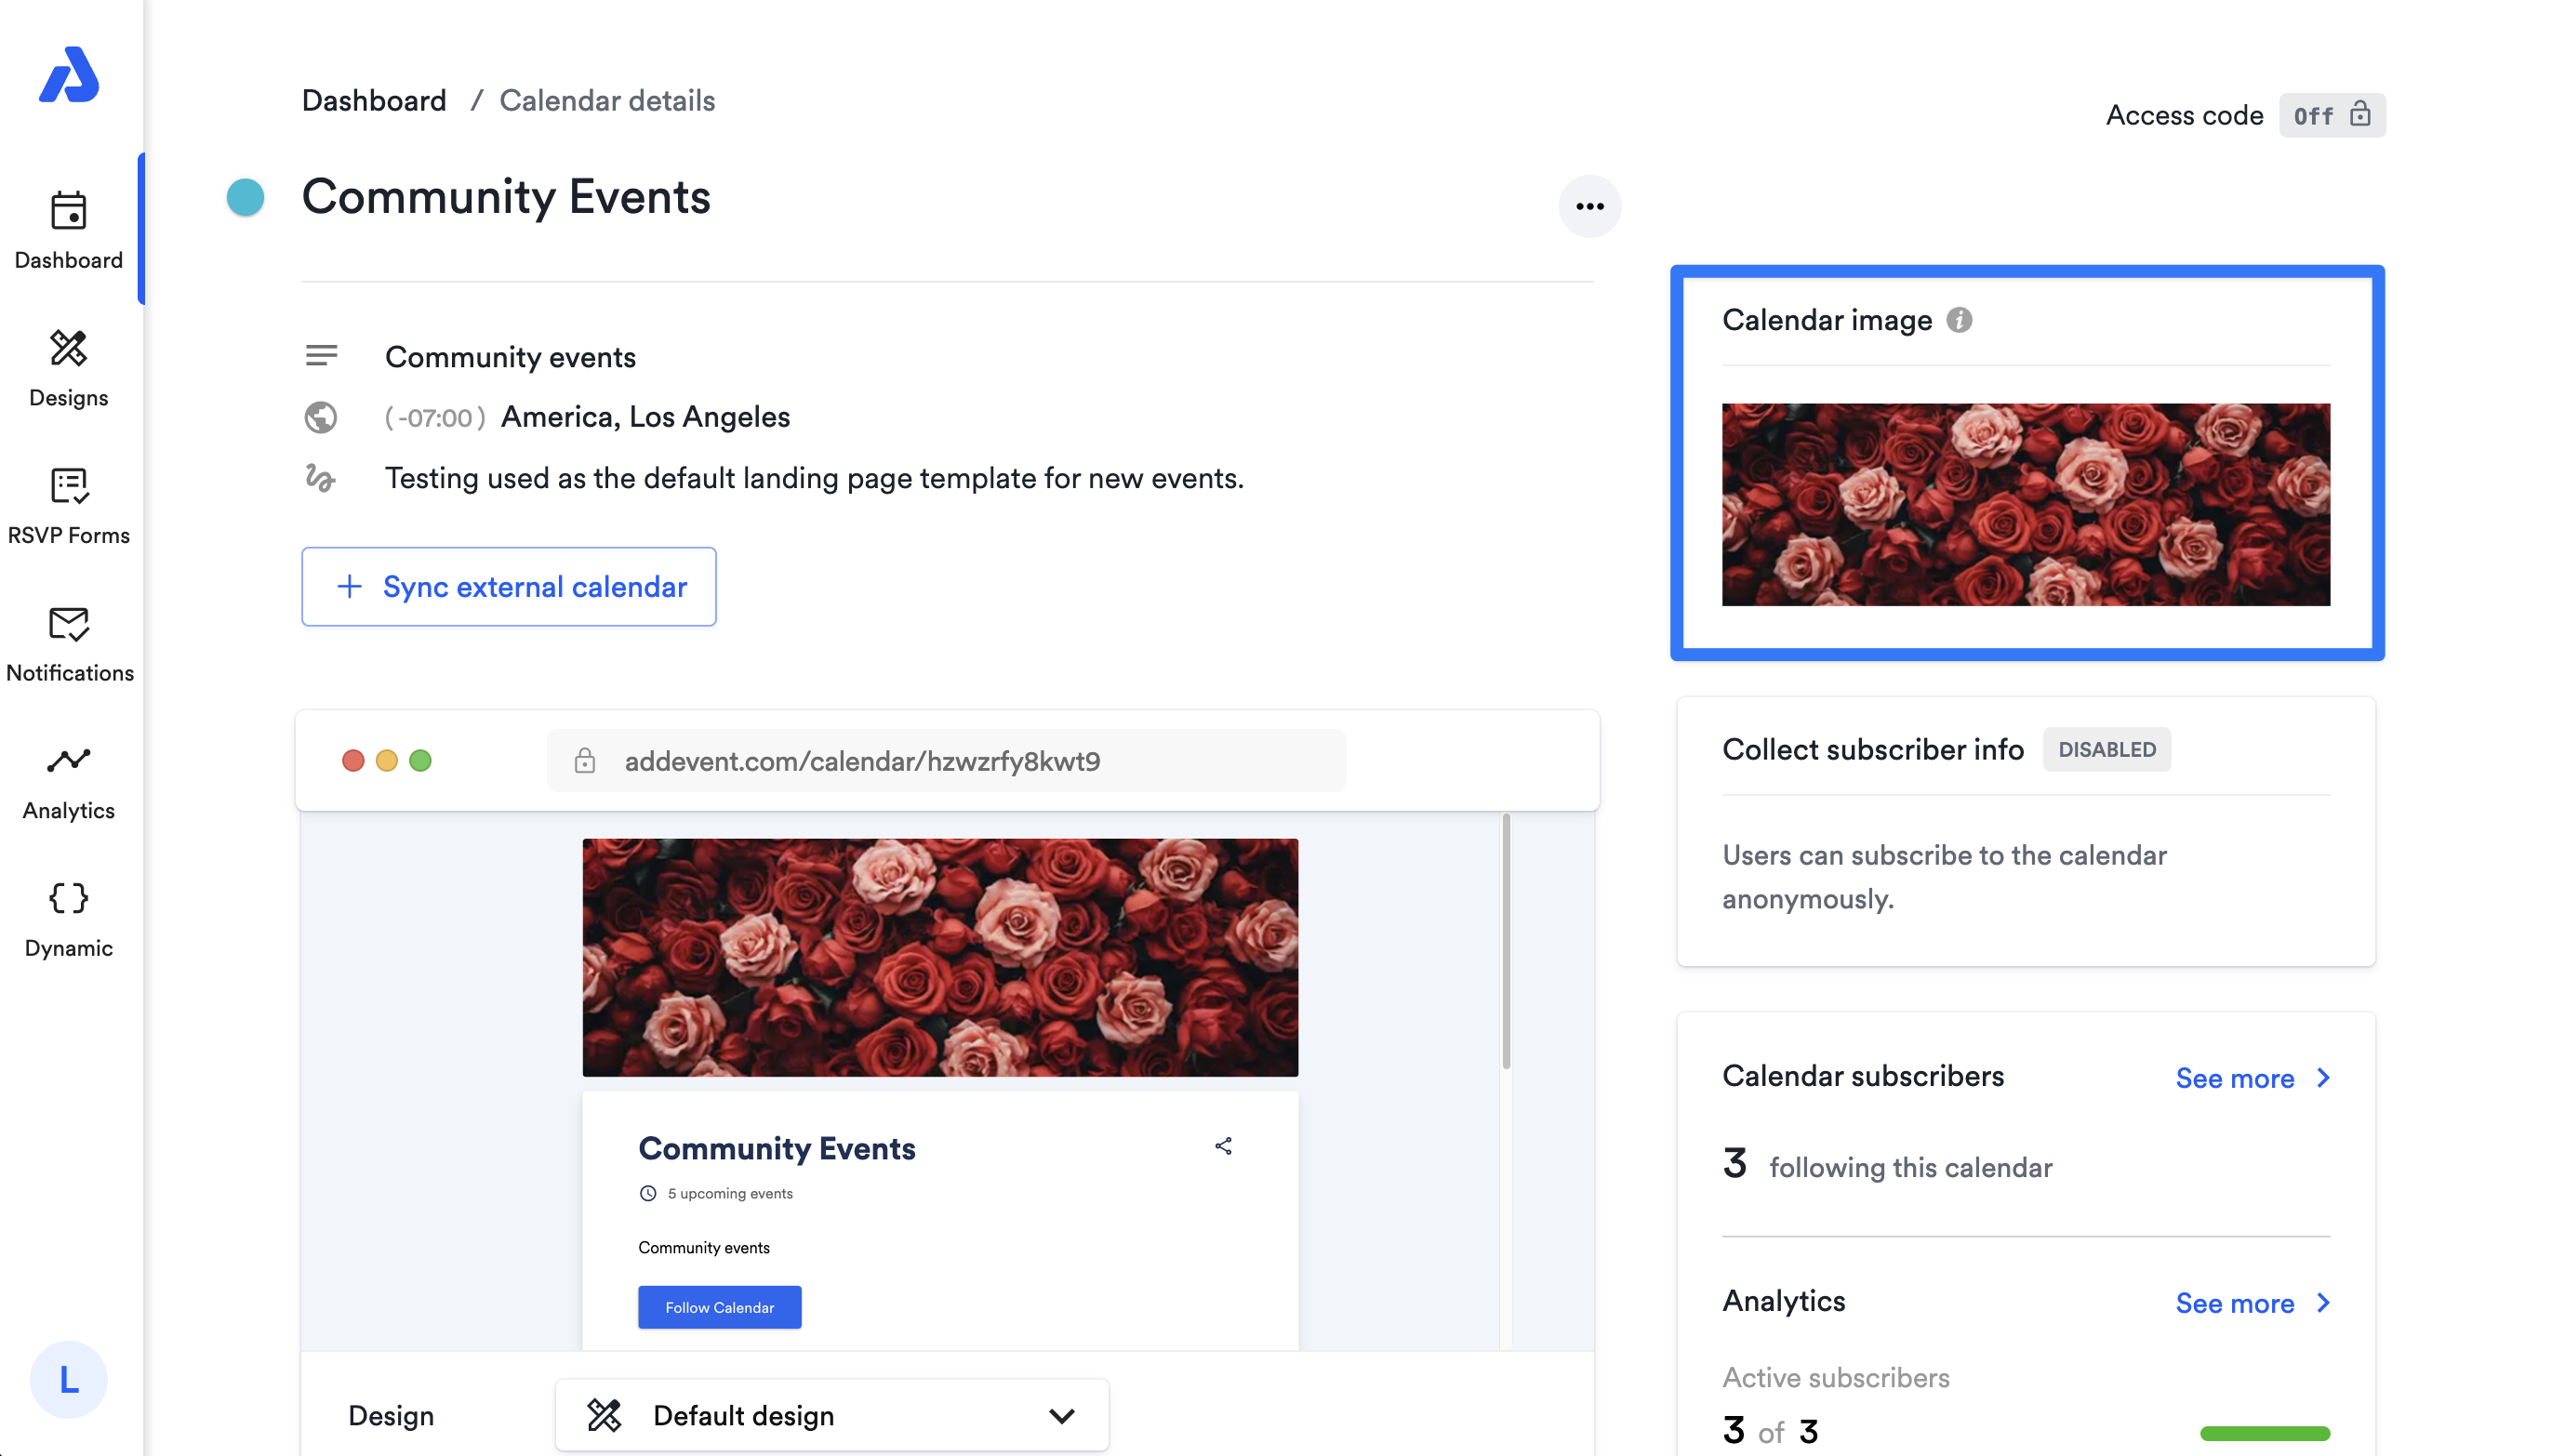
You can now include a calendar image on your calendar landing page:
Calendar Descriptions
Calendar descriptions have received formatting updates:
- Unsupported formatting will now be stripped from content pasted into the calendar description.
- Text color and highlighting have been removed as formatting options.
Calendar Details Page & Sharing
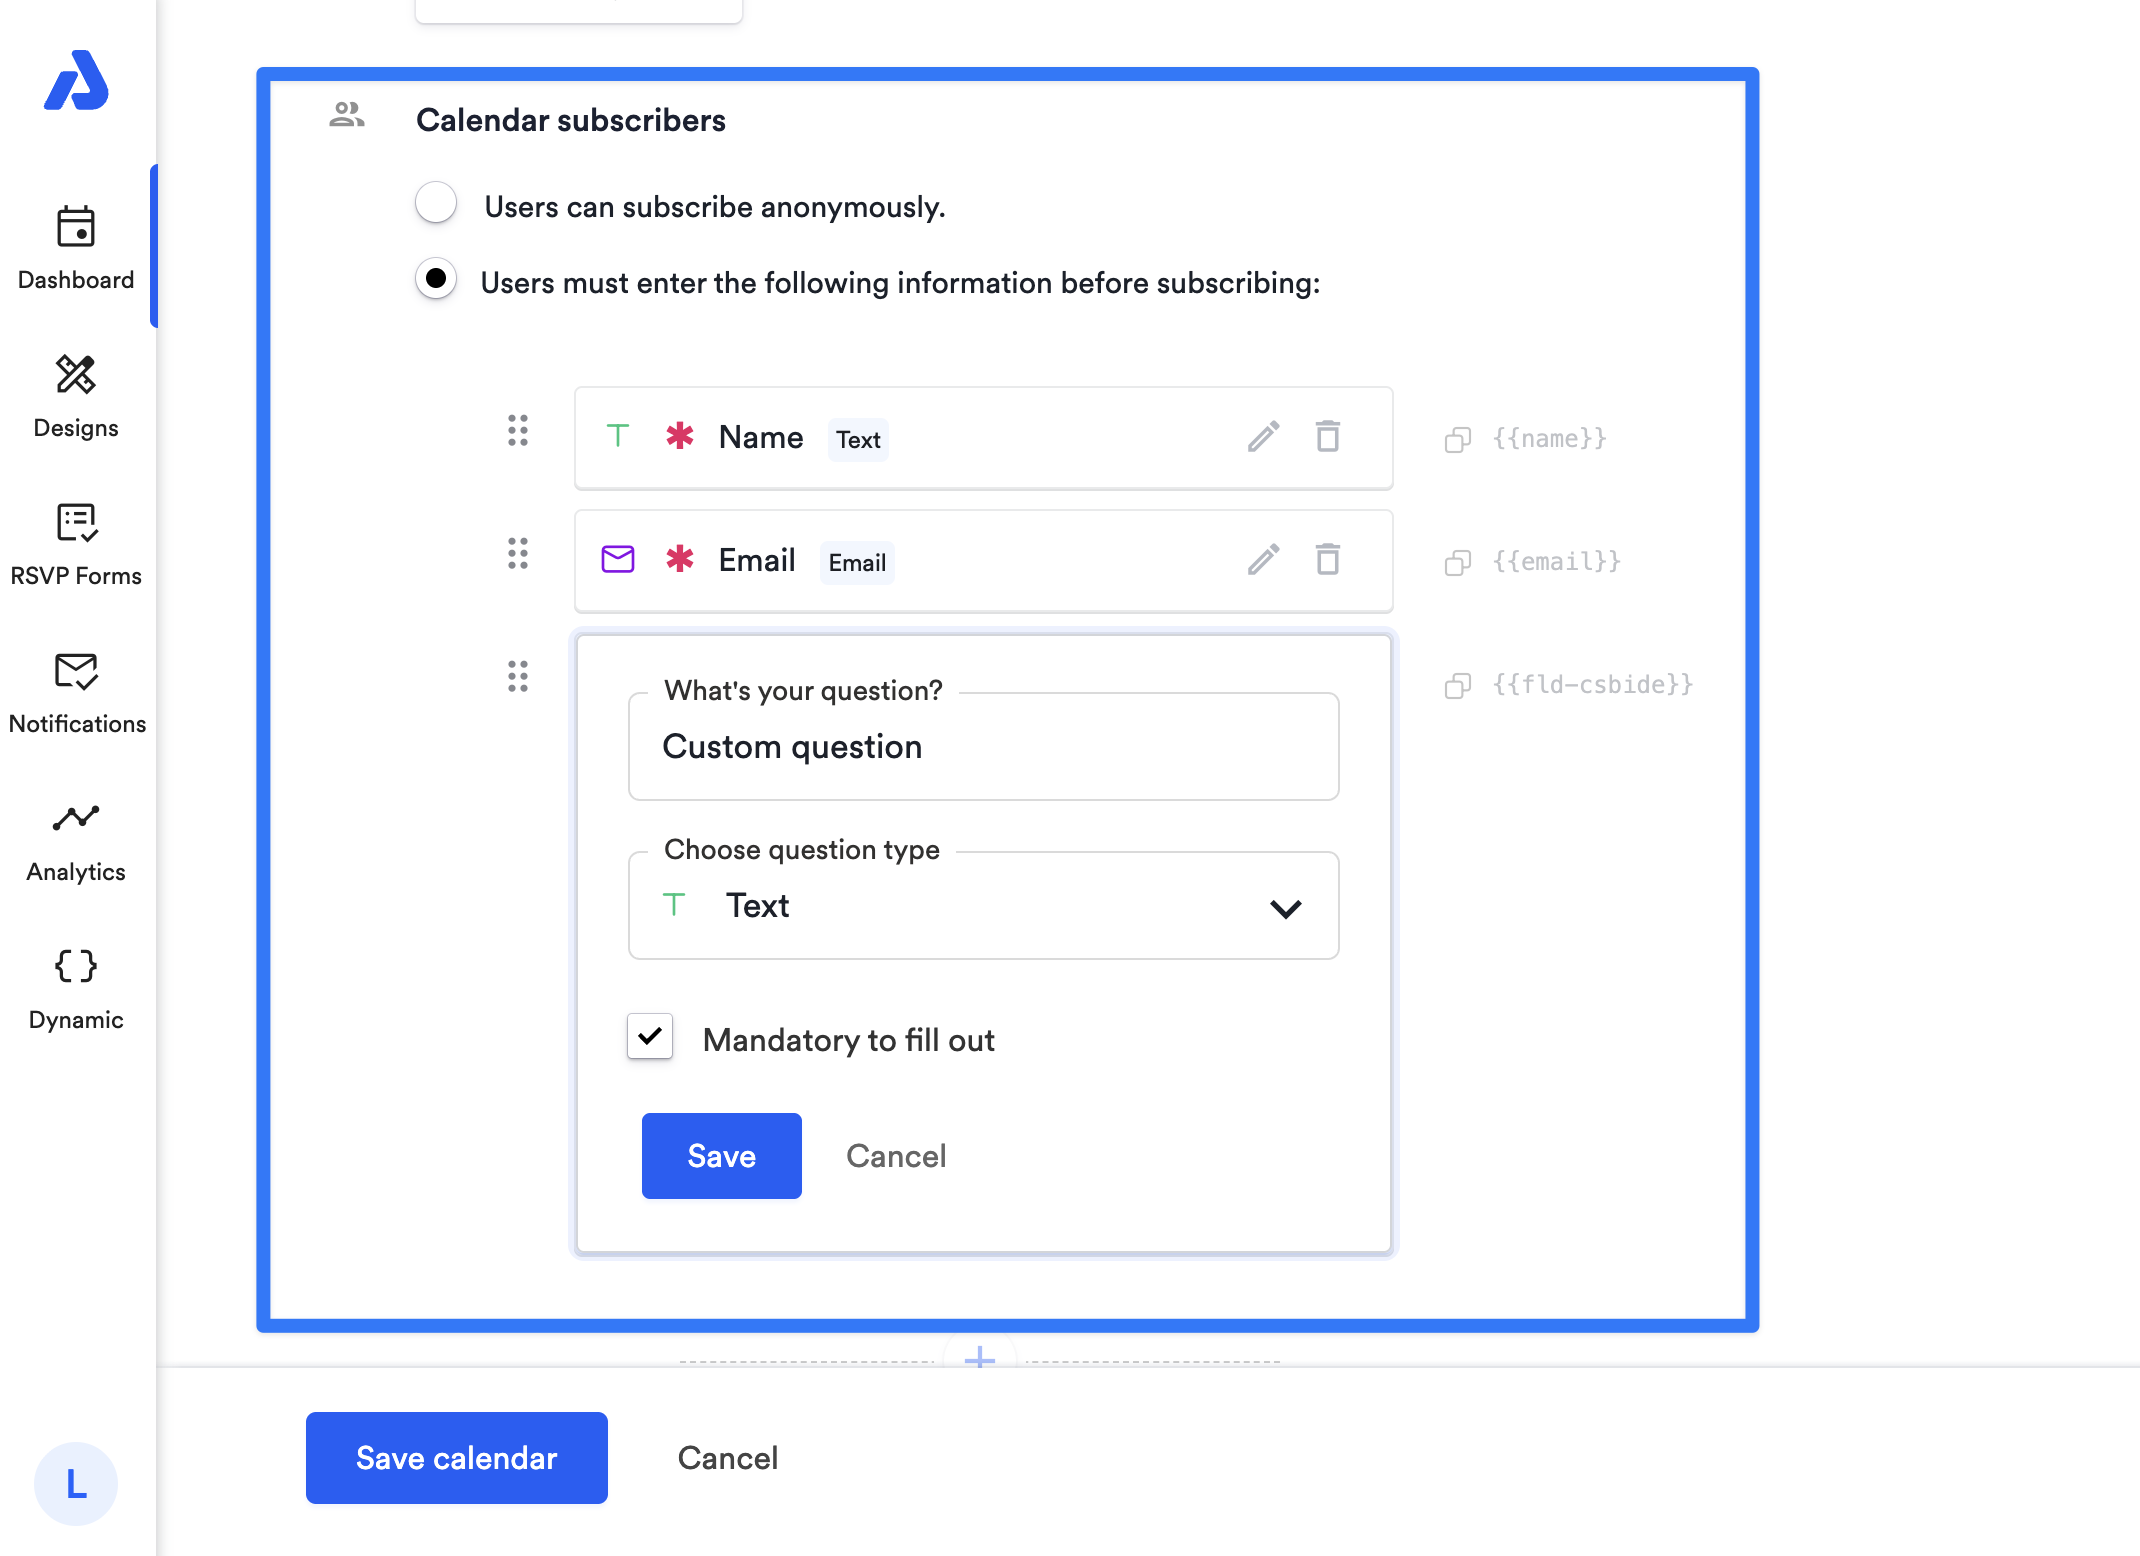
- Collecting custom subscriber information has changed slightly in 2.0. First, type your question/field label, and then choose the field type.
- There are also icons for each field type, and some of the field types have new names to make them easier to understand, such as Dropdown and Radio buttons where you can only select one option.
- When you create a new question, they can also be optional if you do not check the box for Mandatory to fill out.
Color Palettes
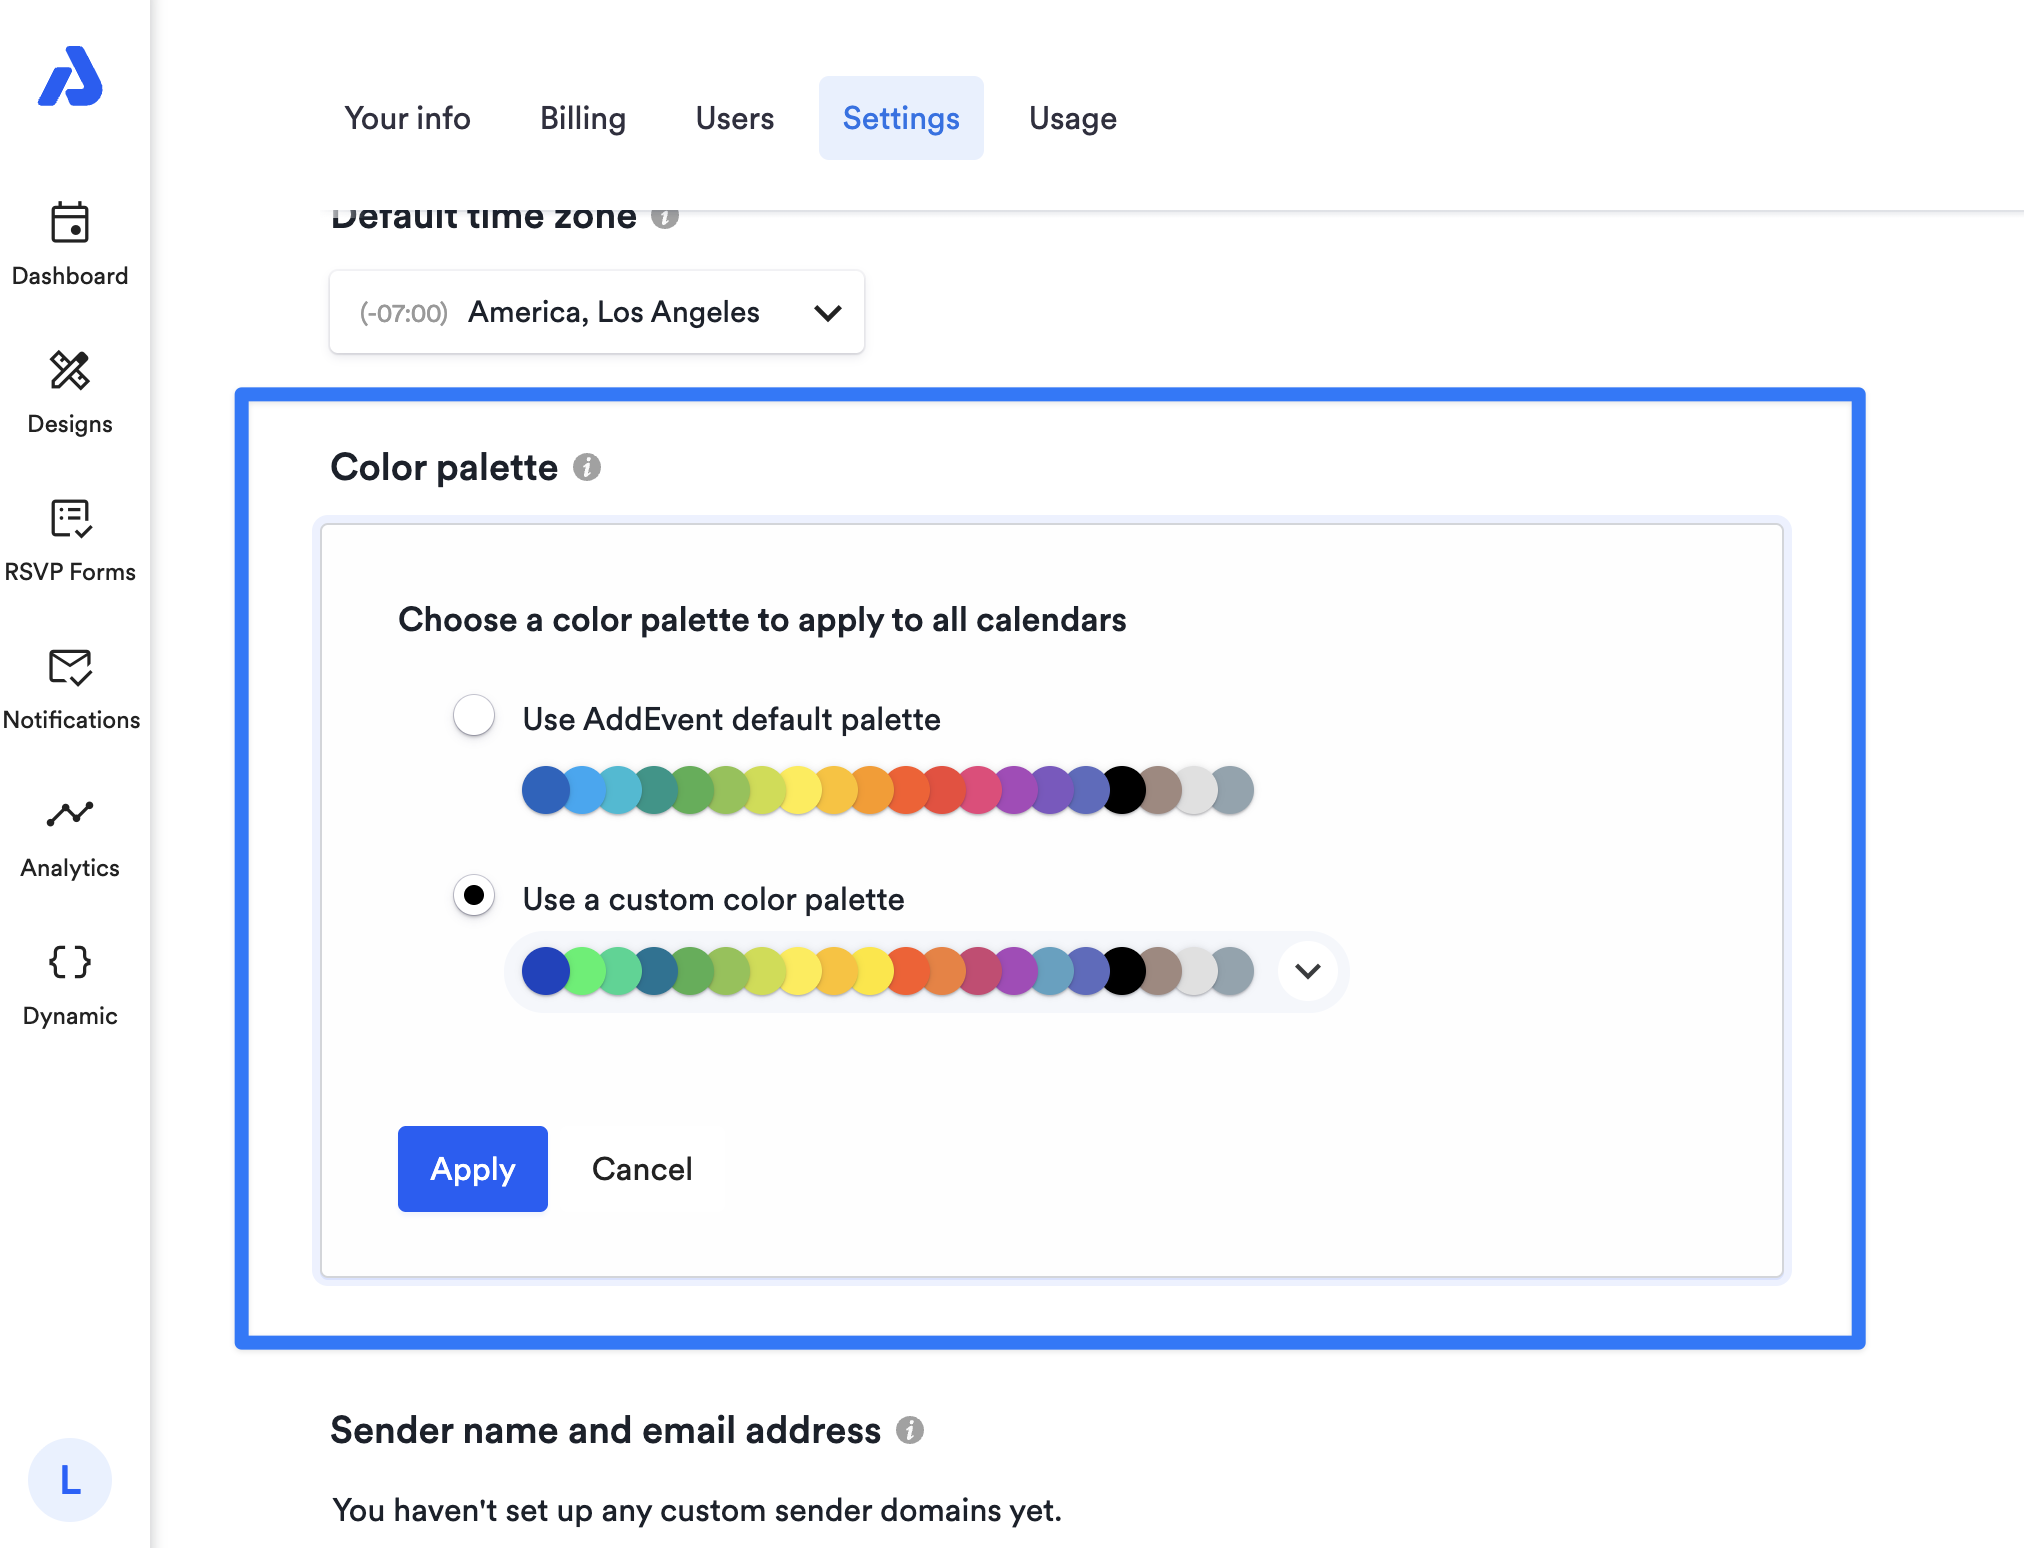
- Color palettes are now set at the account level on the Account and settings page instead of at the calendar level.
- You can still apply a color to your calendar when you create or edit your calendar. By default, events on this calendar will be created with the same color.
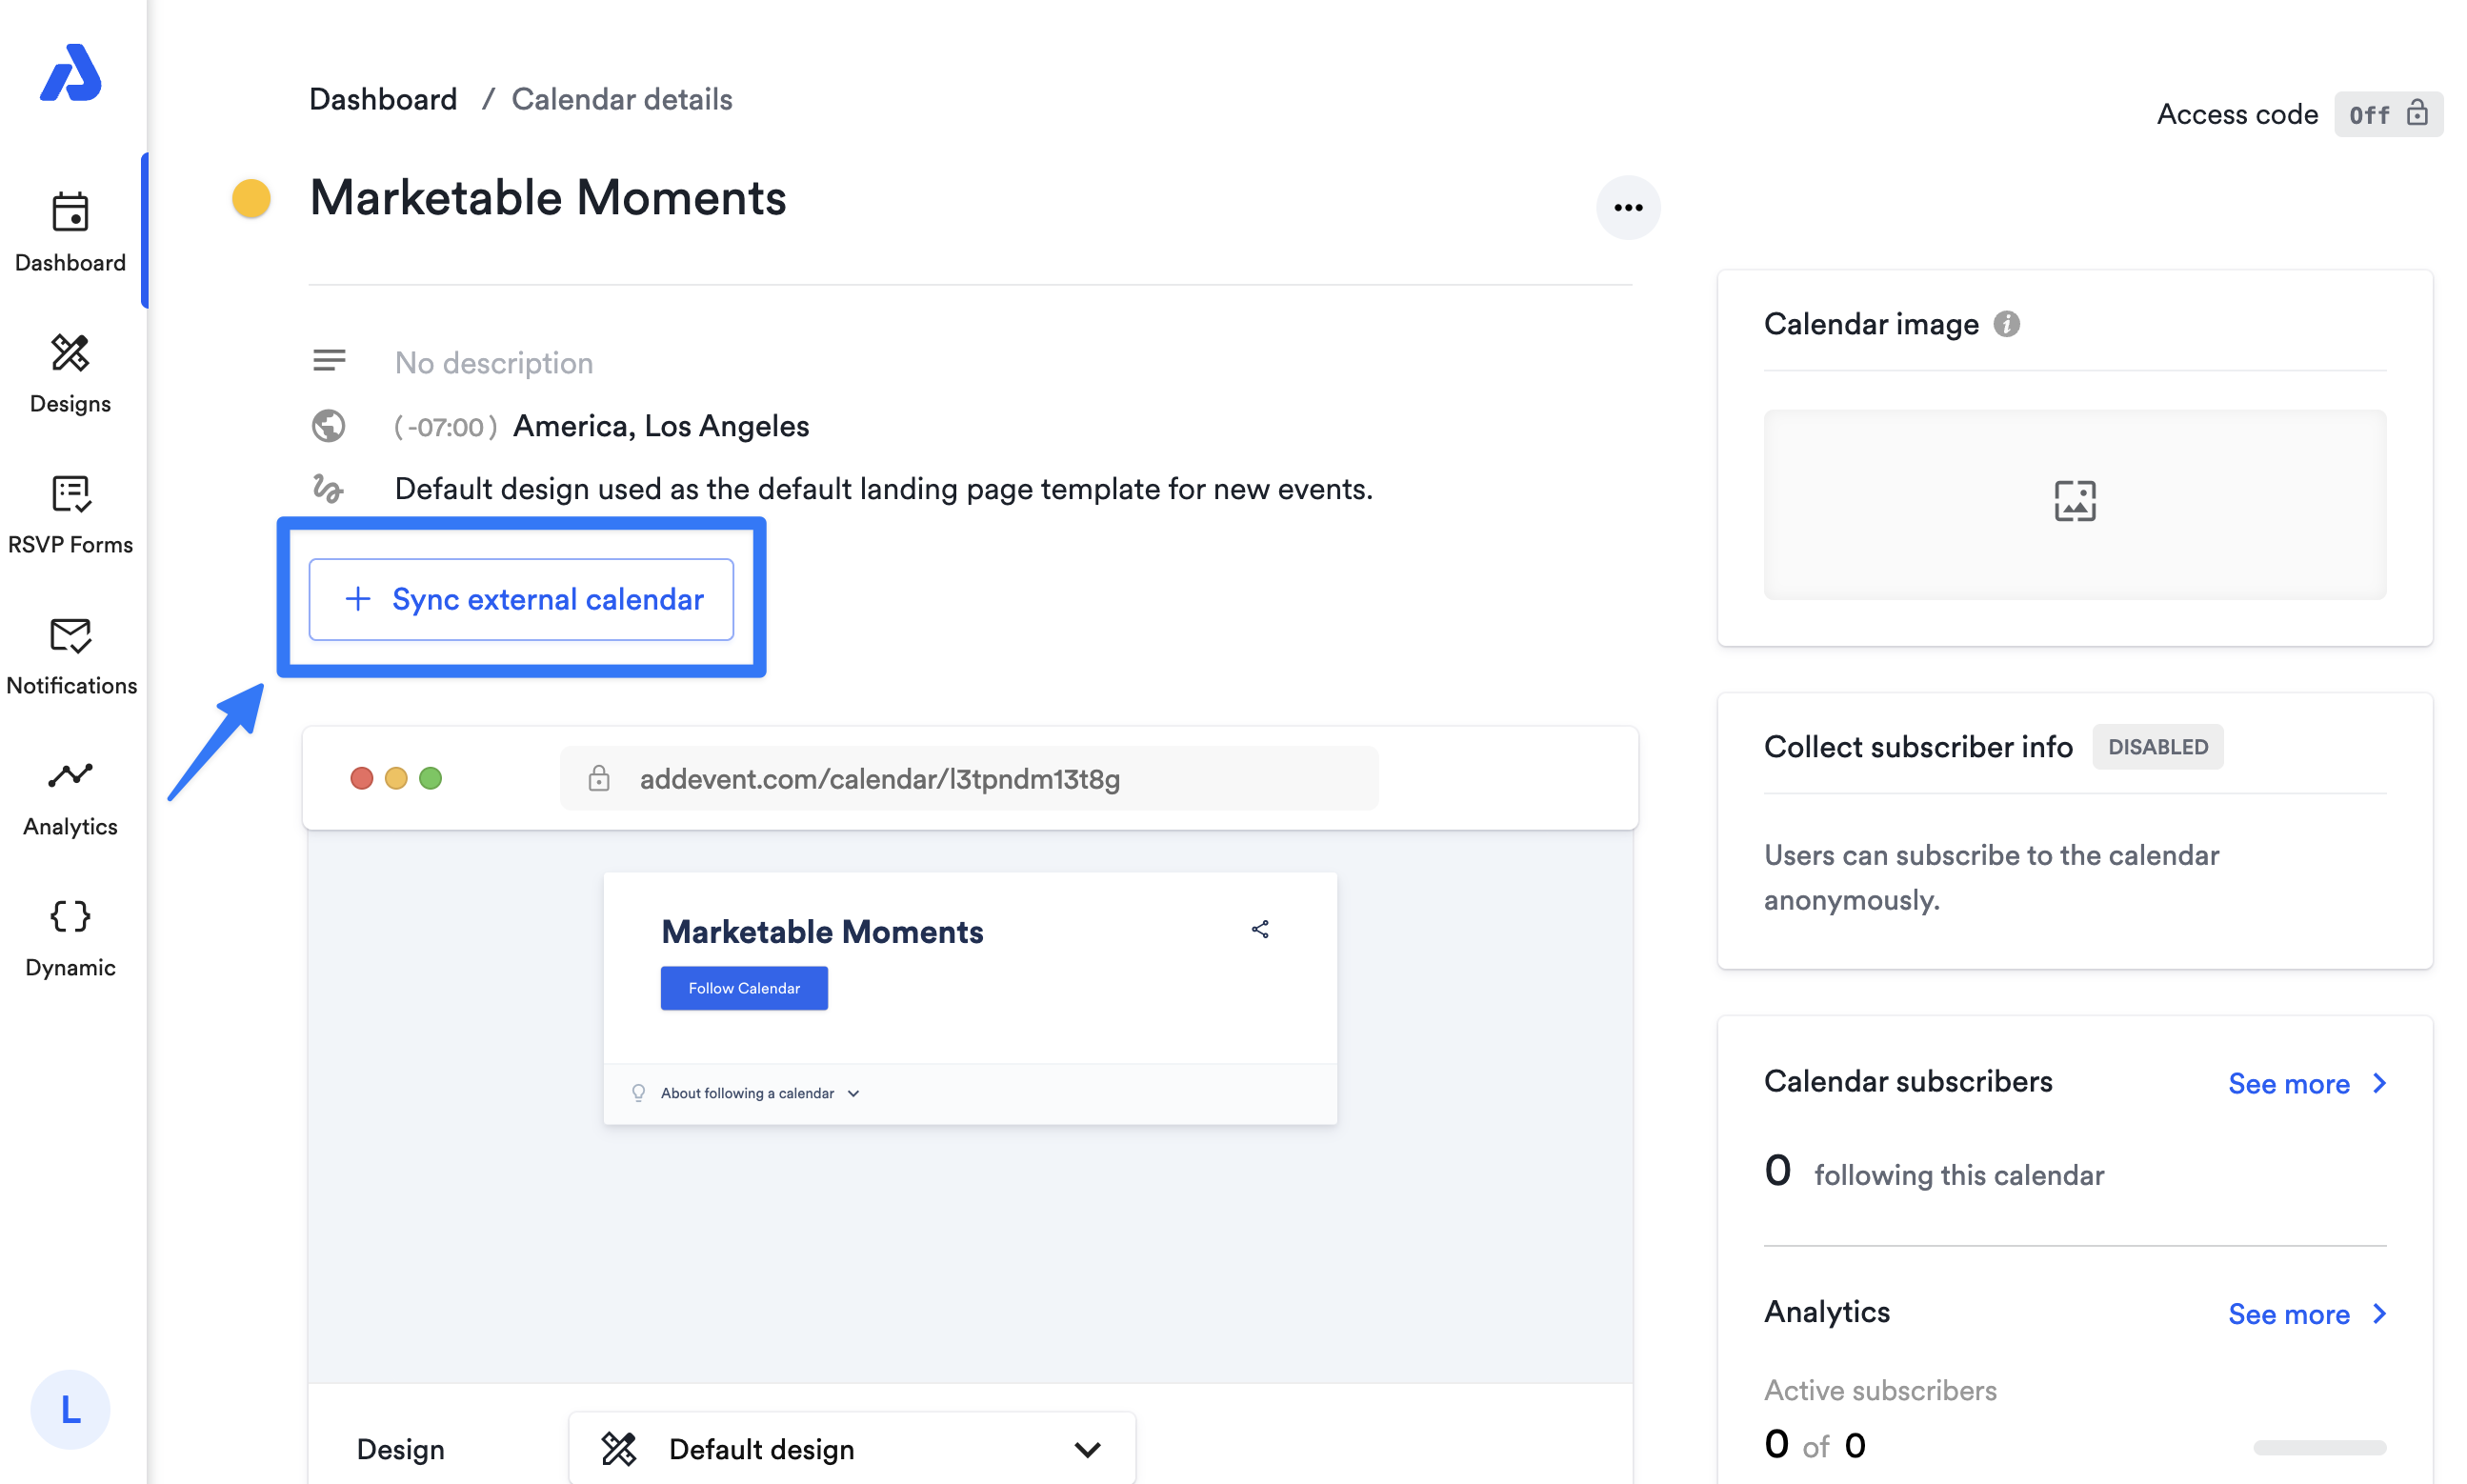
External Calendar Sync
- Syncing external calendars into AddEvent has been moved. Previously, you would sync your external calendar on the calendar edit page. Now, you will set this up on the calendar details page.
- The external calendar feed must be provided in a valid .ics format, and the feed must be accessible via a publicly accessible URL the user provides.
- You can find the + Sync external calendar button once the calendar is created on the calendar details page.
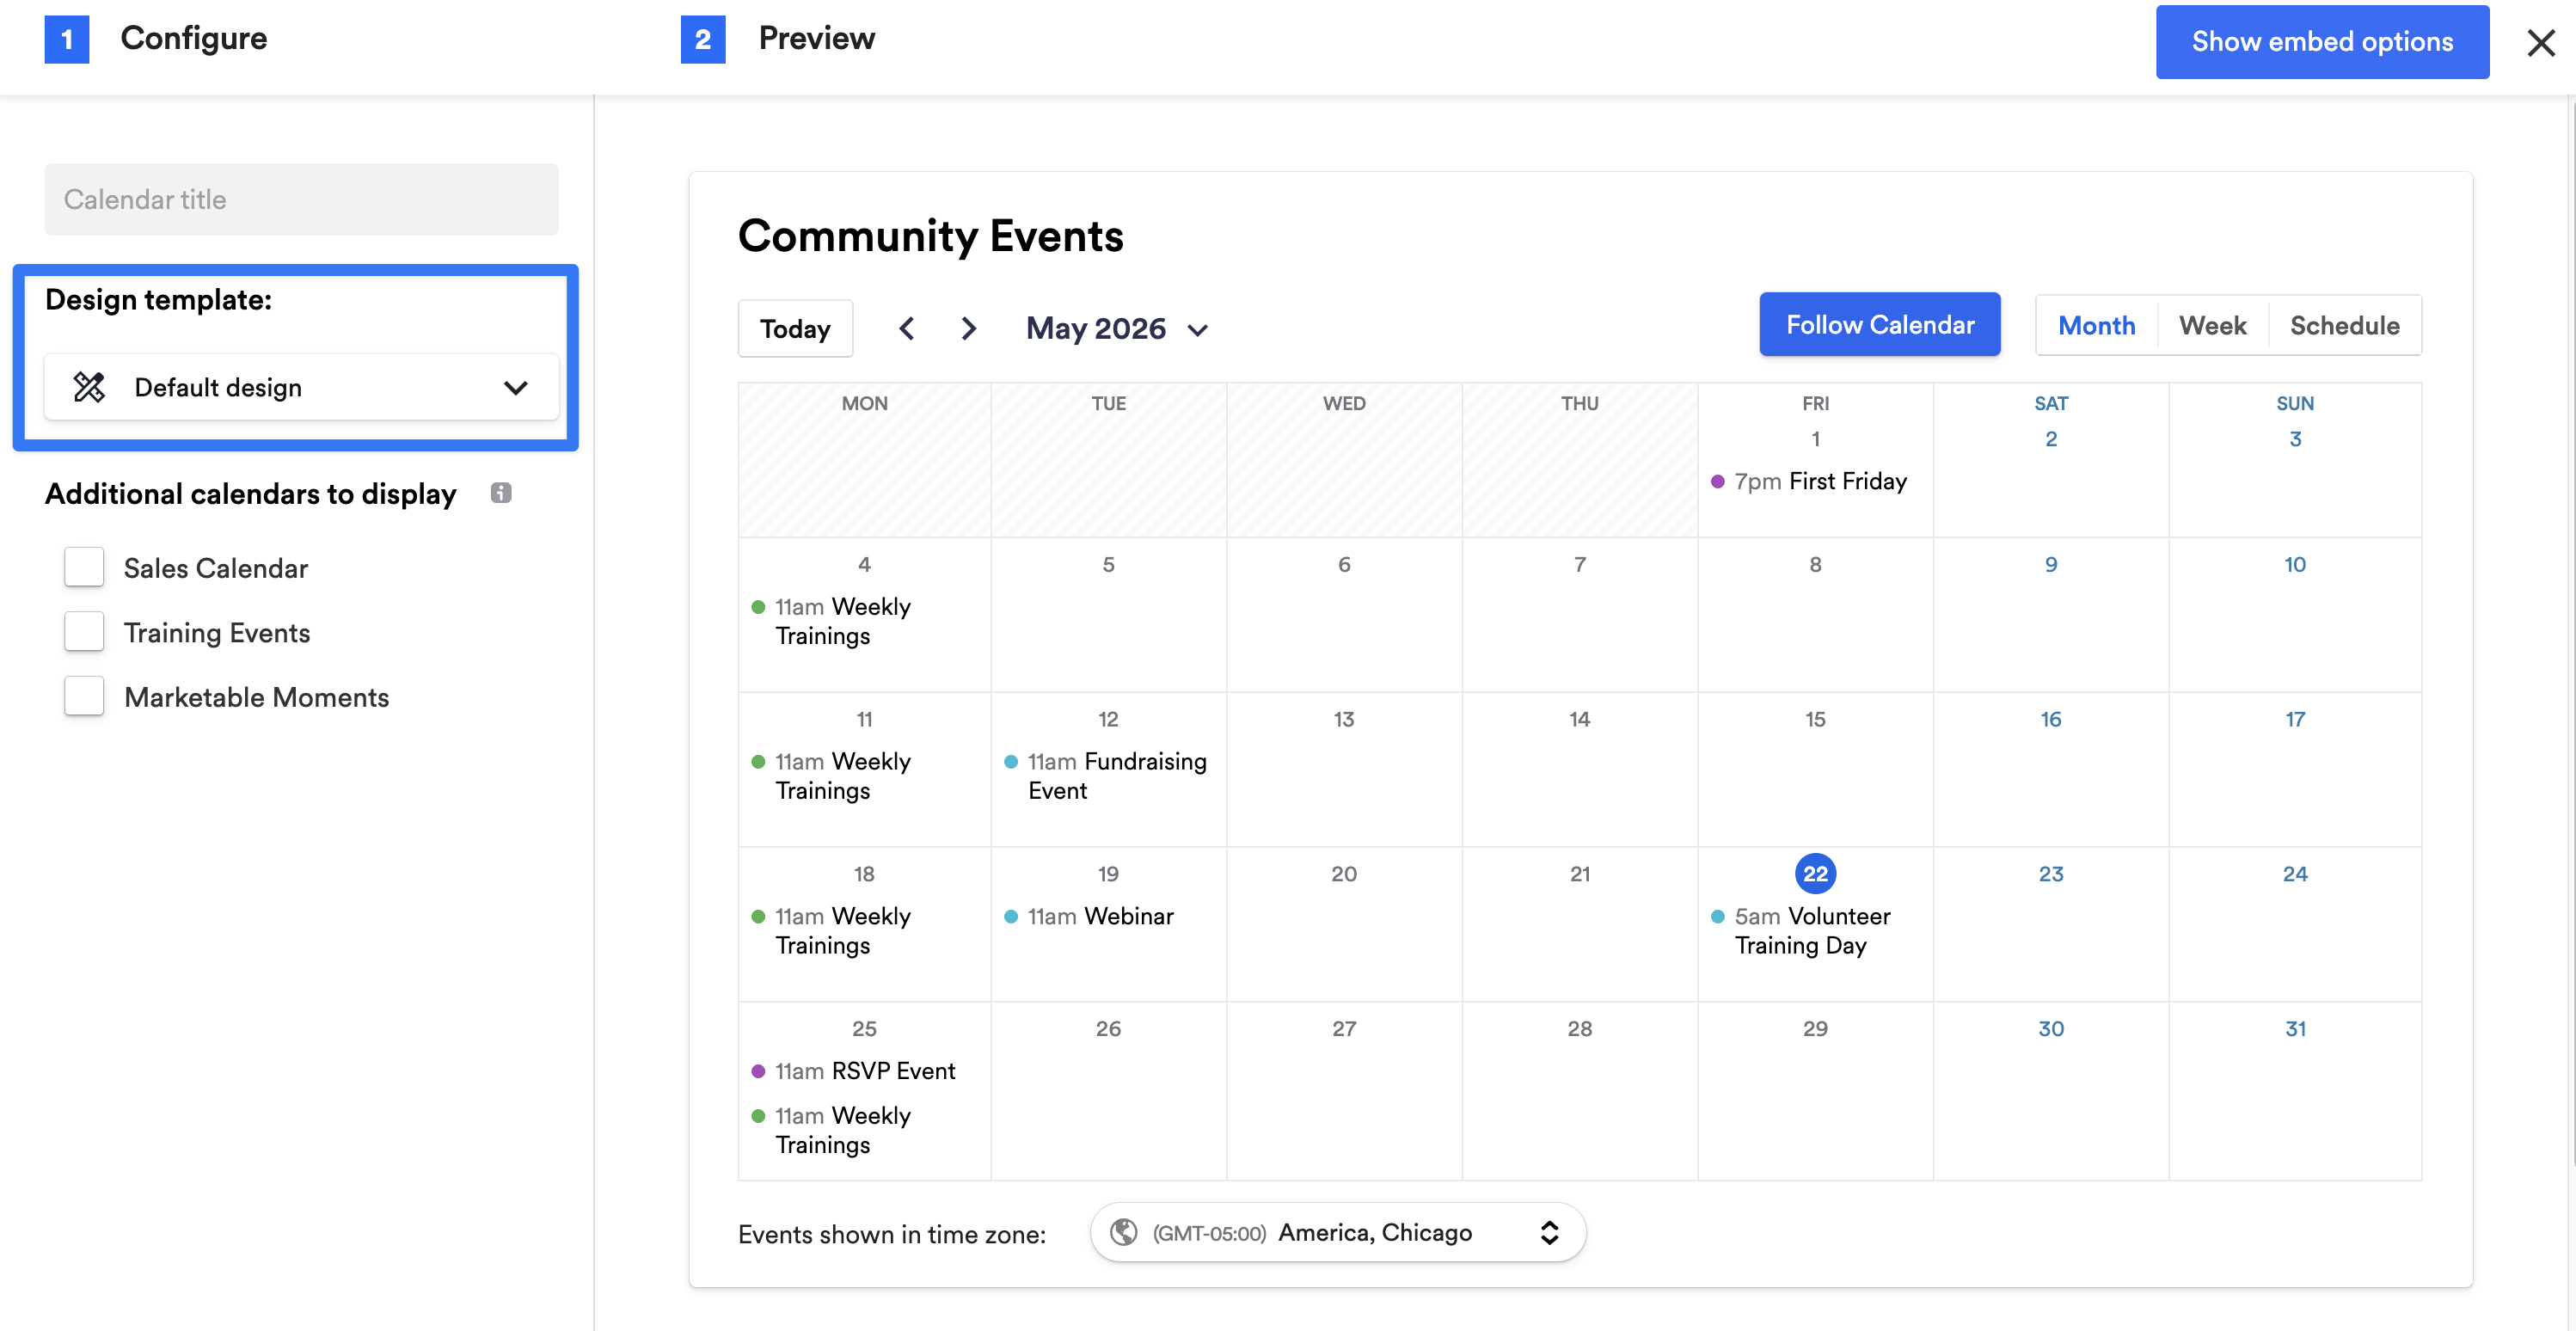
Public Landing Page
You will now see a preview of your public landing page on the calendar details page. To change the Design Template for your public landing page, click the dropdown and select the Design Template you previously created. Once you have selected your Design Template, it will automatically save.
If you have not yet created a custom Design Template, you can click Customize design or head to the Designs tab.
Sharing Methods
Collapsible tiles: Sharing methods for calendars are now organized into collapsible tiles, making them easier to find and access.

Embeddable Calendar
The Quick Customize option has been removed, as the new no-code Design Templates editor provides more functionality.
Creating & Editing Events
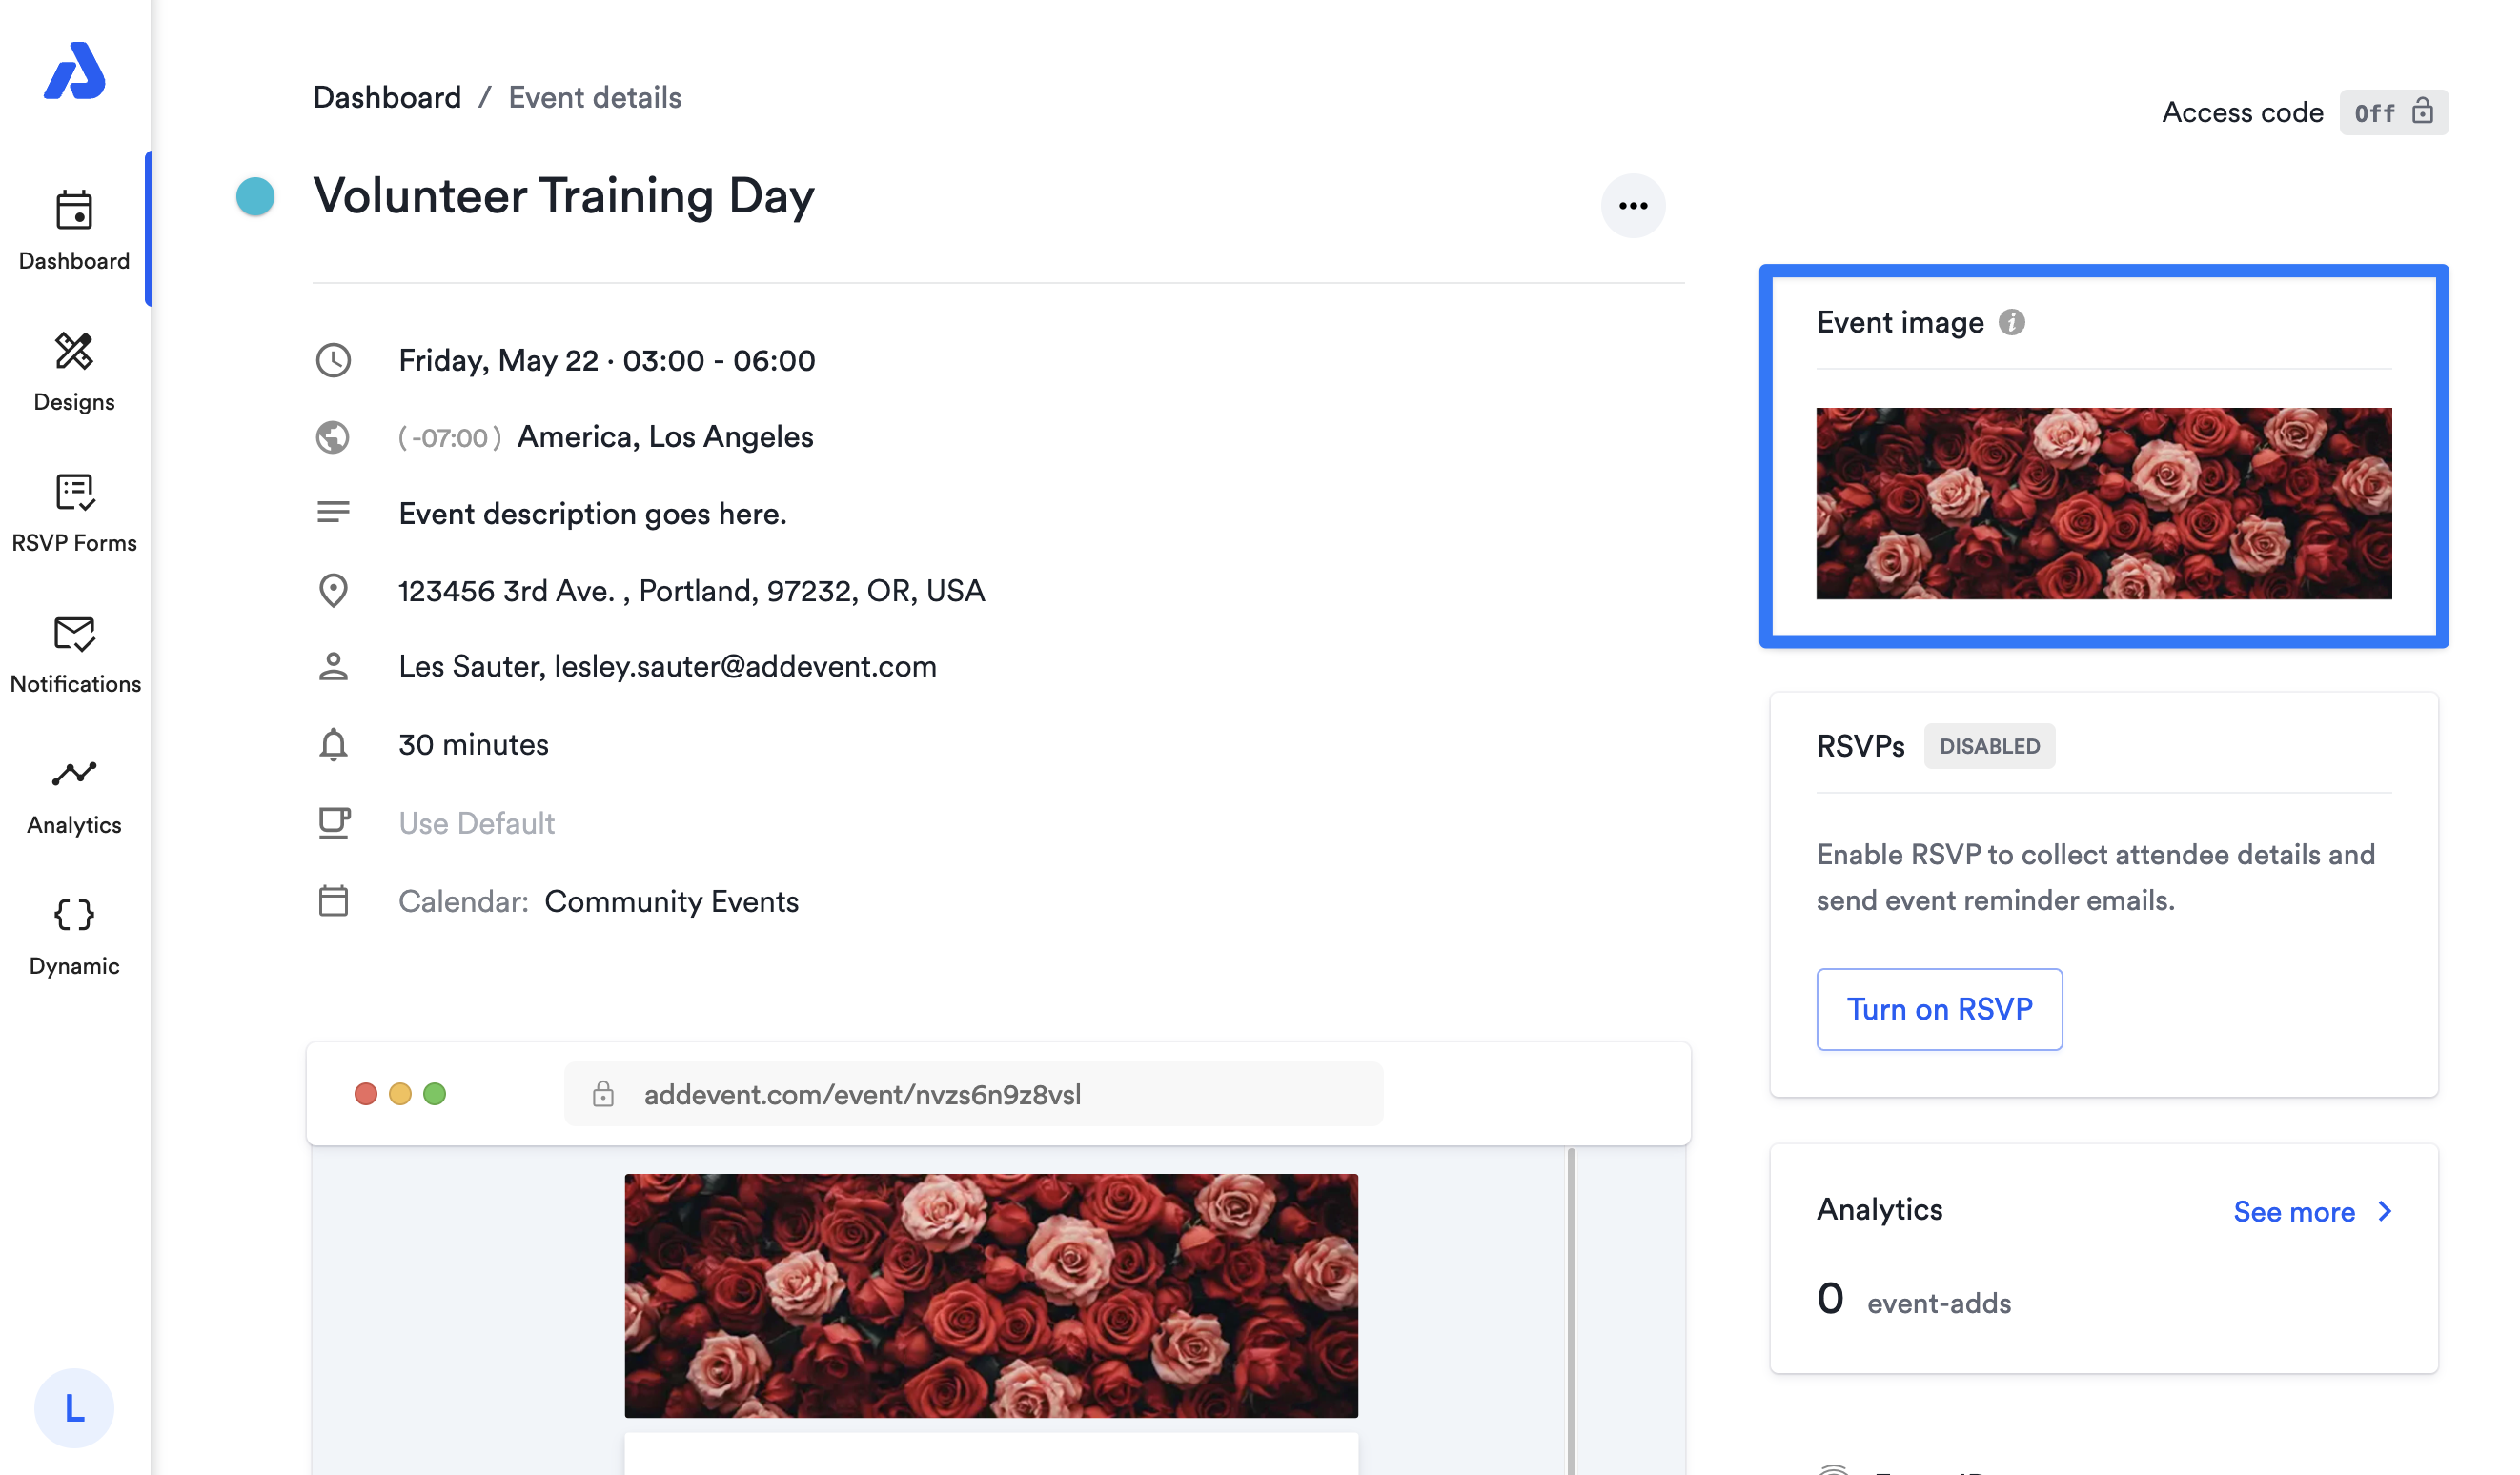
- Event images are now available when you create a new event!
- This image will display at the top of the event’s public landing page and within the events list on a calendar landing page (if your design template is set to display the image).
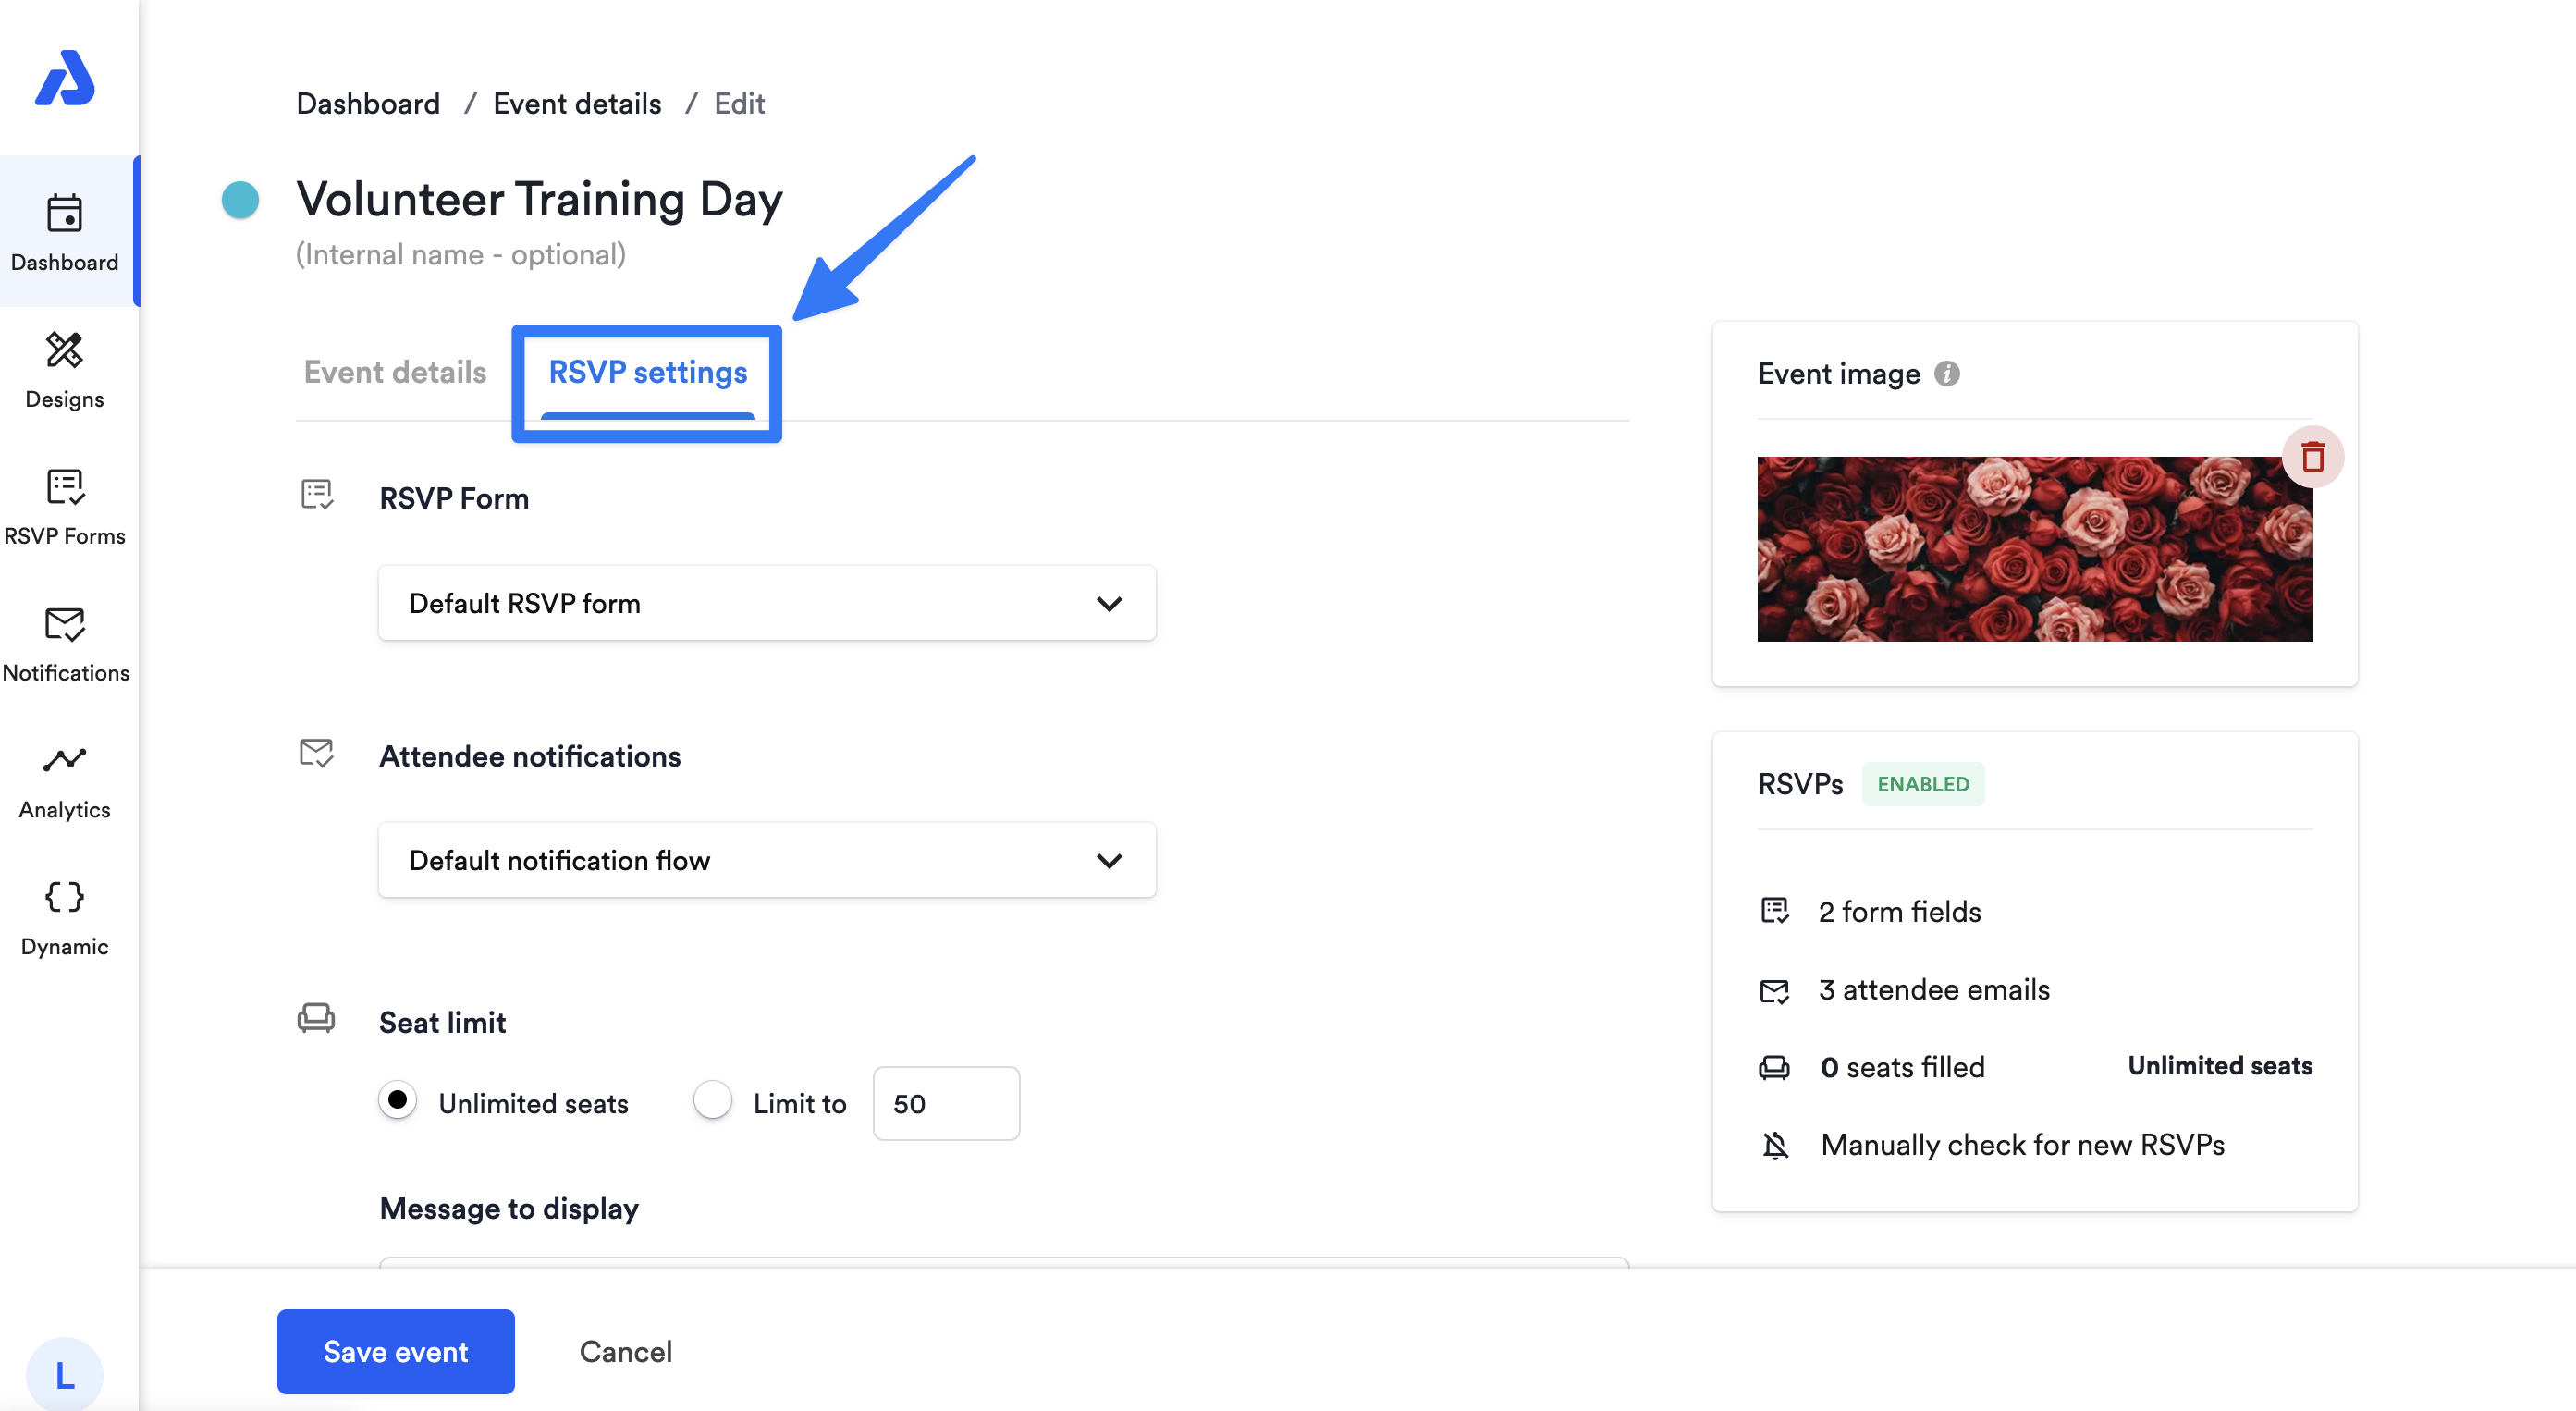
Setting up RSVP Events
- You may notice the Turn on RSVP button is now available on the right-hand side when you are creating or editing an event.
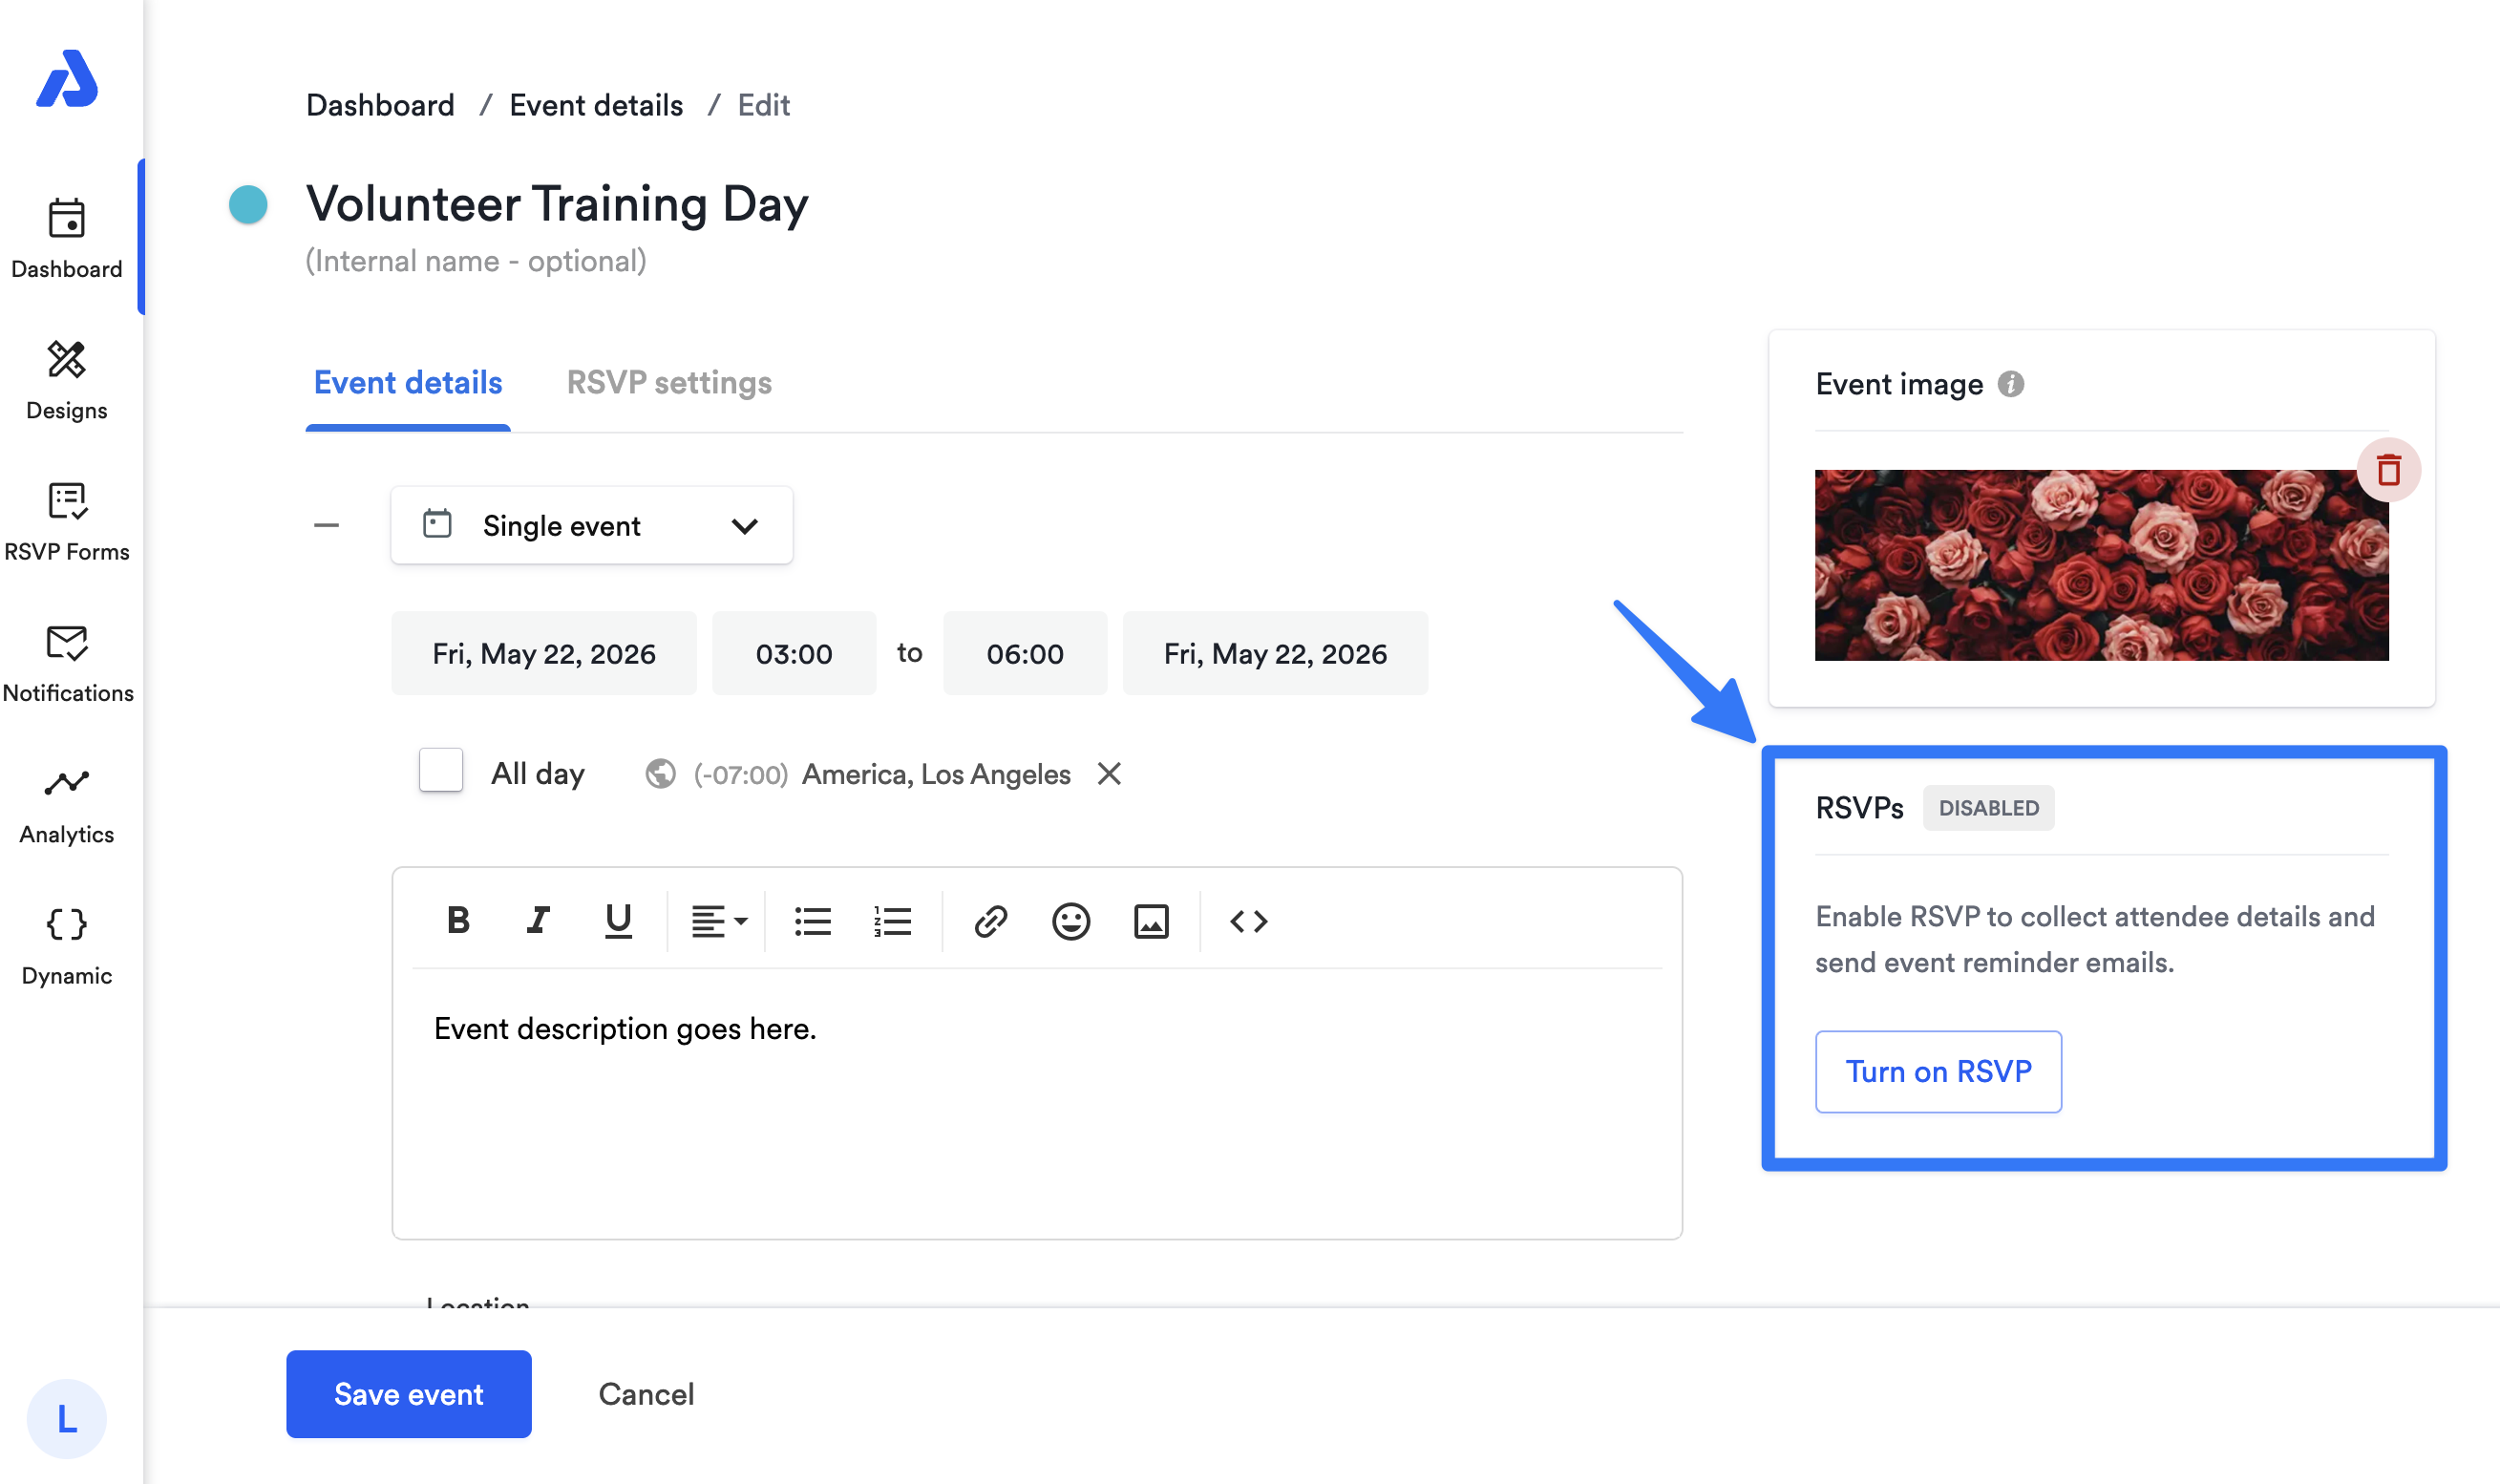
- RSVP settings have also moved to a dedicated tab on the event create/edit page (instead of the event details page).
-
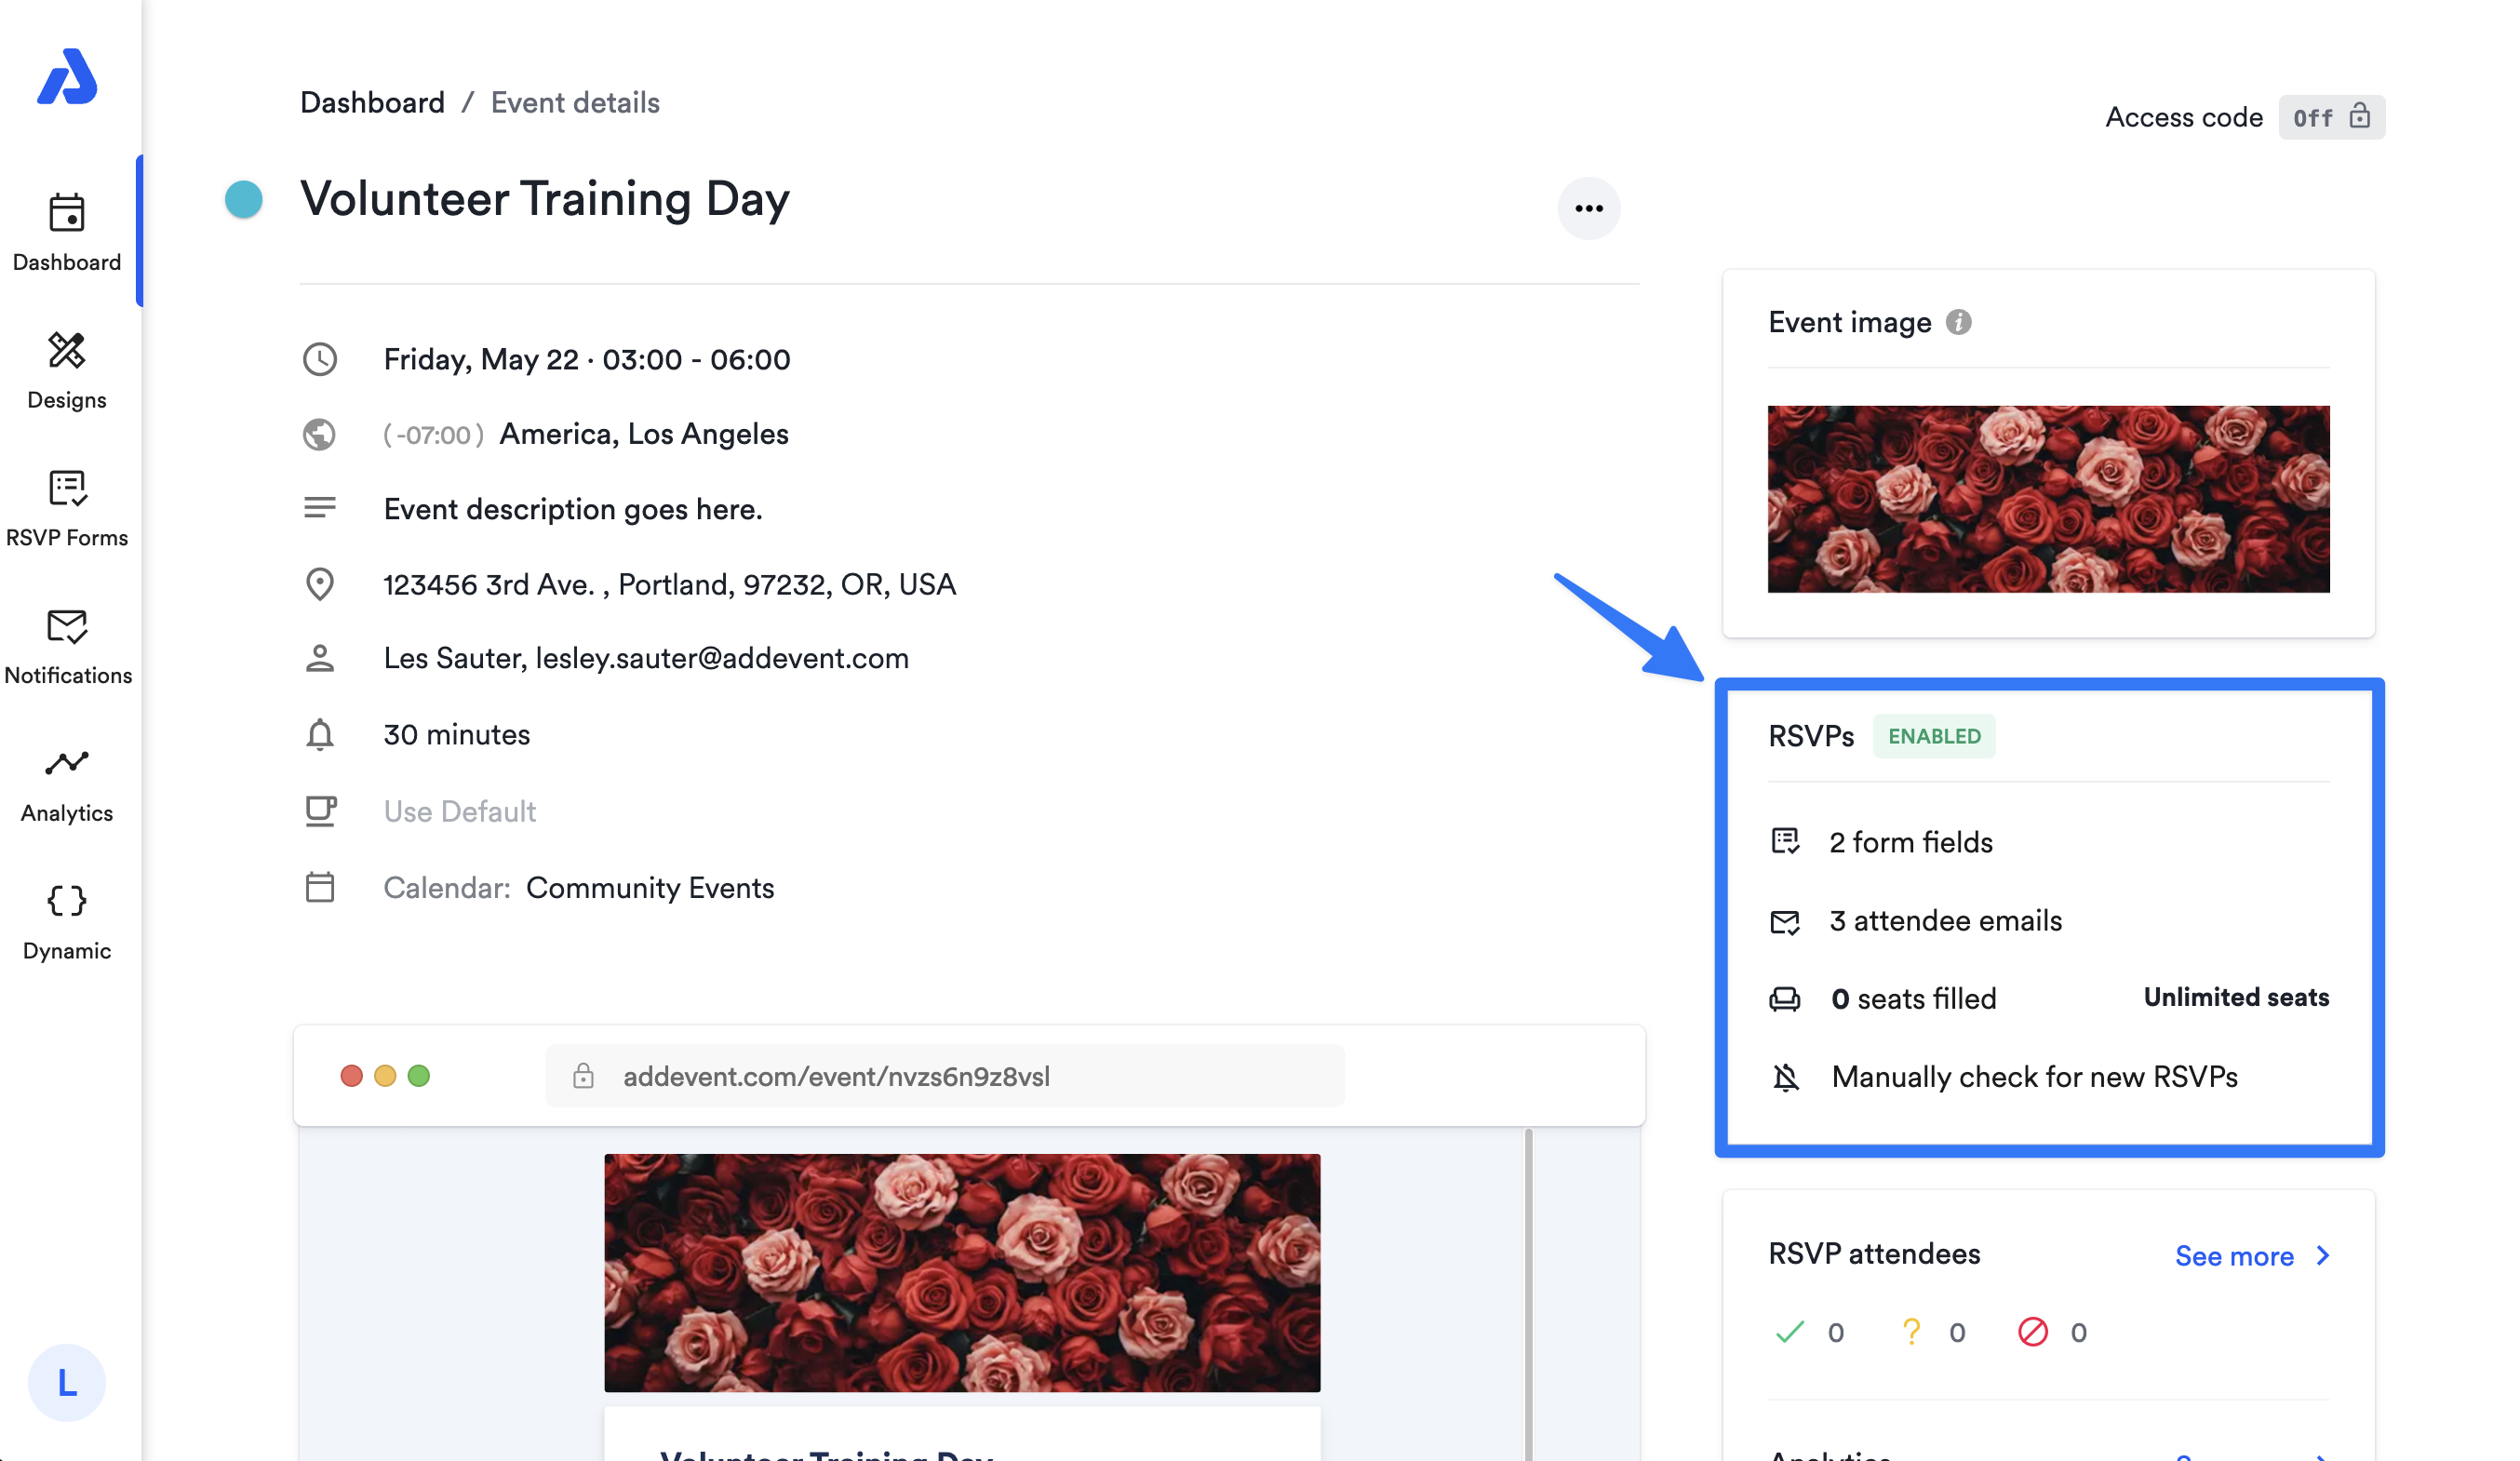
You can now see a preview of the RSVP settings on the sidebar tile, which also carries over to the event details page.
-
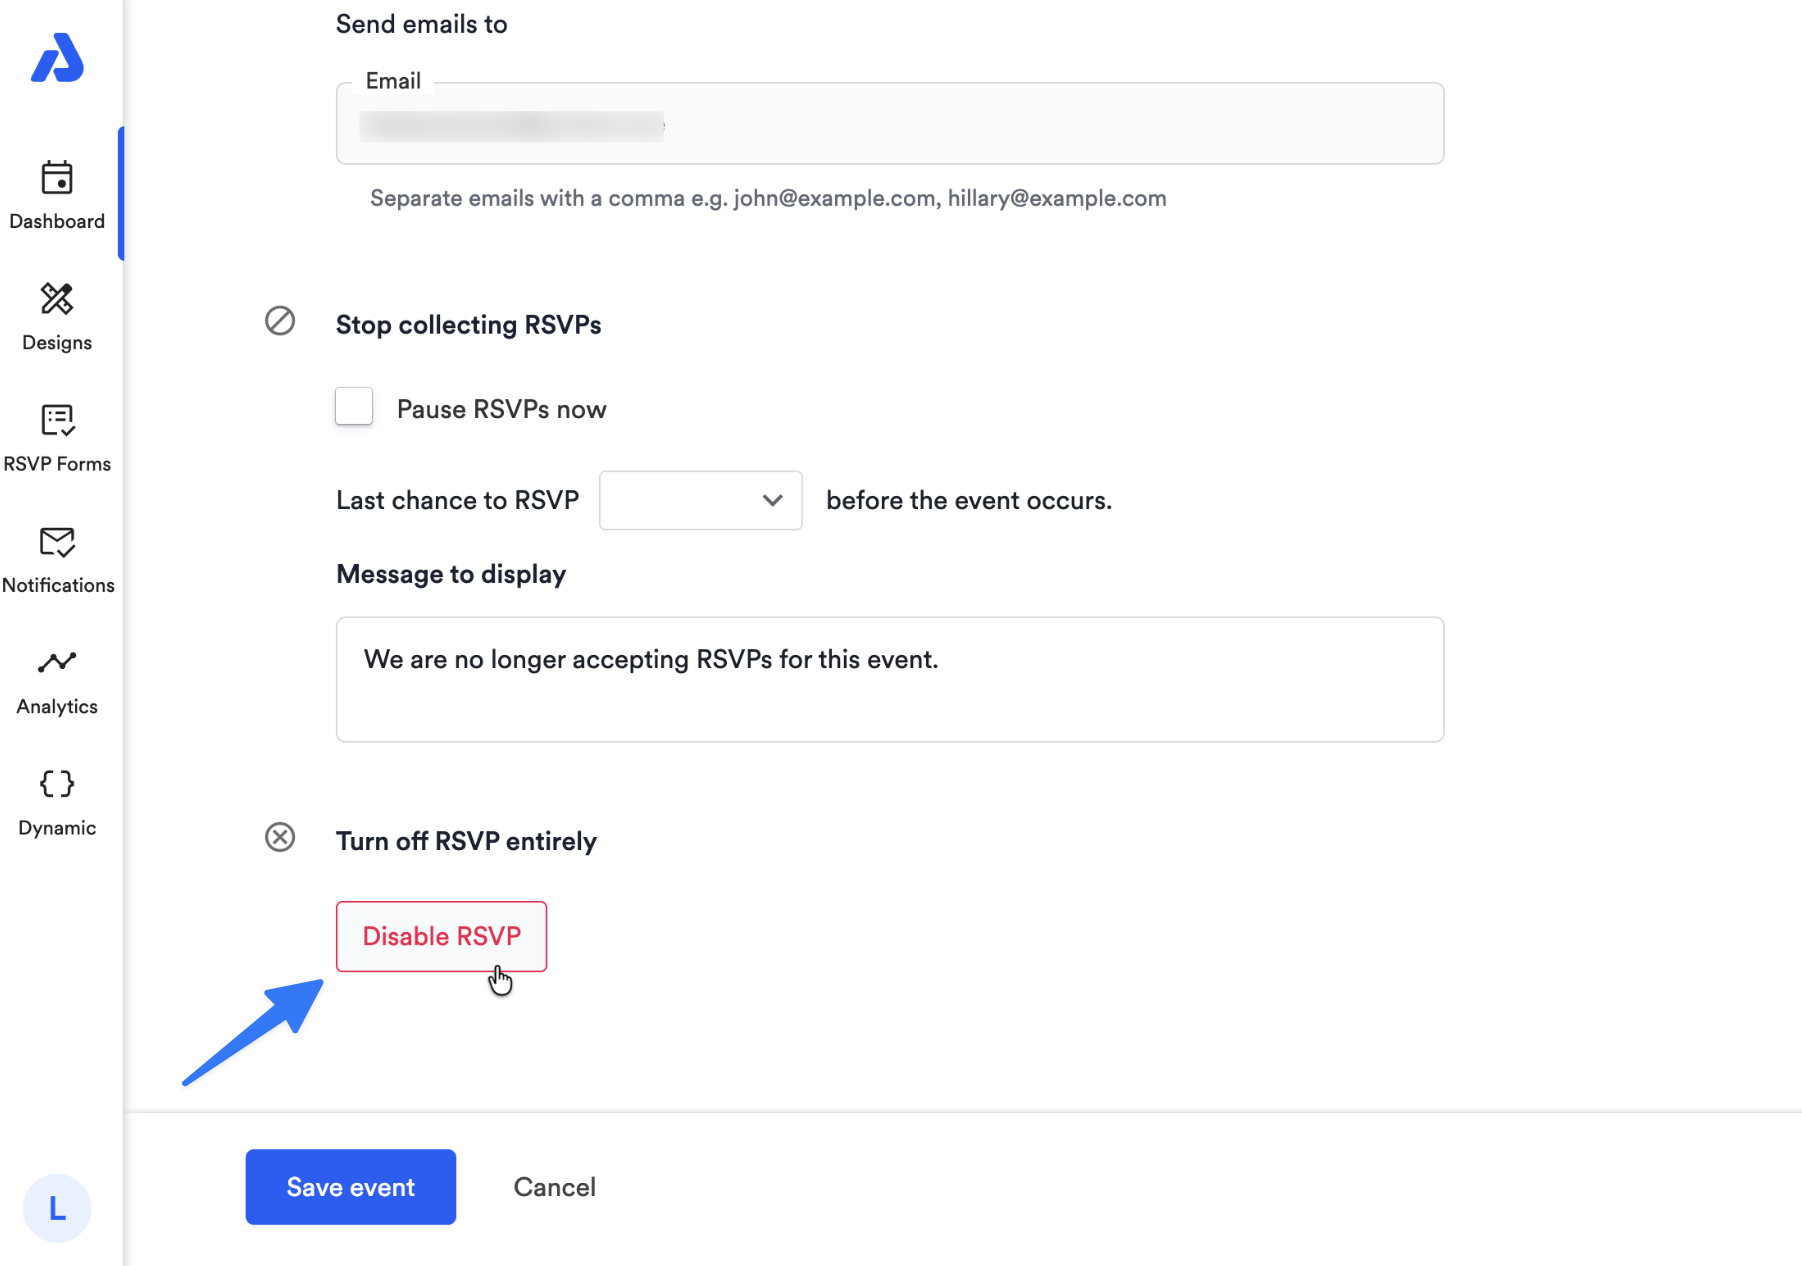
To change an event from an RSVP event to a standard event, you can Disable RSVPs by going to the bottom of the RSVP settings tab. Please note: if you disable RSVP for an event you have already shared and collected registrations for, you will lose access to all attendee data. Learn more about disabling RSVPs here.
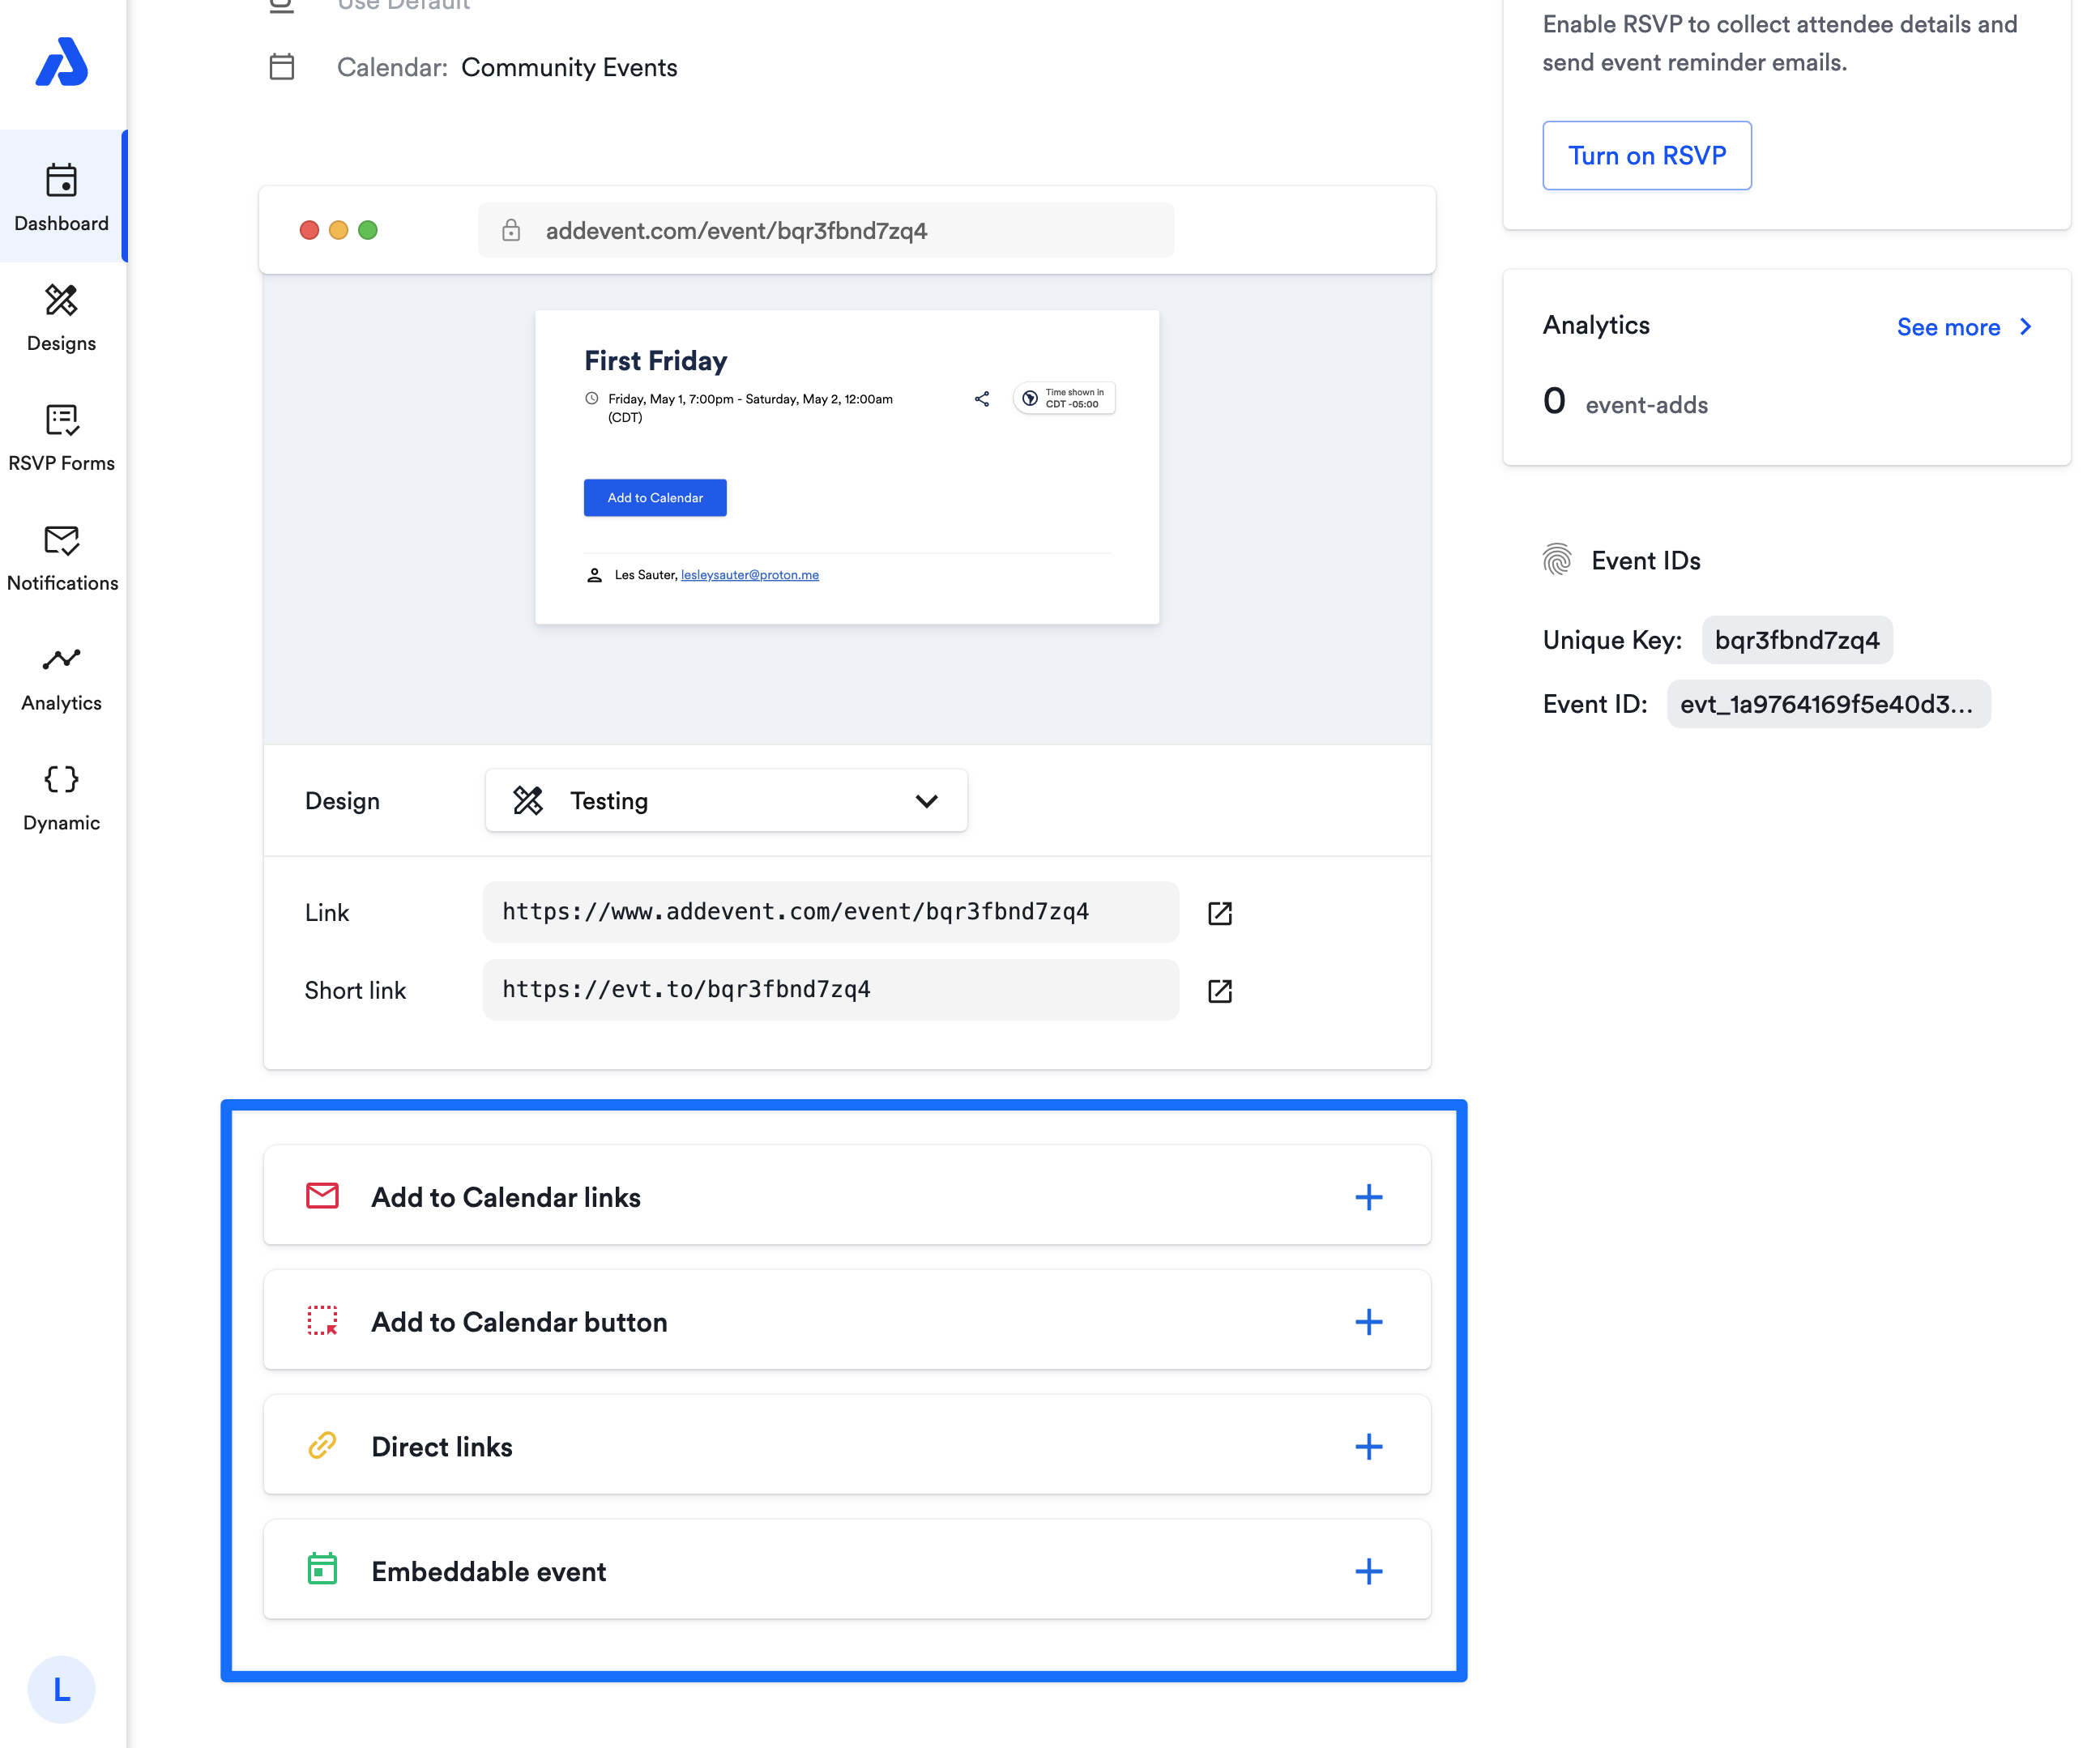
Event Sharing Page
- Passwords for the public event landing page and embeddable event are now located in the top-right corner.
- You will now see a preview of your public landing page on the event details page. To change the Design Template for your public landing page, click the dropdown and select the Design Template you previously created. Once you have selected your Design Template, it will automatically save.
- If you have not yet created a custom Design Template, you can click Customize design or head to the Designs tab.
- Sharing methods are now organized into collapsible tiles, making them easier to access.
RSVP Attendees
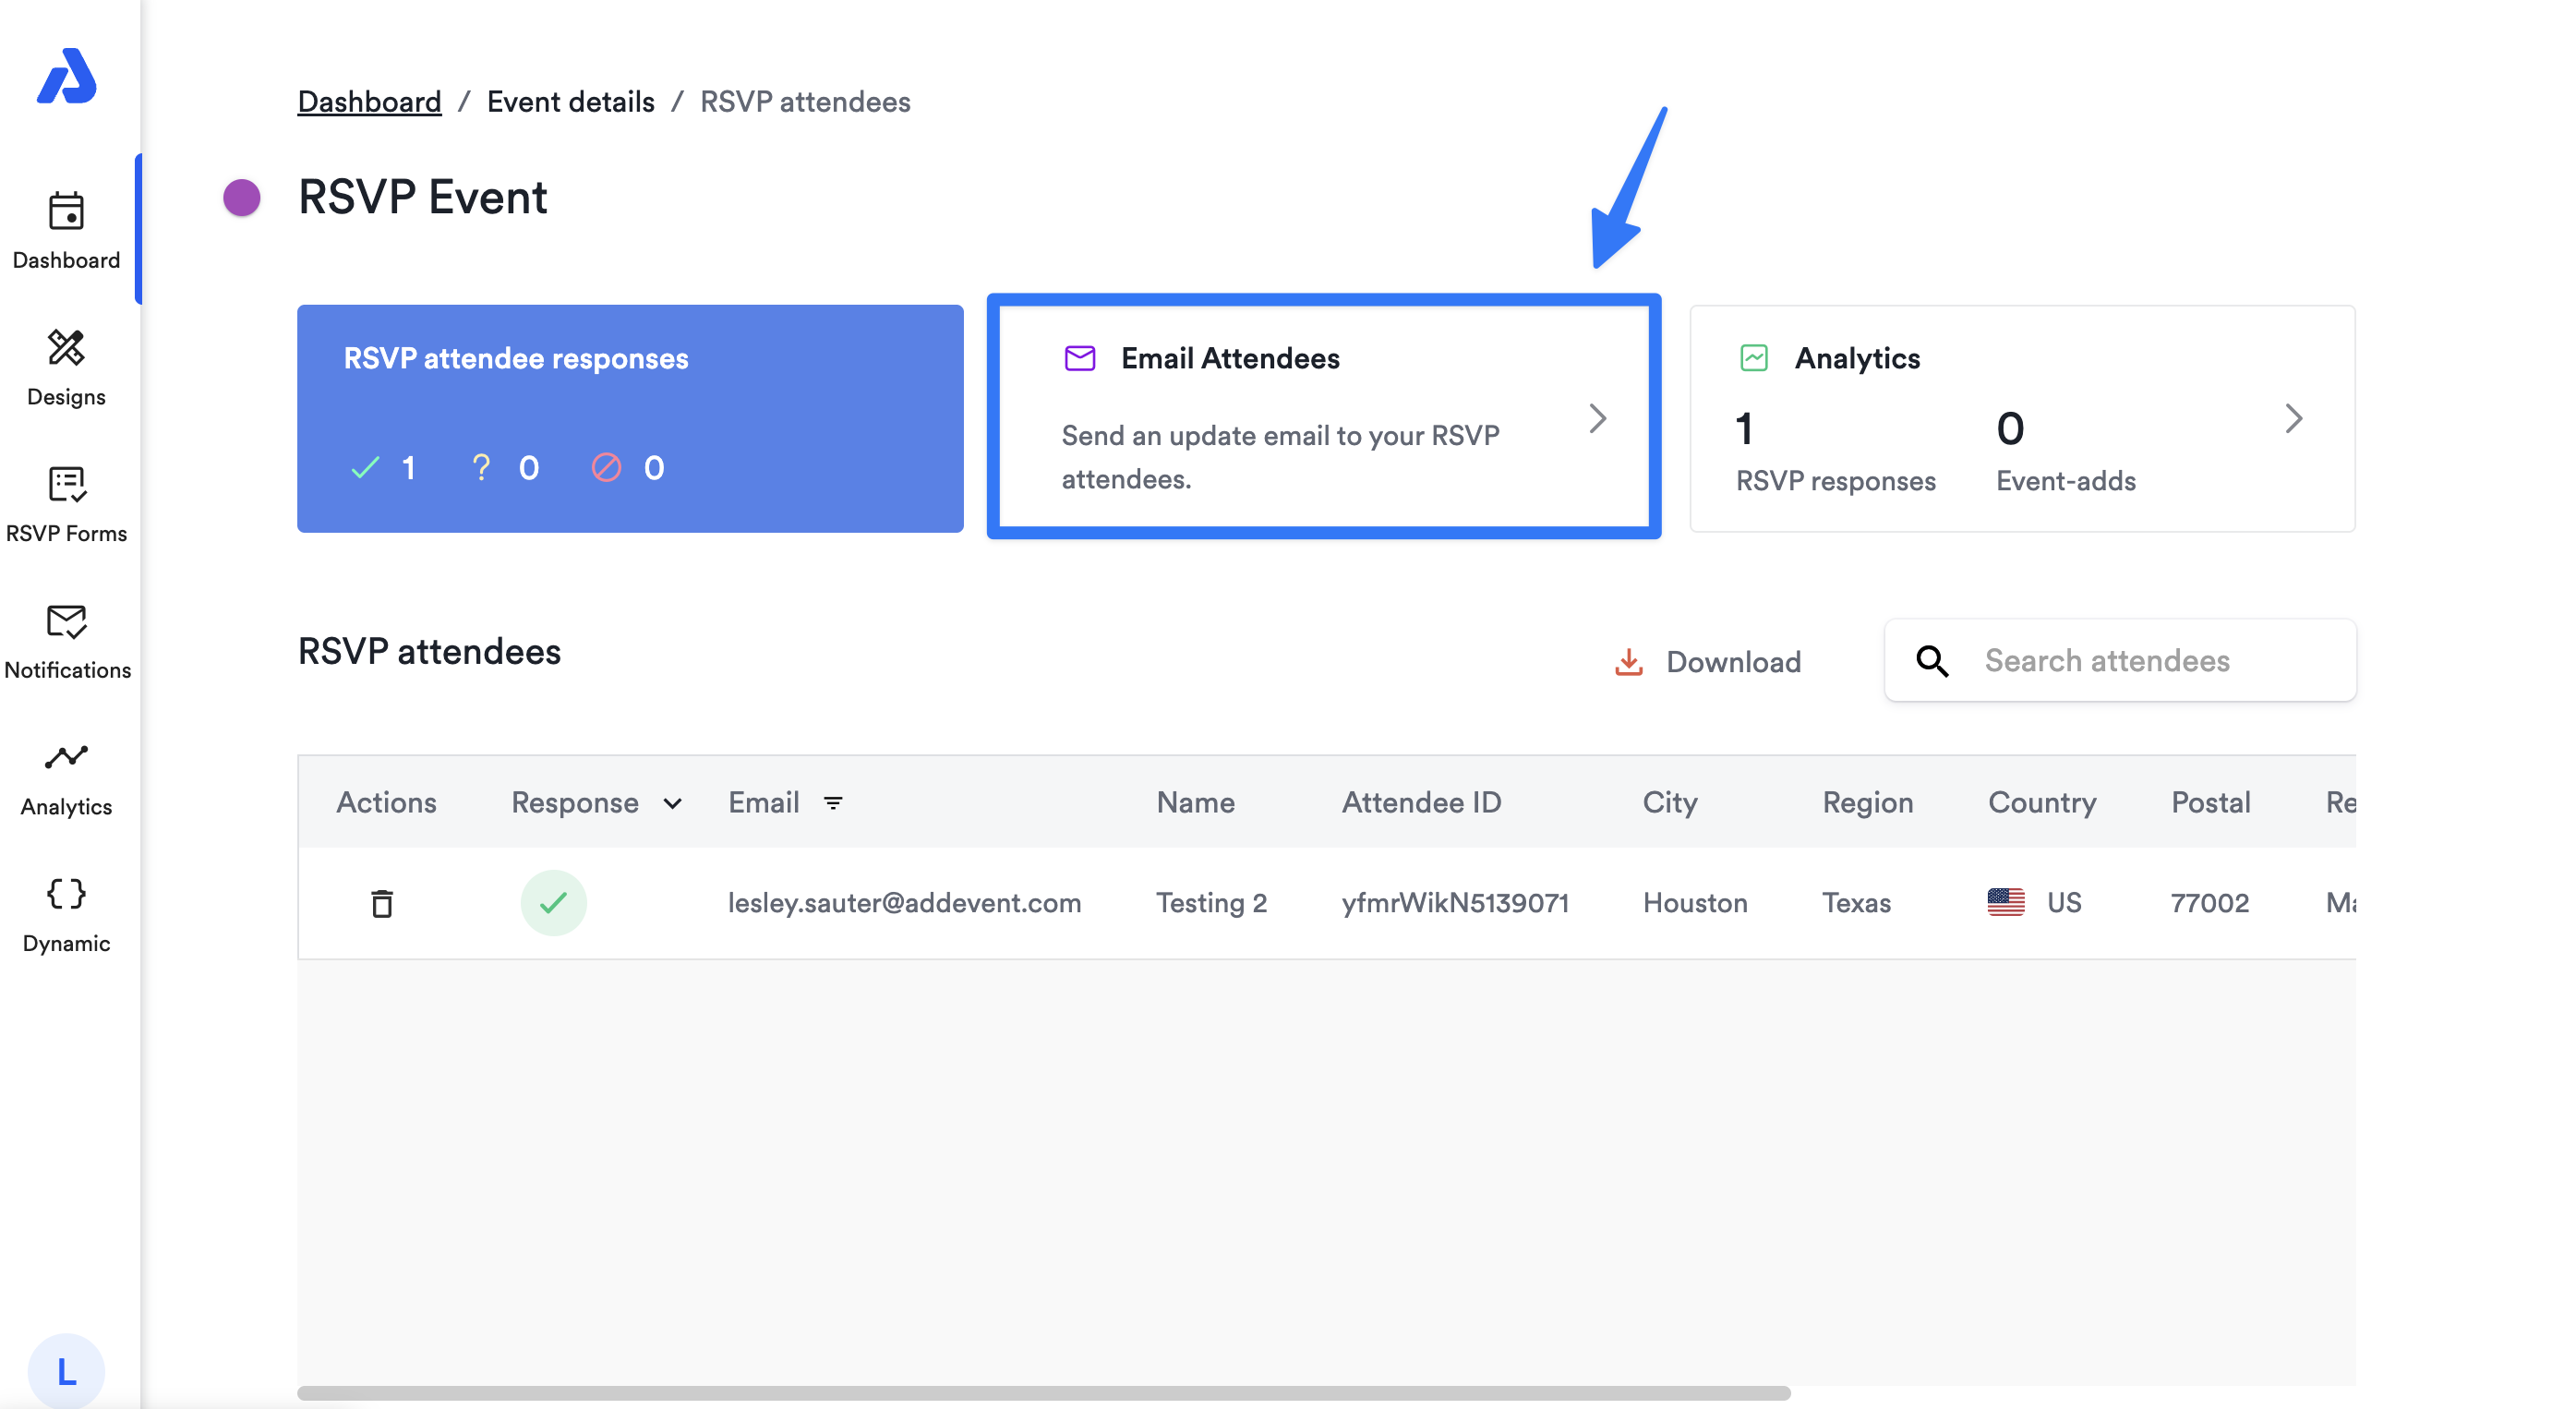
- RSVP attendees are no longer shown directly on the event details page. Instead, they are listed on a dedicated RSVP attendees page. You can also easily navigate to your RSVP responses from the RSVP attendees section. Learn more about RSVP attendees here.
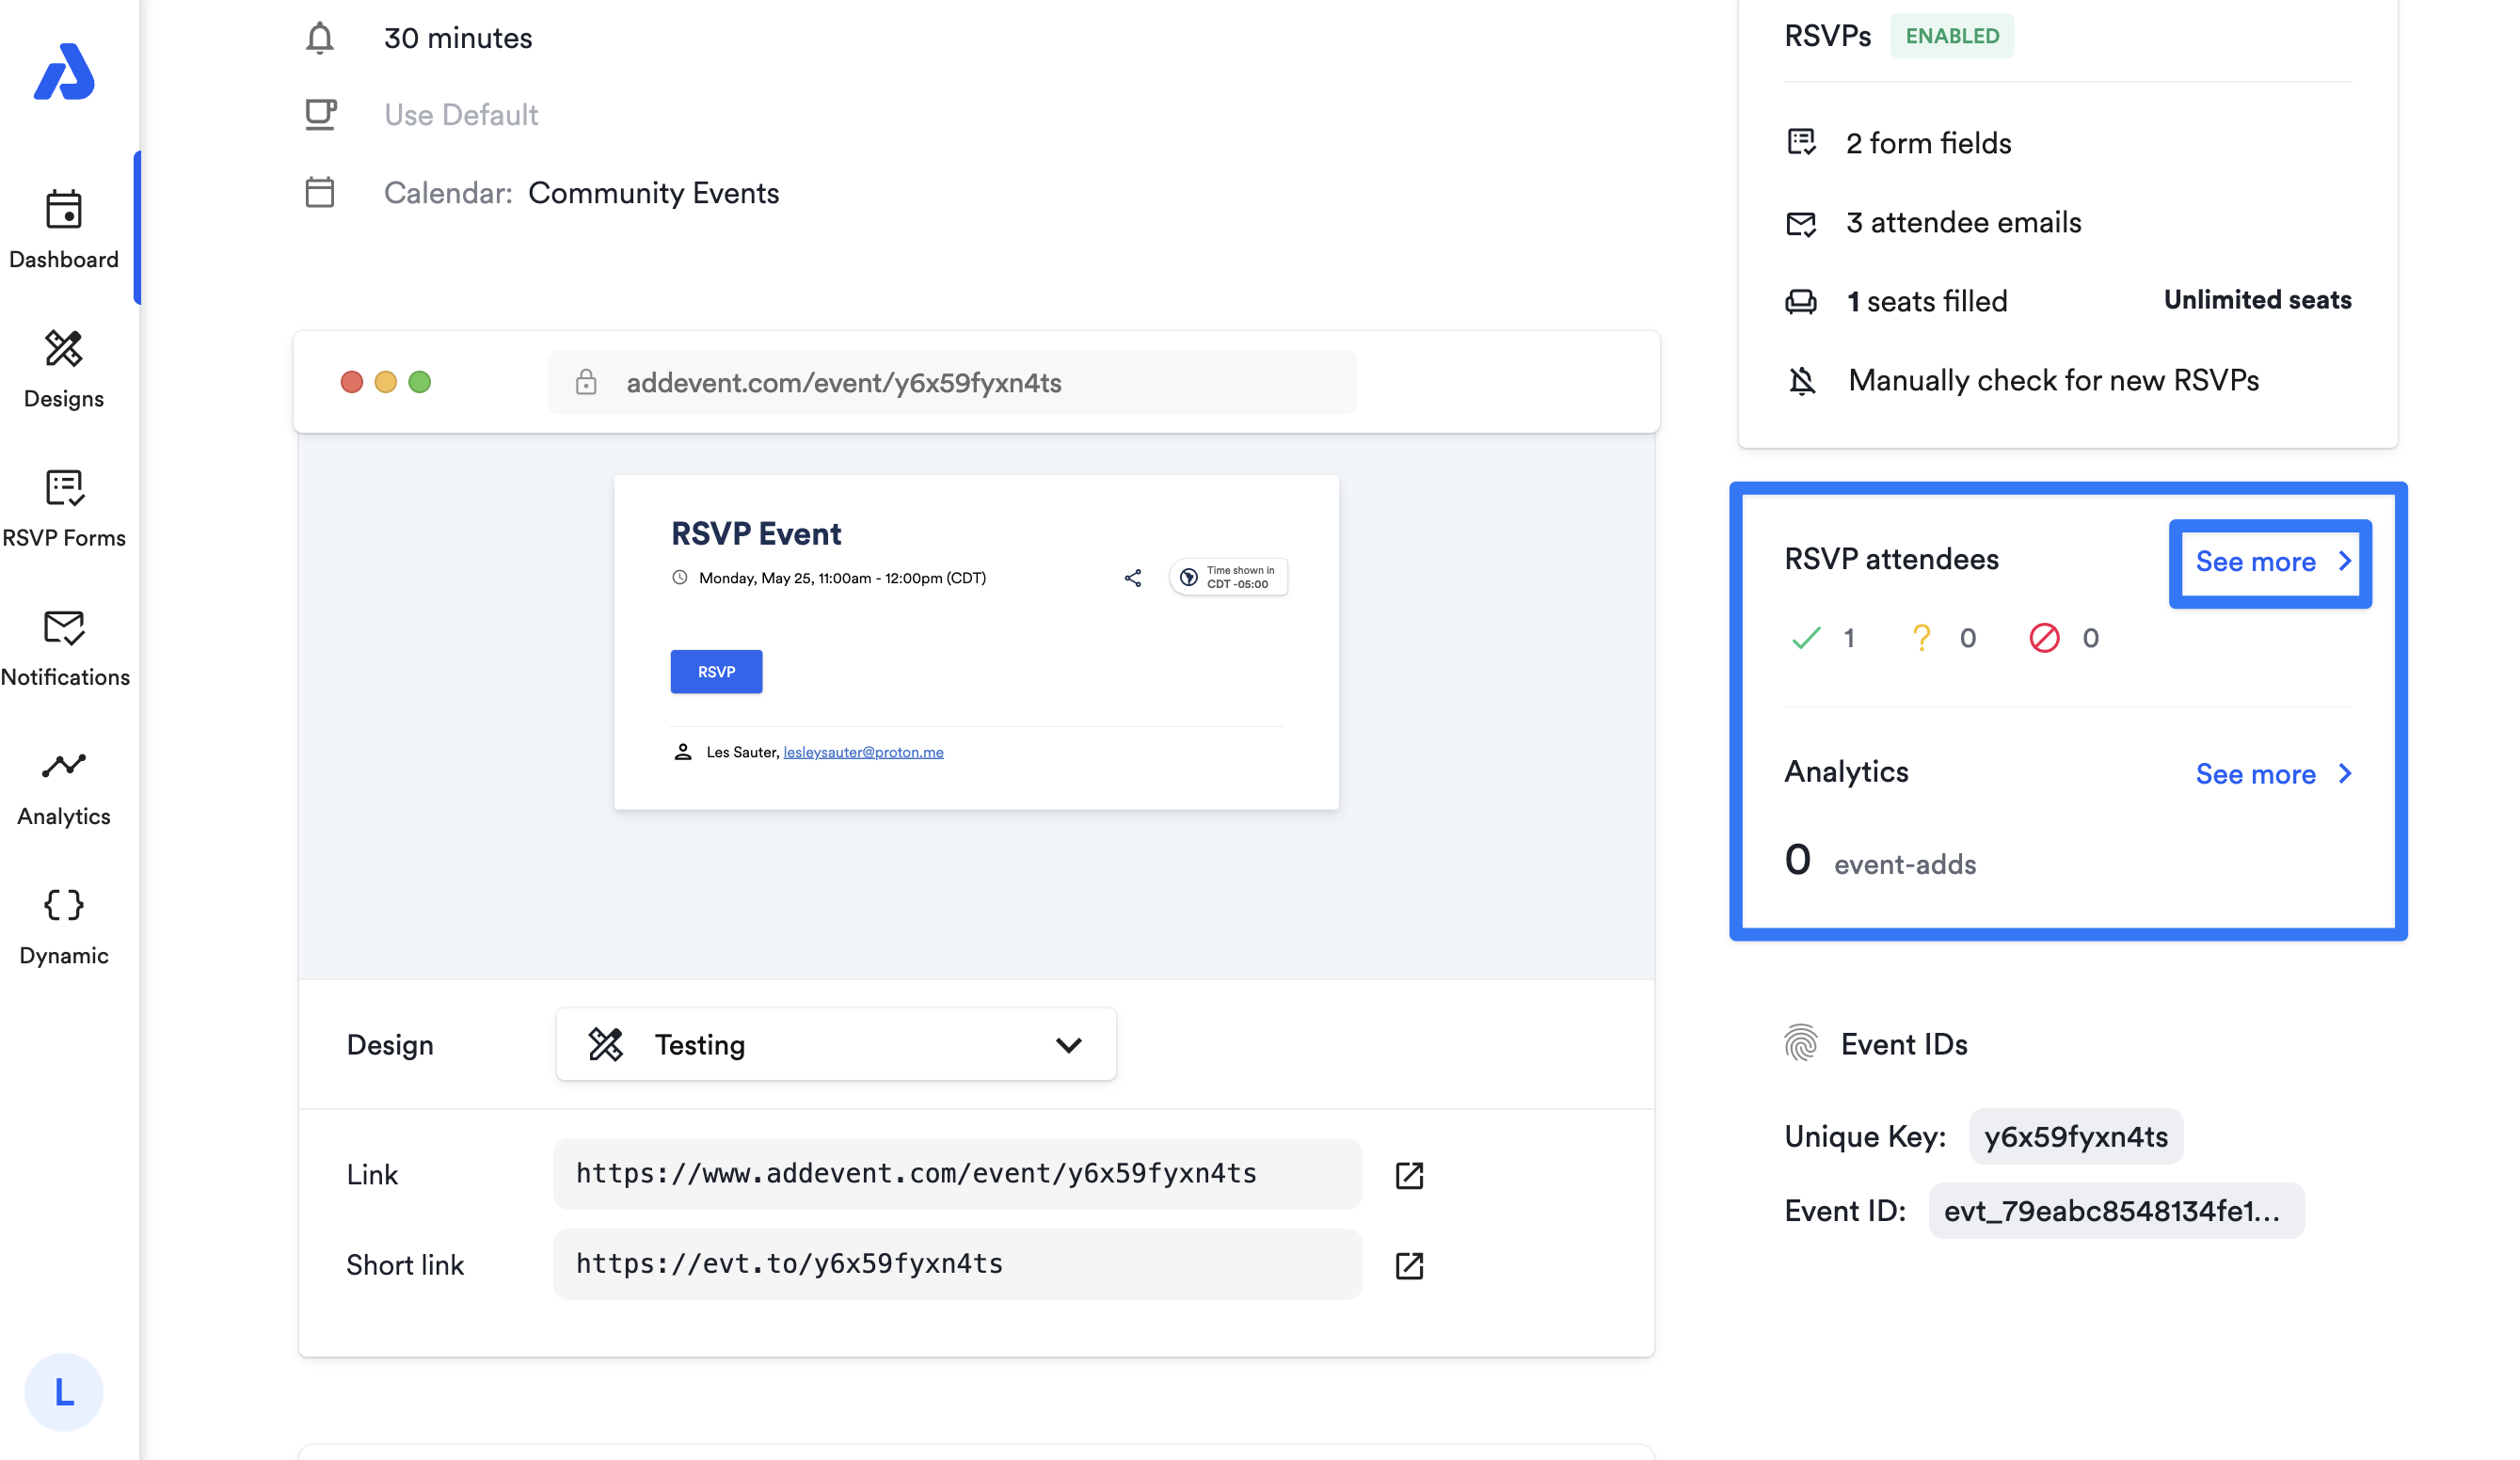
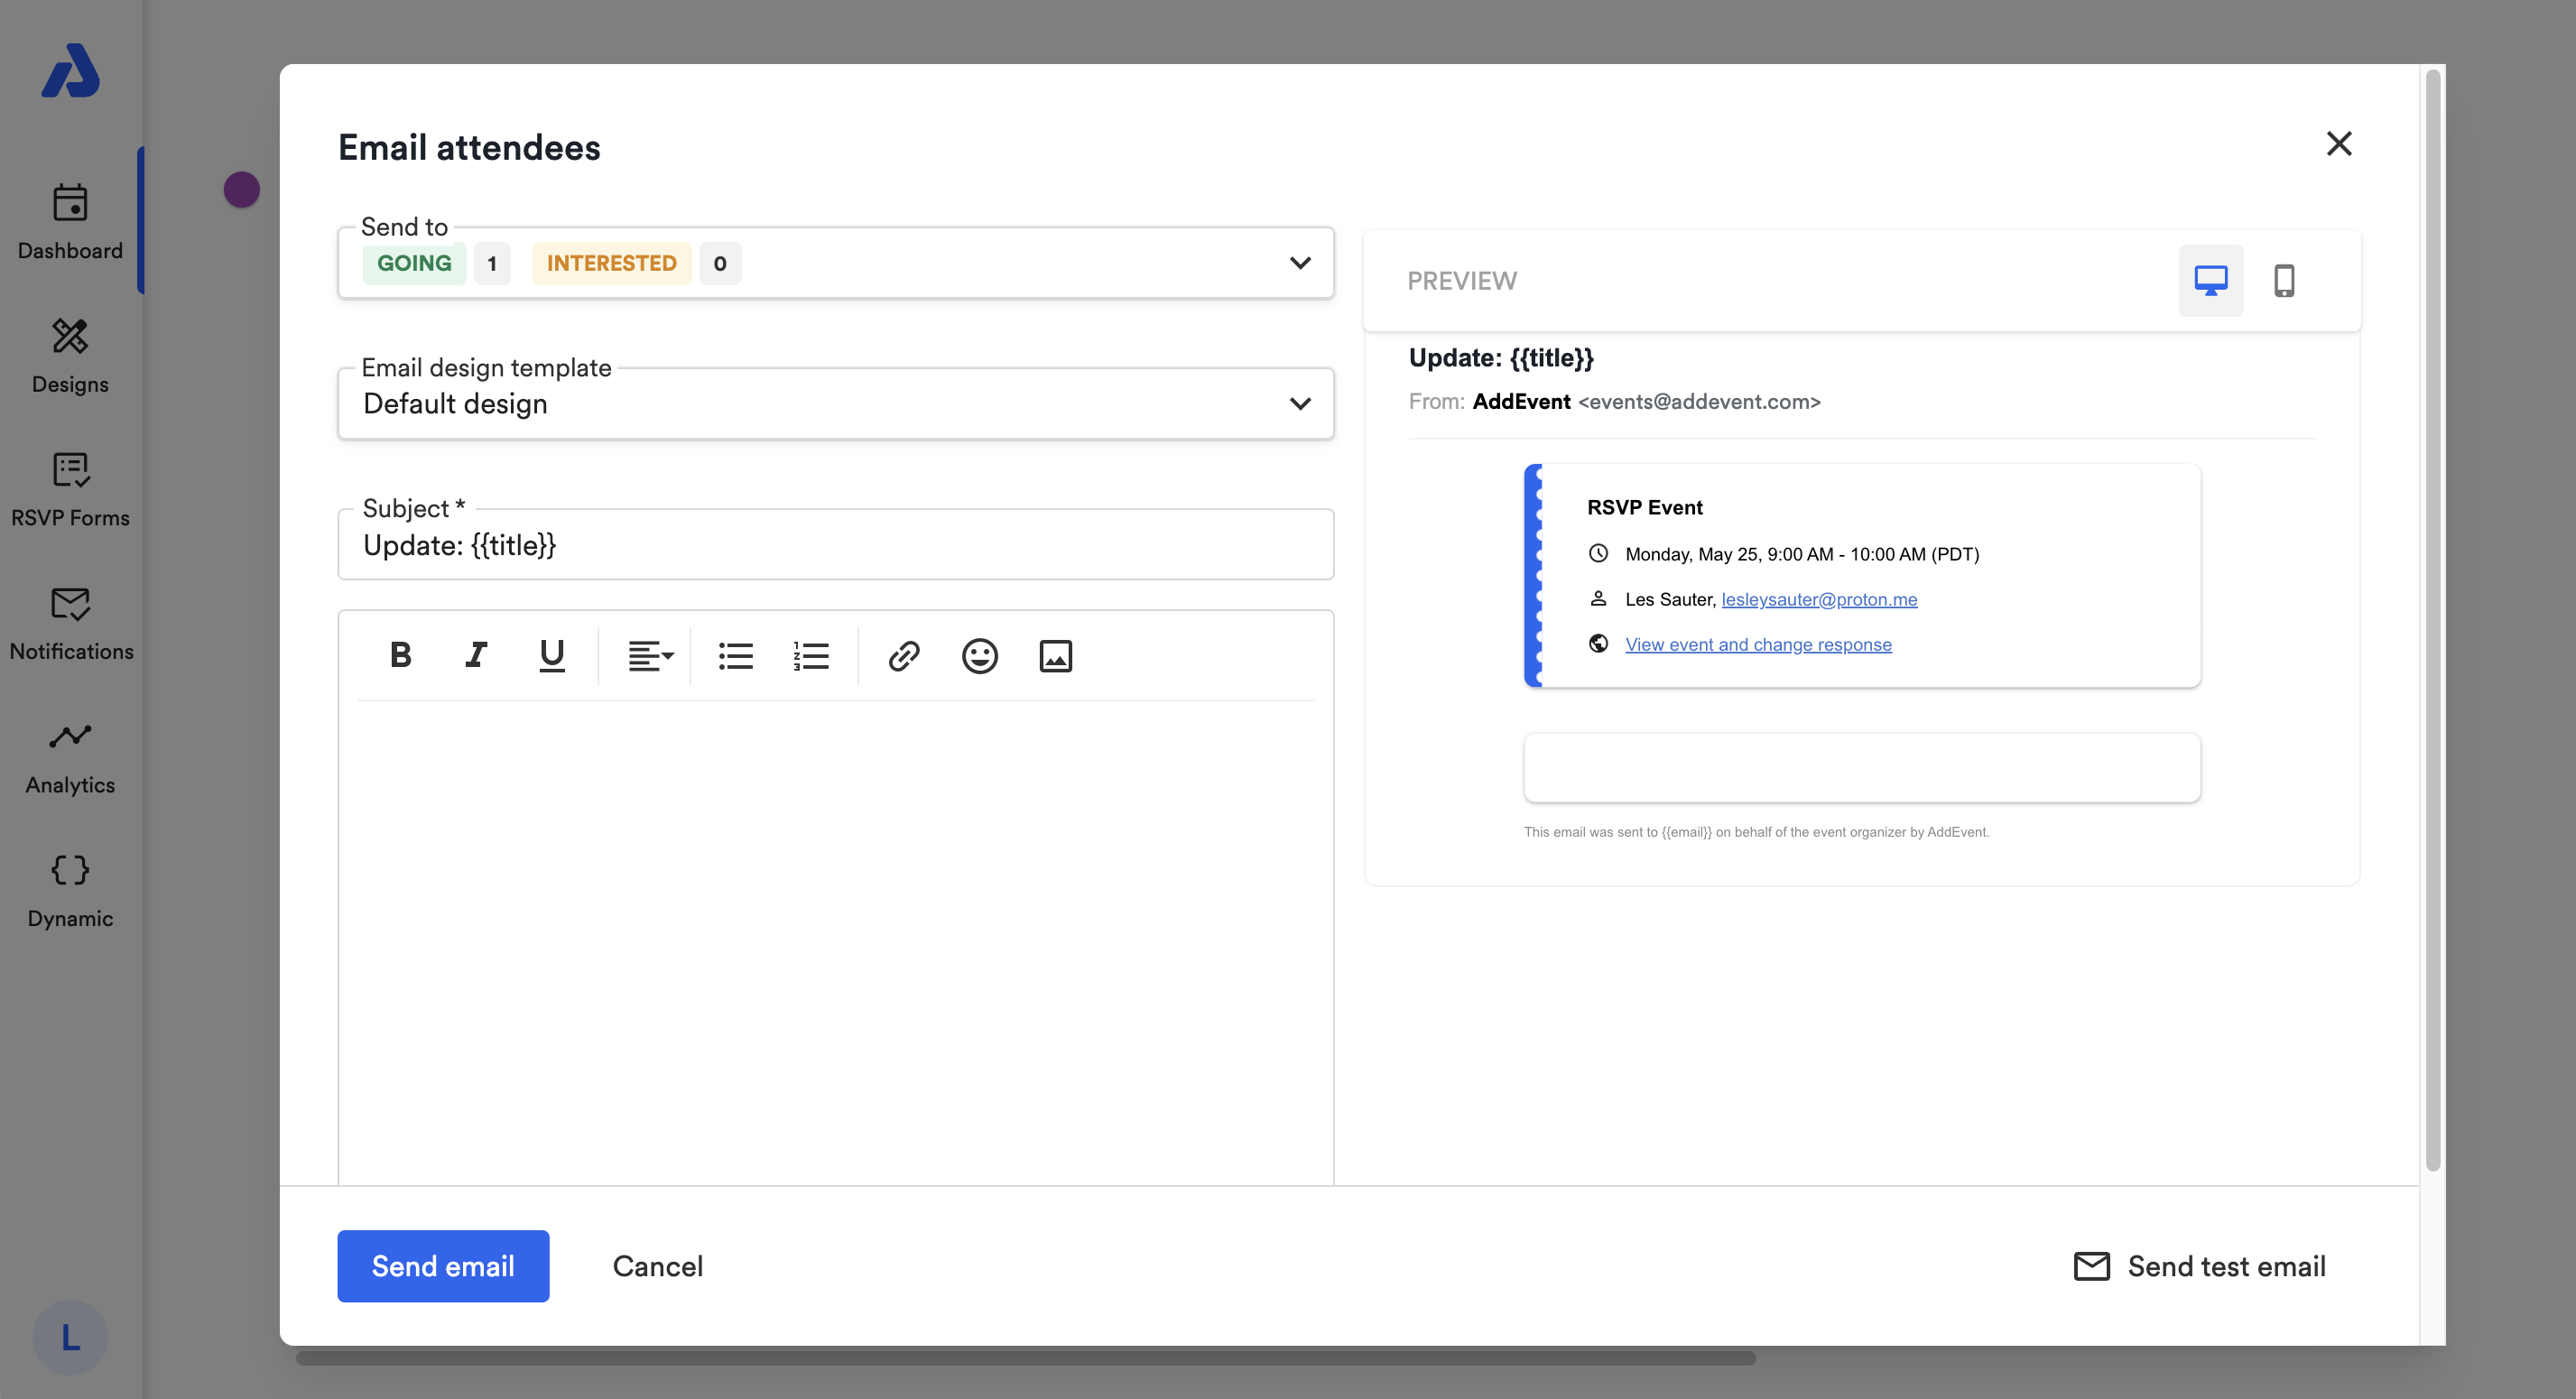
- Sending updates to RSVP attendees is now easier and more prominent, with a built-in WYSIWYG editor for customizing messages. To send one-off emails to your RSVP attendees, click into the RSVP attendees page and then select Email Attendees. Learn more about sending email updates to your registered attendees here.
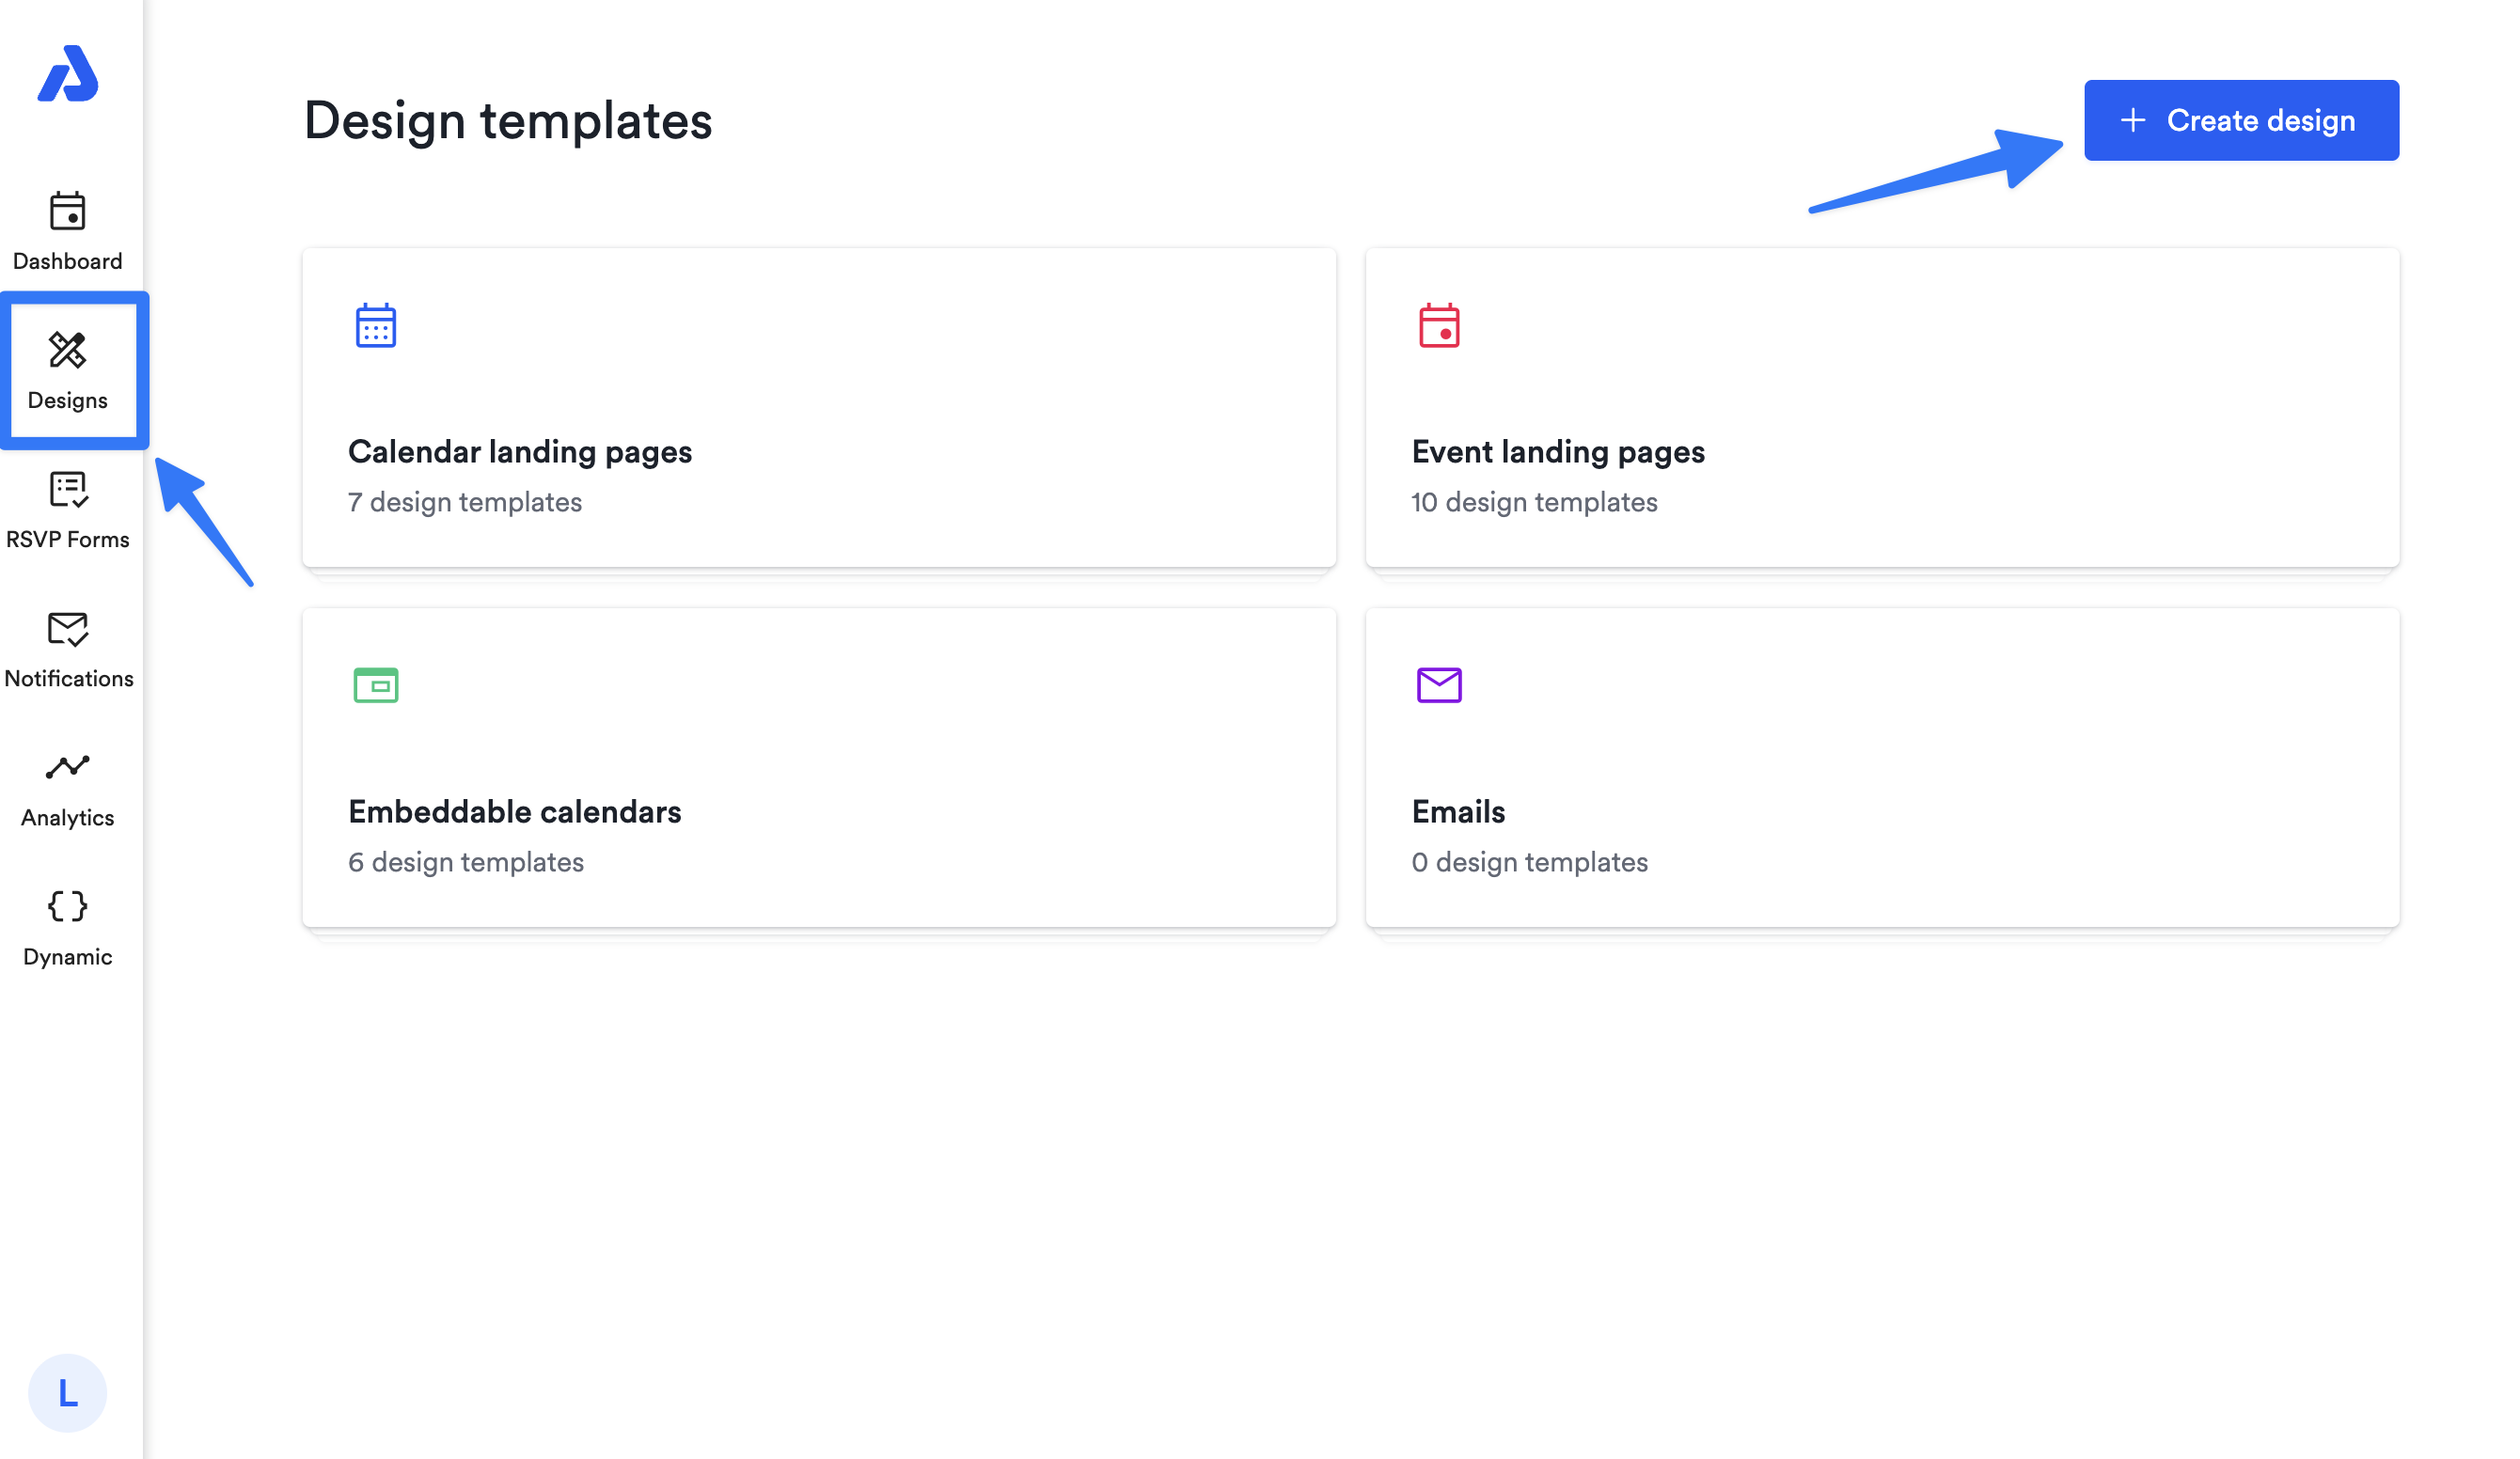
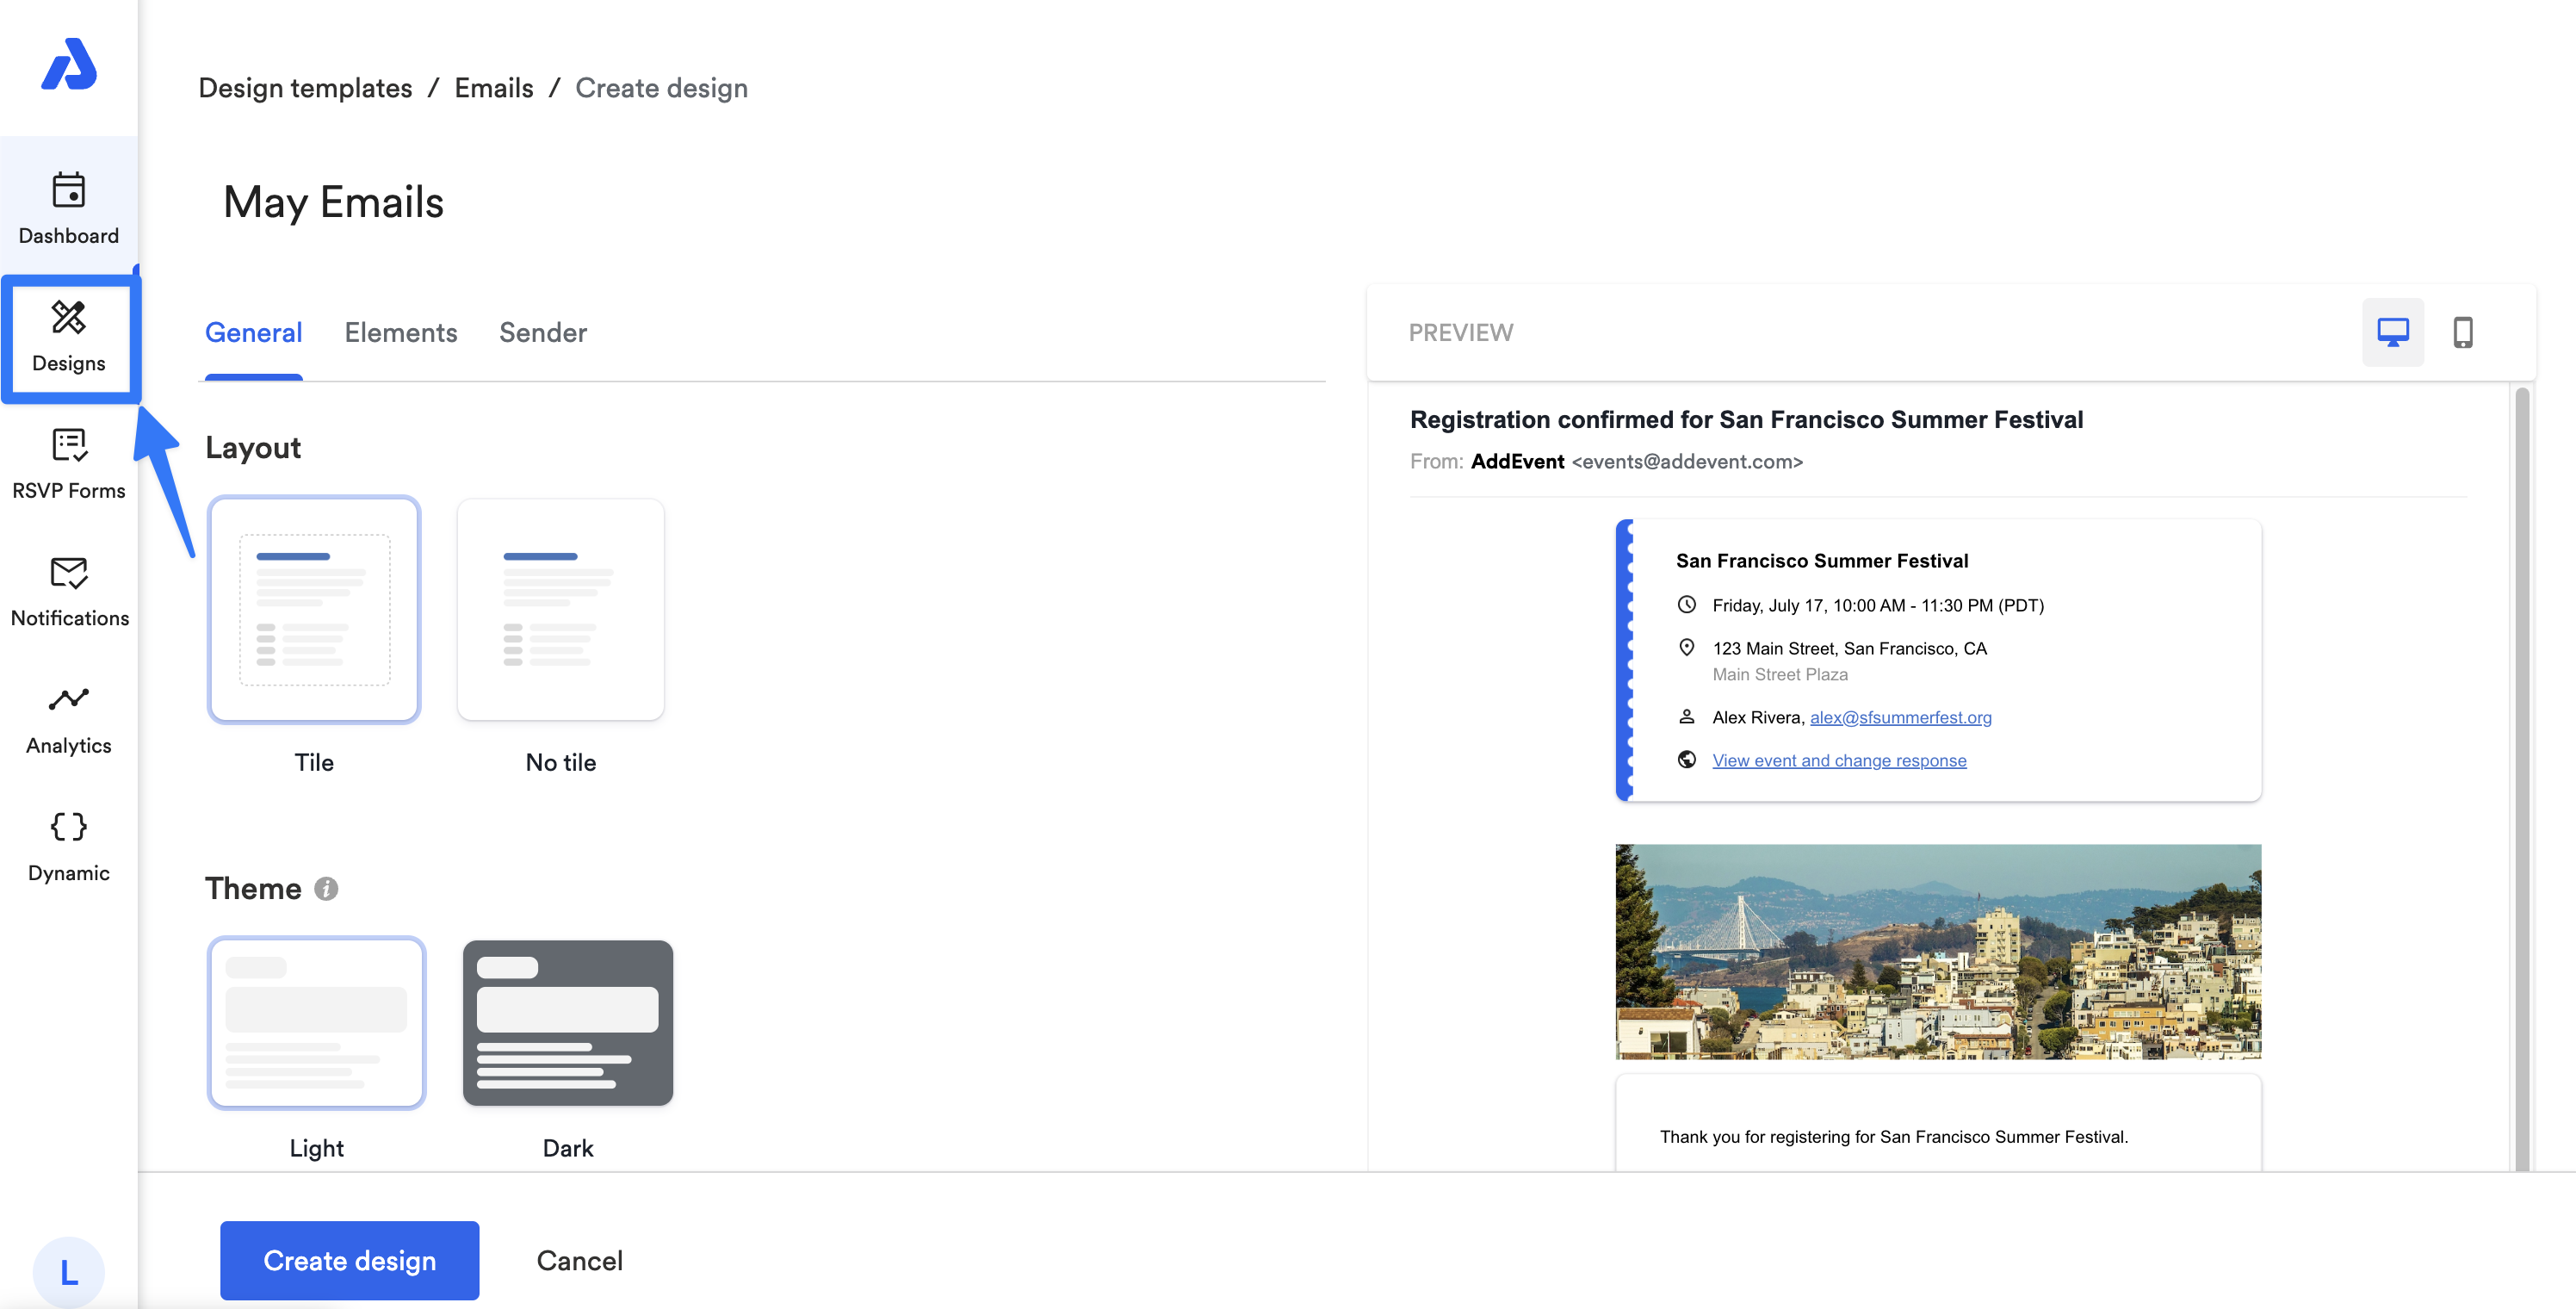
Design Templates Tab
Design Templates are the new and improved way to create and customize visual templates for:
Designs require zero code, so you don’t need any coding experience to create designs. This is AddEvent’s most powerful customization feature yet, bringing design flexibility to all users.
Browsing & Selecting Templates
- When viewing a list of templates, each one now includes a live preview — making it easier to pick the right template without guessing or needing to remember specific template names.
- Previews are also available when selecting templates in the sharing sections for events or calendars.
Managing Templates
From the design template list, you can:
- Edit an existing template
- Duplicate a template to reuse its style
- Delete templates you no longer need
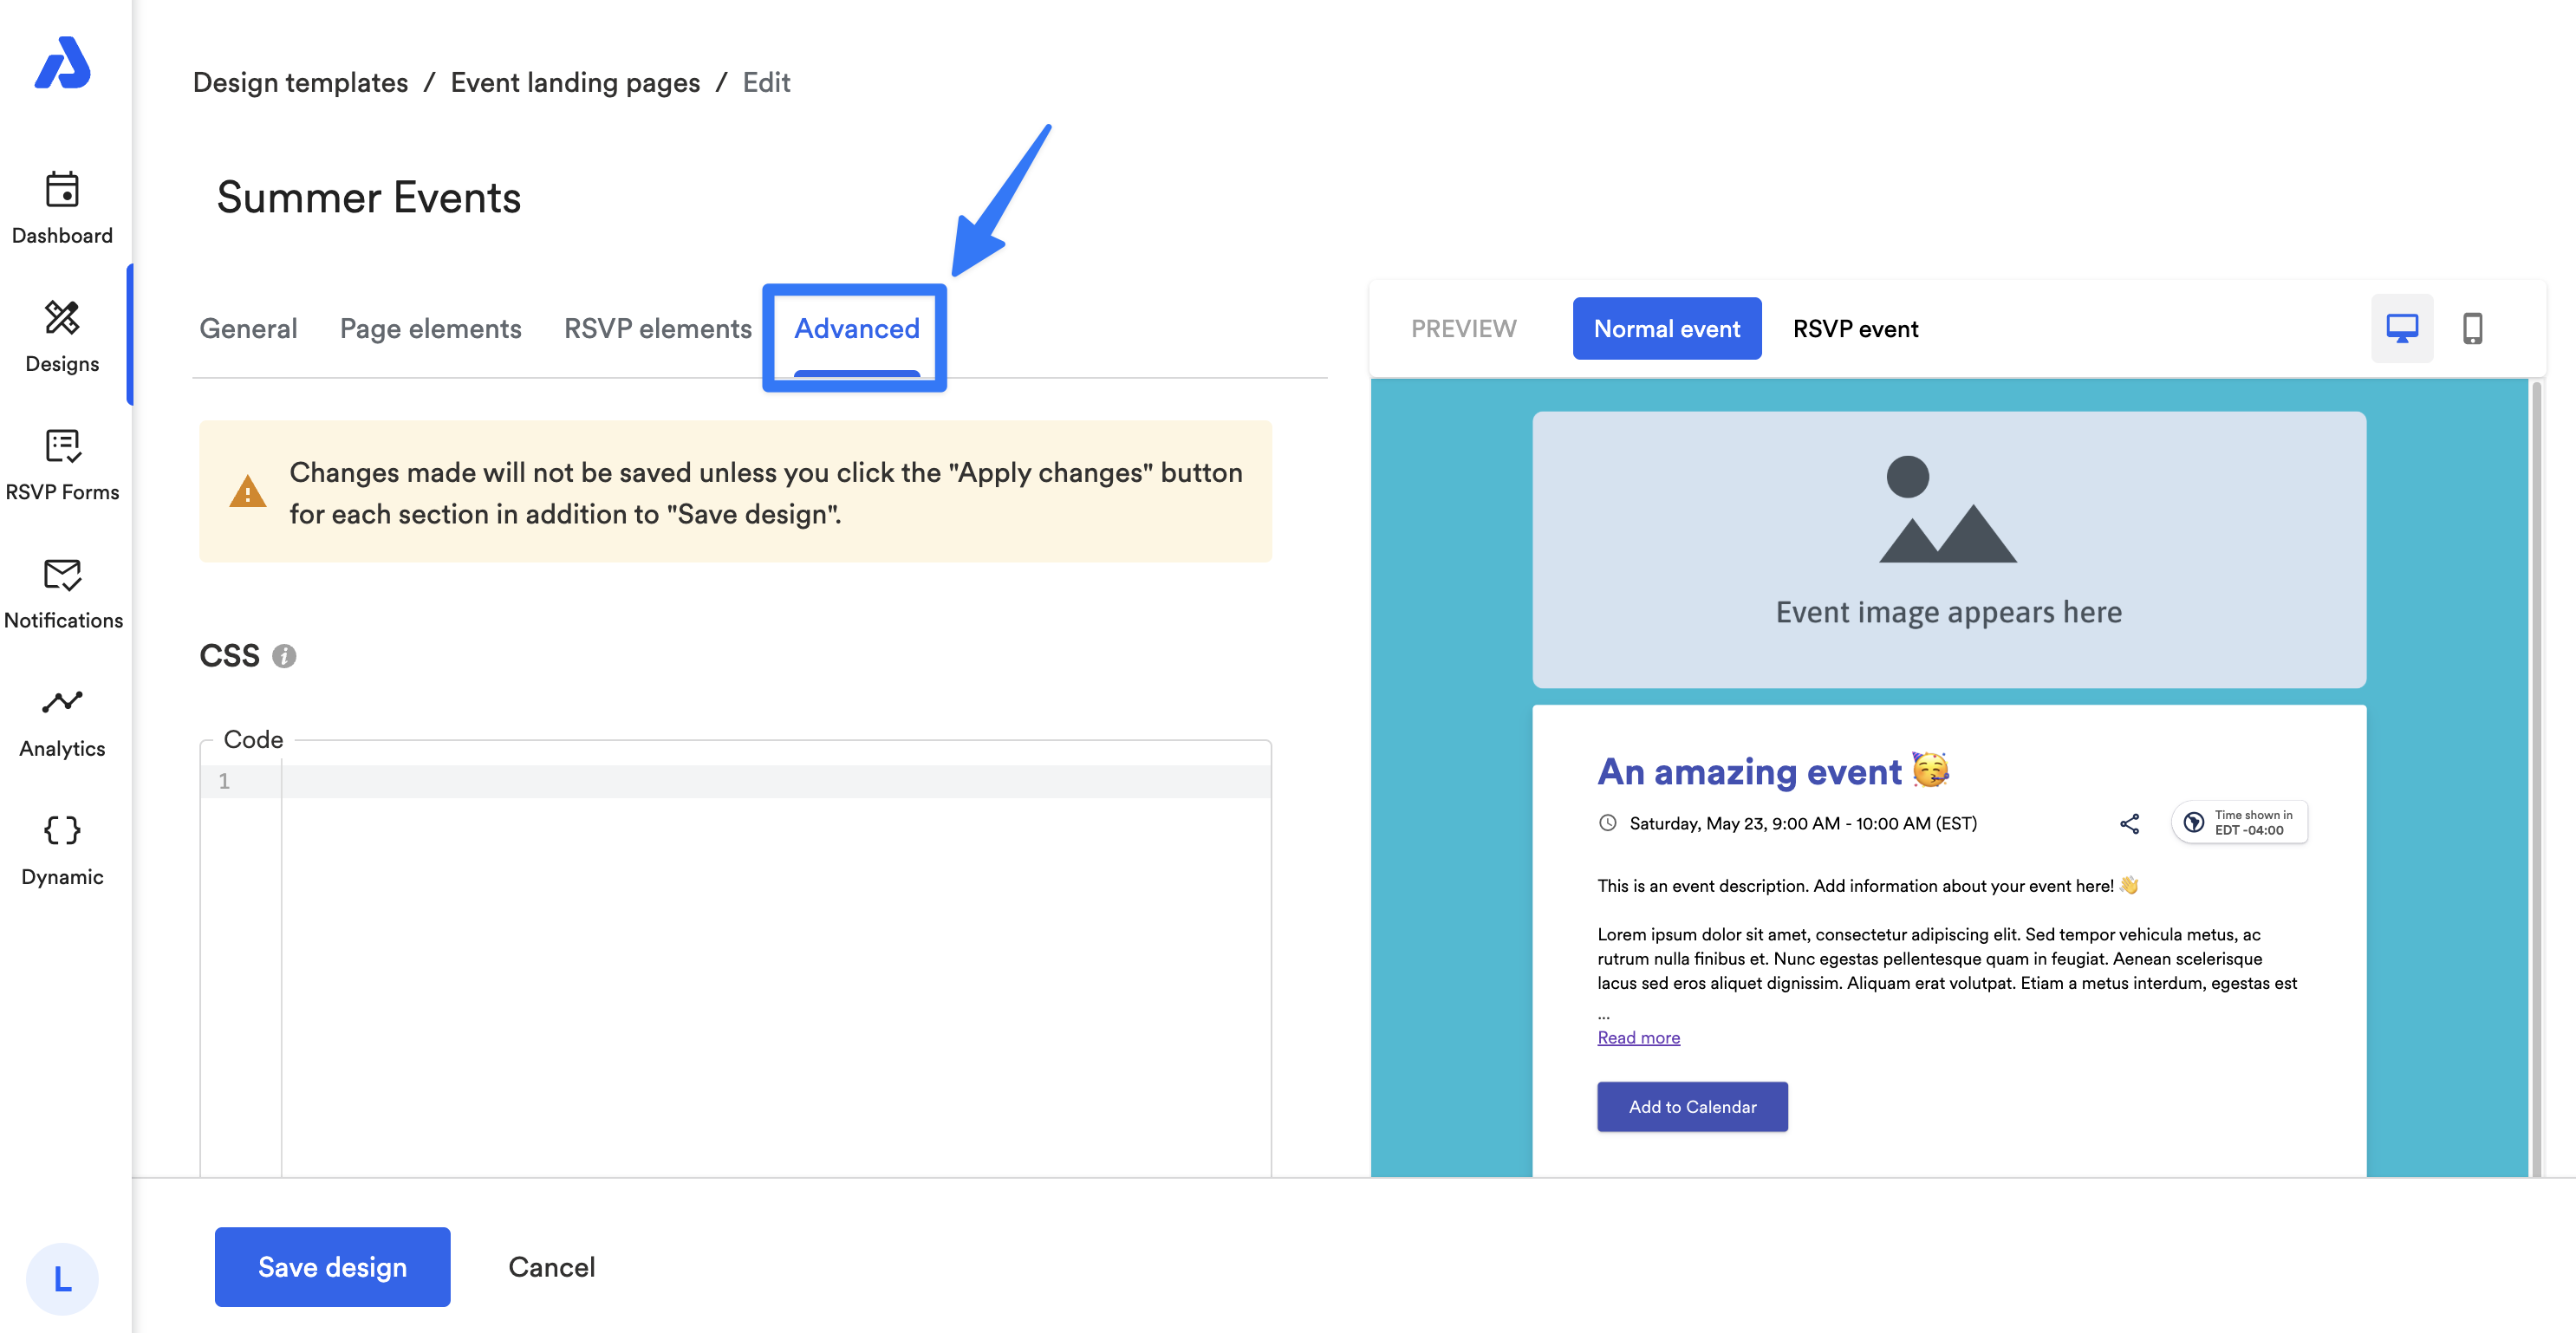
Advanced Customization Option
While the old code editor has been retired, don’t worry — you can still add custom code to your event and calendar landing pages, as well as your embeddable calendar. This is now done through the Advanced Customization tab, giving you full control over the look and functionality of your pages for Professional and Enterprise plans.
AddEvent 1.0 Custom HTML Design Templates
Custom HTML templates cannot be edited in AddEvent 2.0.
You can still apply your existing templates. If you want to make changes to existing designs from AddEvent 1.0, you will need to recreate those custom HTML templates using the no-code editor via design templates.
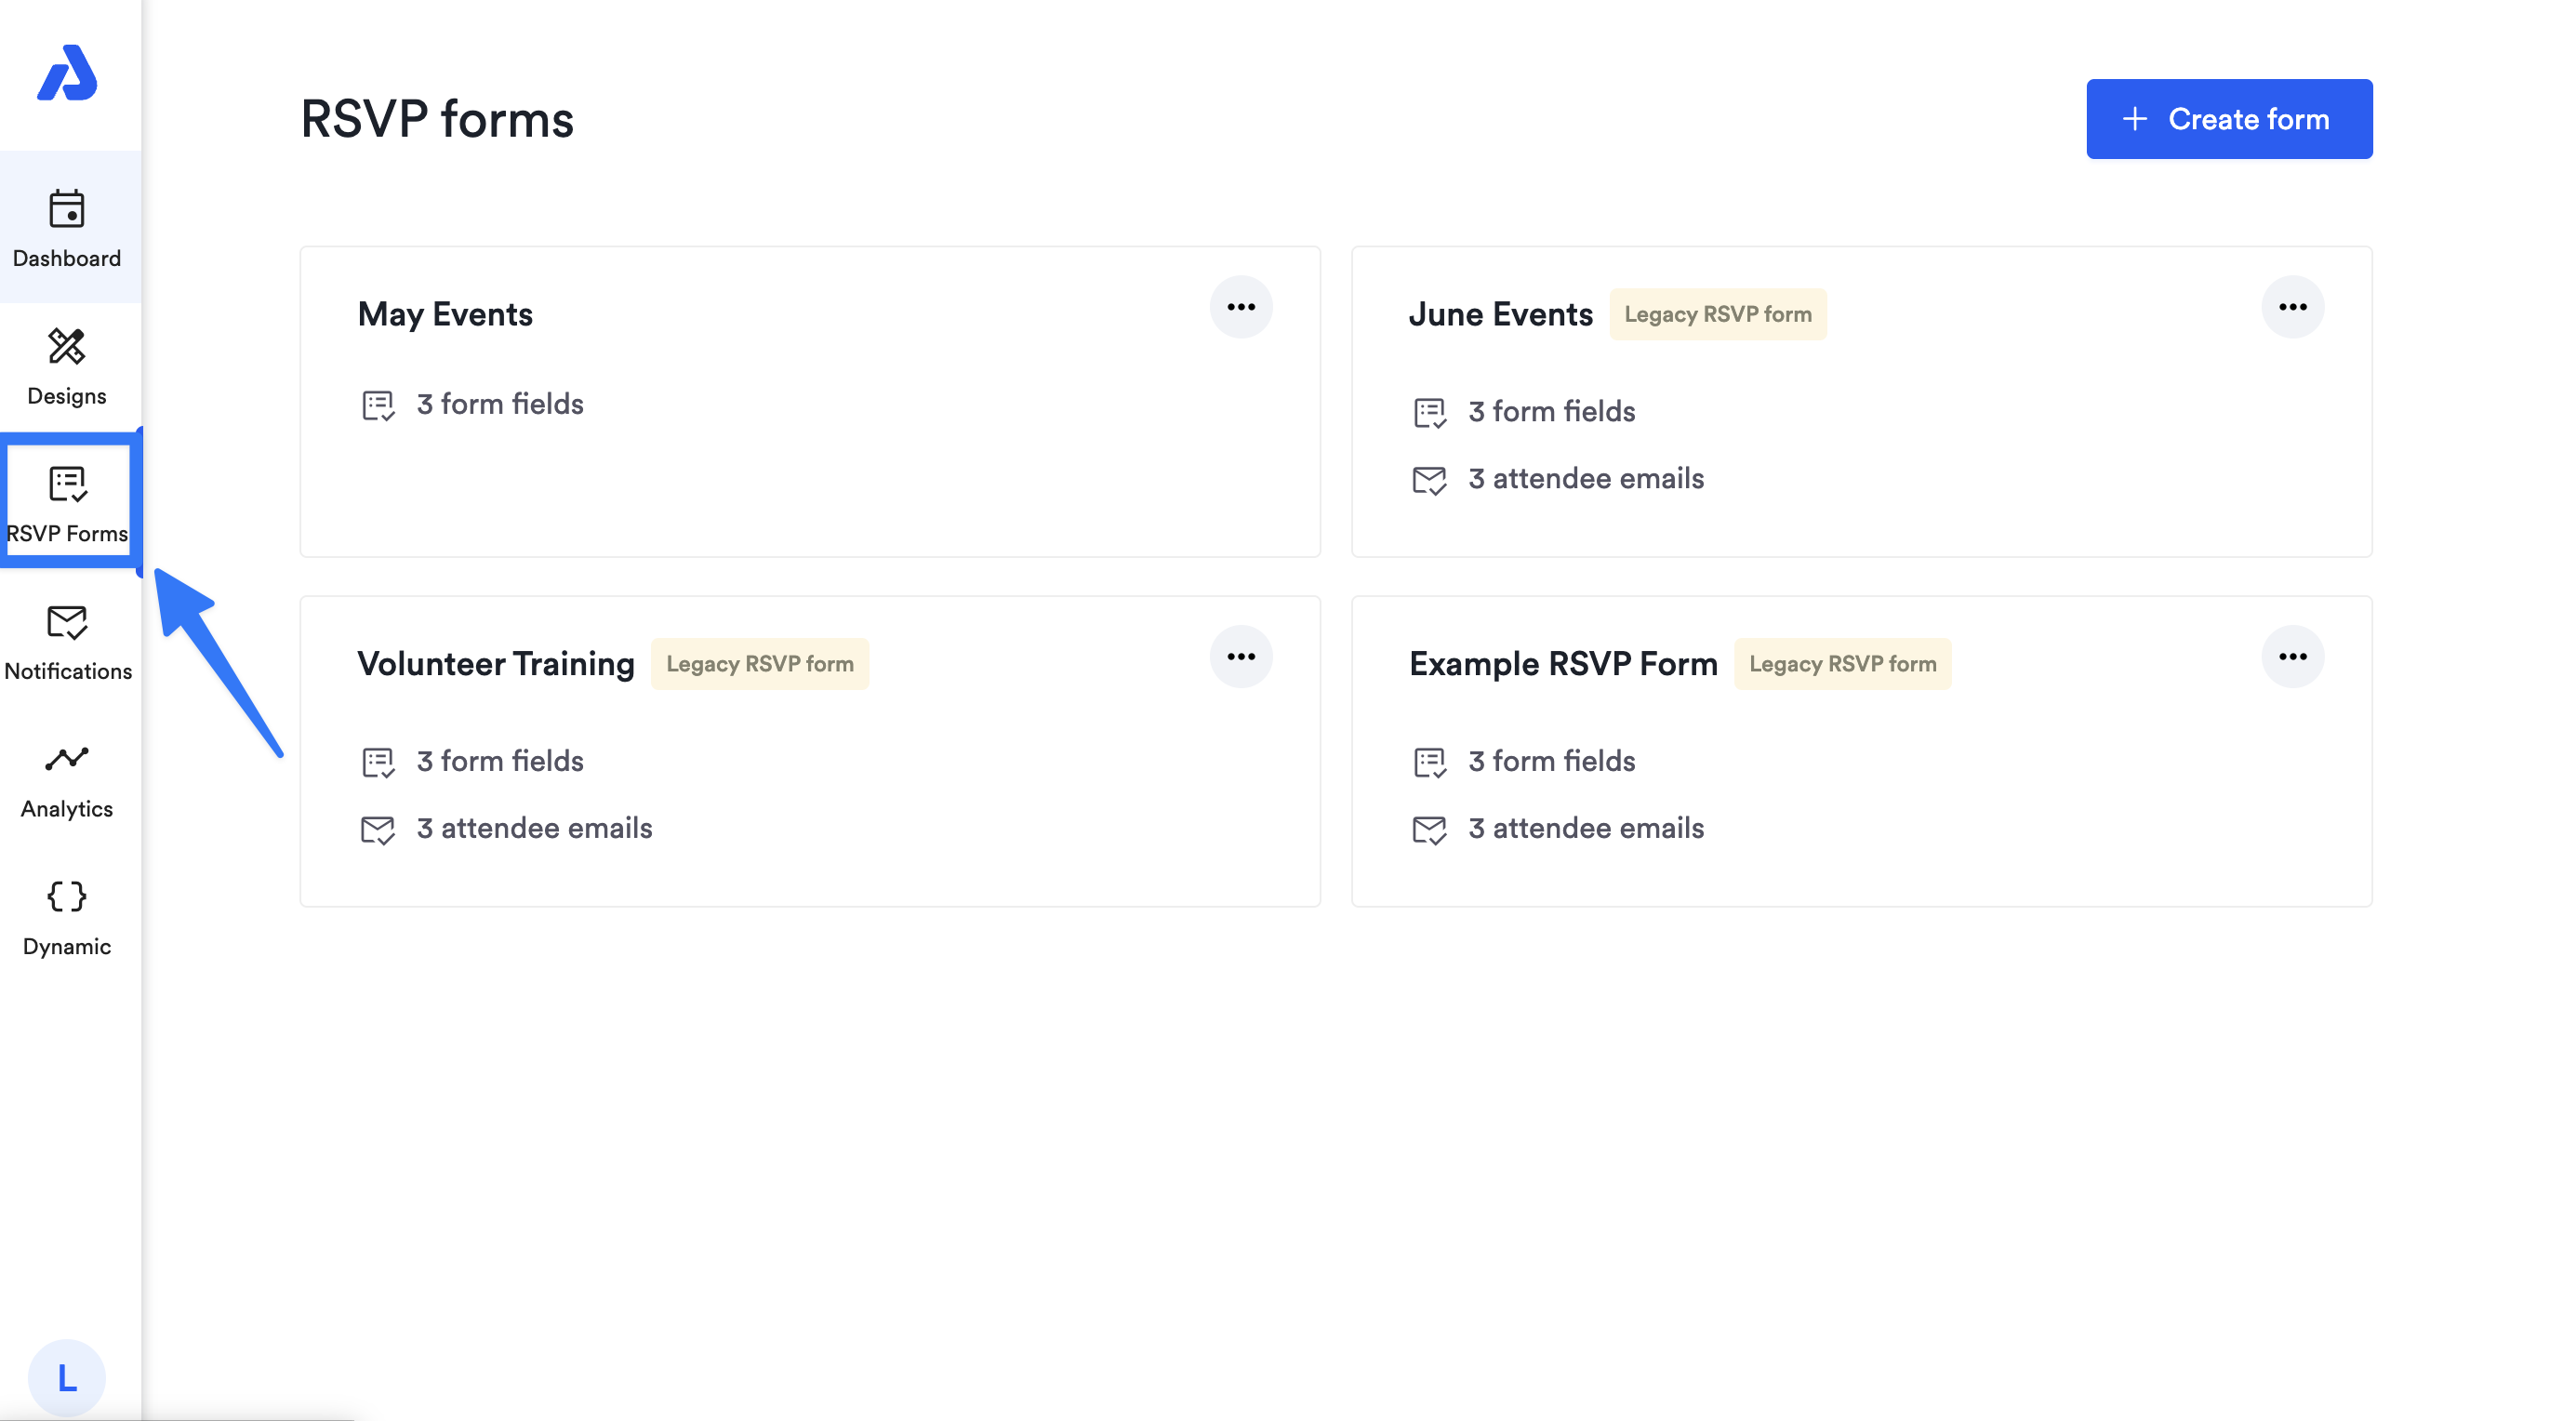
RSVP Forms Tab
RSVPs and RSVP forms are now no-code, more prominent, and easier to access than ever.
Using Existing RSVP Forms
The forms themselves work much the same as before, so any RSVP forms you created previously will still function in AddEvent 2.0. You’ll be able to view, select, and edit them without losing your existing setup.
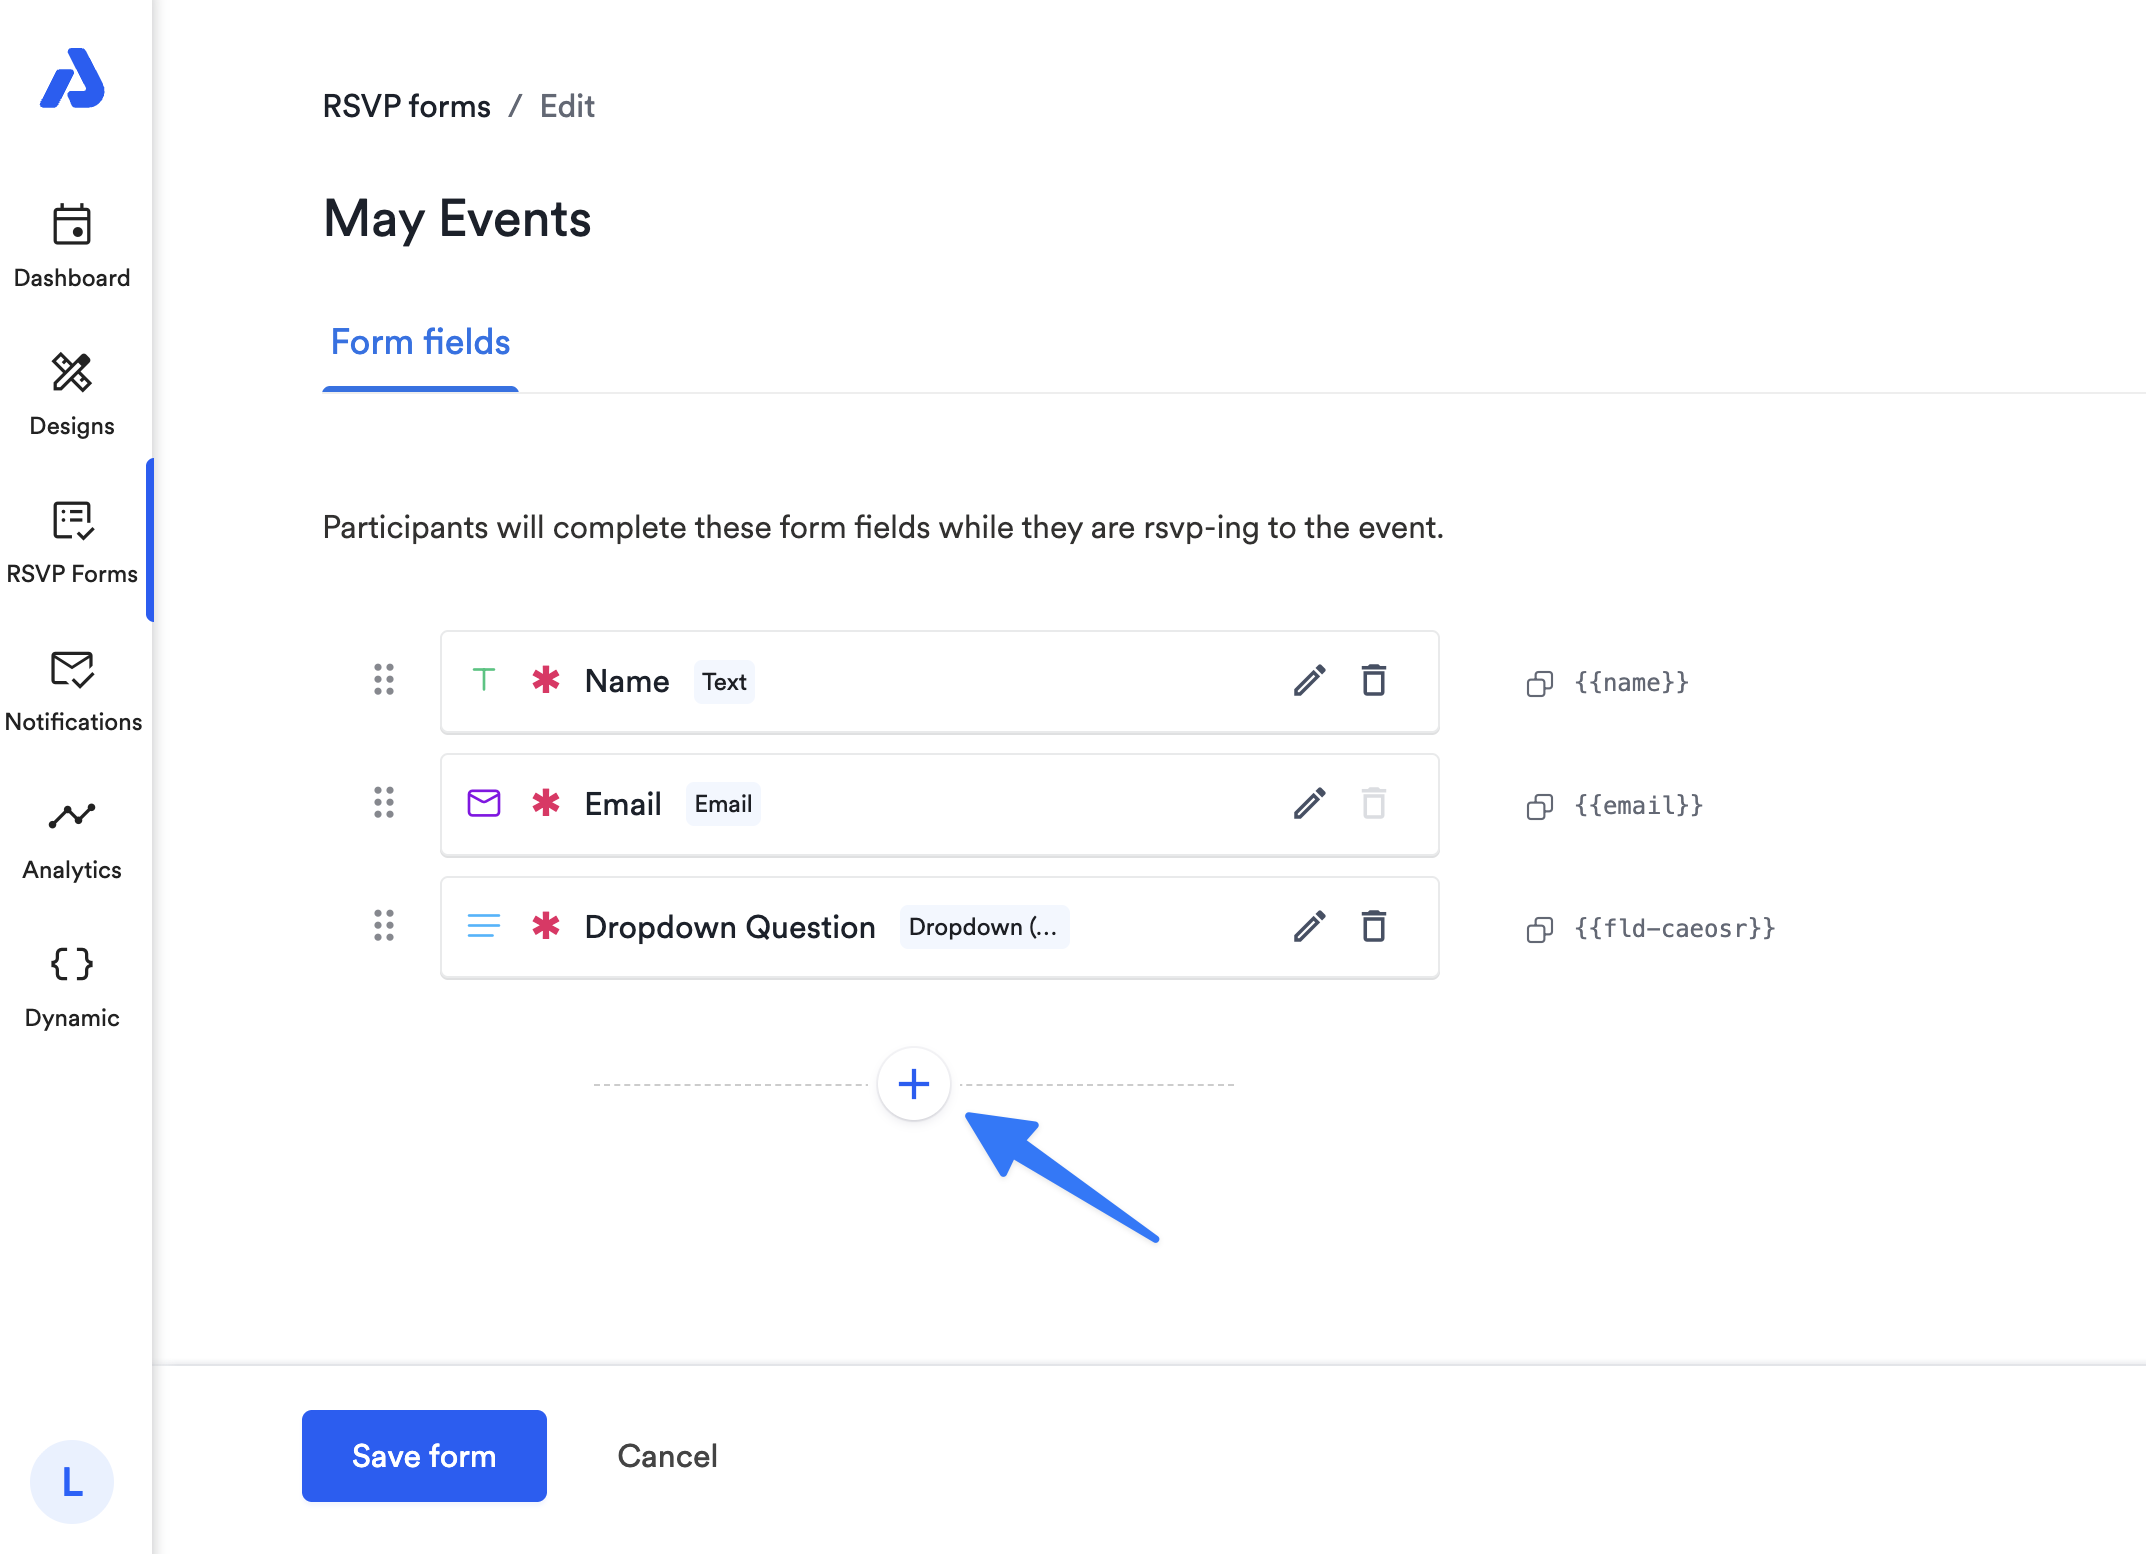
Creating & Editing RSVP Forms
When creating or editing a form, you’ll be able to create custom field questions by clicking the + sign icon:
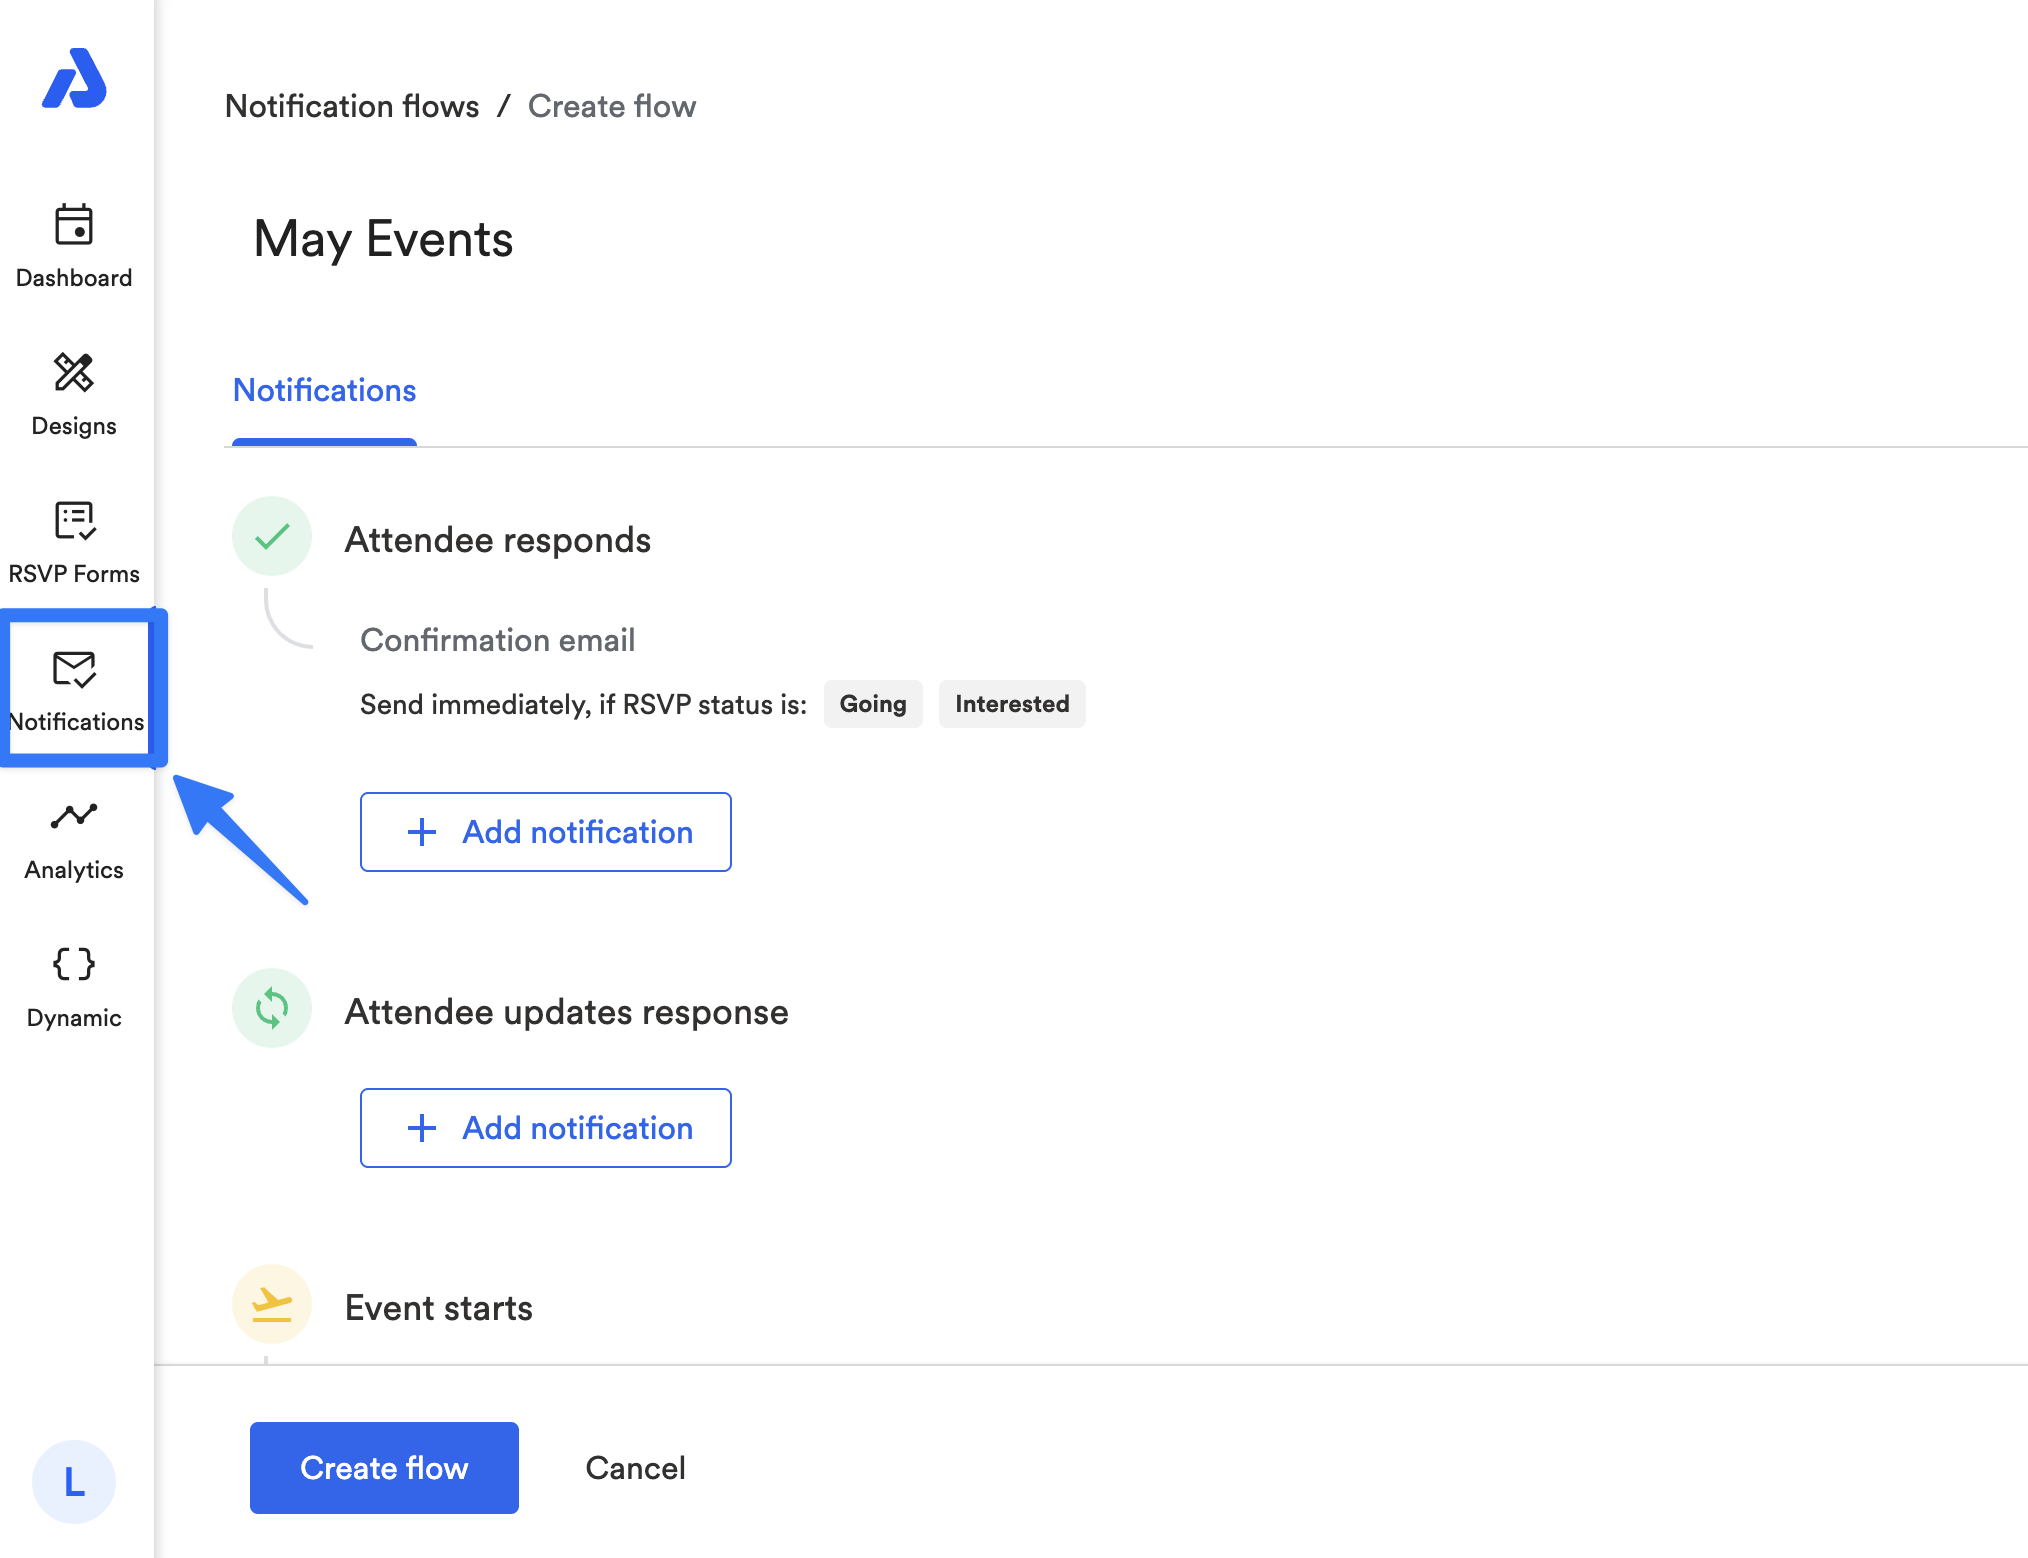
RSVP Notification Flows
With our Notification Flows release here, you can automate email sequences for RSVP attendees based on triggers and timing. You can customize when emails are sent, who receives them, and what they say and then assign flows to RSVP events to handle confirmations, reminders, follow-ups, and other communications automatically.
Learn more about Notification Flows in our help doc here.
RSVP Email Designs
Email design templates control how your emails look when they are sent to RSVP attendees. They define the visual layout, branding, and structure of your emails, but do not control when emails are sent or who receives them.
Email designs are used in:
- Notification flows (automated emails)
- RSVP attendee update emails (manual emails)
Learn more about Email Designs in our help doc here.
Analytics Tab
Explore the Analytics tab to get a full understanding of how your events and calendars are performing in real-time. You can access Analytics directly from an event or calendar details page.
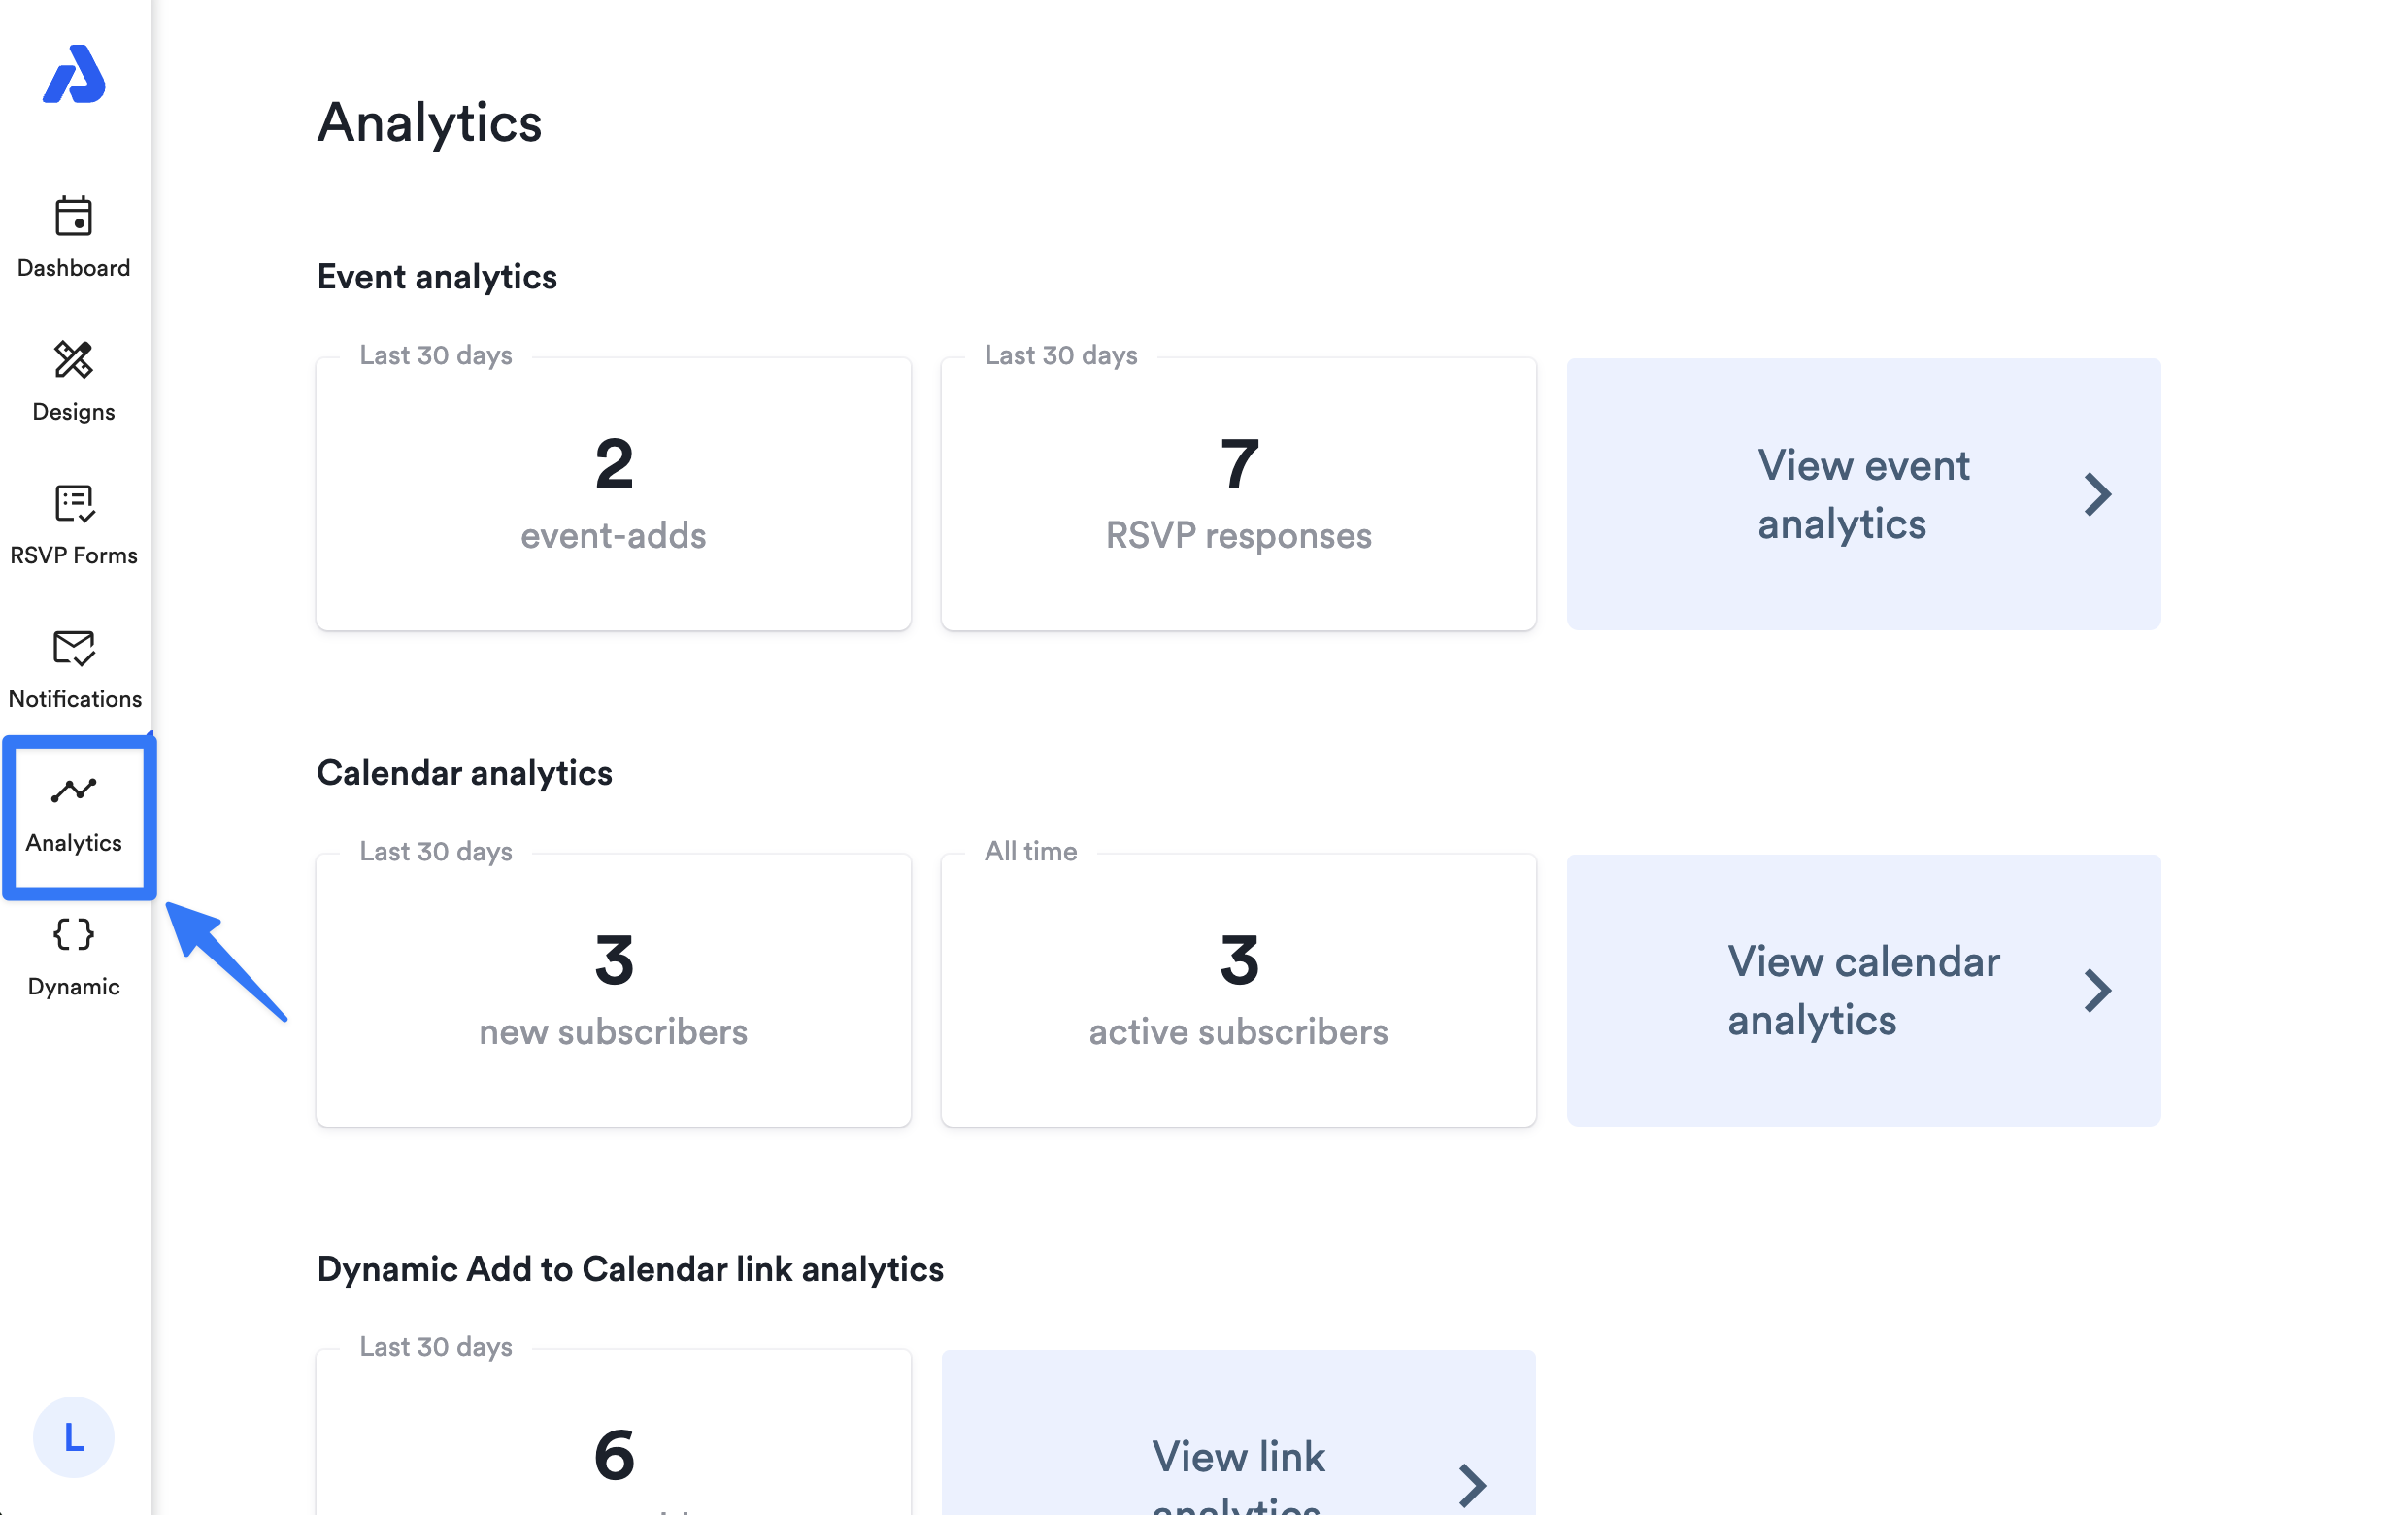
Analytics Overview
- The account overview shows recent usage for your account, focusing on the last 30 days.
- When you click into the event or calendar analytics pages, you can select the exact event or calendar you want to see more detailed information about, including a graph.
Account & Settings
Here’s what’s new or updated in your account settings section:
- Single Access Point: Everything about your account (settings, billing, users) can now be accessed from one menu.
- Tabbed Navigation: User info, account details, and billing each have their own tab for a cleaner, more organized experience.
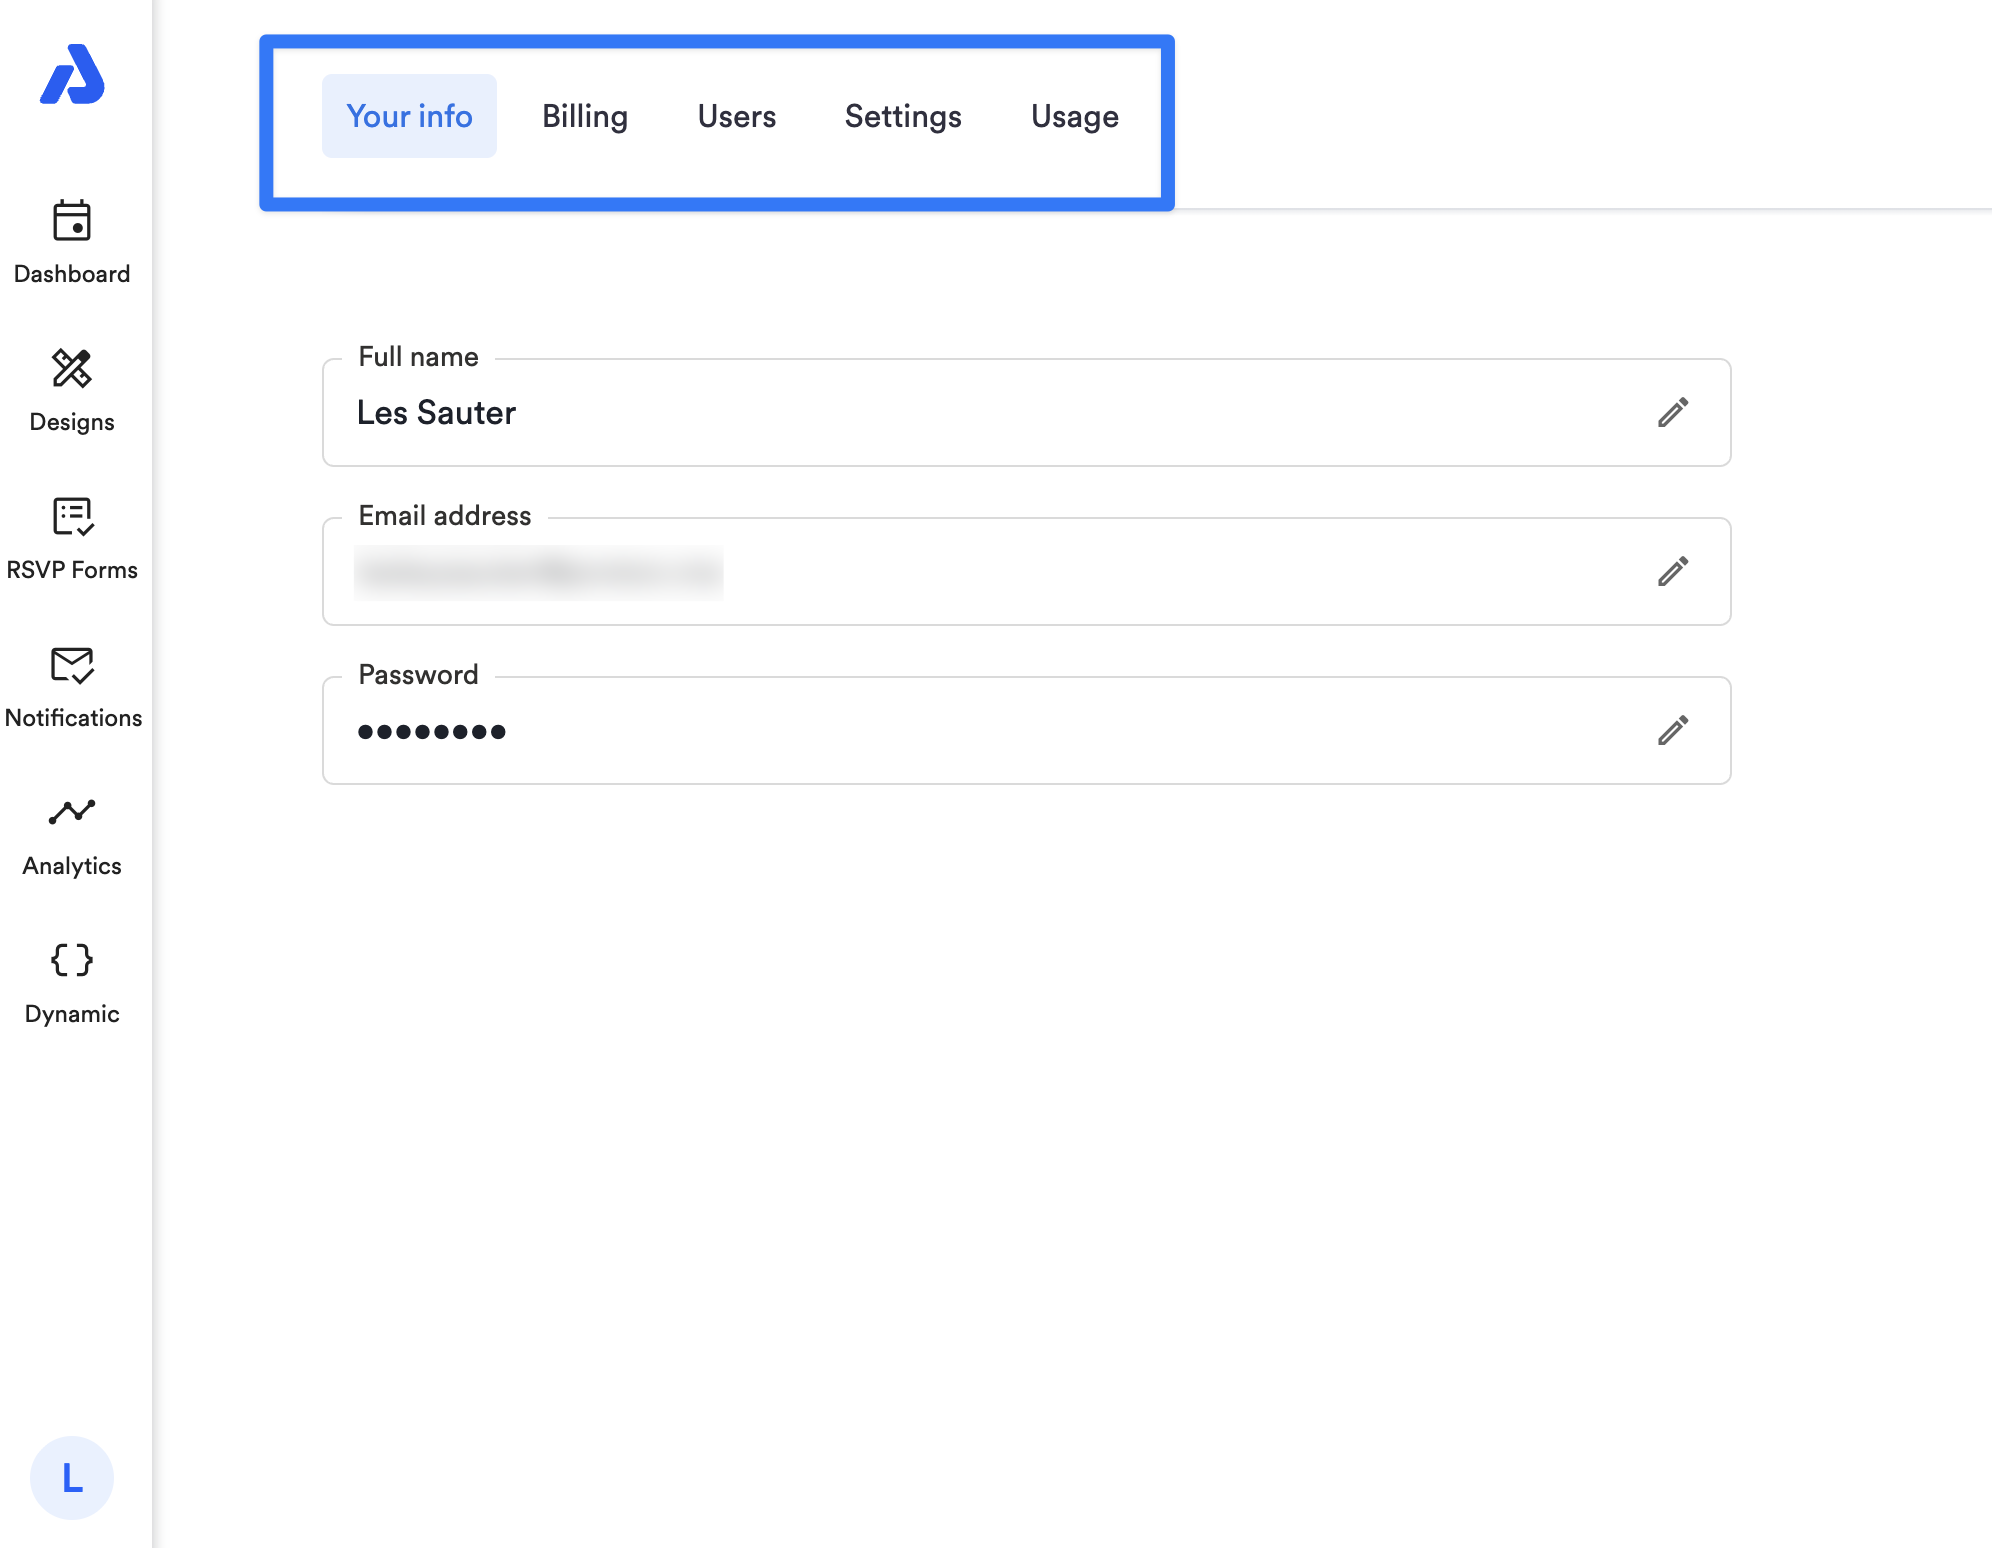
- Your Info: Updates to your email, name, or login now apply across all accounts you access.
- Billing: Manage billing info directly via Stripe.
- Users: Pending invites appear in the same list as active users, and you can search for users easily.
- Settings: All settings combined in one tab, including account info, API tokens, sender email validation, and color palettes for events and calendars.
- Usage: Usage tracking now has clearer links and selectors for events, calendars, buttons, and links, making it easier to monitor activity against plan limits.
Updated 7 days ago