Calendar Landing Page Designs
This help doc provides an overview of design templates for calendar landing pages.
Accessing Your Designs
-
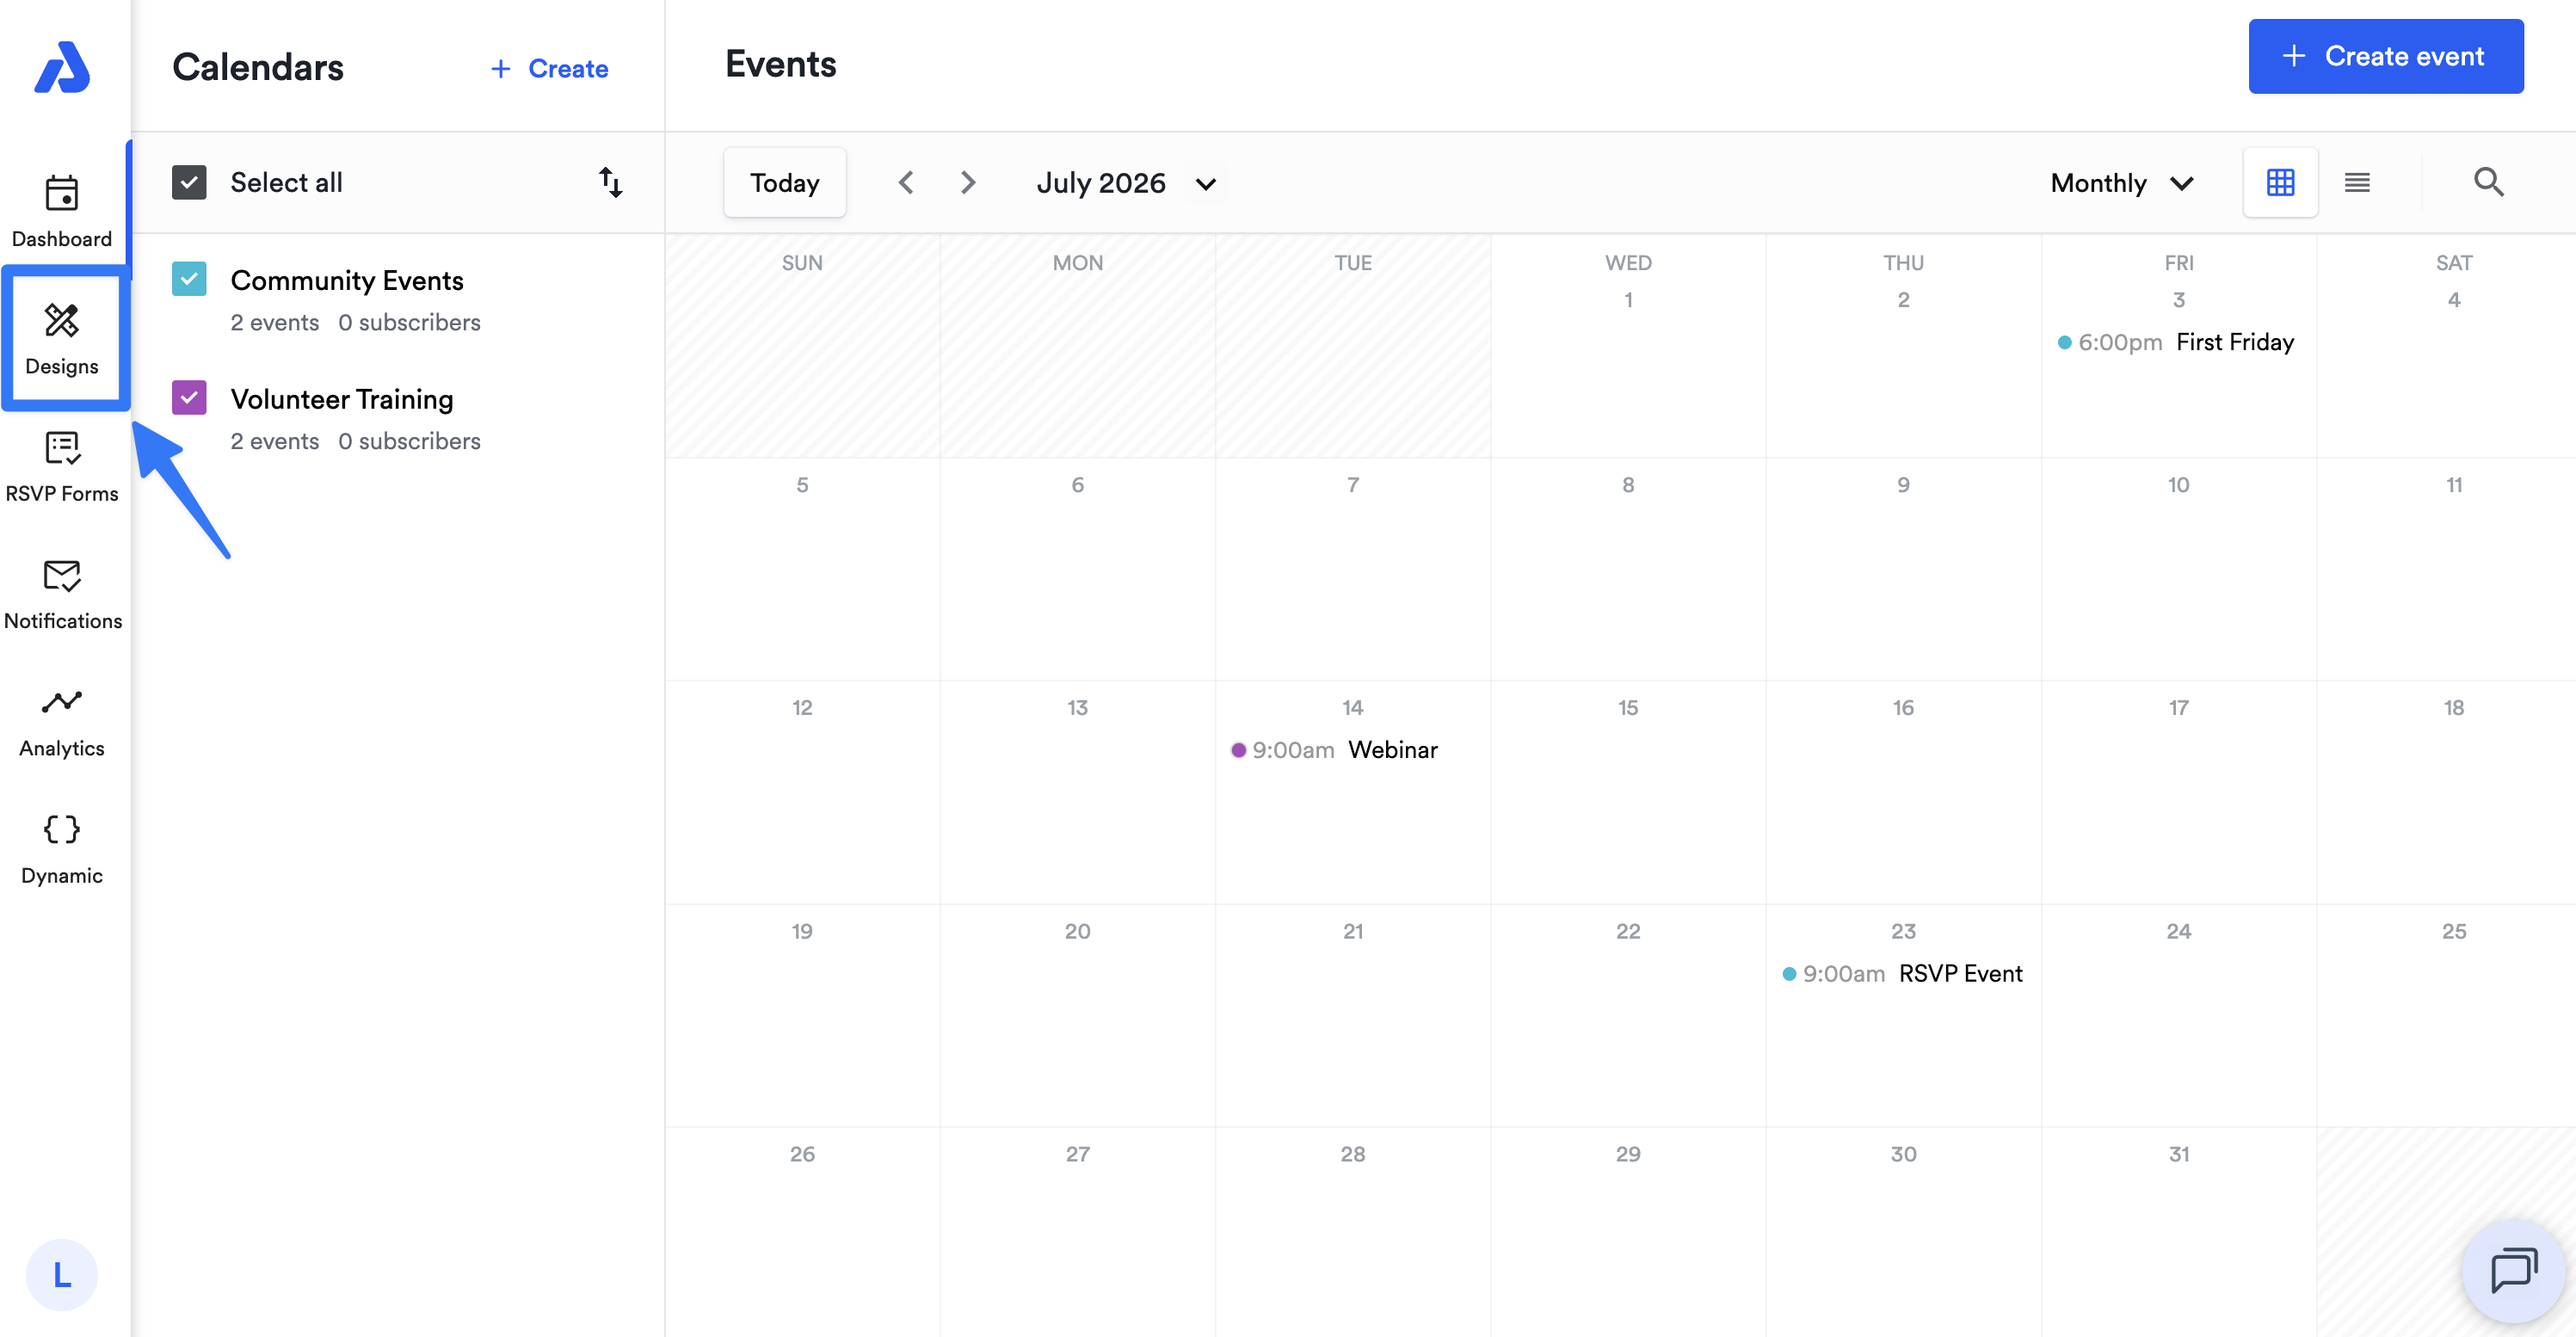
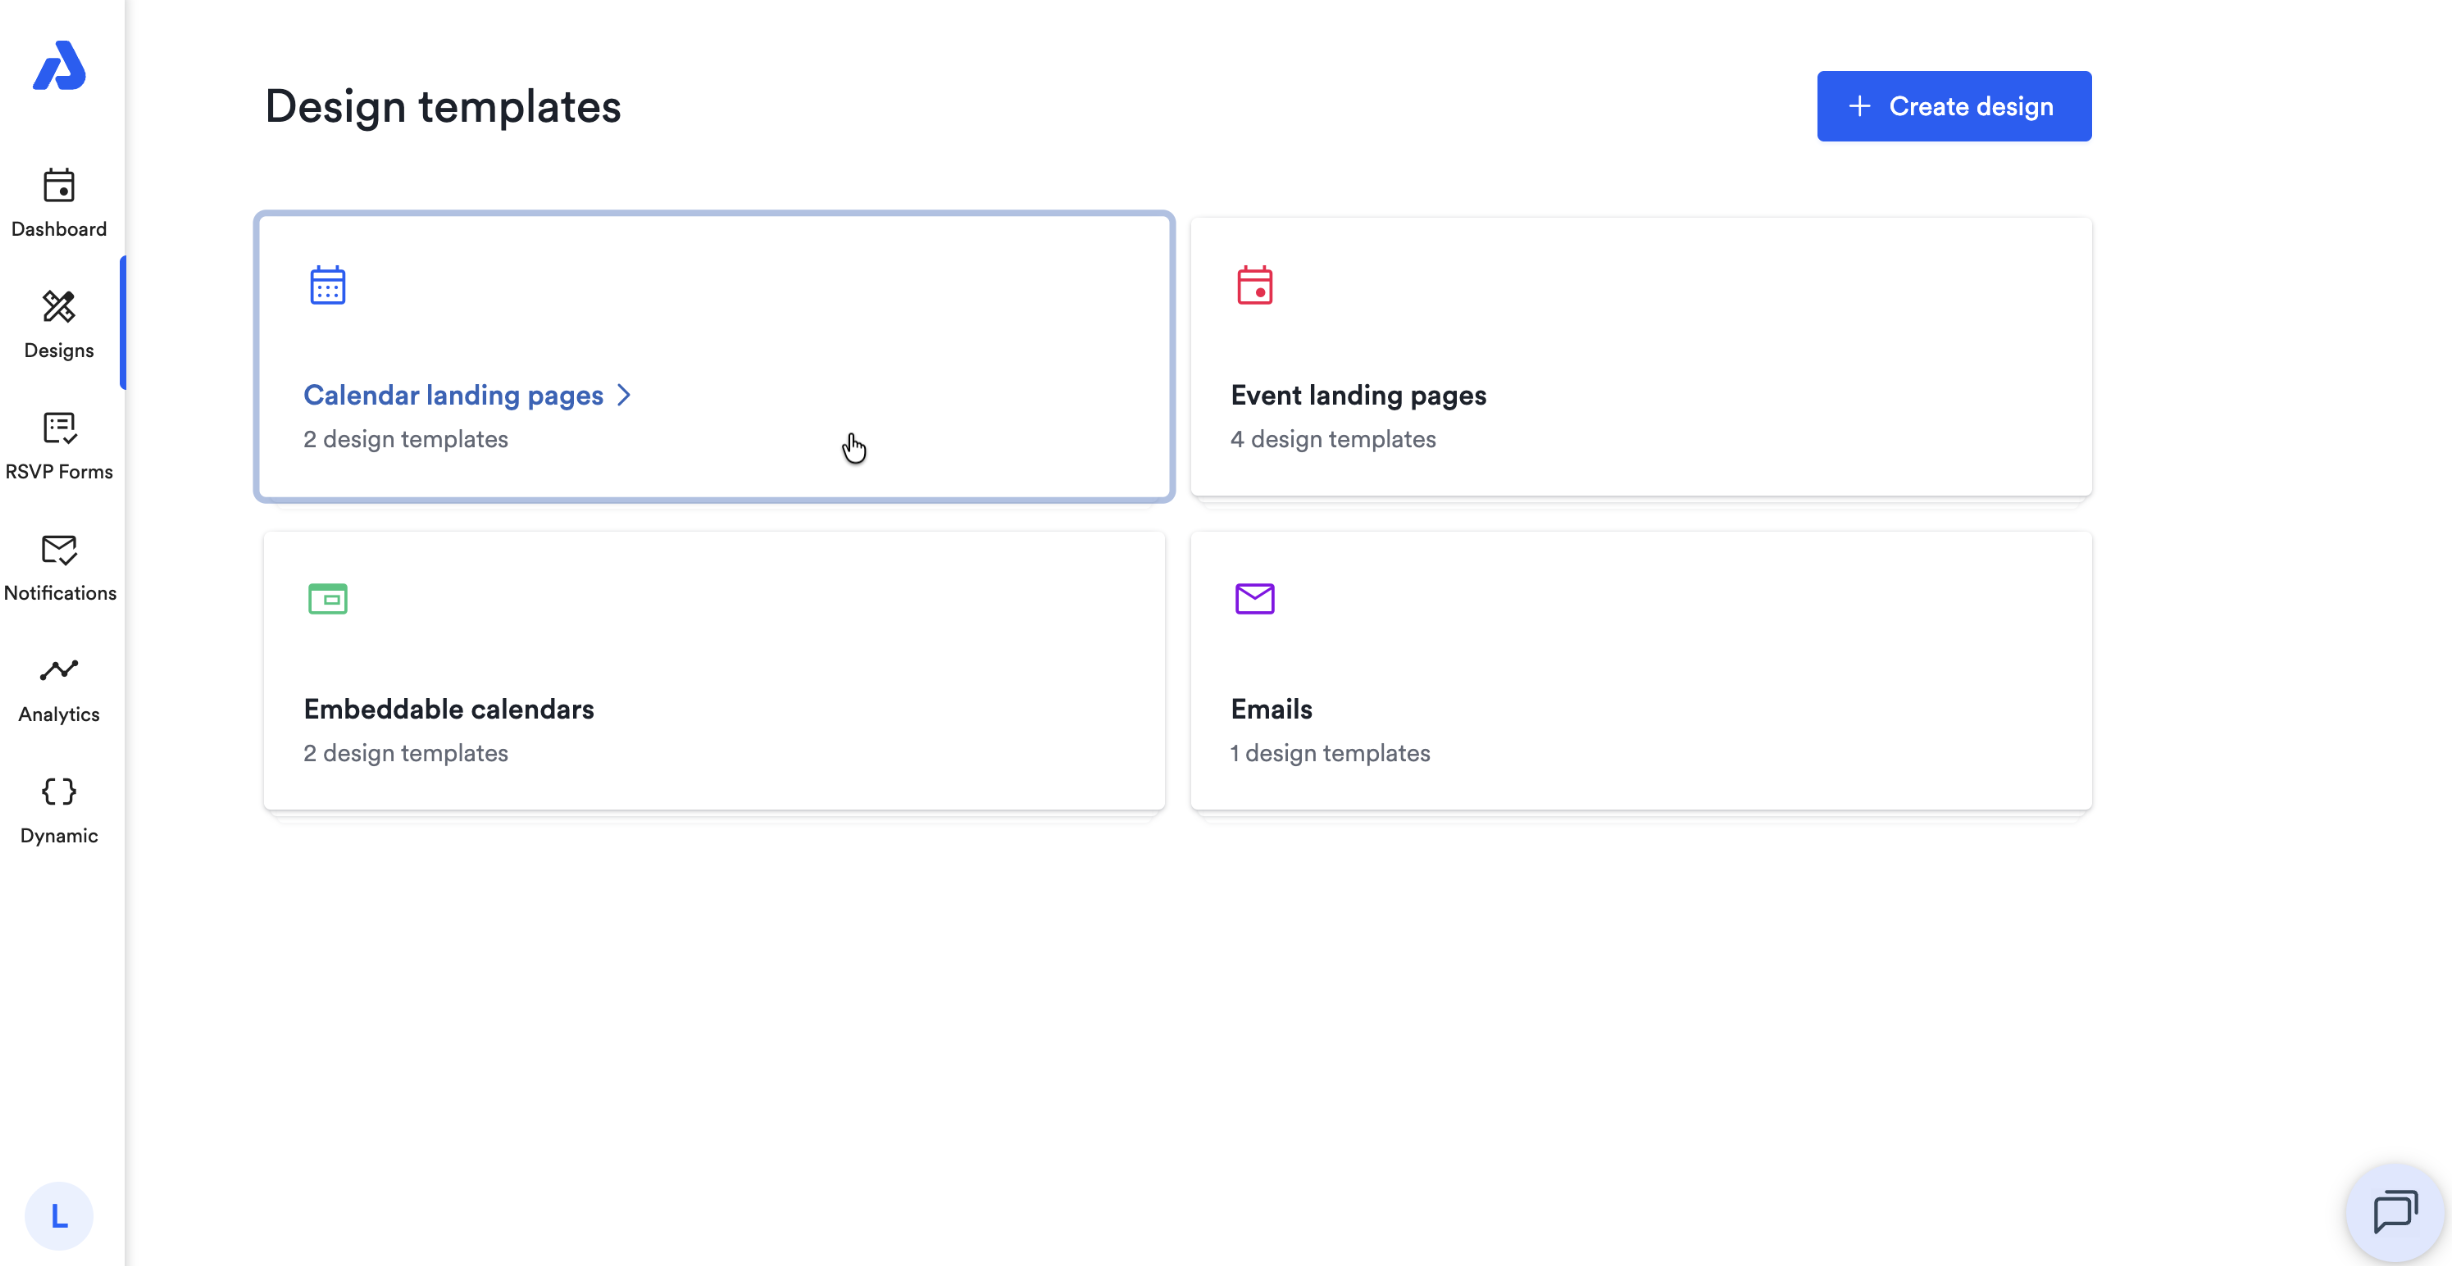
From the Dashboard, click the Designs tab within the left-hand navigation menu.
-
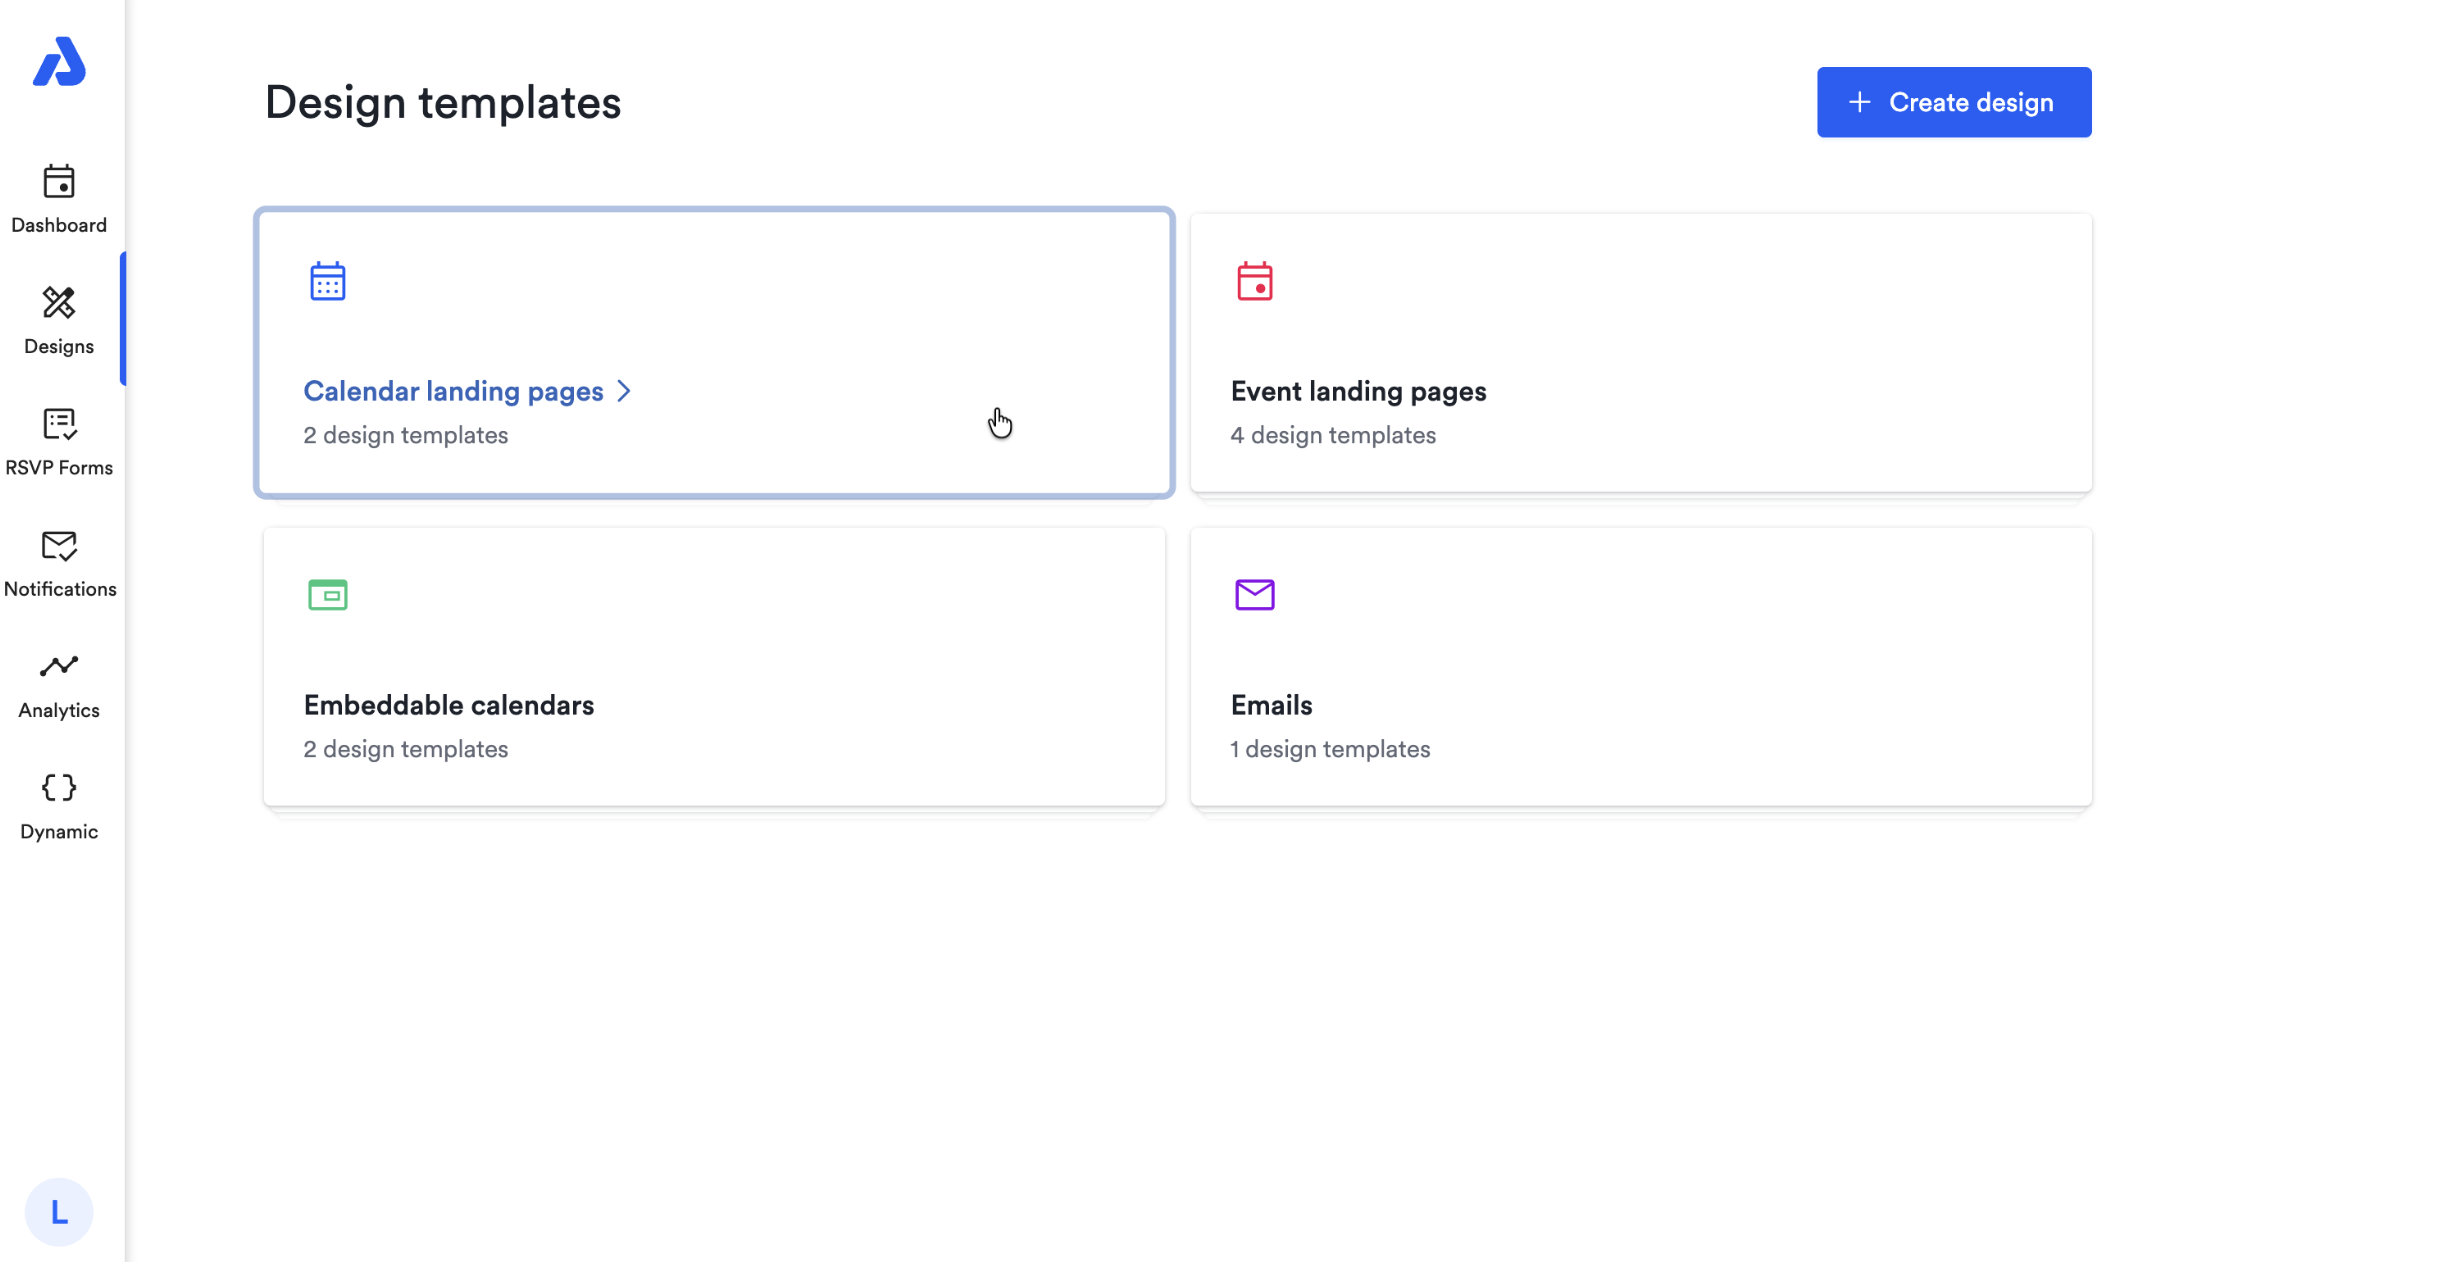
Select the Calendar landing pages card.
-
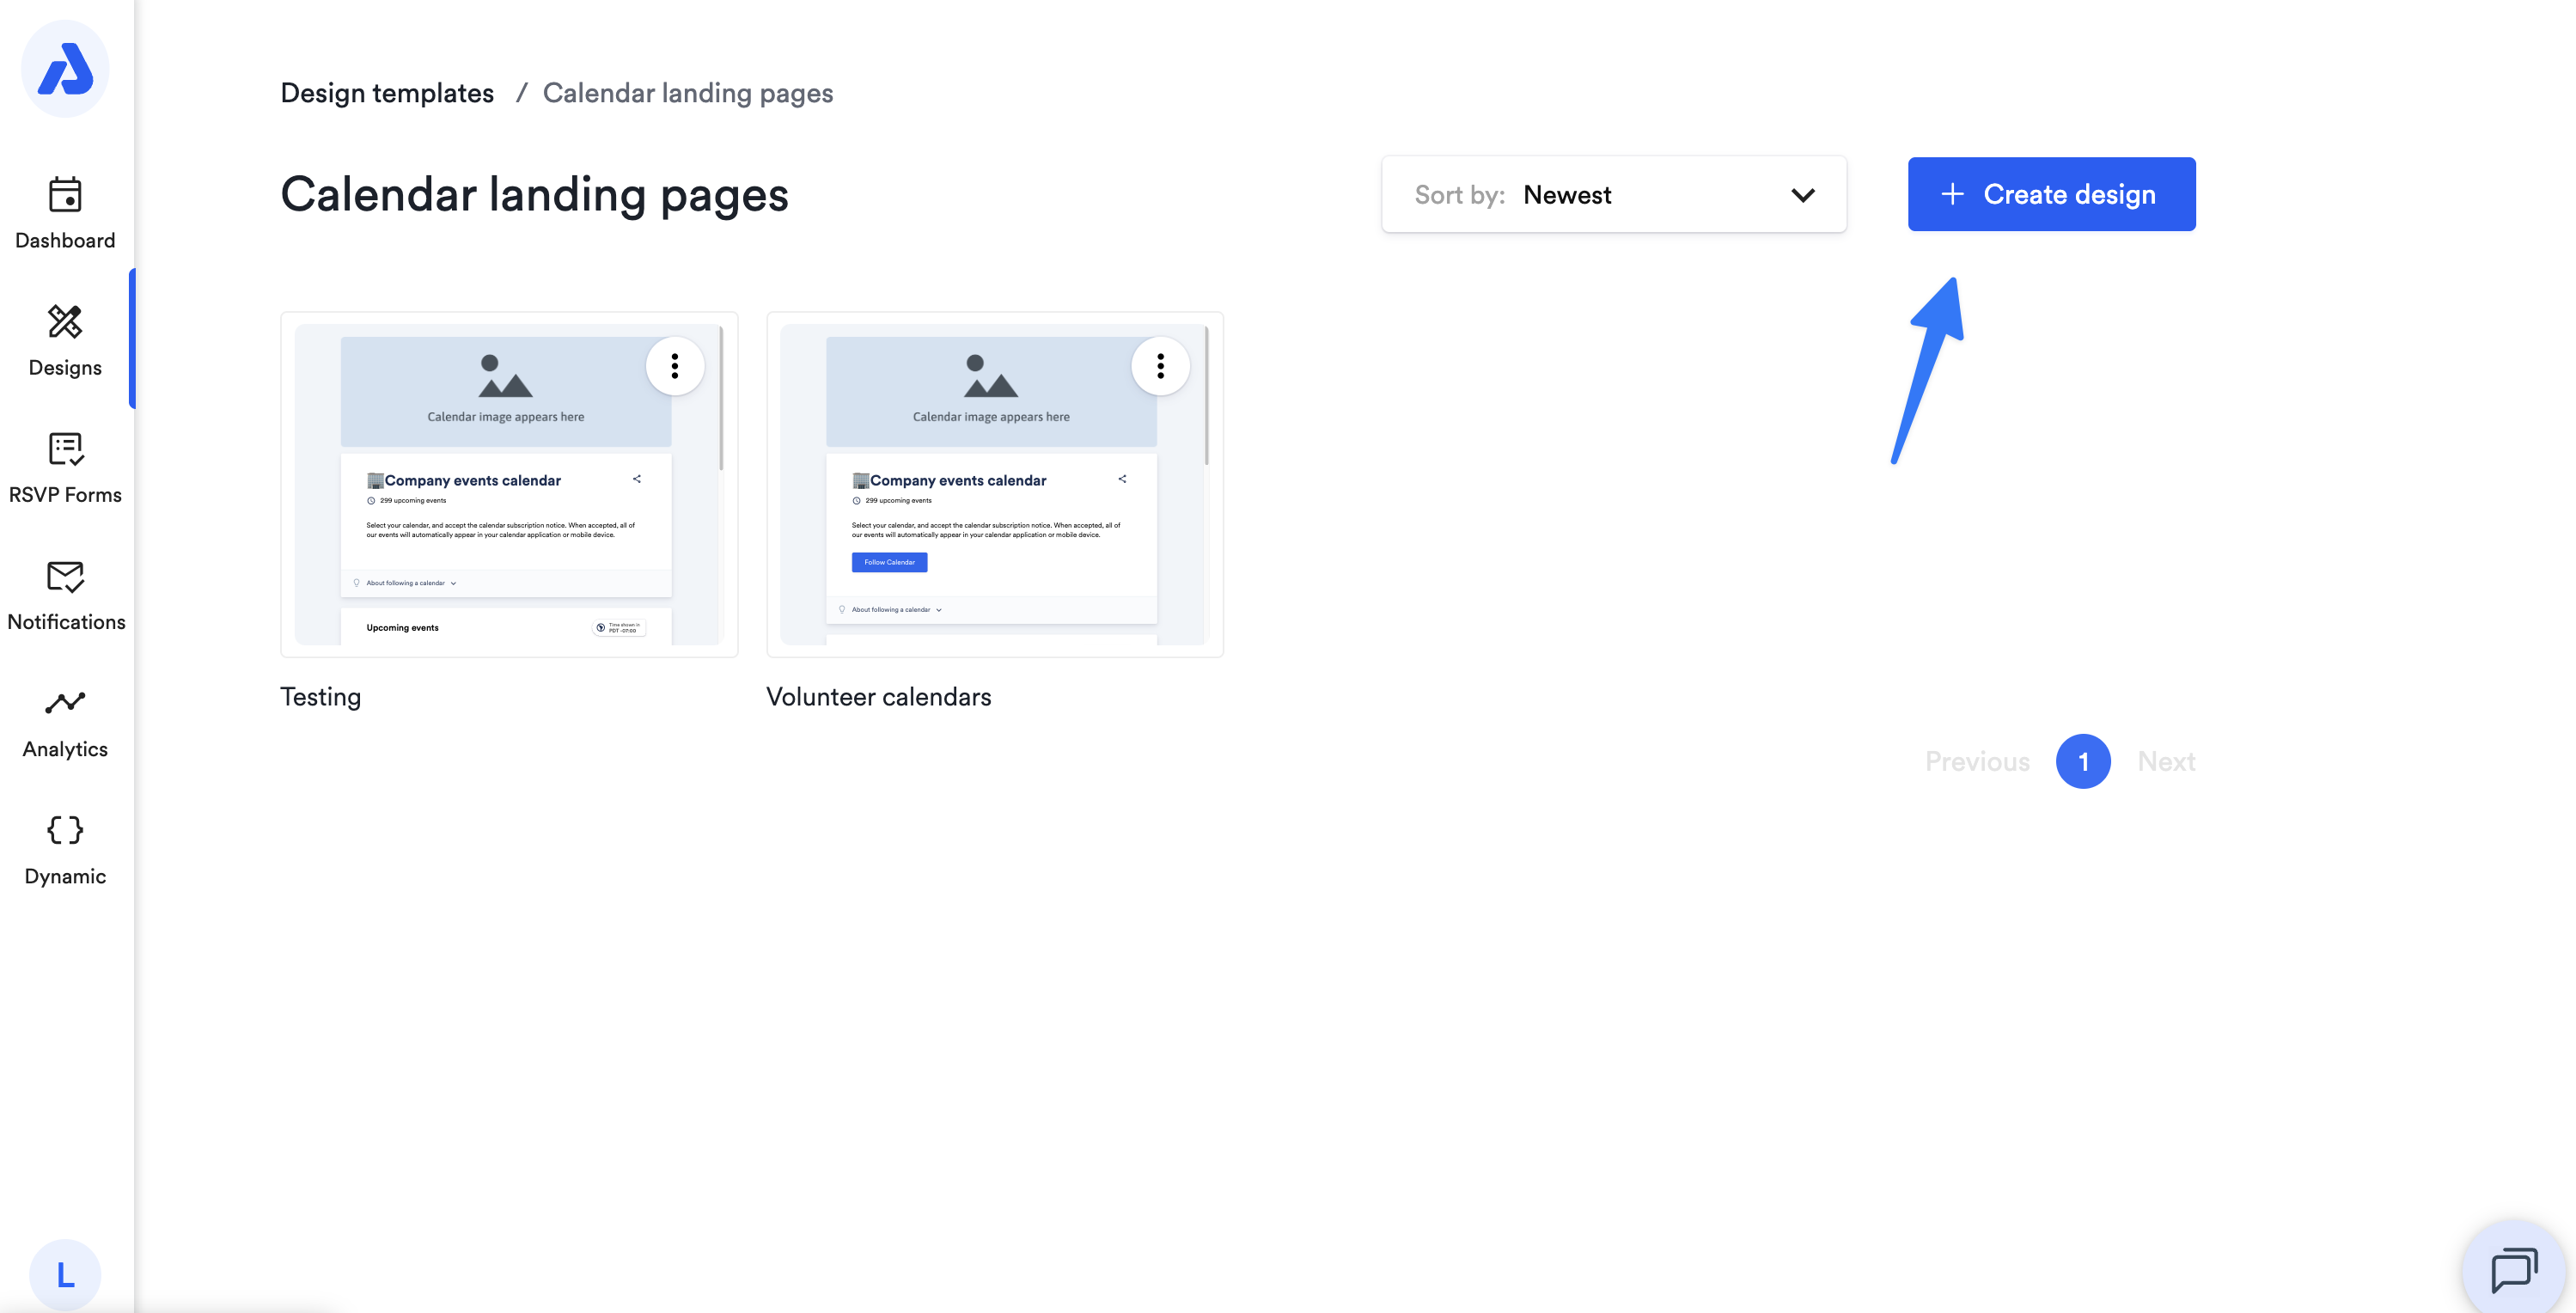
Choose an existing design to edit, or click + Create design to start from scratch.
-
If you're creating a new design, you’ll be prompted to give the design a title.
-
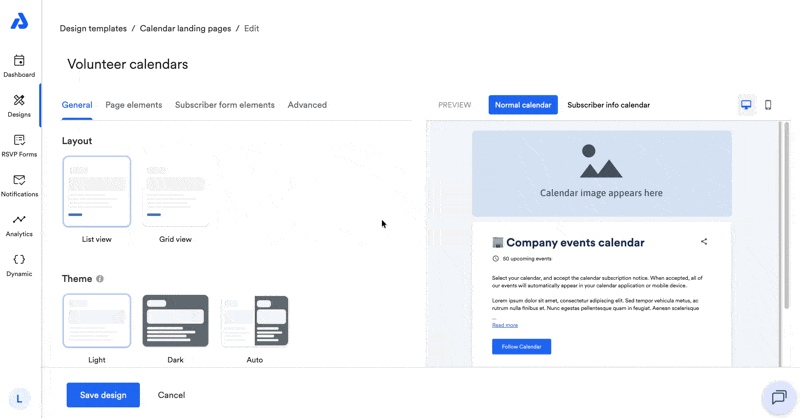
Each tab in the design editor corresponds to a section of your calendar landing page that you can customize. The live preview updates as you make changes.
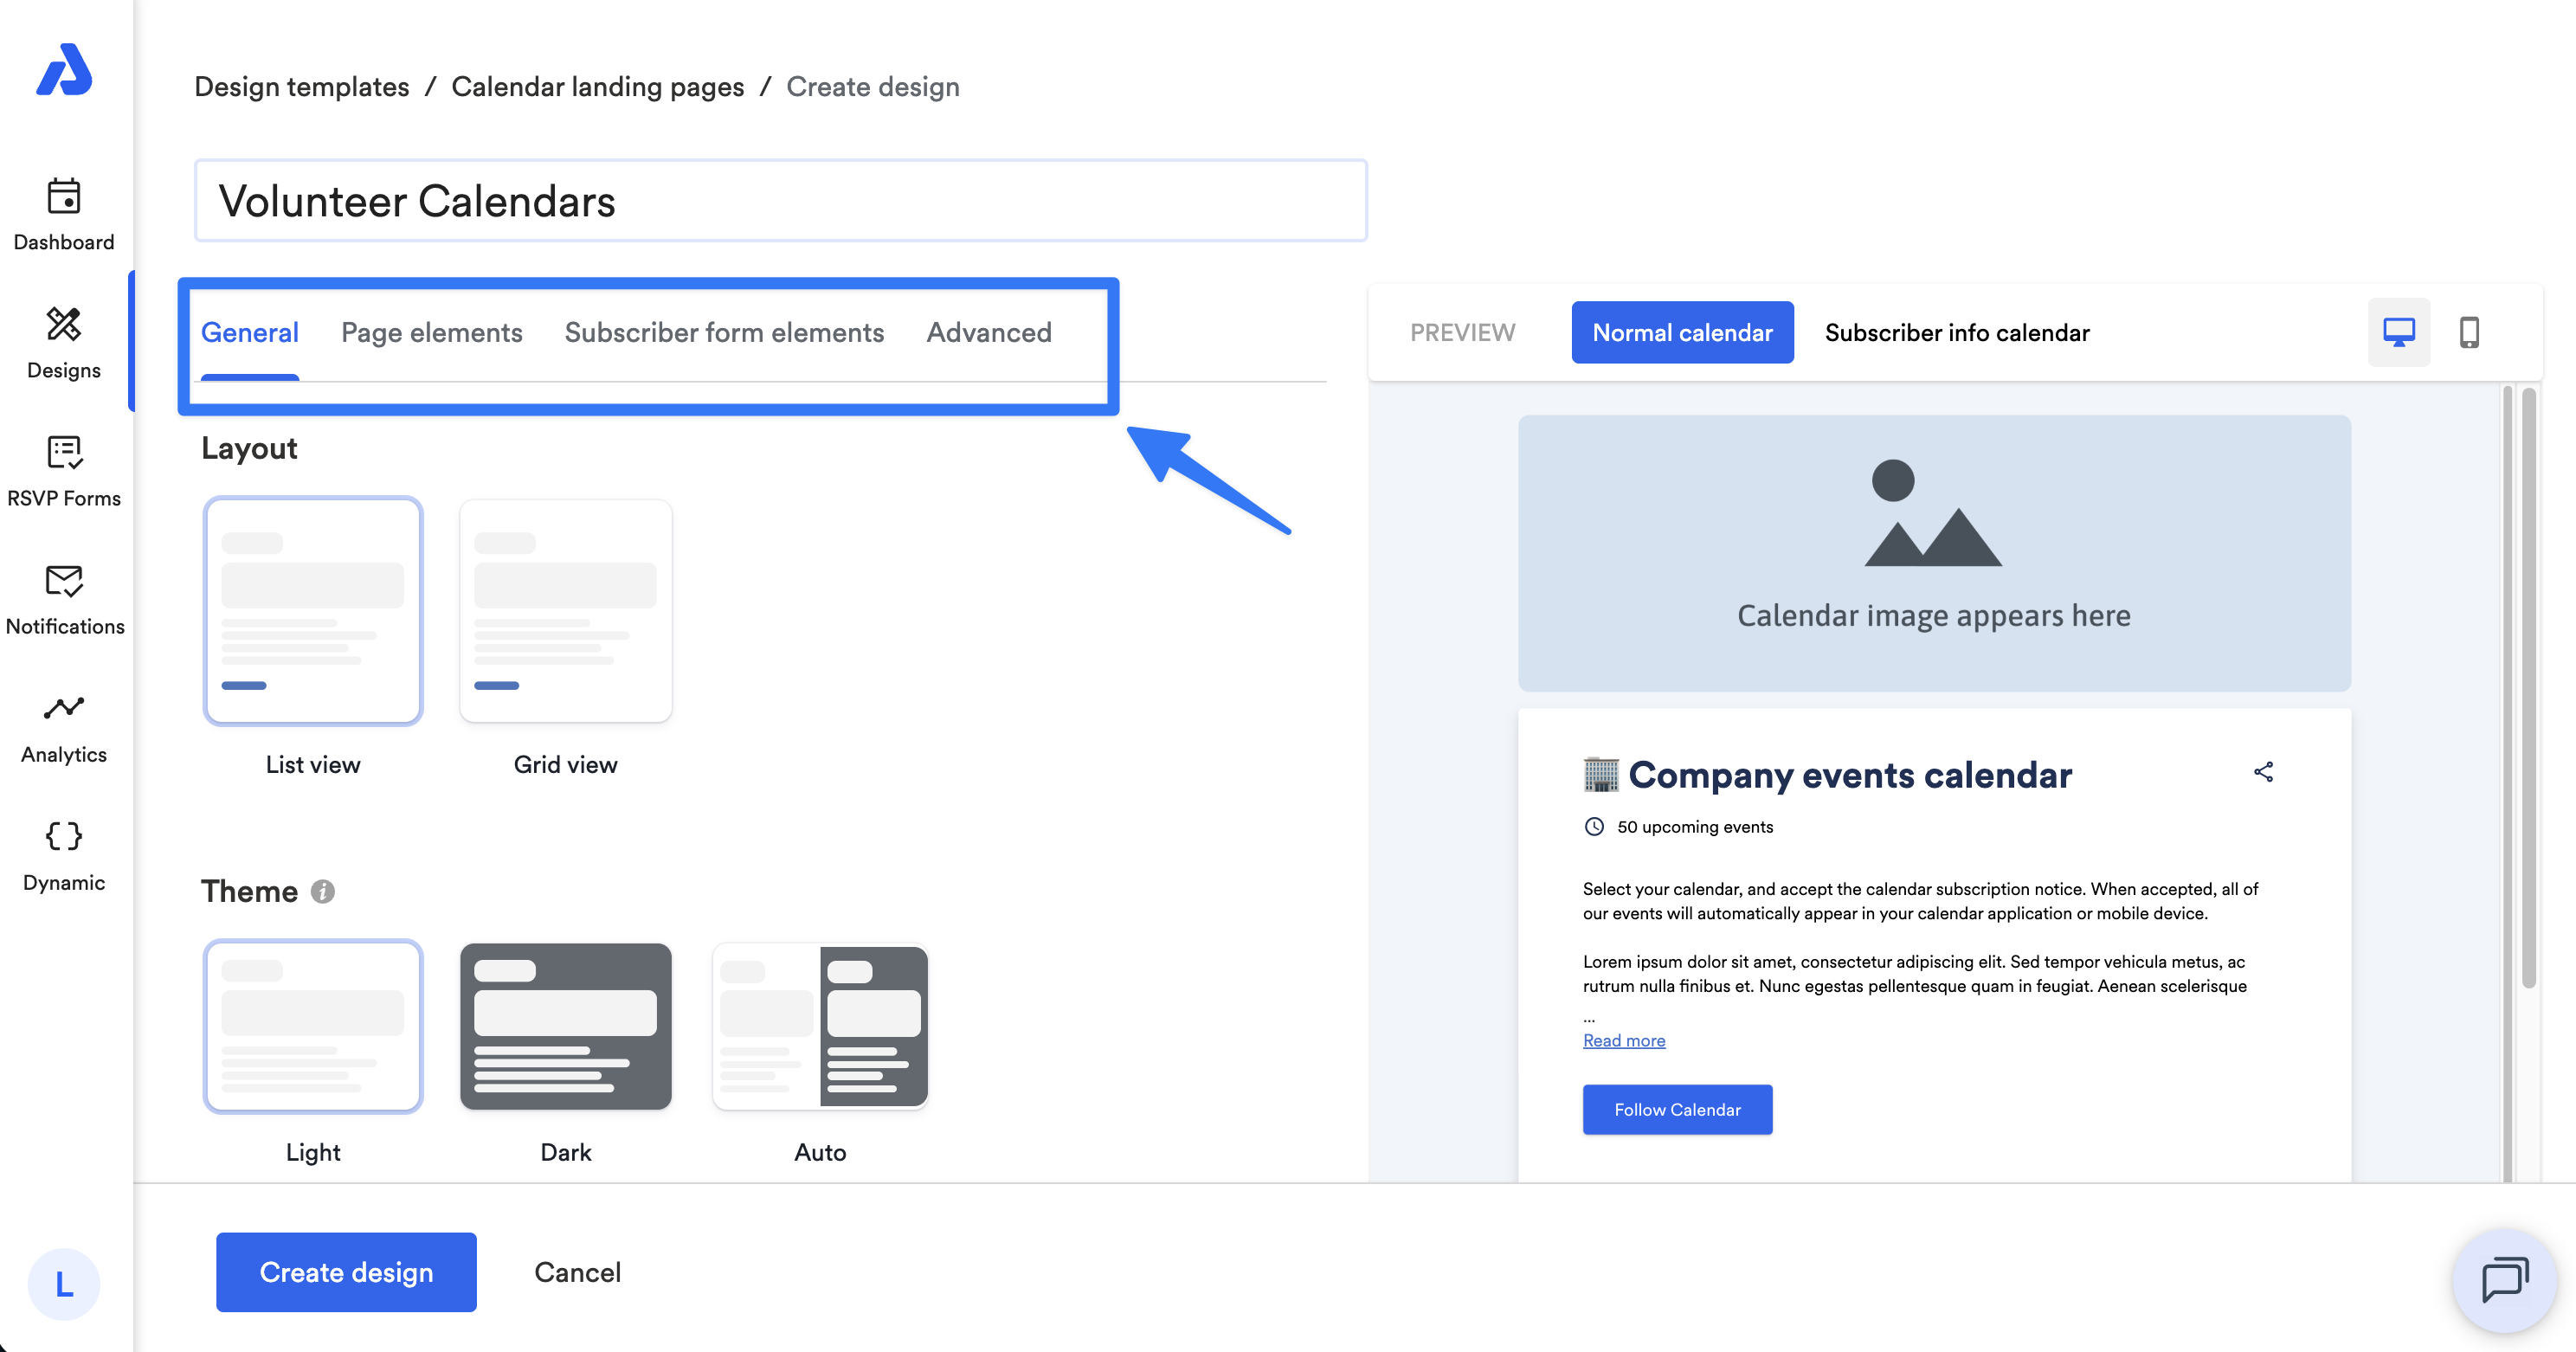
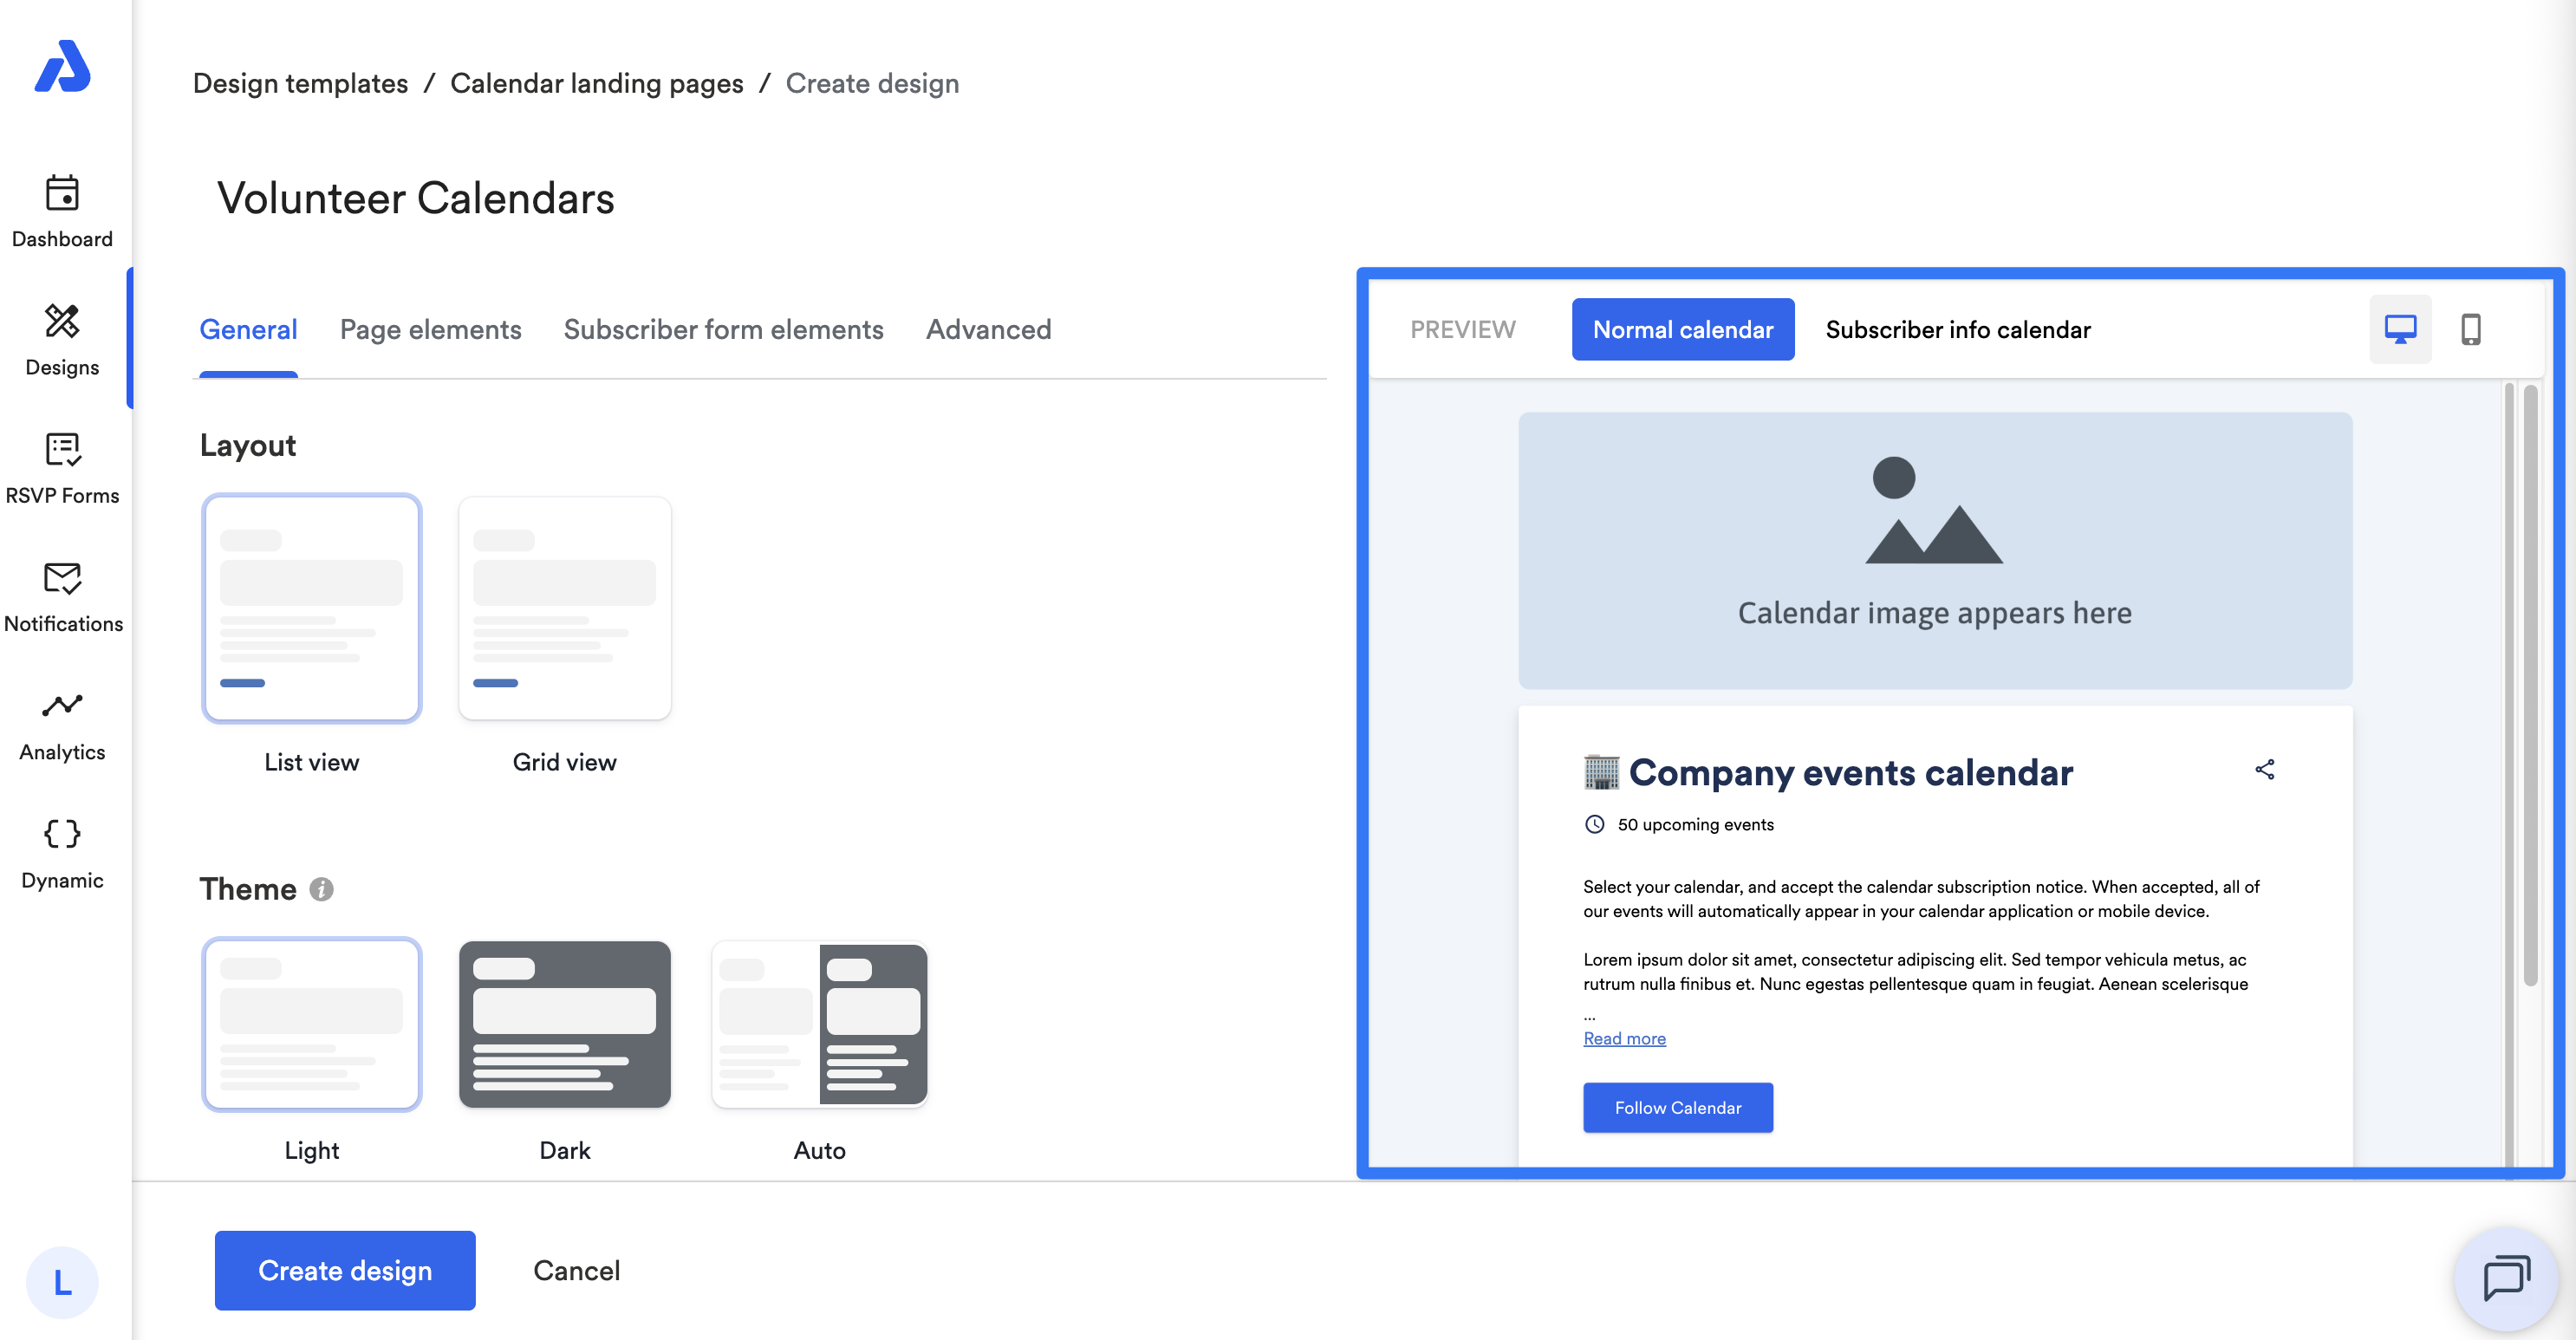
You can preview the design with or without calendar subscriber info collection enabled and switch between Desktop and Mobile previews.
Creating and Applying a Design
To create or save your design and apply it your calendar, follow the below steps.
-
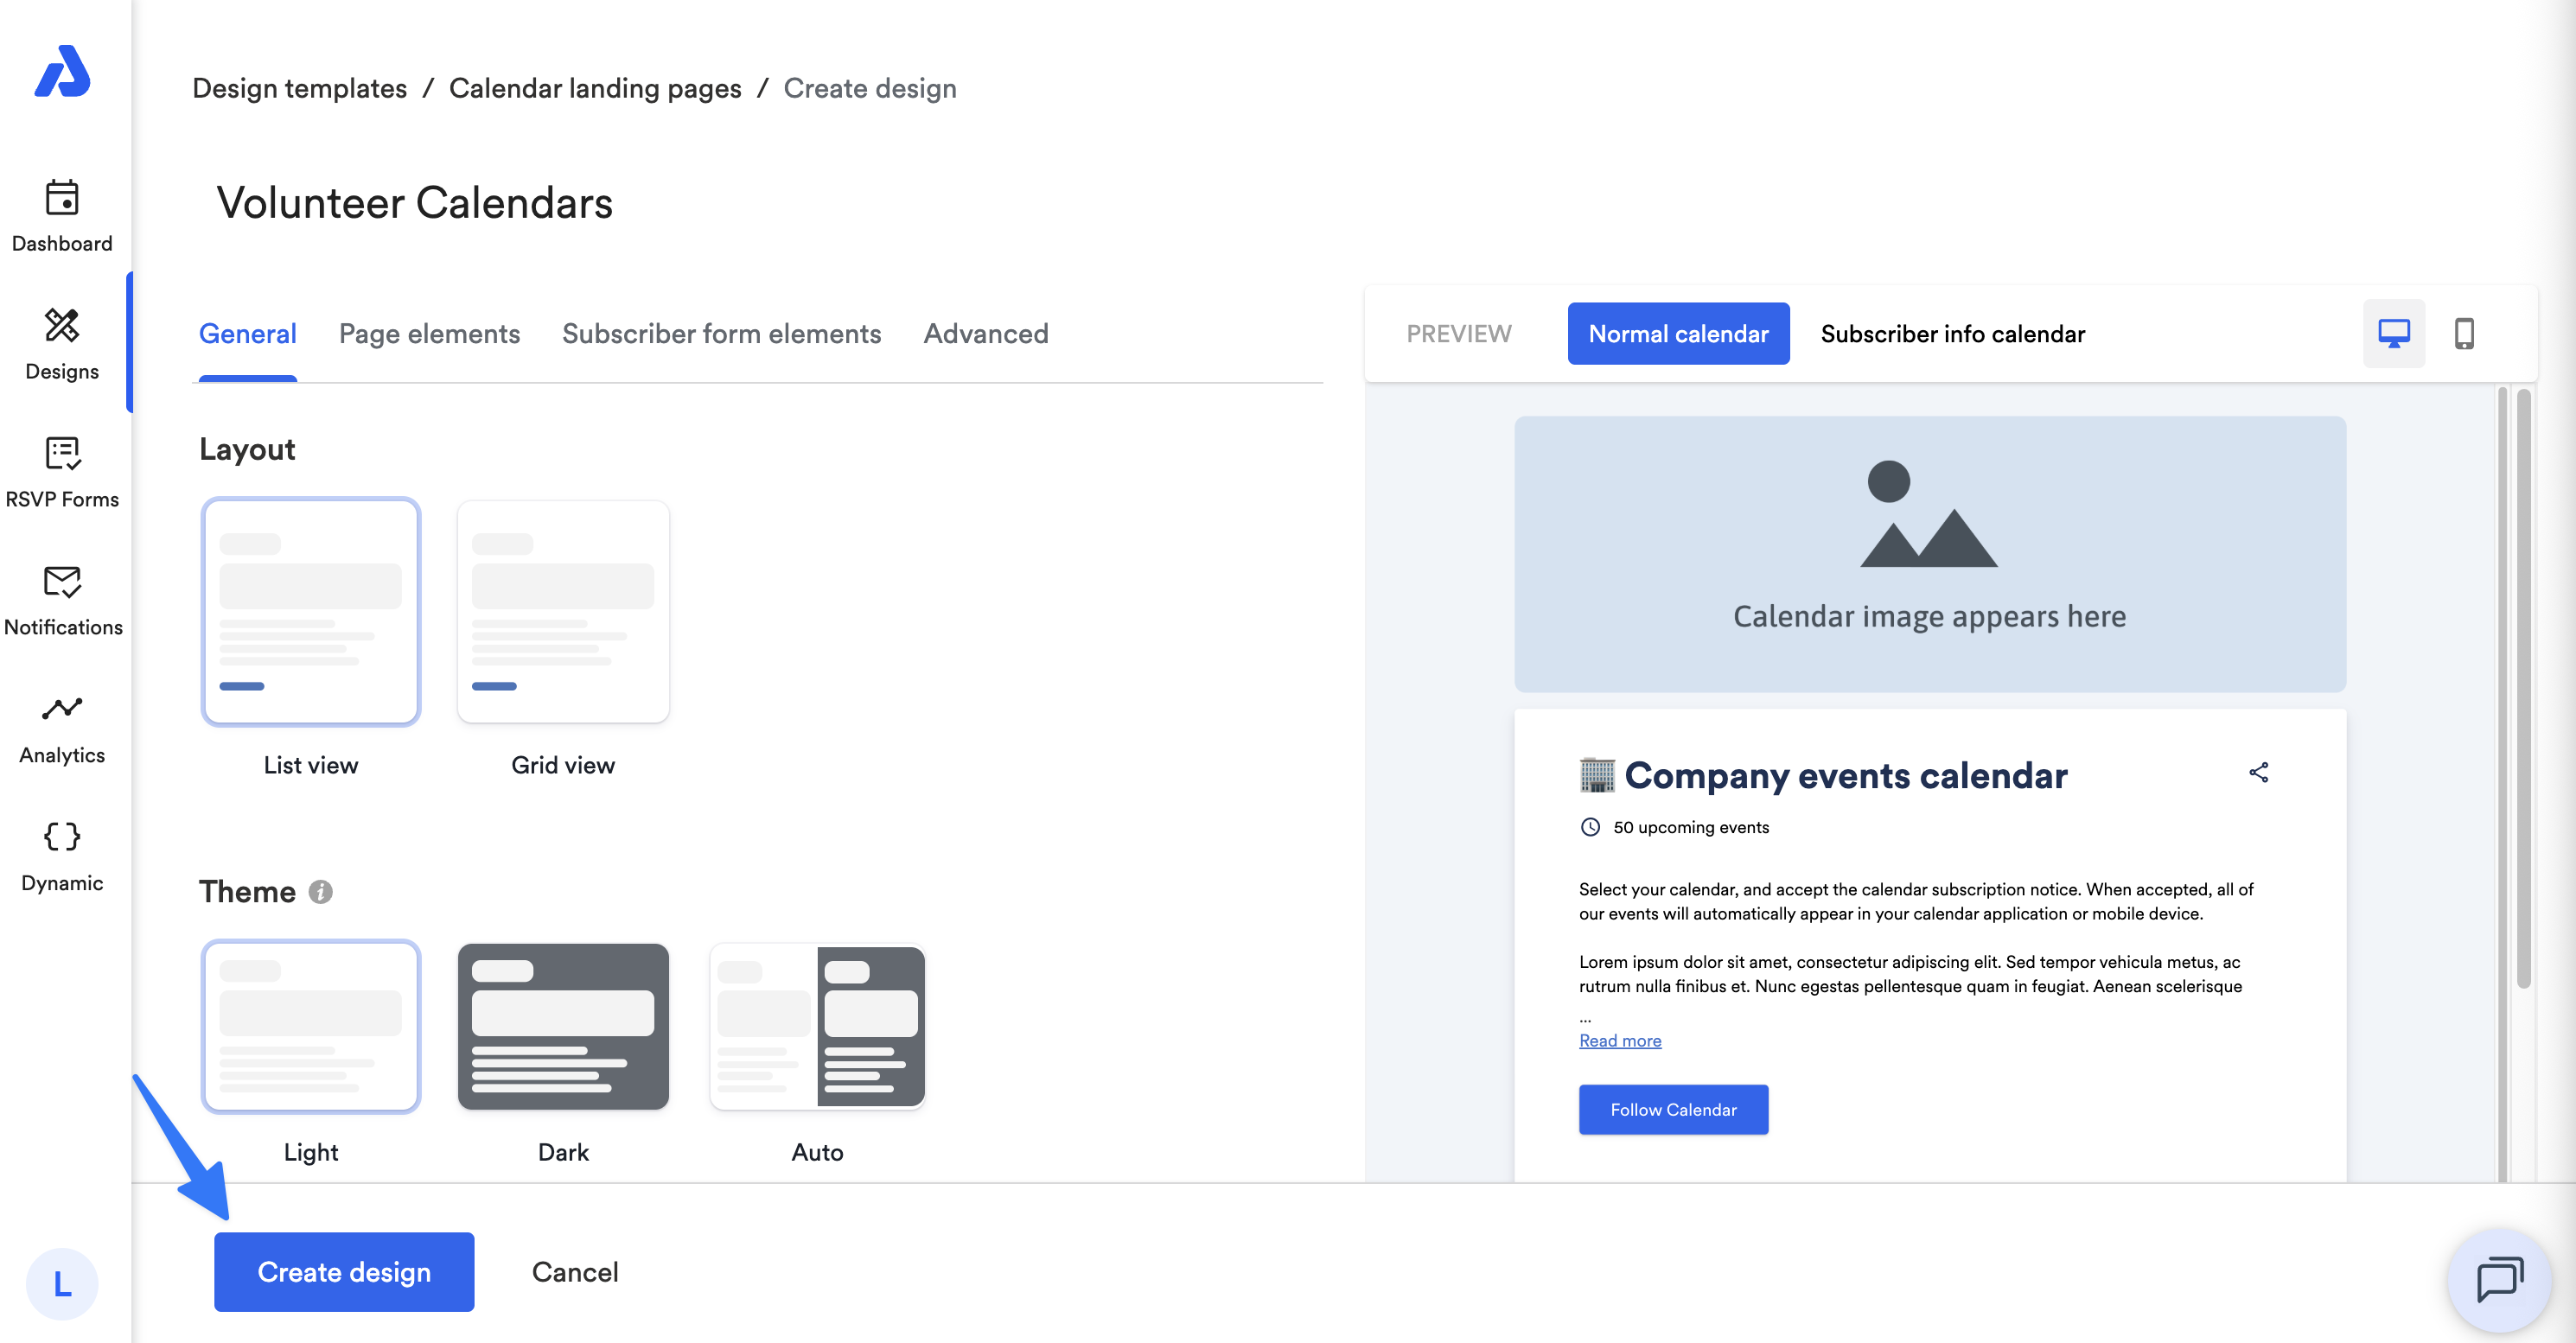
When you're finished configuring the design, click the Create design / Save design button.
-
To apply the design to your calendar, follow the steps shared here in our help doc: Apply a Calendar Landing Page Design Template to a Calendar
Deleting a Design
Deleting a design is permanent. To delete an existing design, follow the below steps.
-
Click the Designs tab within the left-hand navigation menu.

-
Select the card for the design type that you would like to delete.
-
Click the three dots icon within the design card that you want to delete.
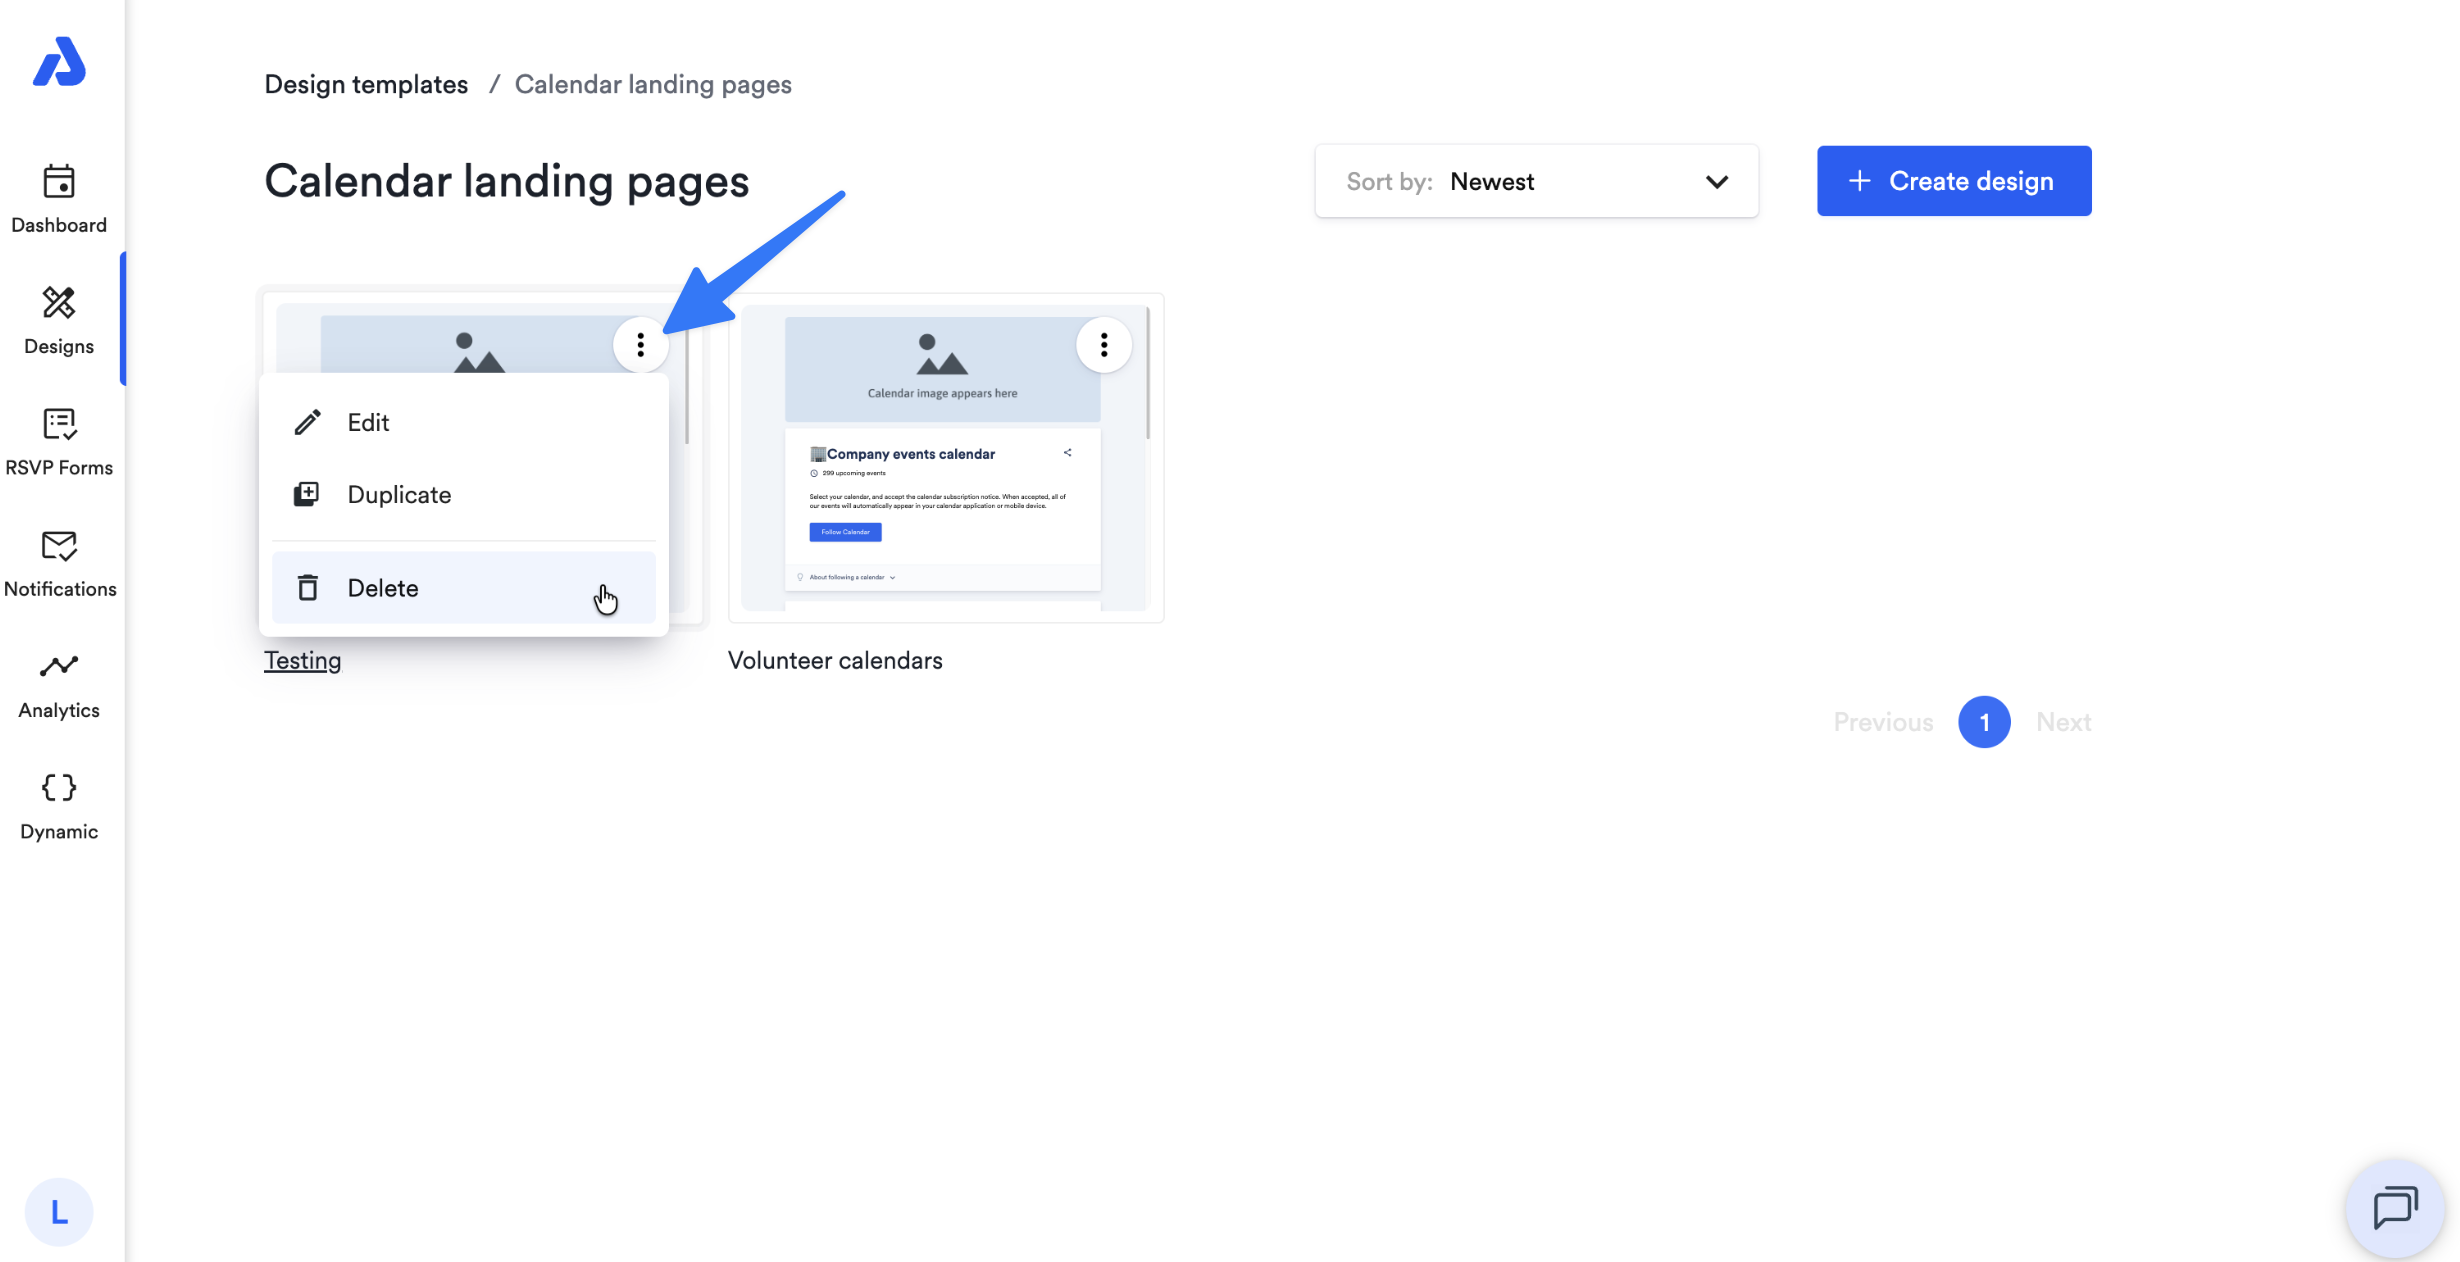
-
Select the Delete option.
-
Type Delete to confirm and click the Delete button.
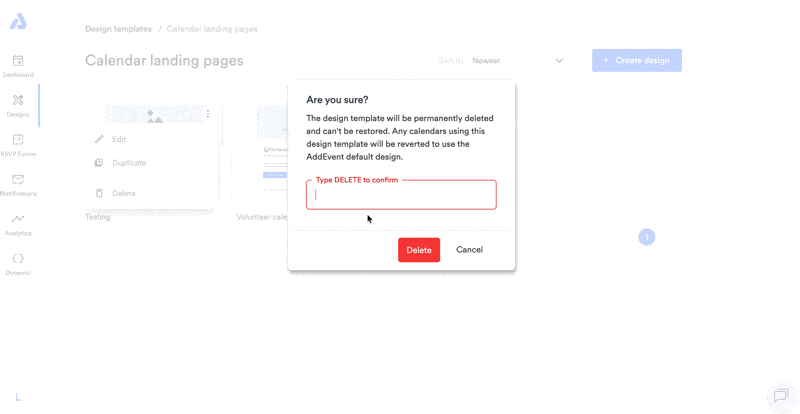
Any calendars using a design template that is deleted will be reverted to use the AddEvent default design.
Best Practices
-
Use clear design titles: Name designs based on purpose (e.g., “Default Calendar,” “Holiday Events”) because design templates can be used for many or one calendar.
-
Preview before applying: Check both Desktop and Mobile views before saving and applying the design template.
Updated 24 days ago