How to Configure the Event Calendar App for Webflow
To configure the Event Calendar App for Webflow, follow along with the following steps (if you prefer a video, please jump to the bottom of this help doc):
-
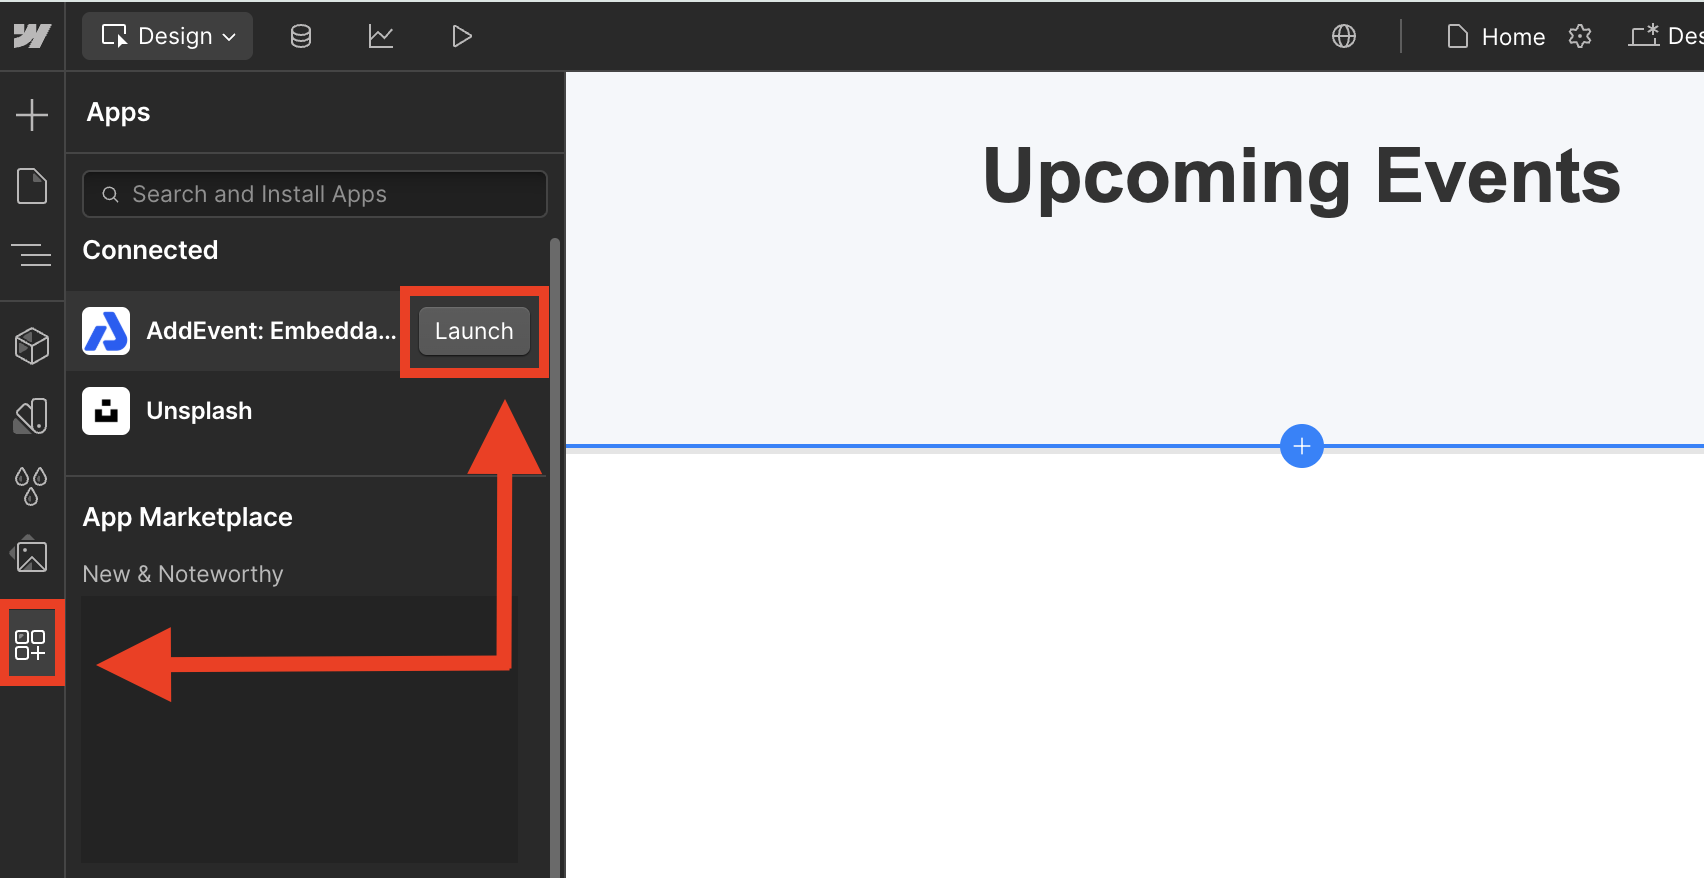
Once you have installed the Embeddable Event Calendar App, navigate to the site you would like to add your calendar to.
-
Click the Apps icon on the left-hand menu, as shown in the photo below, and then click Launch on the AddEvent Embeddable Event Calendar App.
-
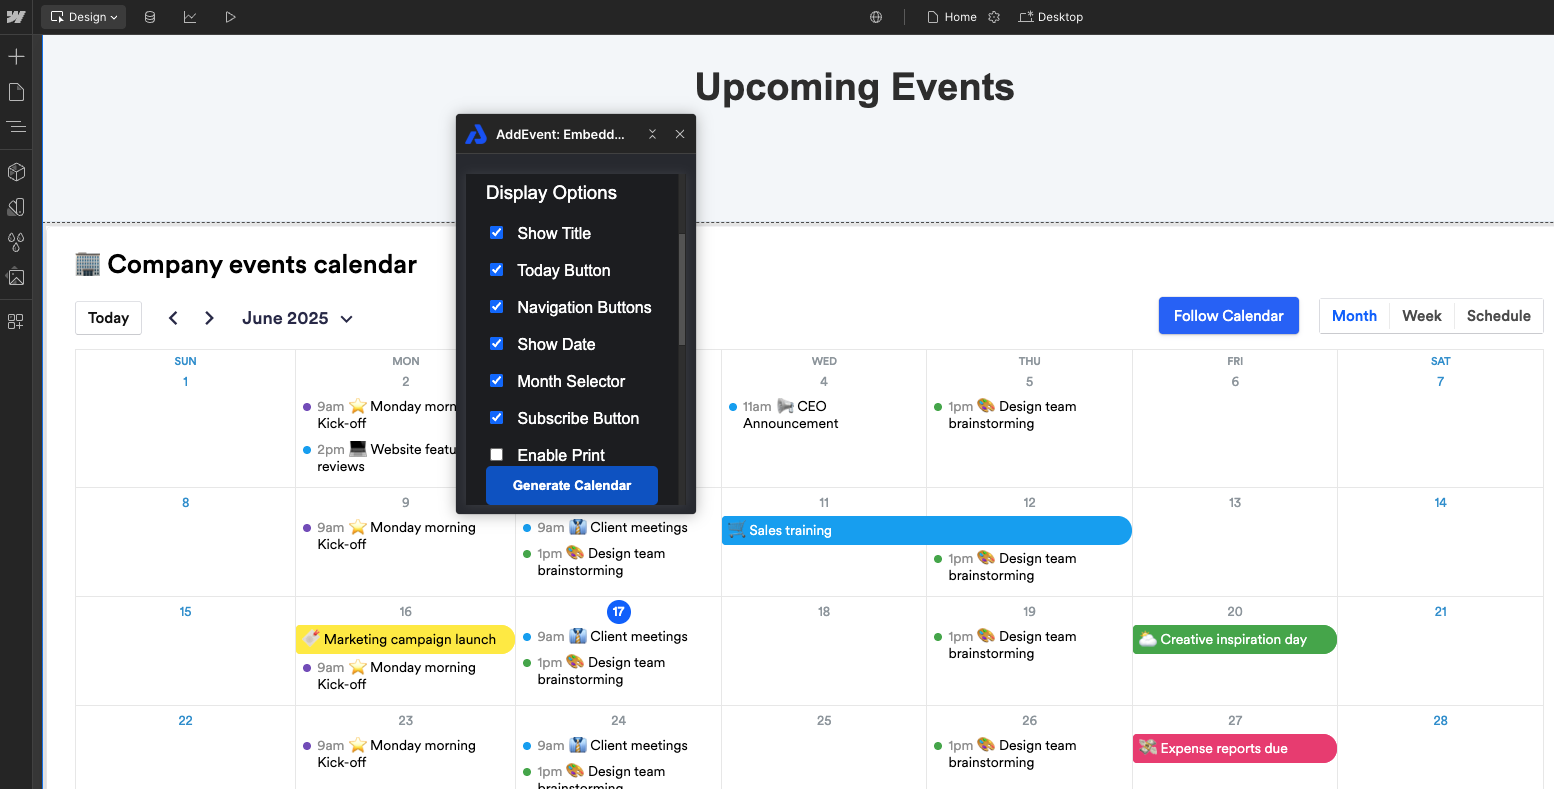
By default, a placeholder AddEvent Calendar is added in the Unique Key field. To change the calendar to your AddEvent Calendar, you will need to update the field with your Unique Key (covered in the next steps).
After you have updated your Unique Key, you can adjust the Calendar Settings as you see fit for any other customizations.
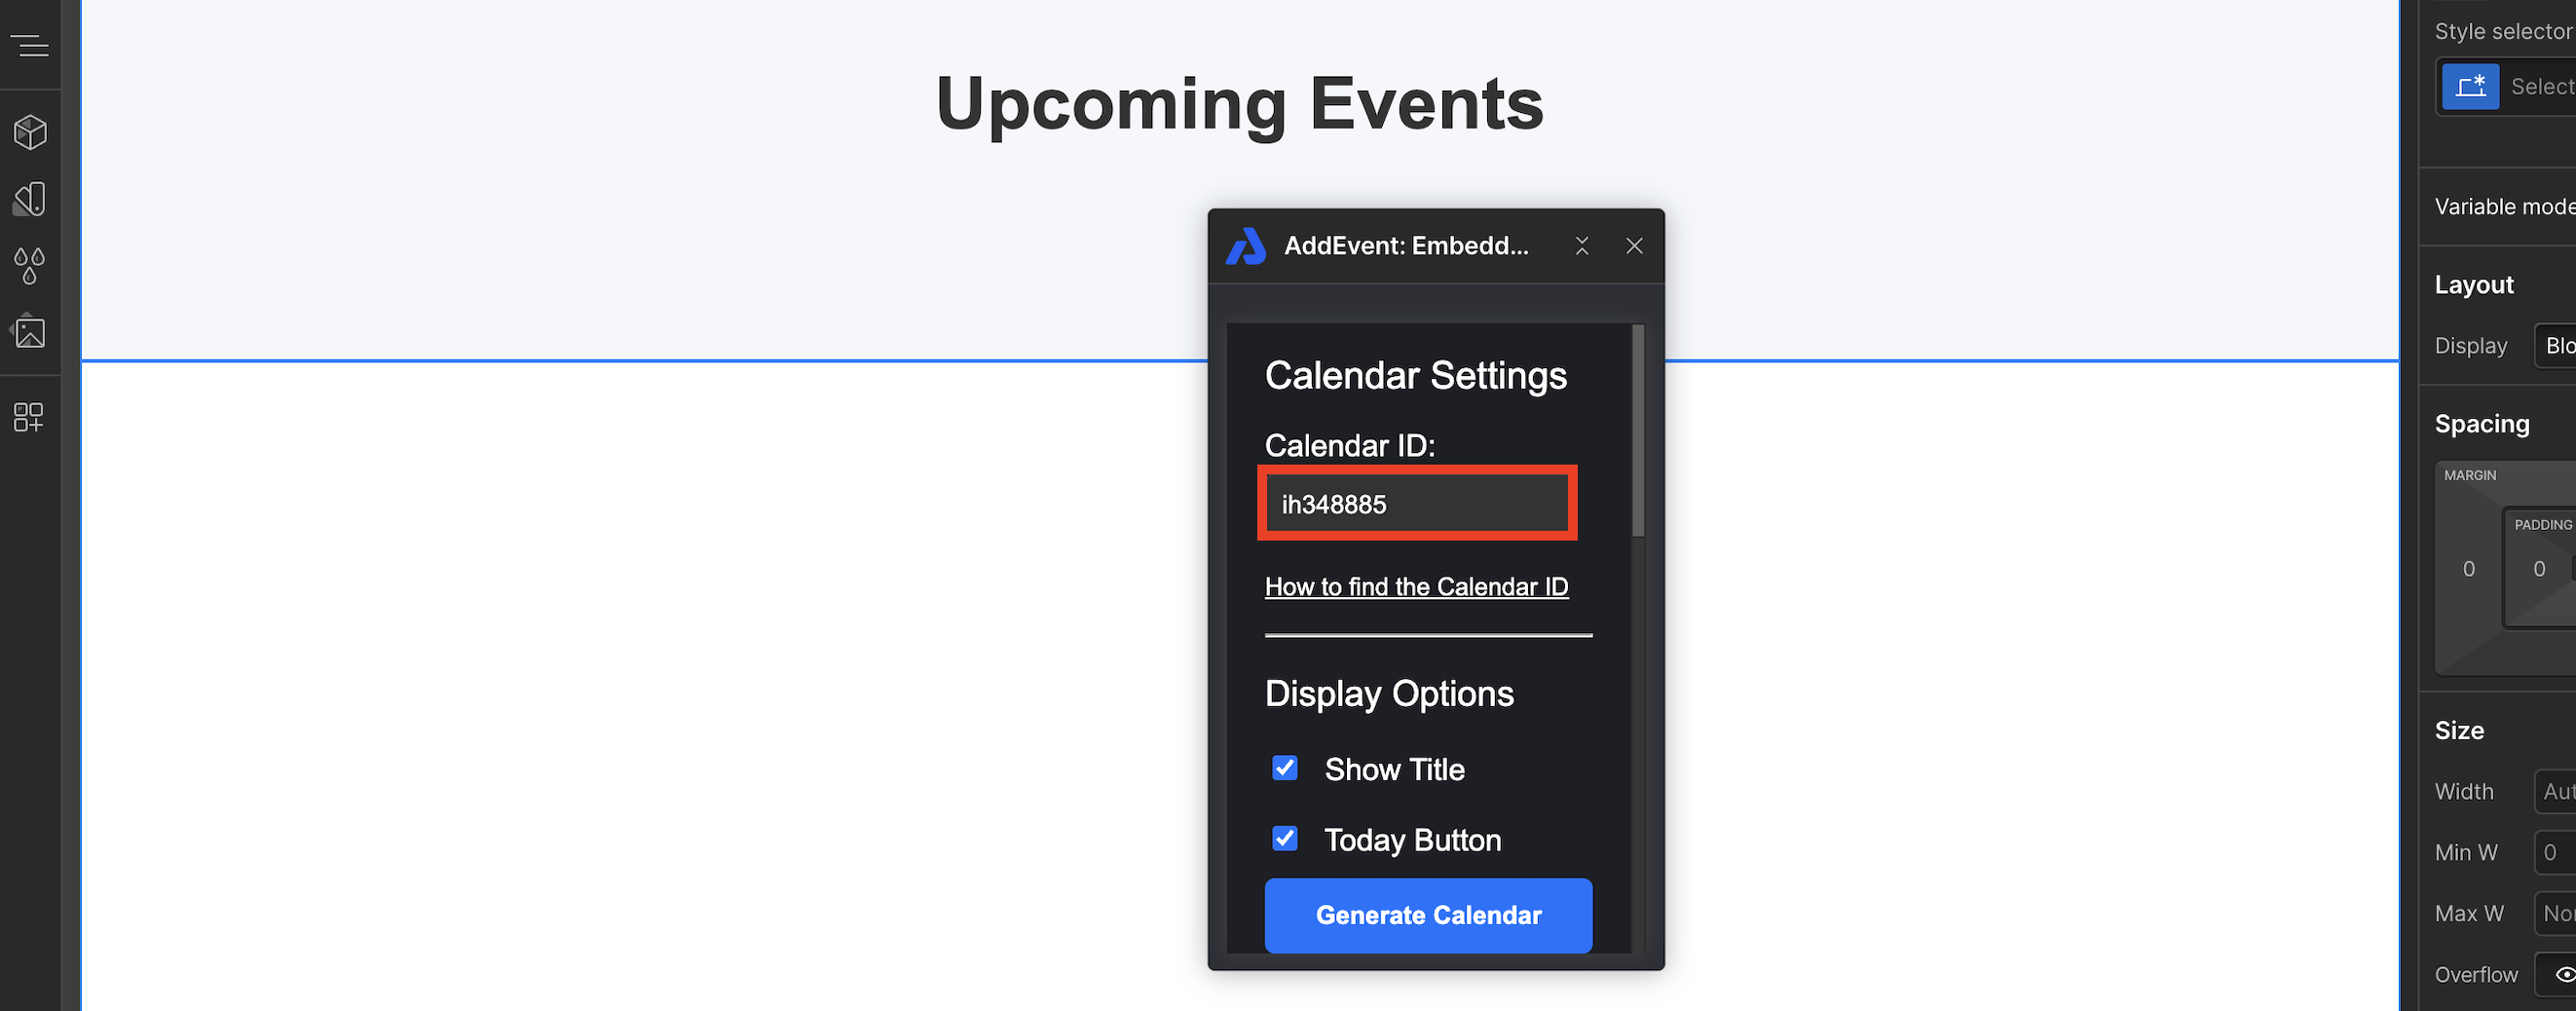
You will need to update this Unique Key for the block to display the calendar you would like.
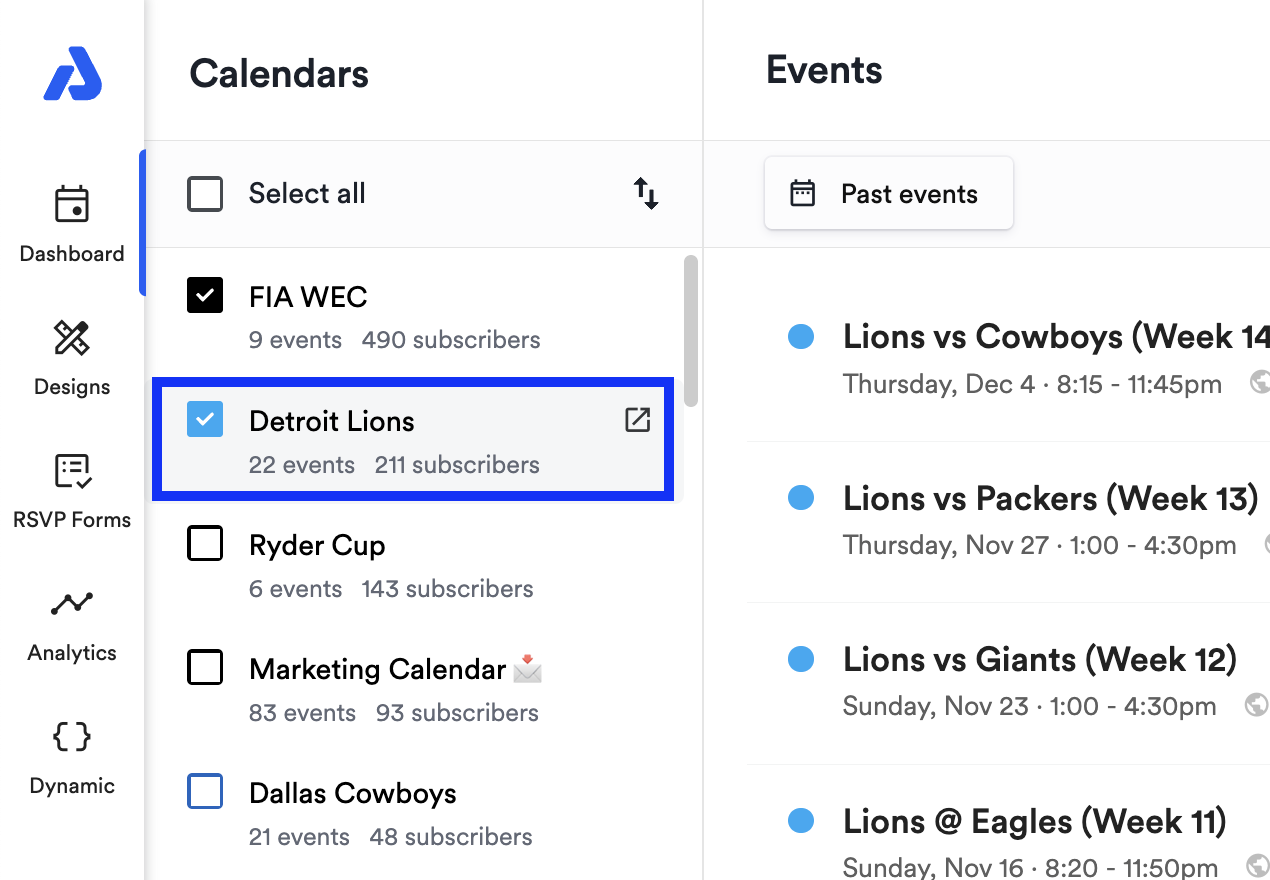
- To find your Unique Key, go to your AddEvent Dashboard > Hover over the calendar you would like to display and click into the Calendar page.
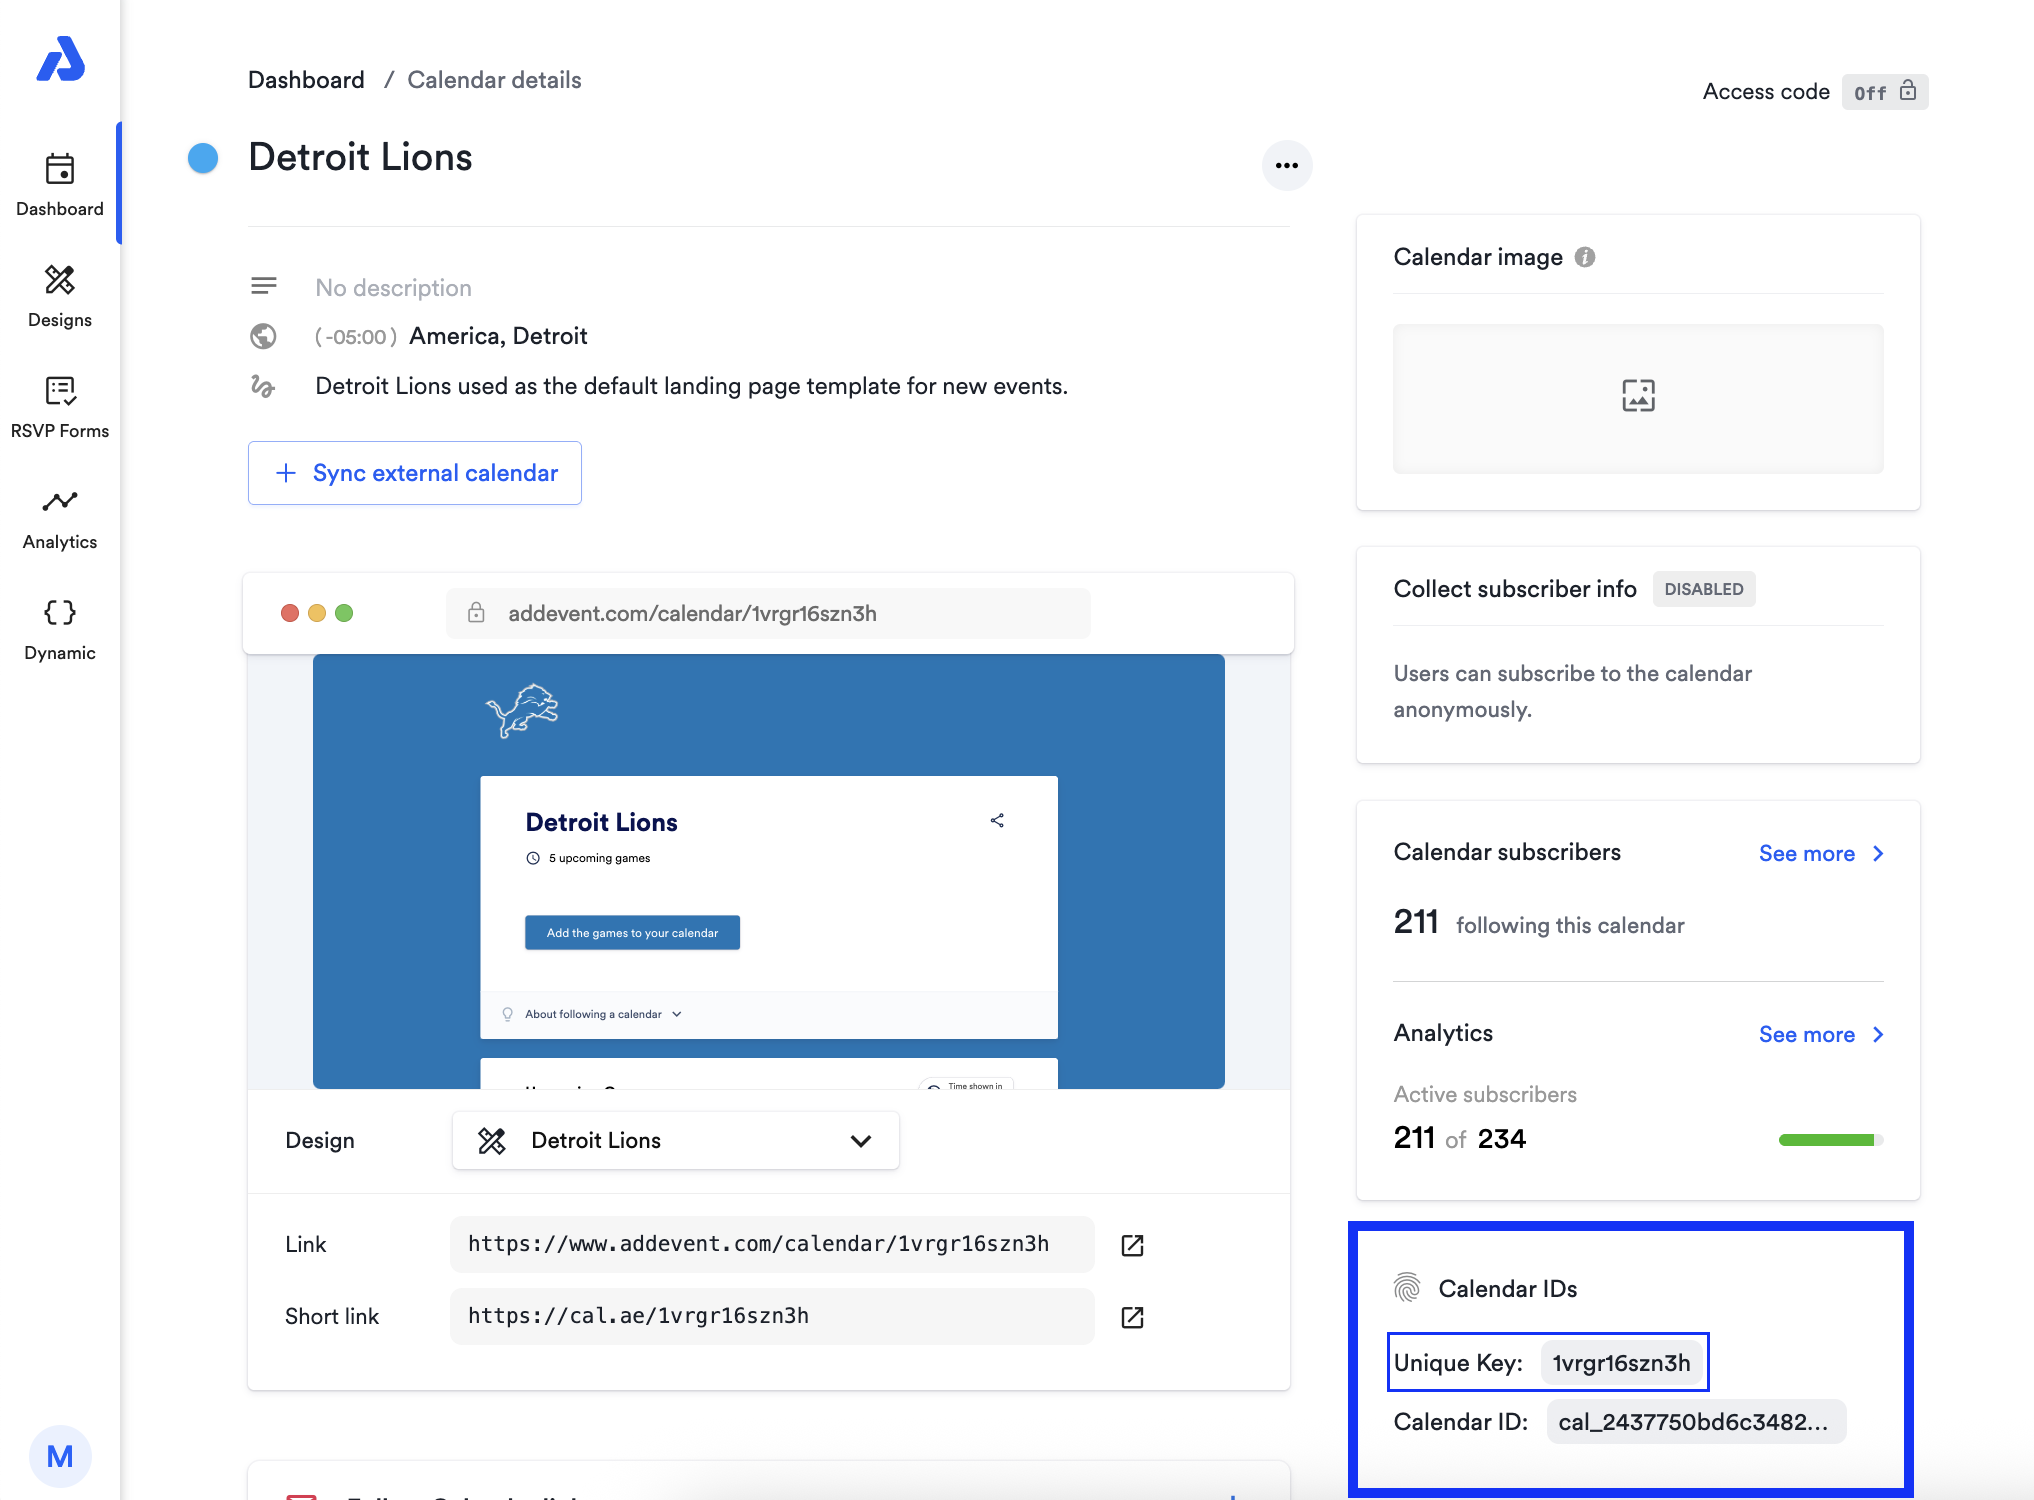
- On your Calendar details page, look at the bottom right for the Calendar IDs tile. Copy the Unique Key that you see
-
Open your Webflow page and paste your Unique Key into the text box below 'Calendar ID'
-
Adjust any of the Display Options you would like and then click the Generate Calendar button
- Hit Publish and your calendar is ready to go!
If you prefer to follow along with our video, you can do so here:
Updated 6 months ago