

How to Hide the Location of Your Event Before Attendees RSVP
This help doc shares instructions on how to hide the Location field on your RSVP event landing page to avoid users from retrieiving the event location before they RSVP for the event. After RSVPing, attendees can add the event to their calendar where the event's location will be displayed.
If you're sharing an RSVP event, and you would like to hide the Location field on your RSVP event landing page to prevent end-users from retrieving Zoom meeting links, physical locations, etc. before they RSVP to the event, follow the steps below.
These instructions assume you are familiar with event landing page design templates. To learn more about event landing page designs, see our help doc here.
How to Hide the Location Field on Your RSVP Event Landing Page
-
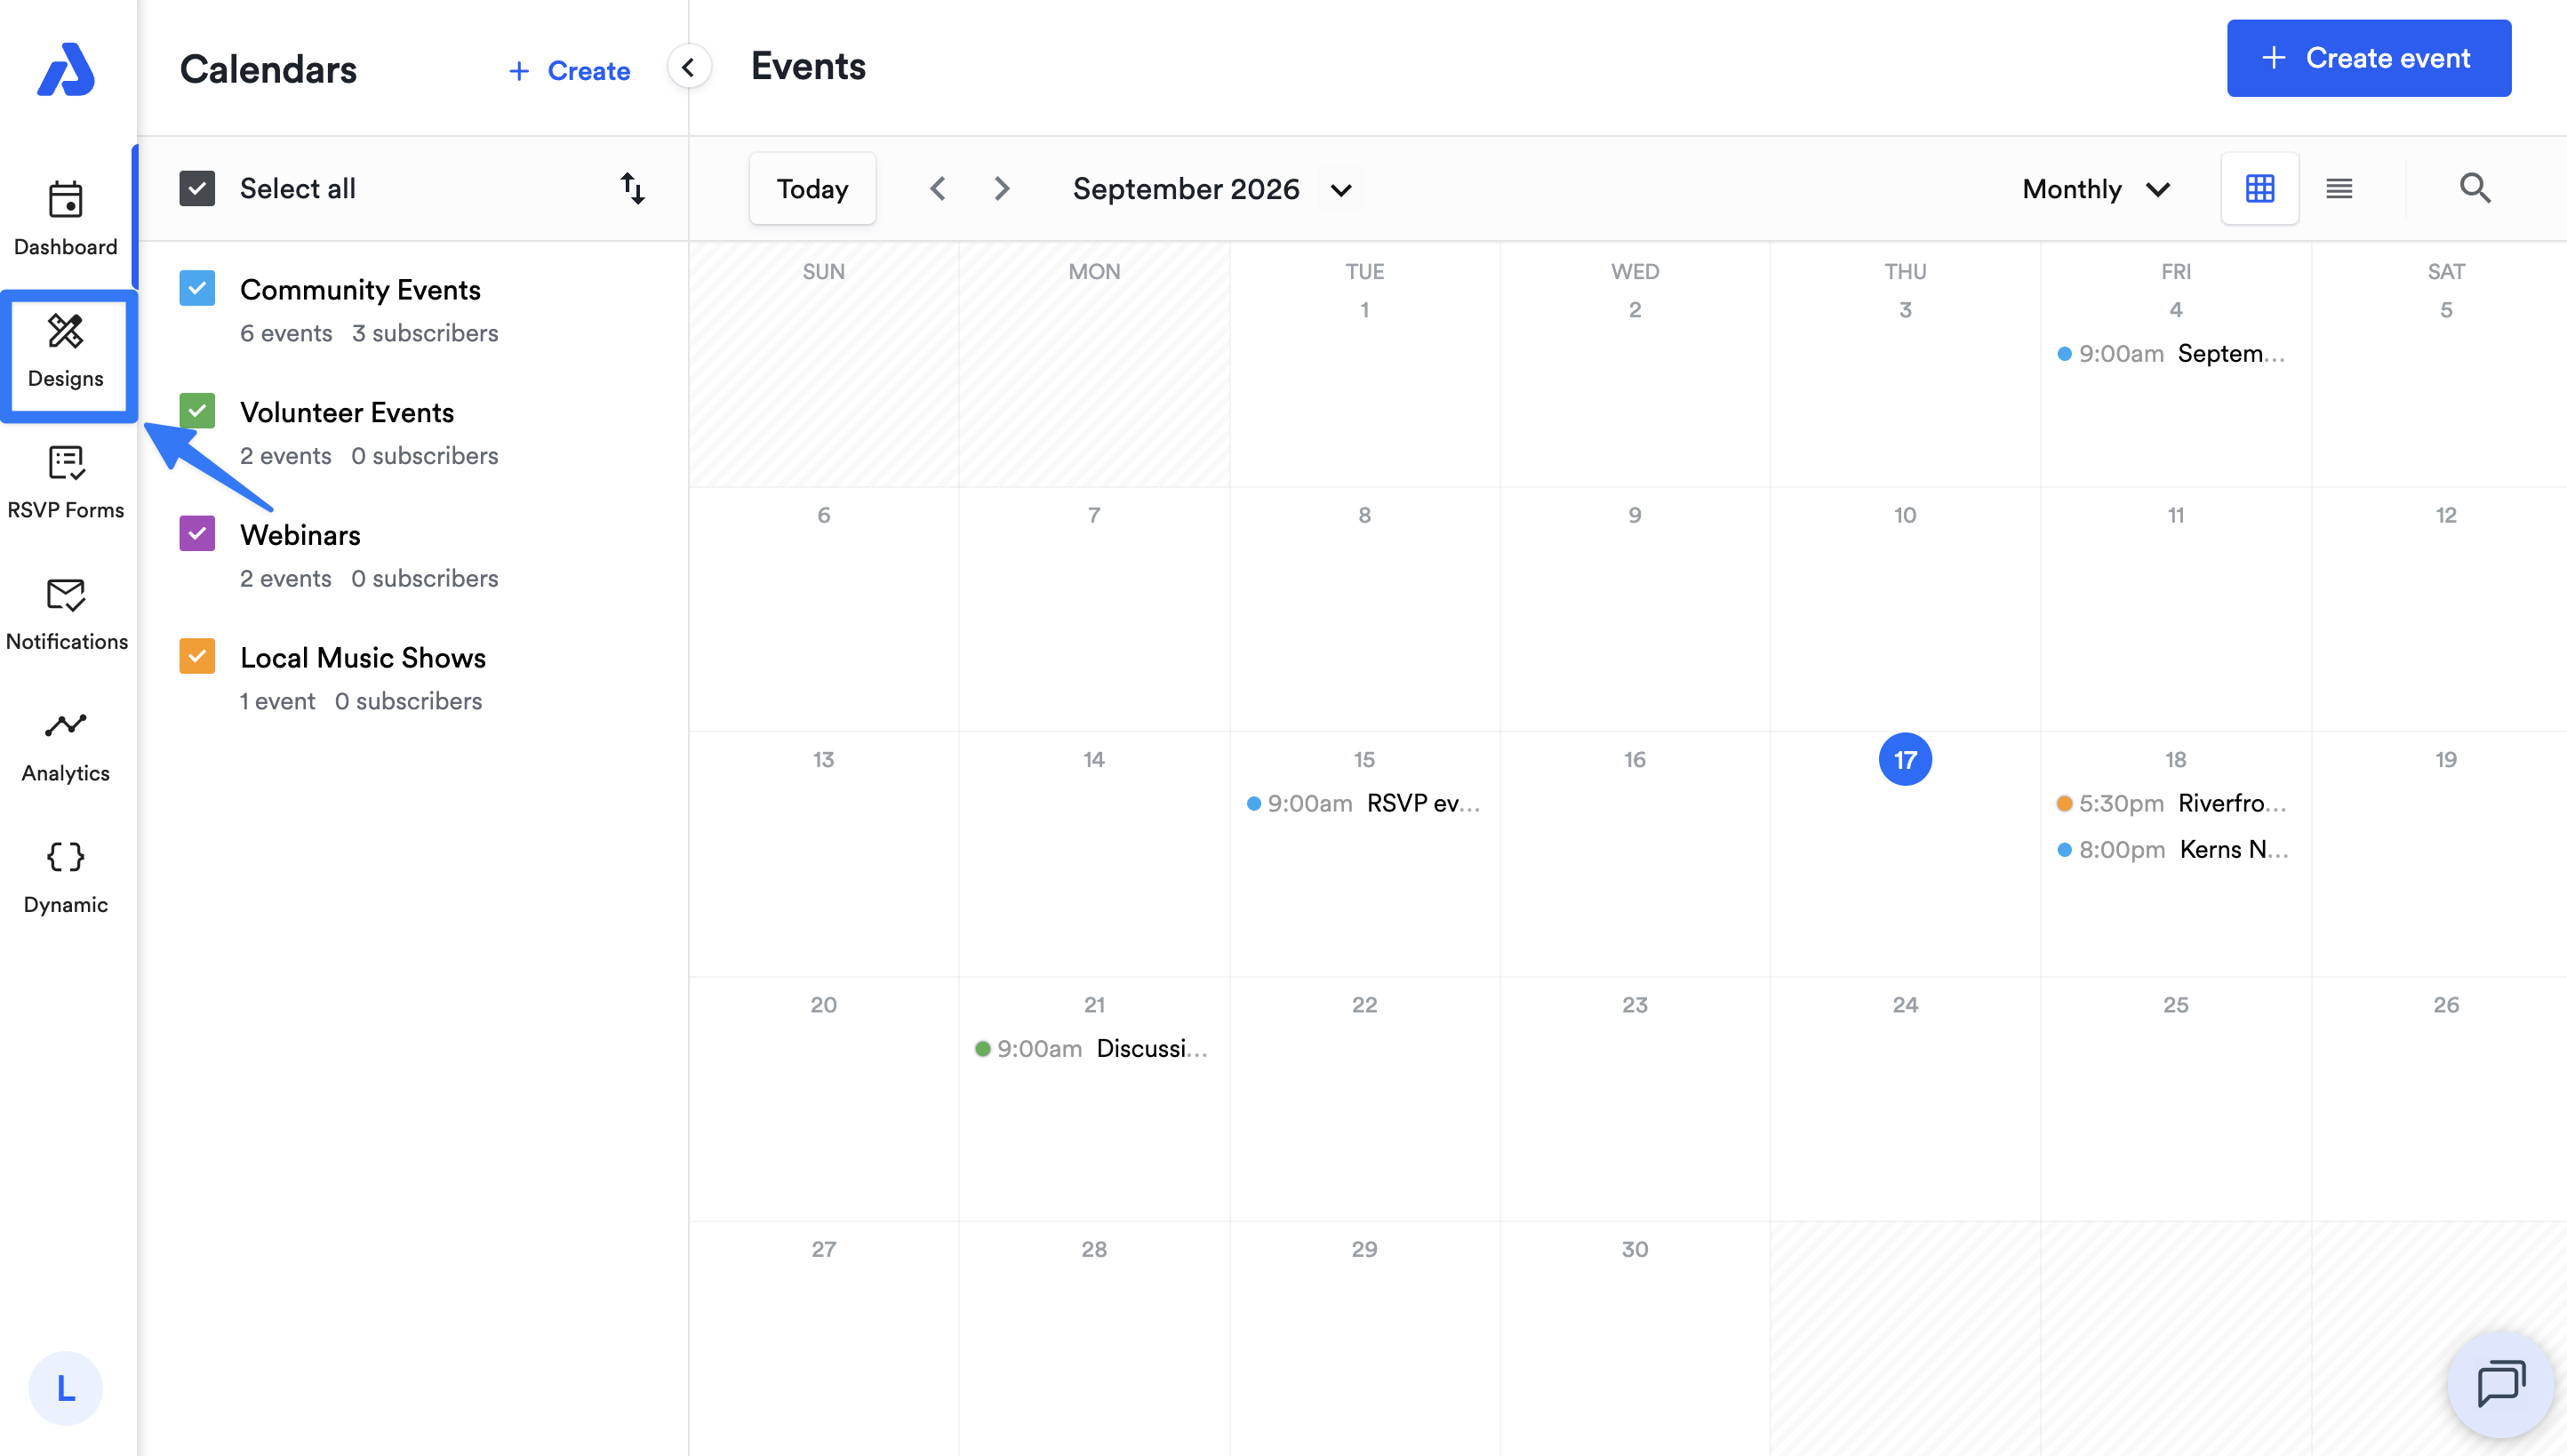
From the Dashboard, click on the Designs tab located on the left-side navigation menu.
-
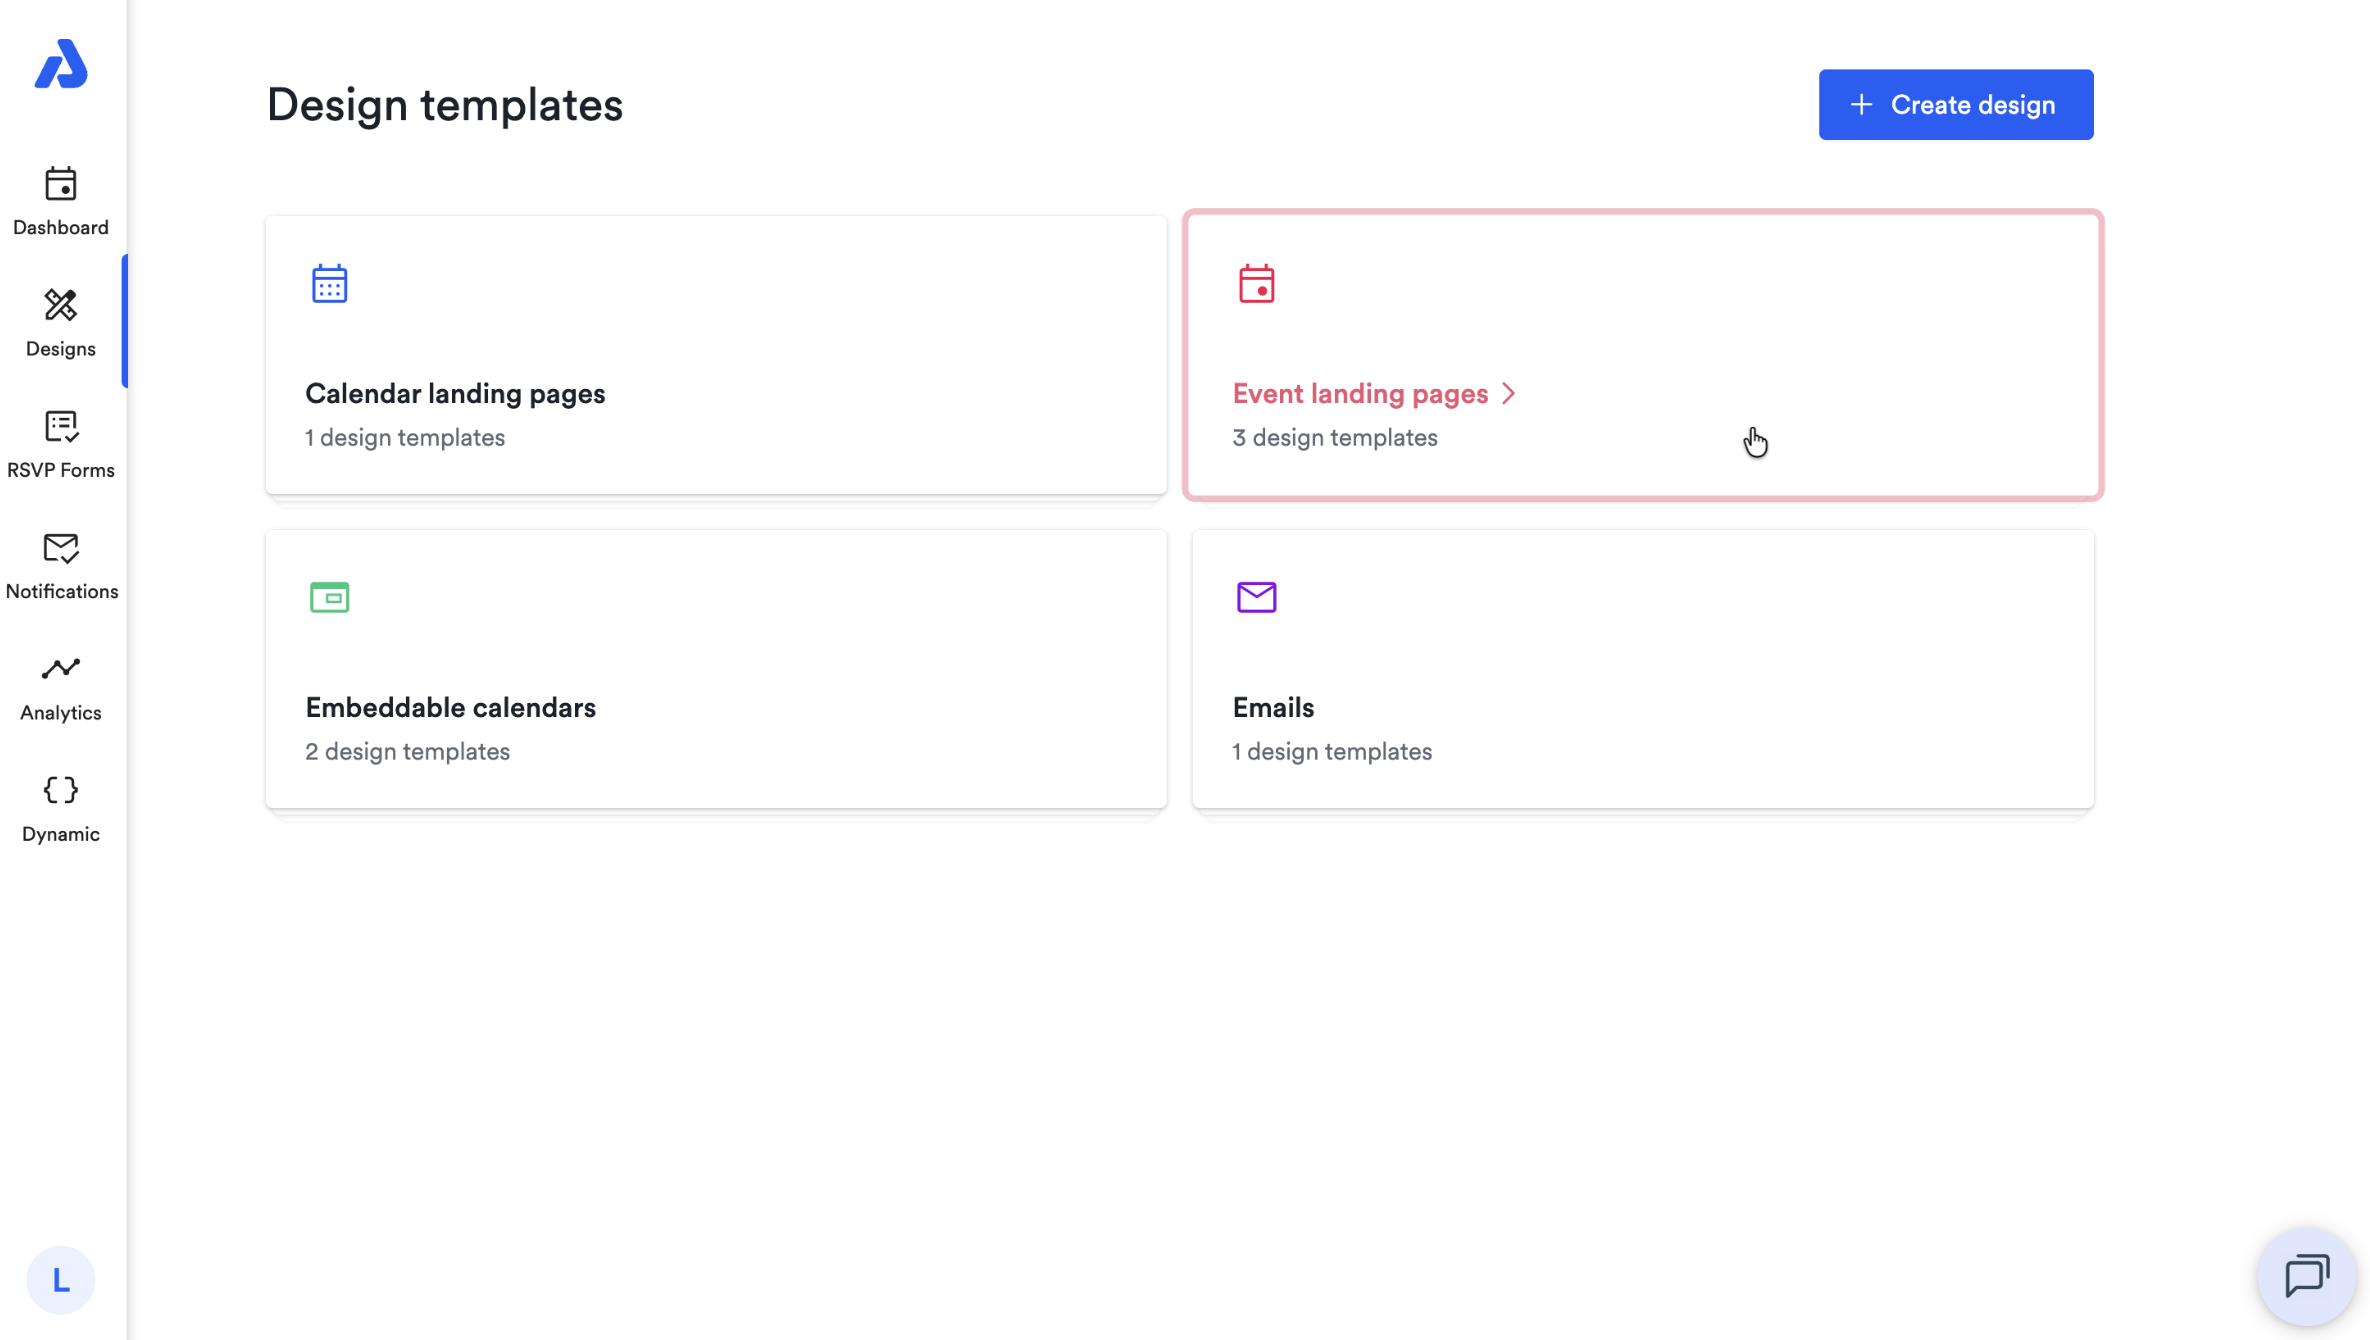
Click the Event landing pages option.
-
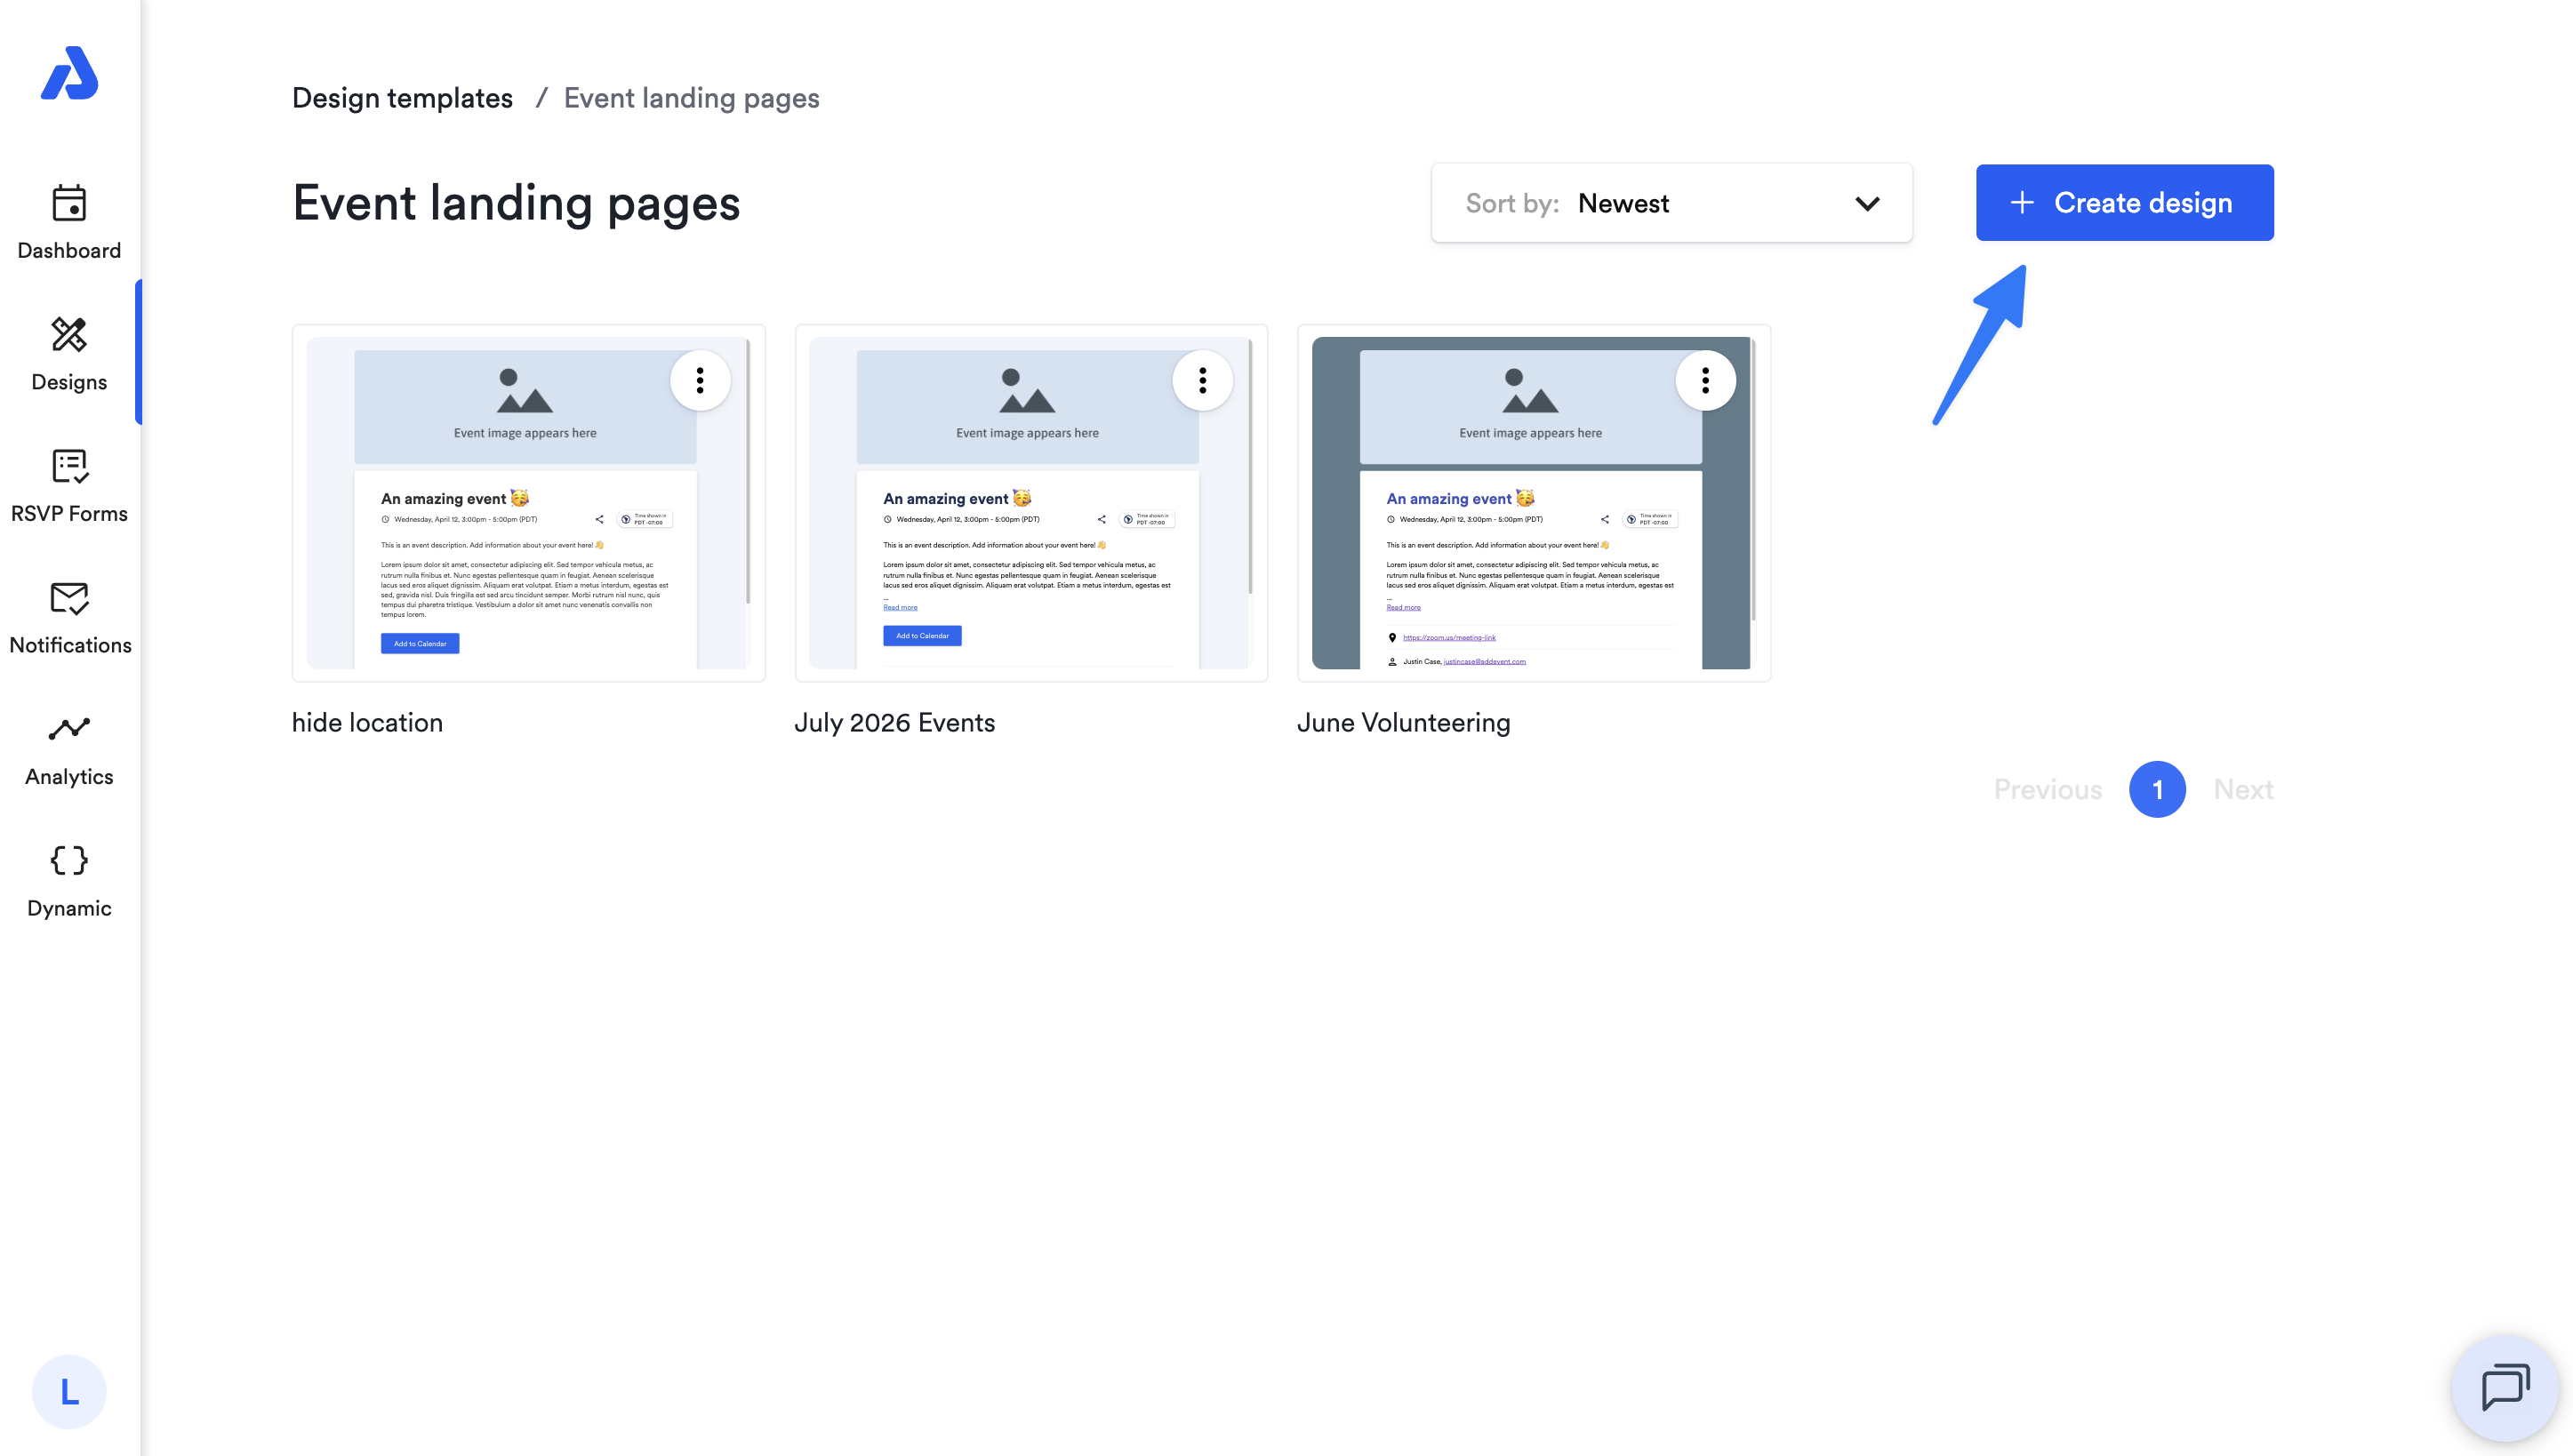
Select an existing design template to edit, or create a new design by clicking the + Create design button on the top-left of the page.
-
If creating a new design, enter a design name at the top of the page.
-
-
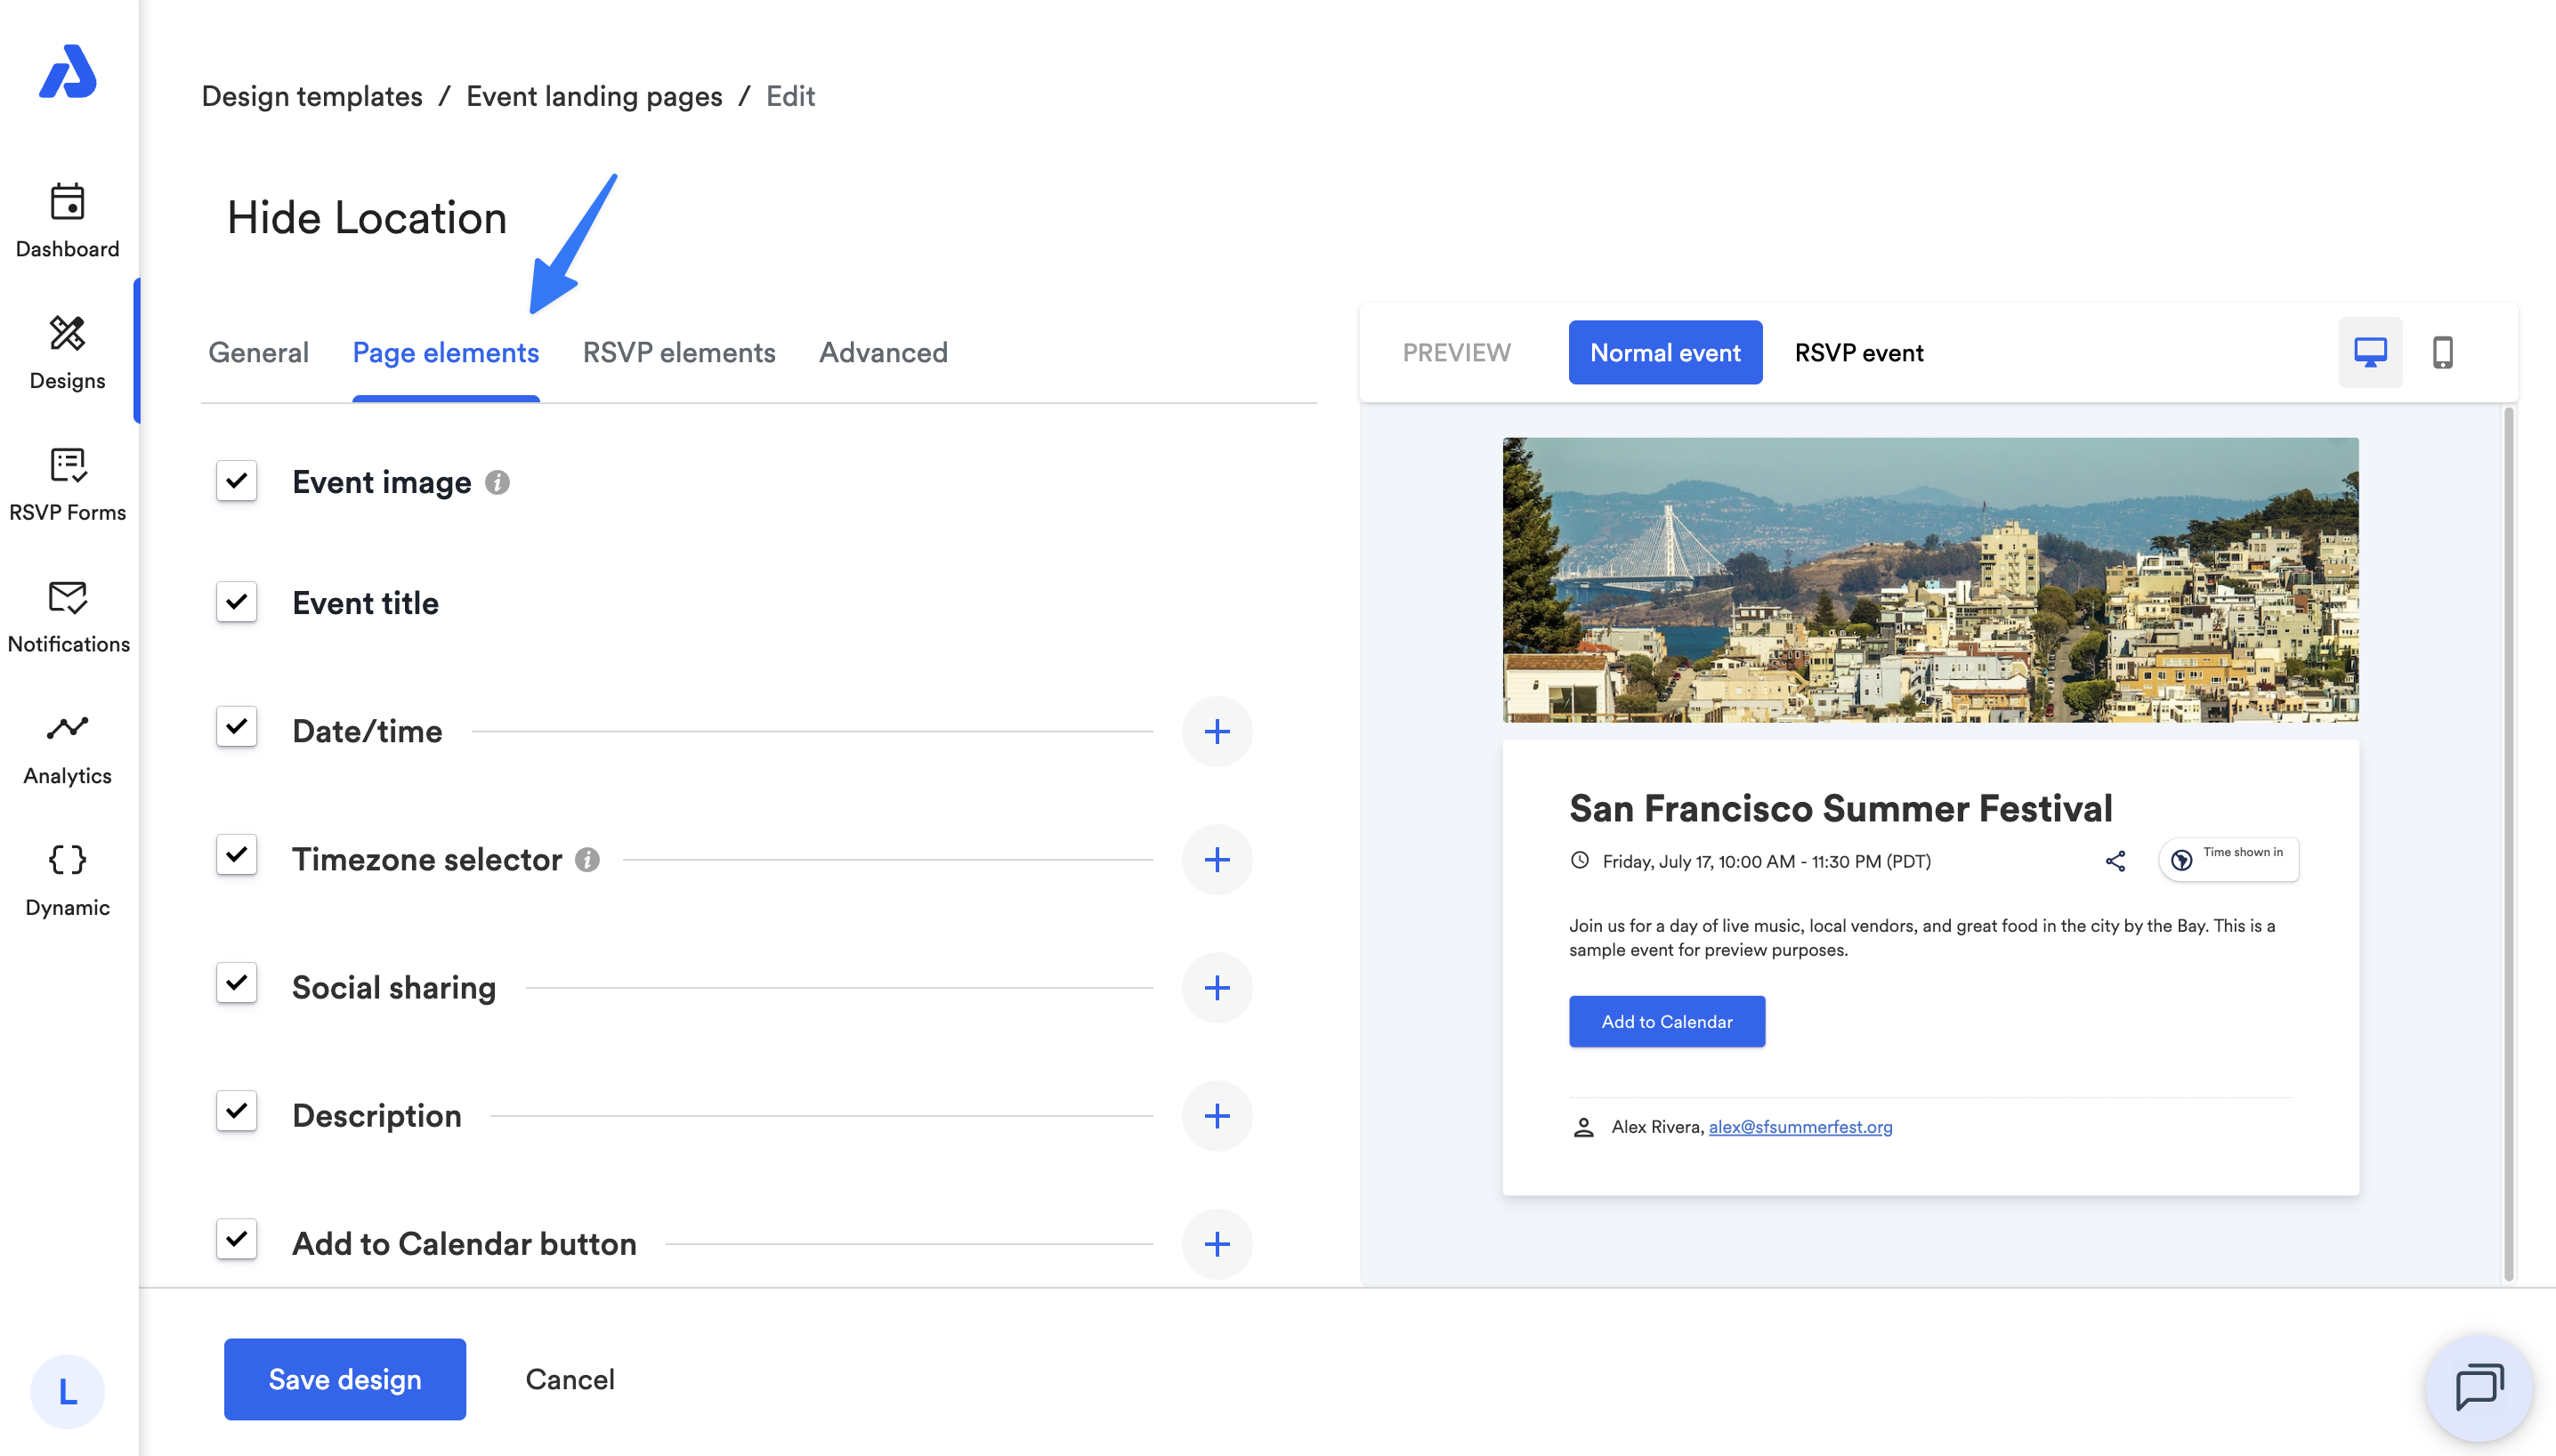
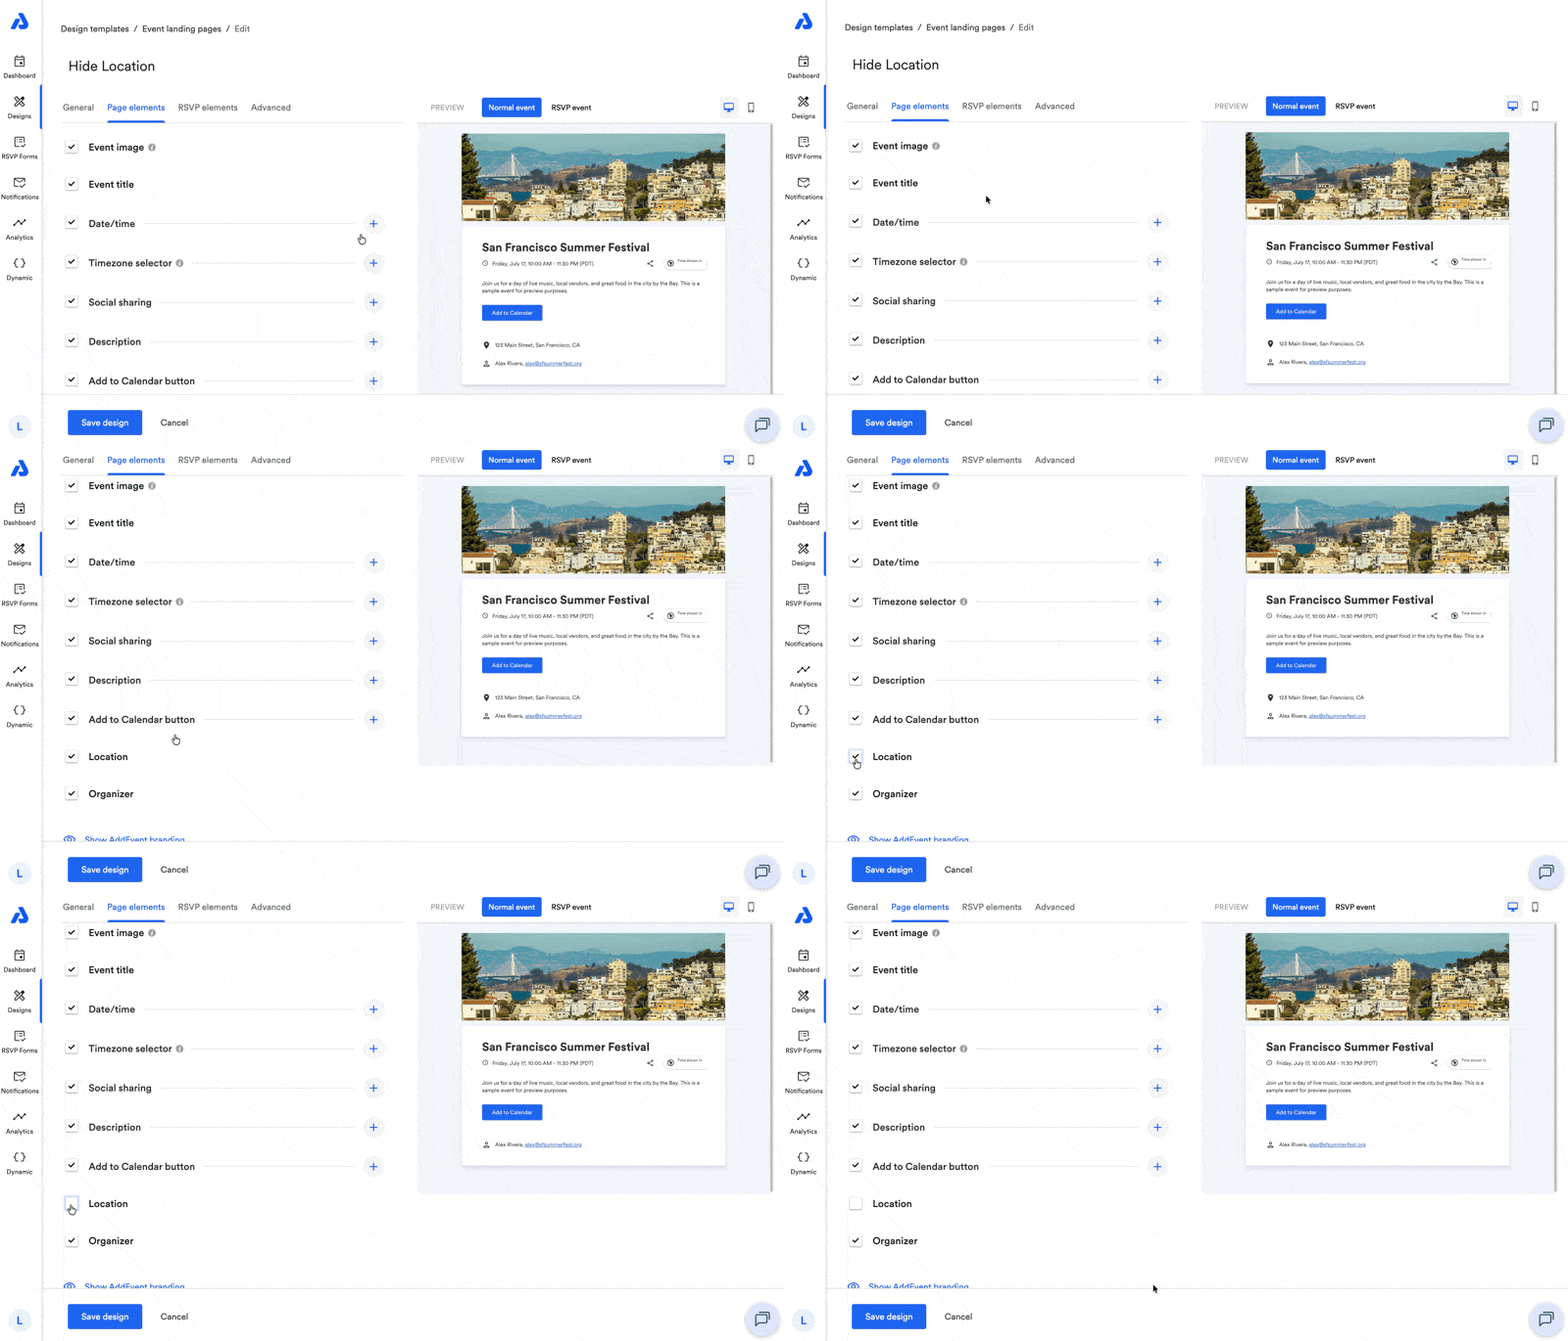
Select the Page elements tab.
-
Scroll down to the Location element and uncheck the box next to it.
-
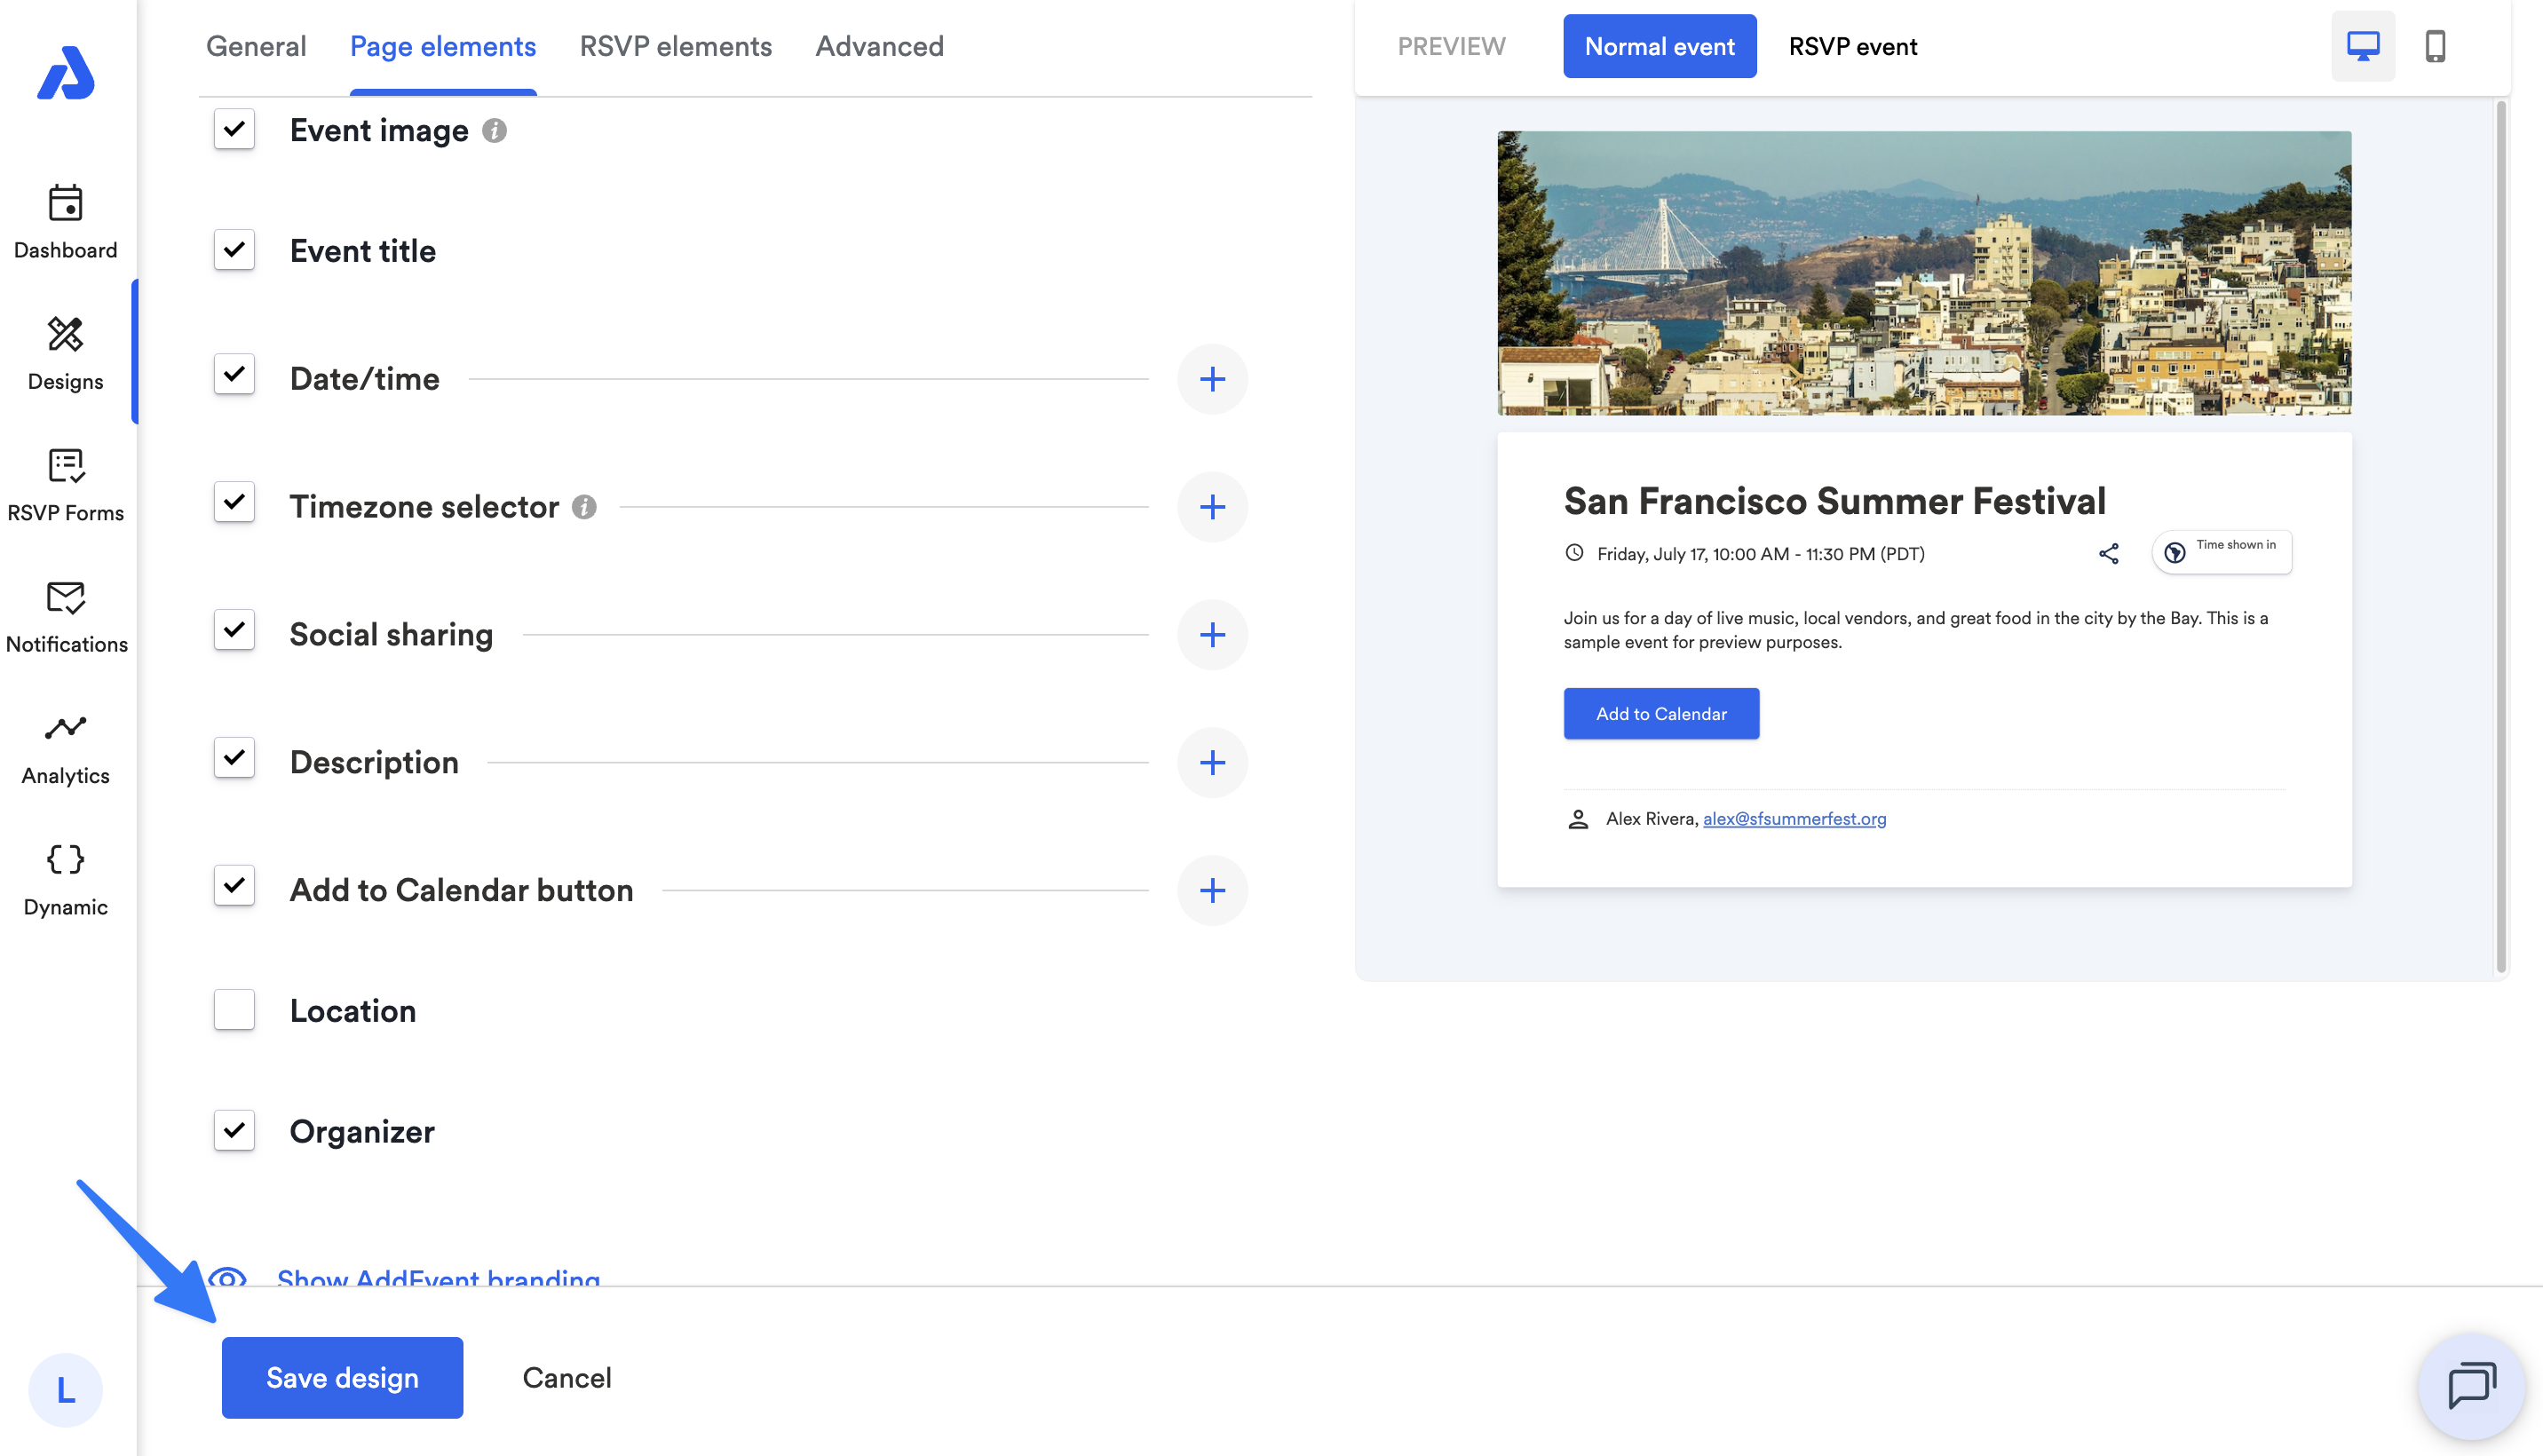
Click the Save design or Create design button at the bottom of the page.
-
Assign the design to your RSVP event by following the steps shared here in our help doc: Apply an Event Landing Page Design Template to an Event
Your RSVP event landing page will now exclude the Location field. End-users will first need to submit the RSVP form and then add the event to their calendar with the Add to Calendar button that displays after registering. The event on their calendar will include the location information within the event's details.
Updated 20 days ago