

Create a Calendar
This help doc explains how to create a calendar in your AddEvent Dashboard. Each calendar can contain multiple events and can be followed by your audience through a subscription calendar.
Creating a Calendar
To create a calendar, follow the steps below.
-
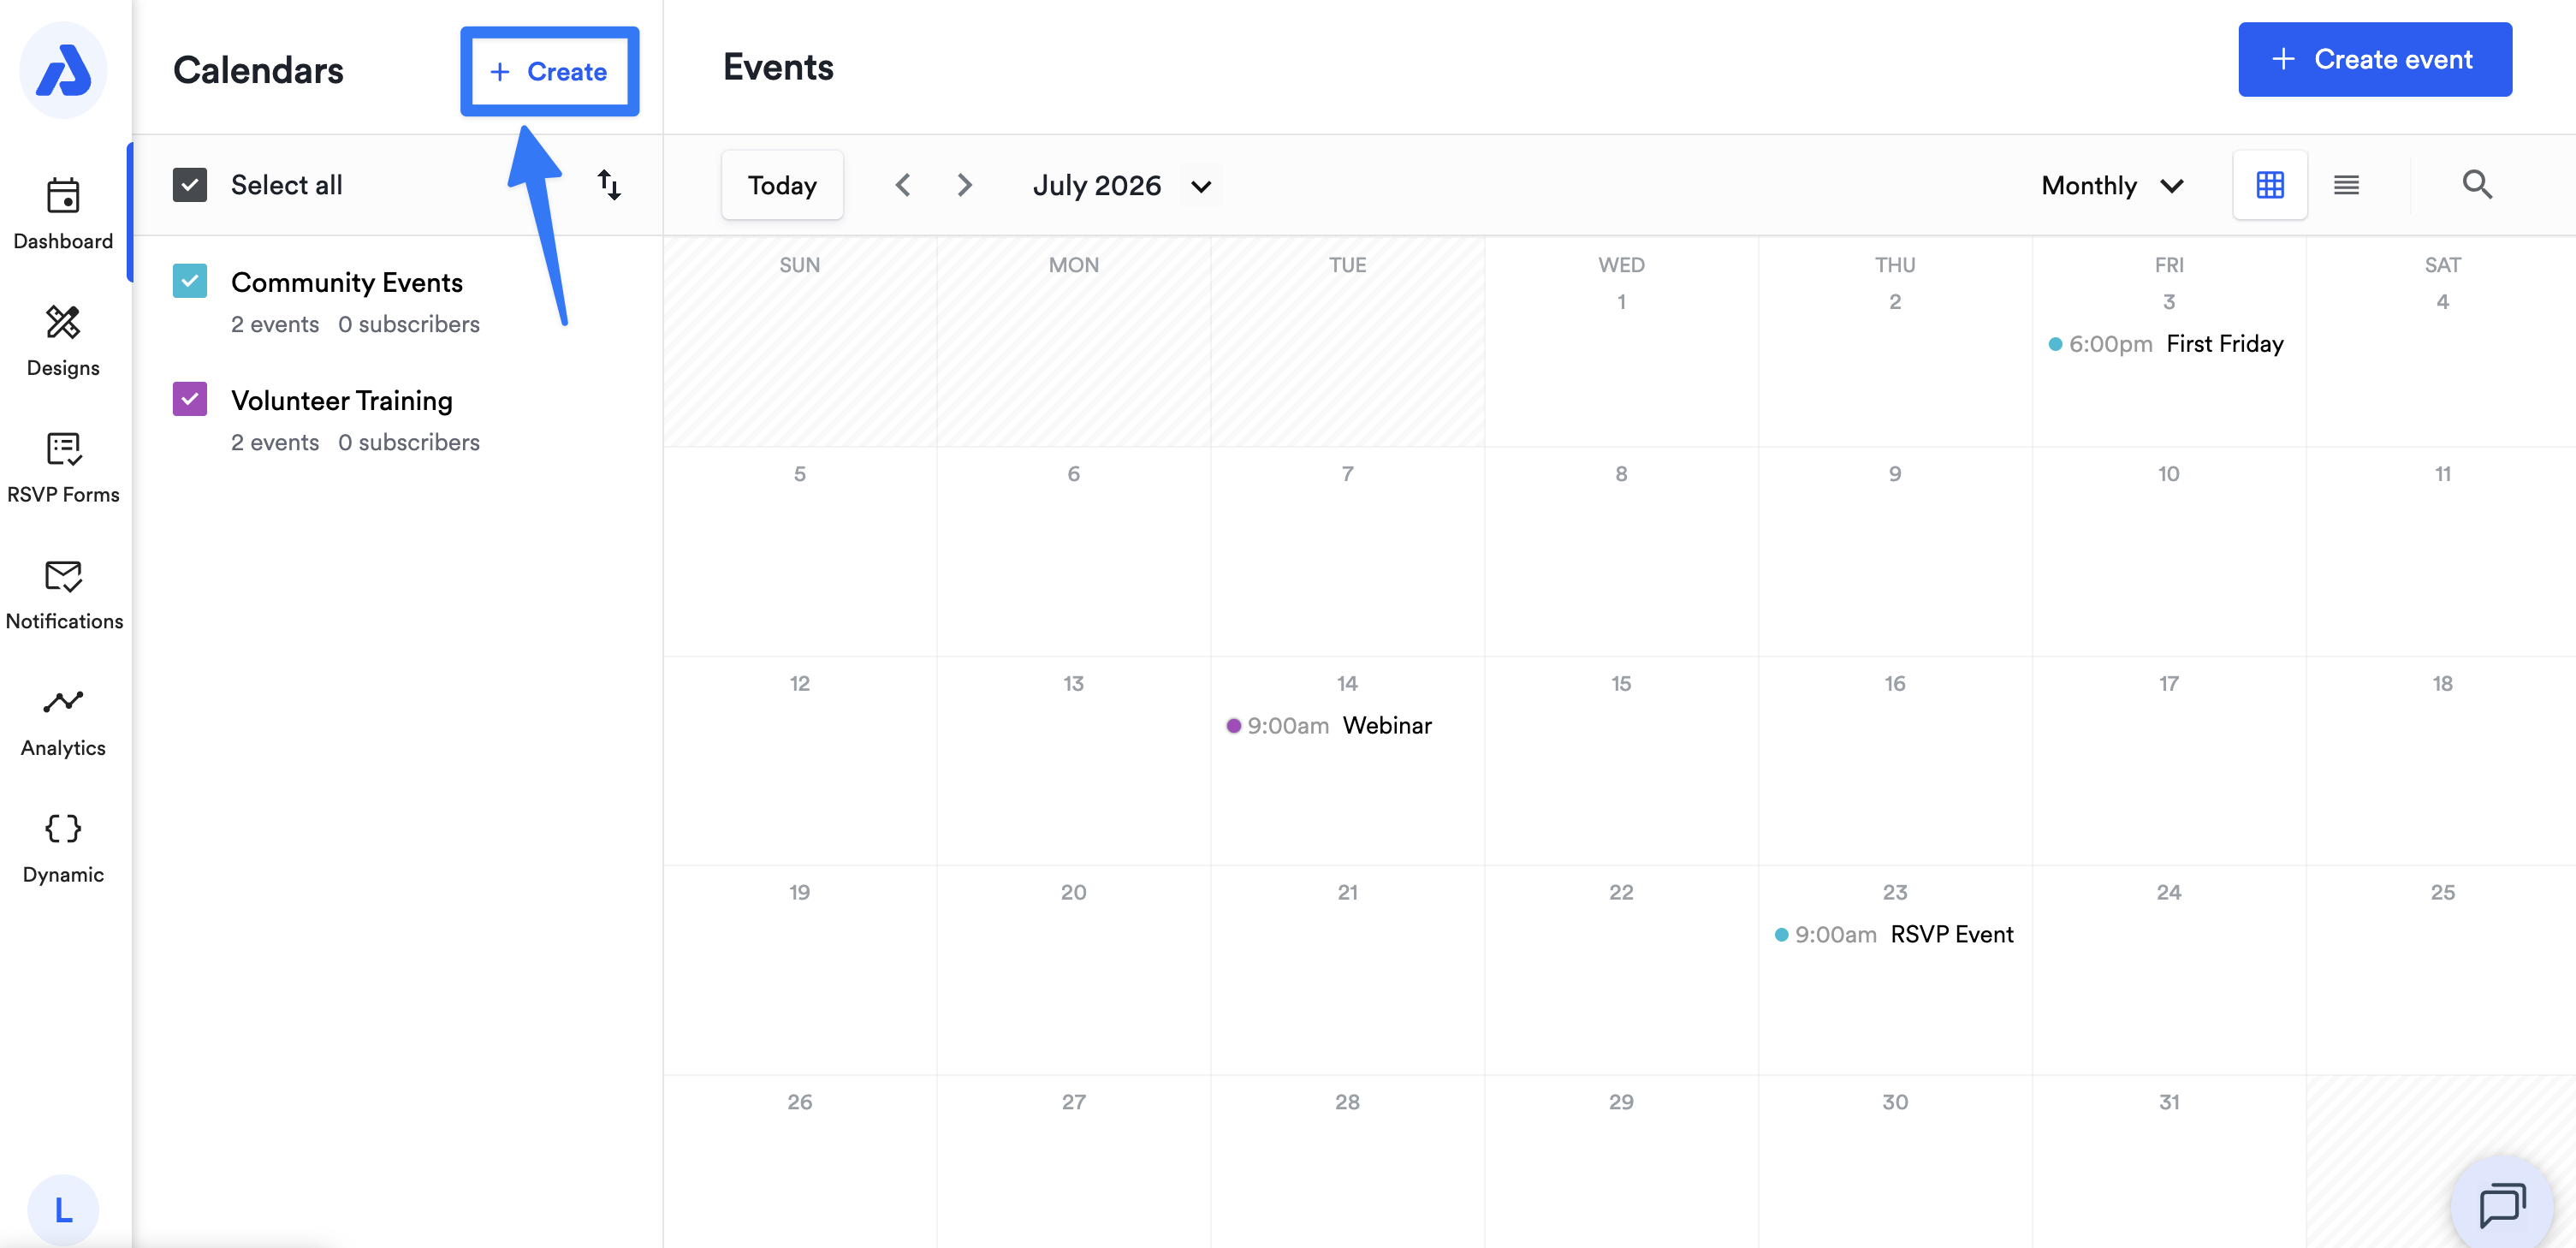
From the Dashboard, click the + Create option located at the top of the Calendars list.
-
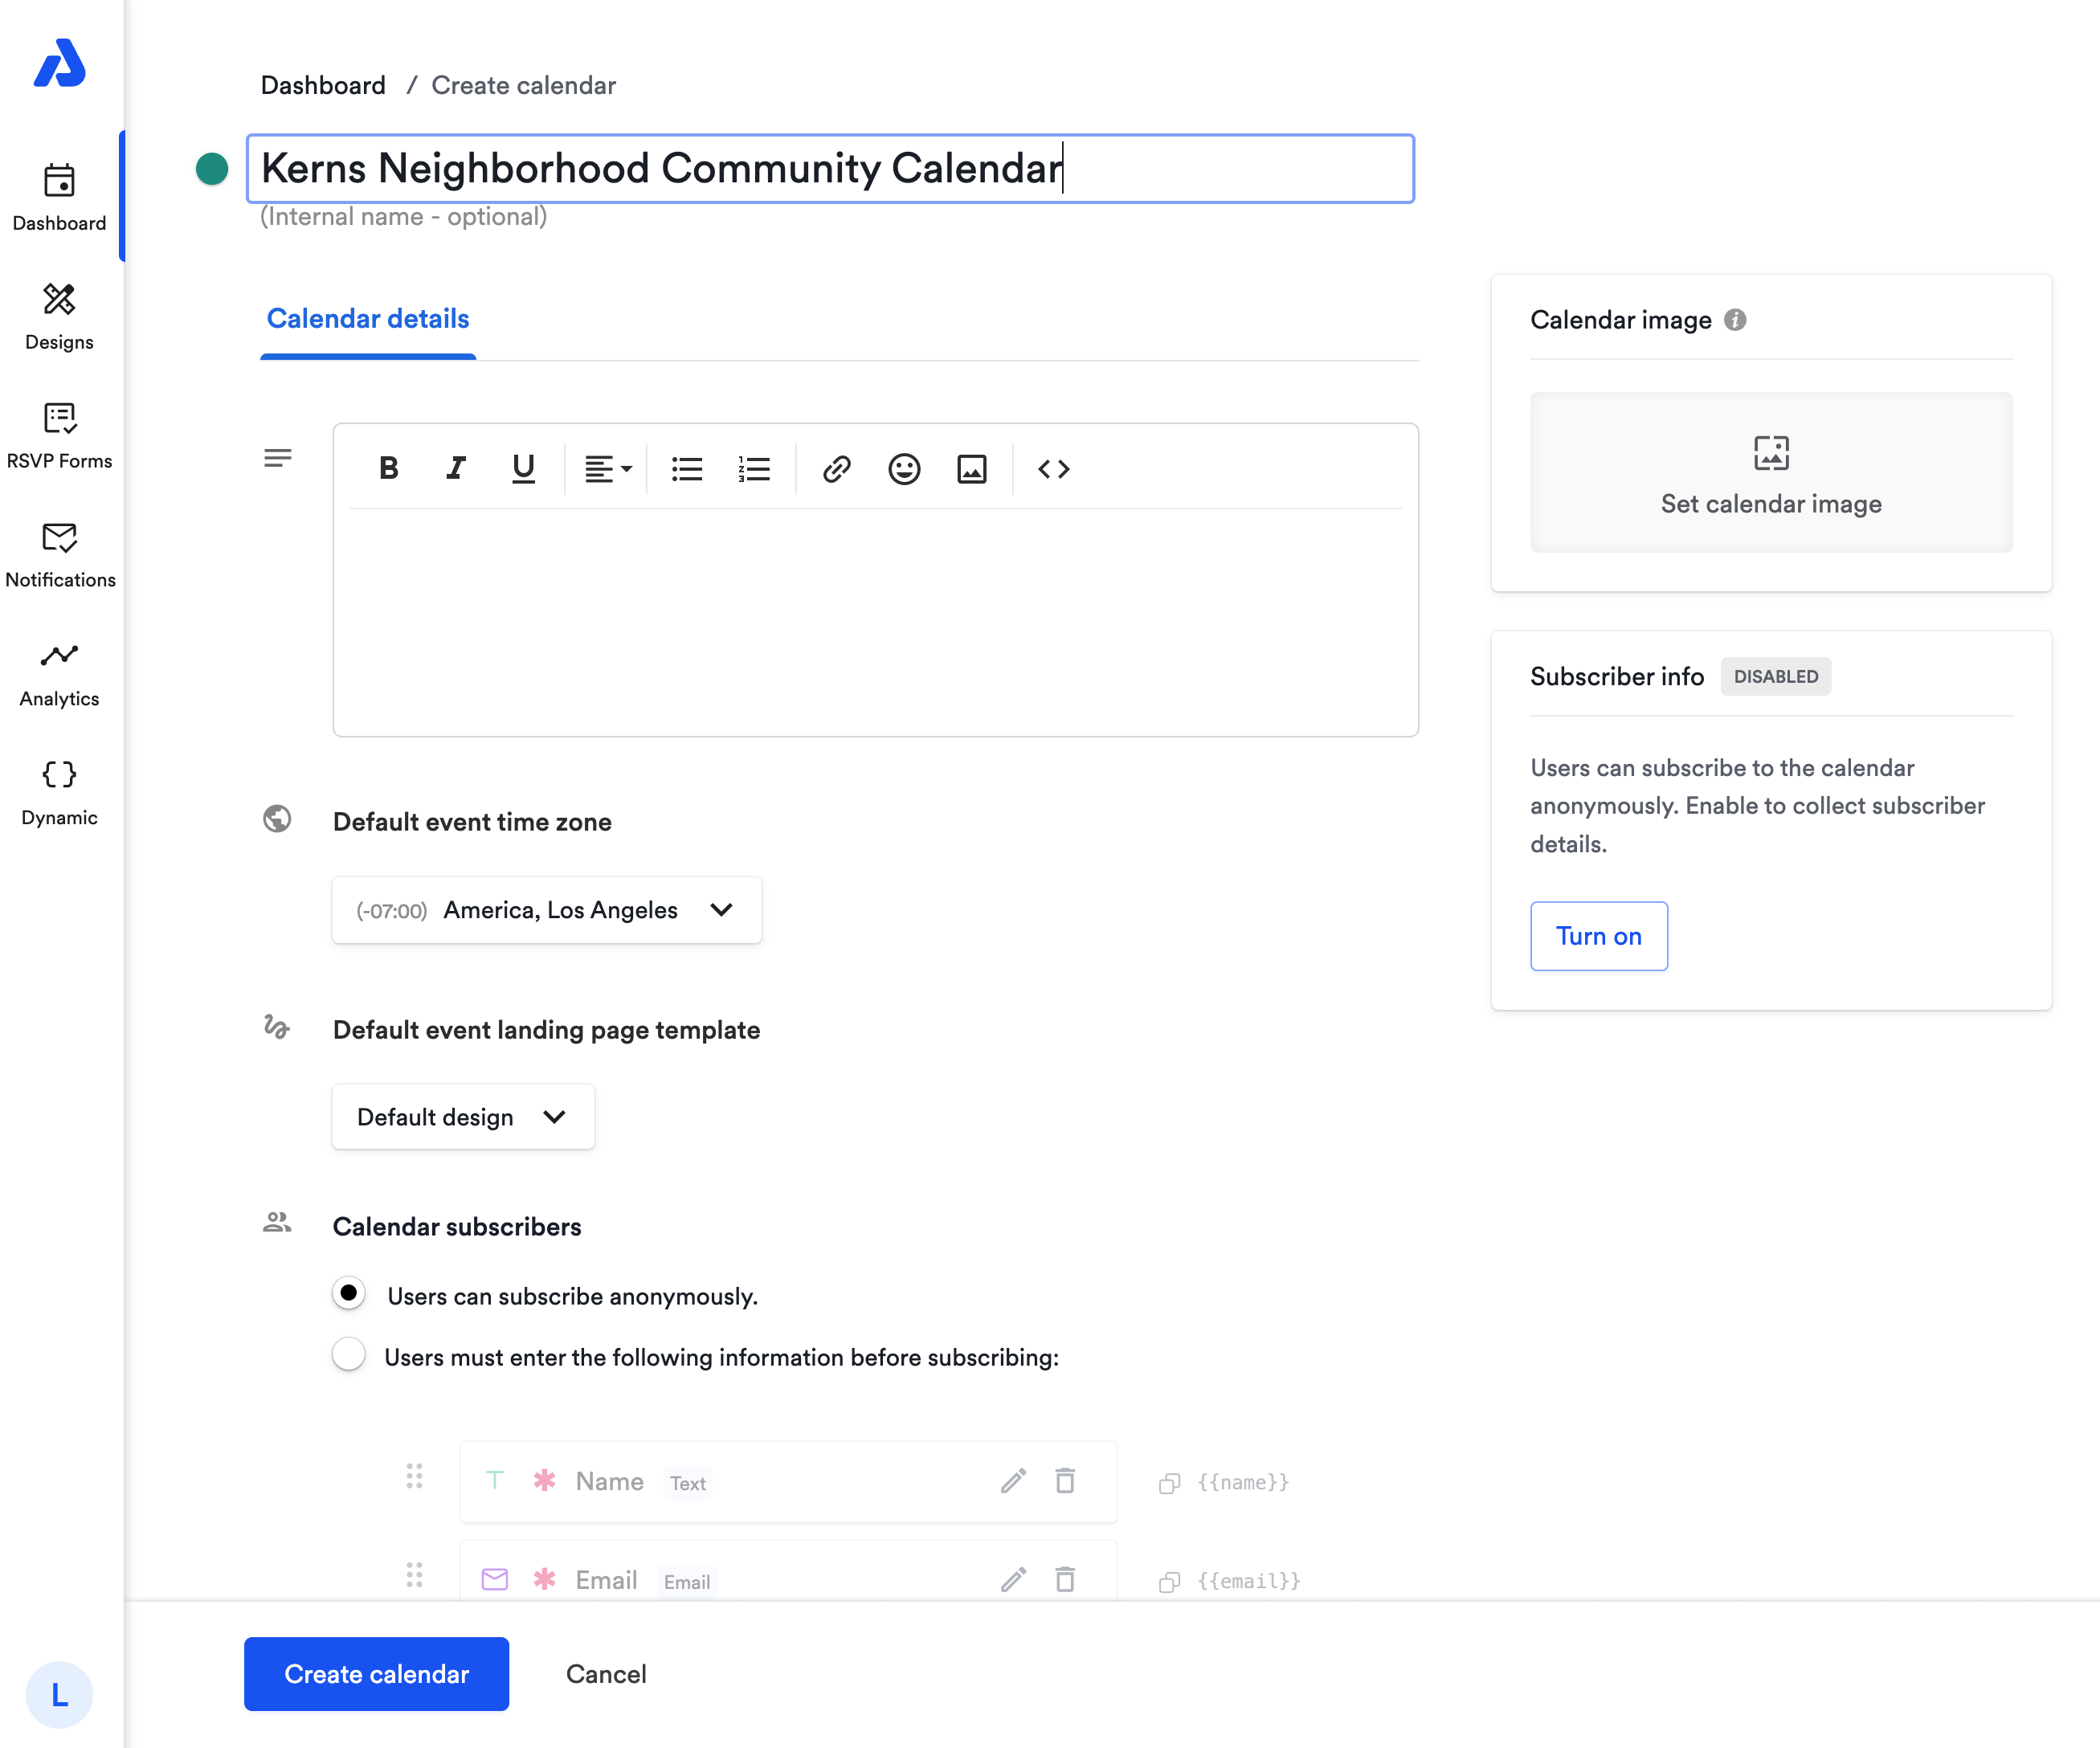
On the Create calendar page that follows, configure and save all of your calendar details such as, calendar title, calendar description, calendar image, etc.
-
Click the Create calendar button at the bottom of the page.
Customizing Your Calendar
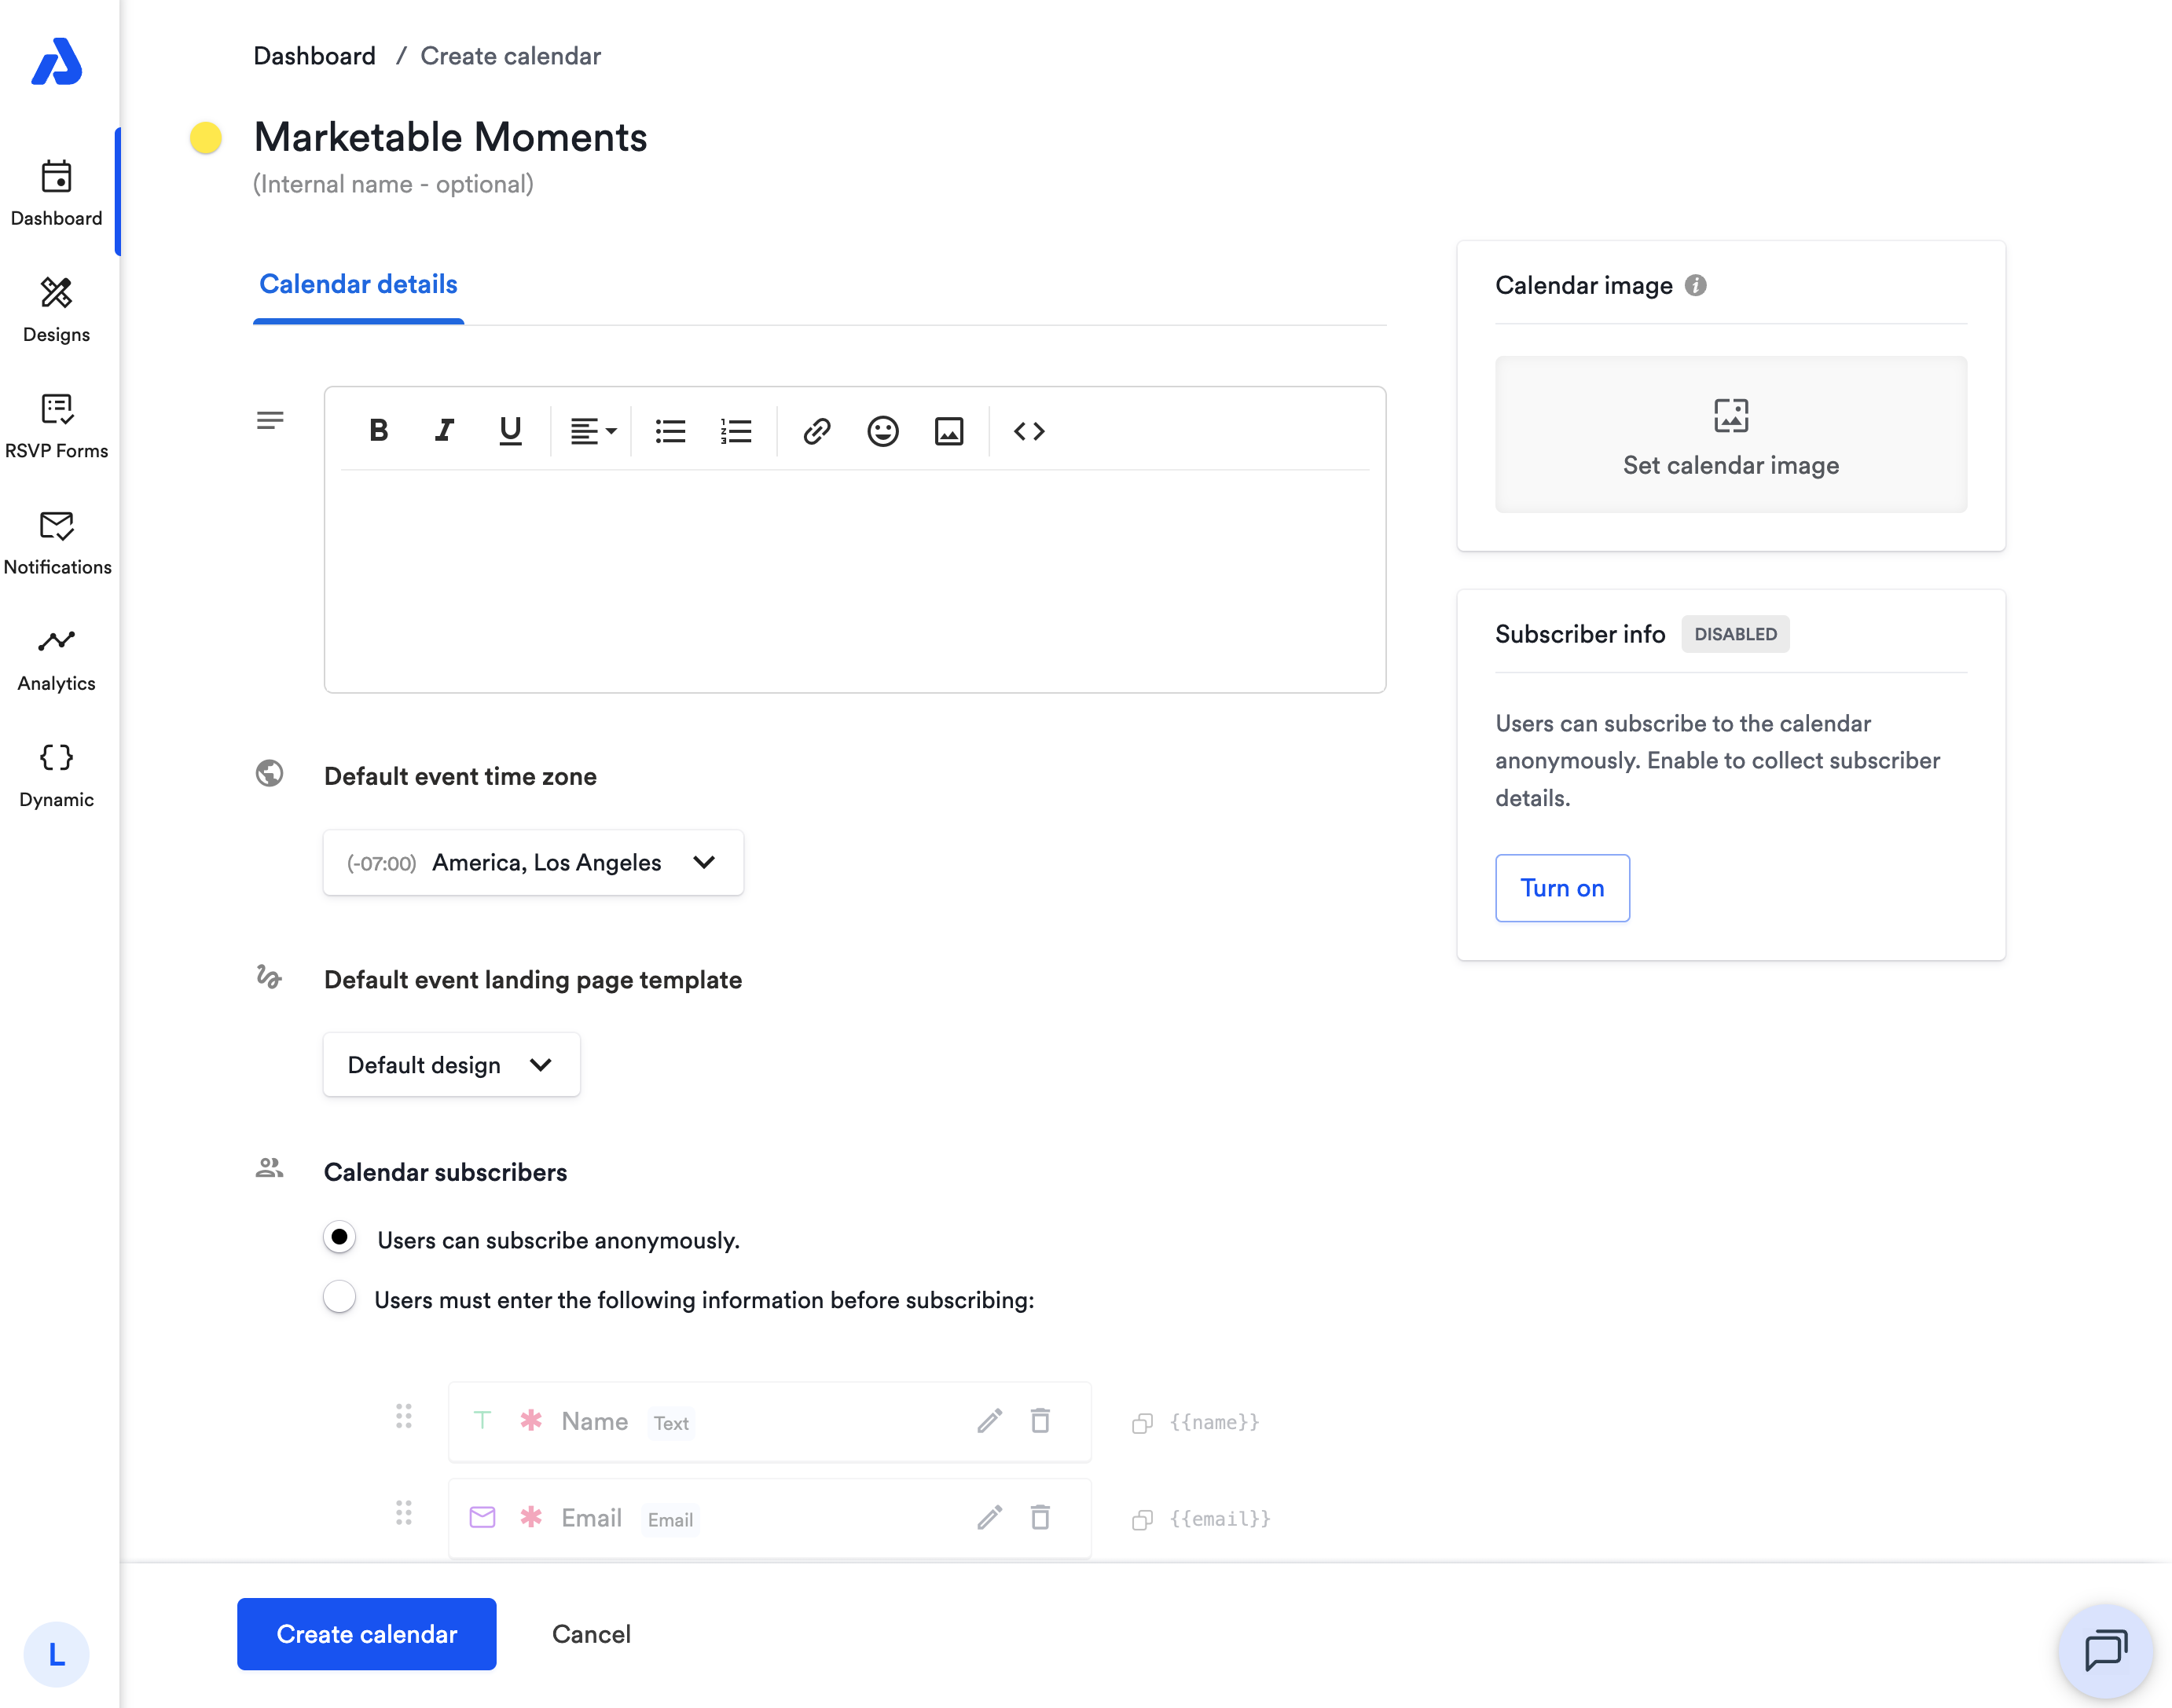
The following sections outline the customizable fields on the Create calendar page. It is important to give your attendees and subscribers clear and essential details related to the events so they can stay informed.
Title of Your Calendar
Enter the title of the calendar; this is the calendar title your end-users will see when they add the calendar to their external calendars. The best titles are brief and informative.
Internal Name of Your Calendar
Only you and your other account users (admin and editors) will see the internal name of the calendar. This is meant to help with internal organization, for instance, if you have many different calendars with similar or identical titles.
Description
This is the description of your calendar that end-users will see when you share this calendar’s unique landing page with them.
Timezone
This will be the default timezone for events added to this calendar. If unsure of the appropriate timezone, click the timezone box and search based on location. To learn more about time zone selectors, see our help doc here: Timezone Selector
The time zone you select is only the default for new events. Events can be changed to any timezone and a single calendar can contain events with different timezones.
Default Event Landing Page Template
This is the default event landing page design template that will be applied to any events that you create in the calendar. You can edit the design template applied to events upon event creation. To learn more about event landing page design templates, see our help doc here: Event Landing Page Designs
Calendar Subscribers
When you share a calendar with your end-users, you can either allow them to subscribe to your calendar anonymously or collect information from them via a form they are presented with before they can subscribe. To collect subscriber information, click here for instructions.
Once you have created a calendar, you can now create events that you can share with your end-users and get those events onto their external calendars. Click here for instructions on how to create an event.
Updated 2 months ago