

Create an RSVP Event in AddEvent
To create an RSVP event in AddEvent, create or open an event in the Dashboard, click Turn on RSVP, choose an RSVP form, configure the RSVP settings, and click Create event. RSVP events let you collect registrations, add the event to users’ calendars, and send reminder emails.
How to Create an RSVP Event in AddEvent
Start by creating a new event from the Dashboard in either of these ways:
-
Click + Create event in the upper-right corner of the Dashboard.
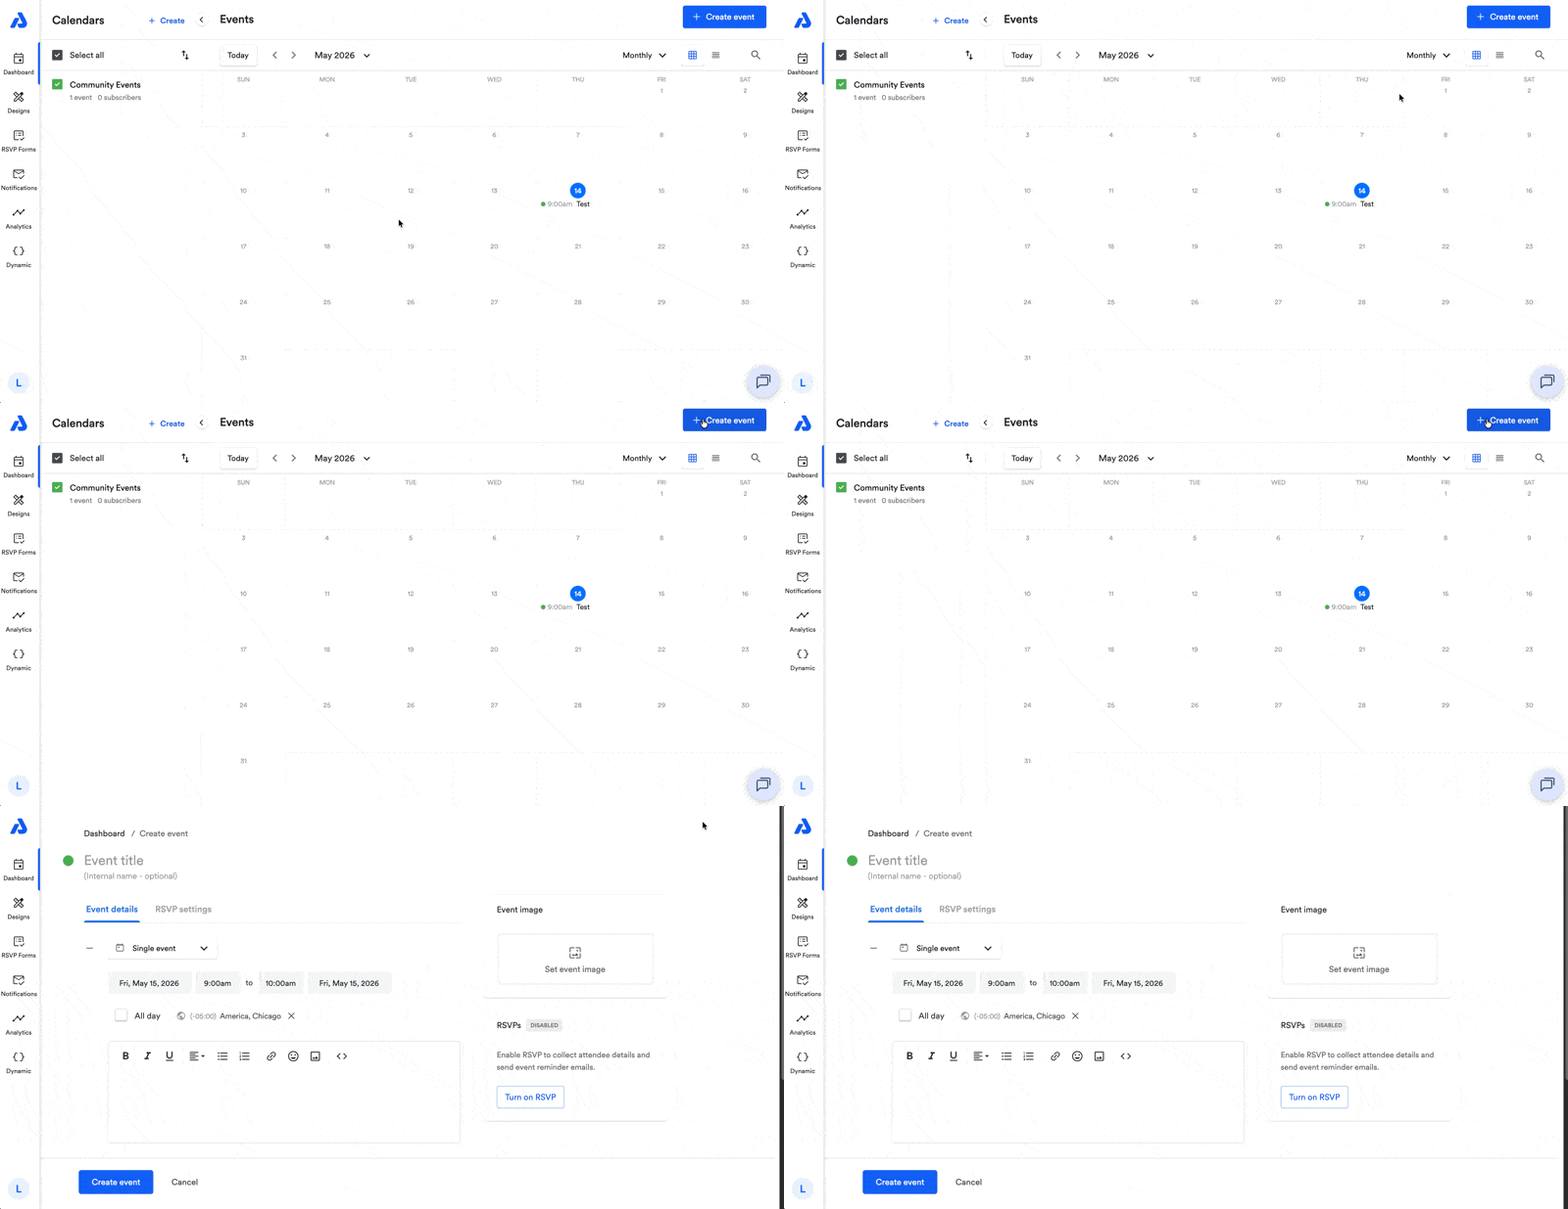
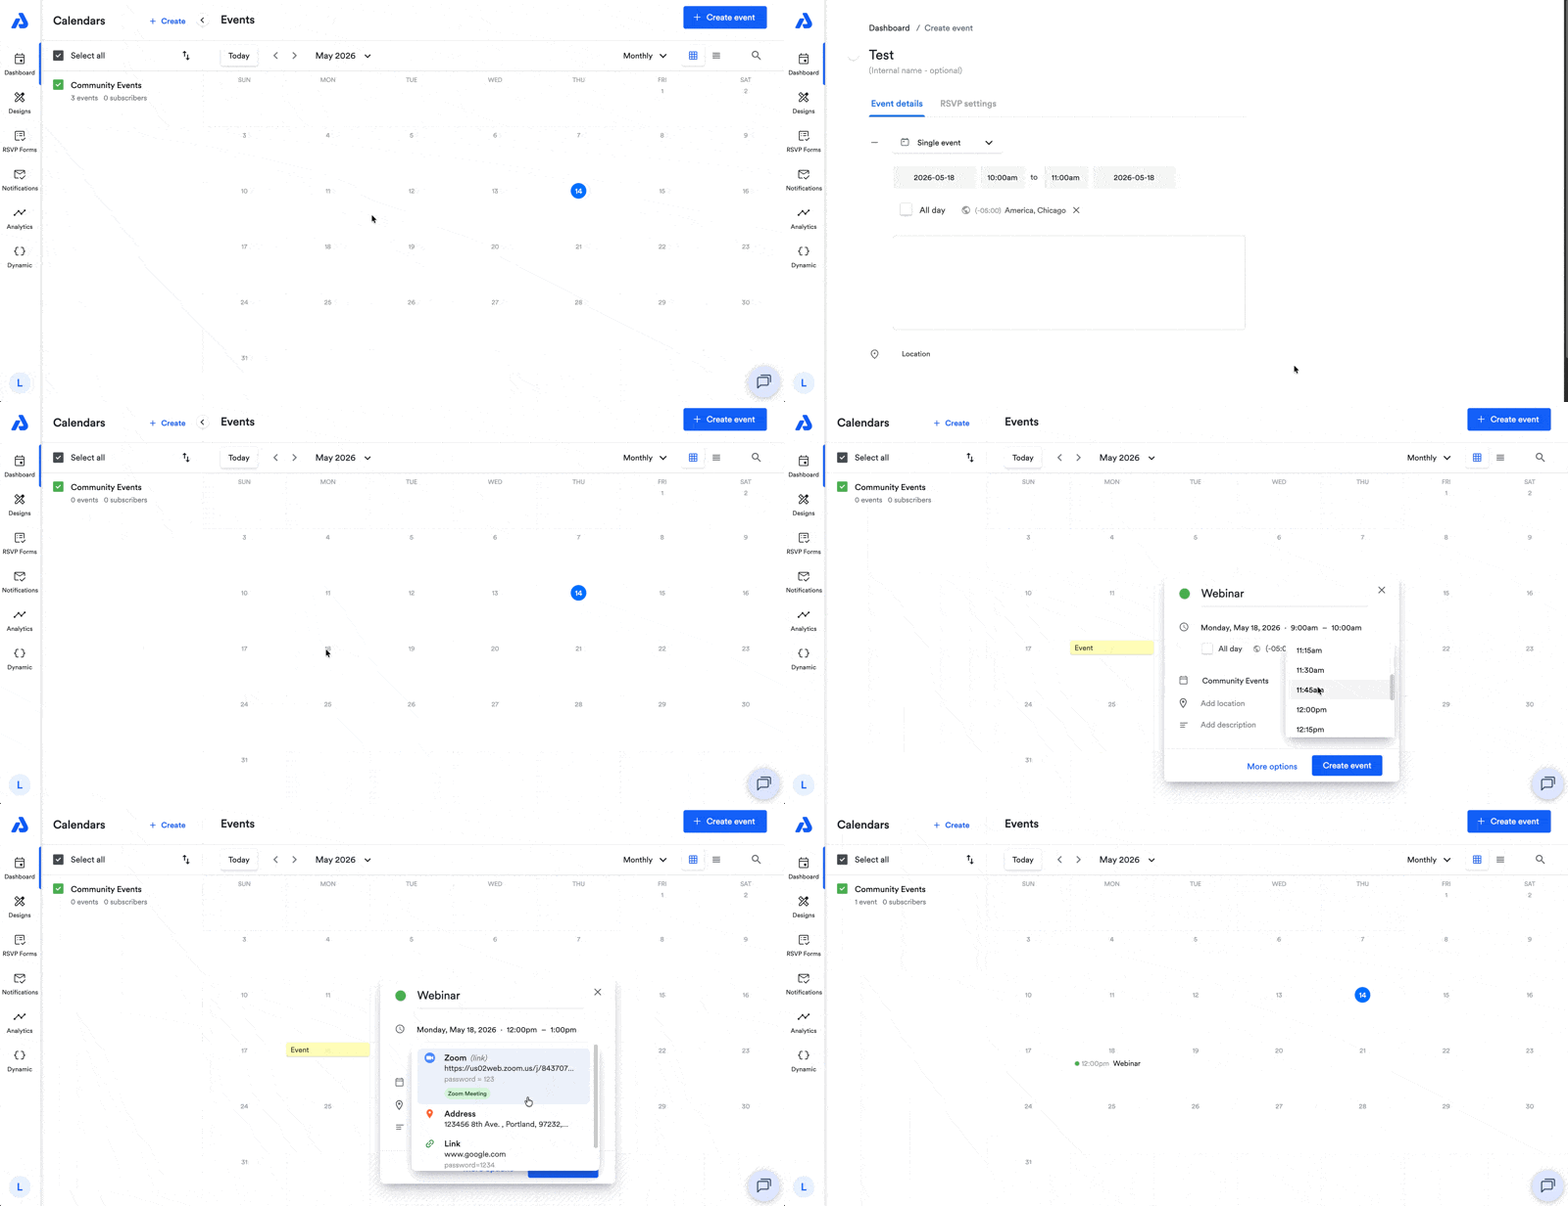
- Click the event date in the calendar view. Then use the quick create modal, or select More options to open the Create event page.
Turn on RSVP for the Event
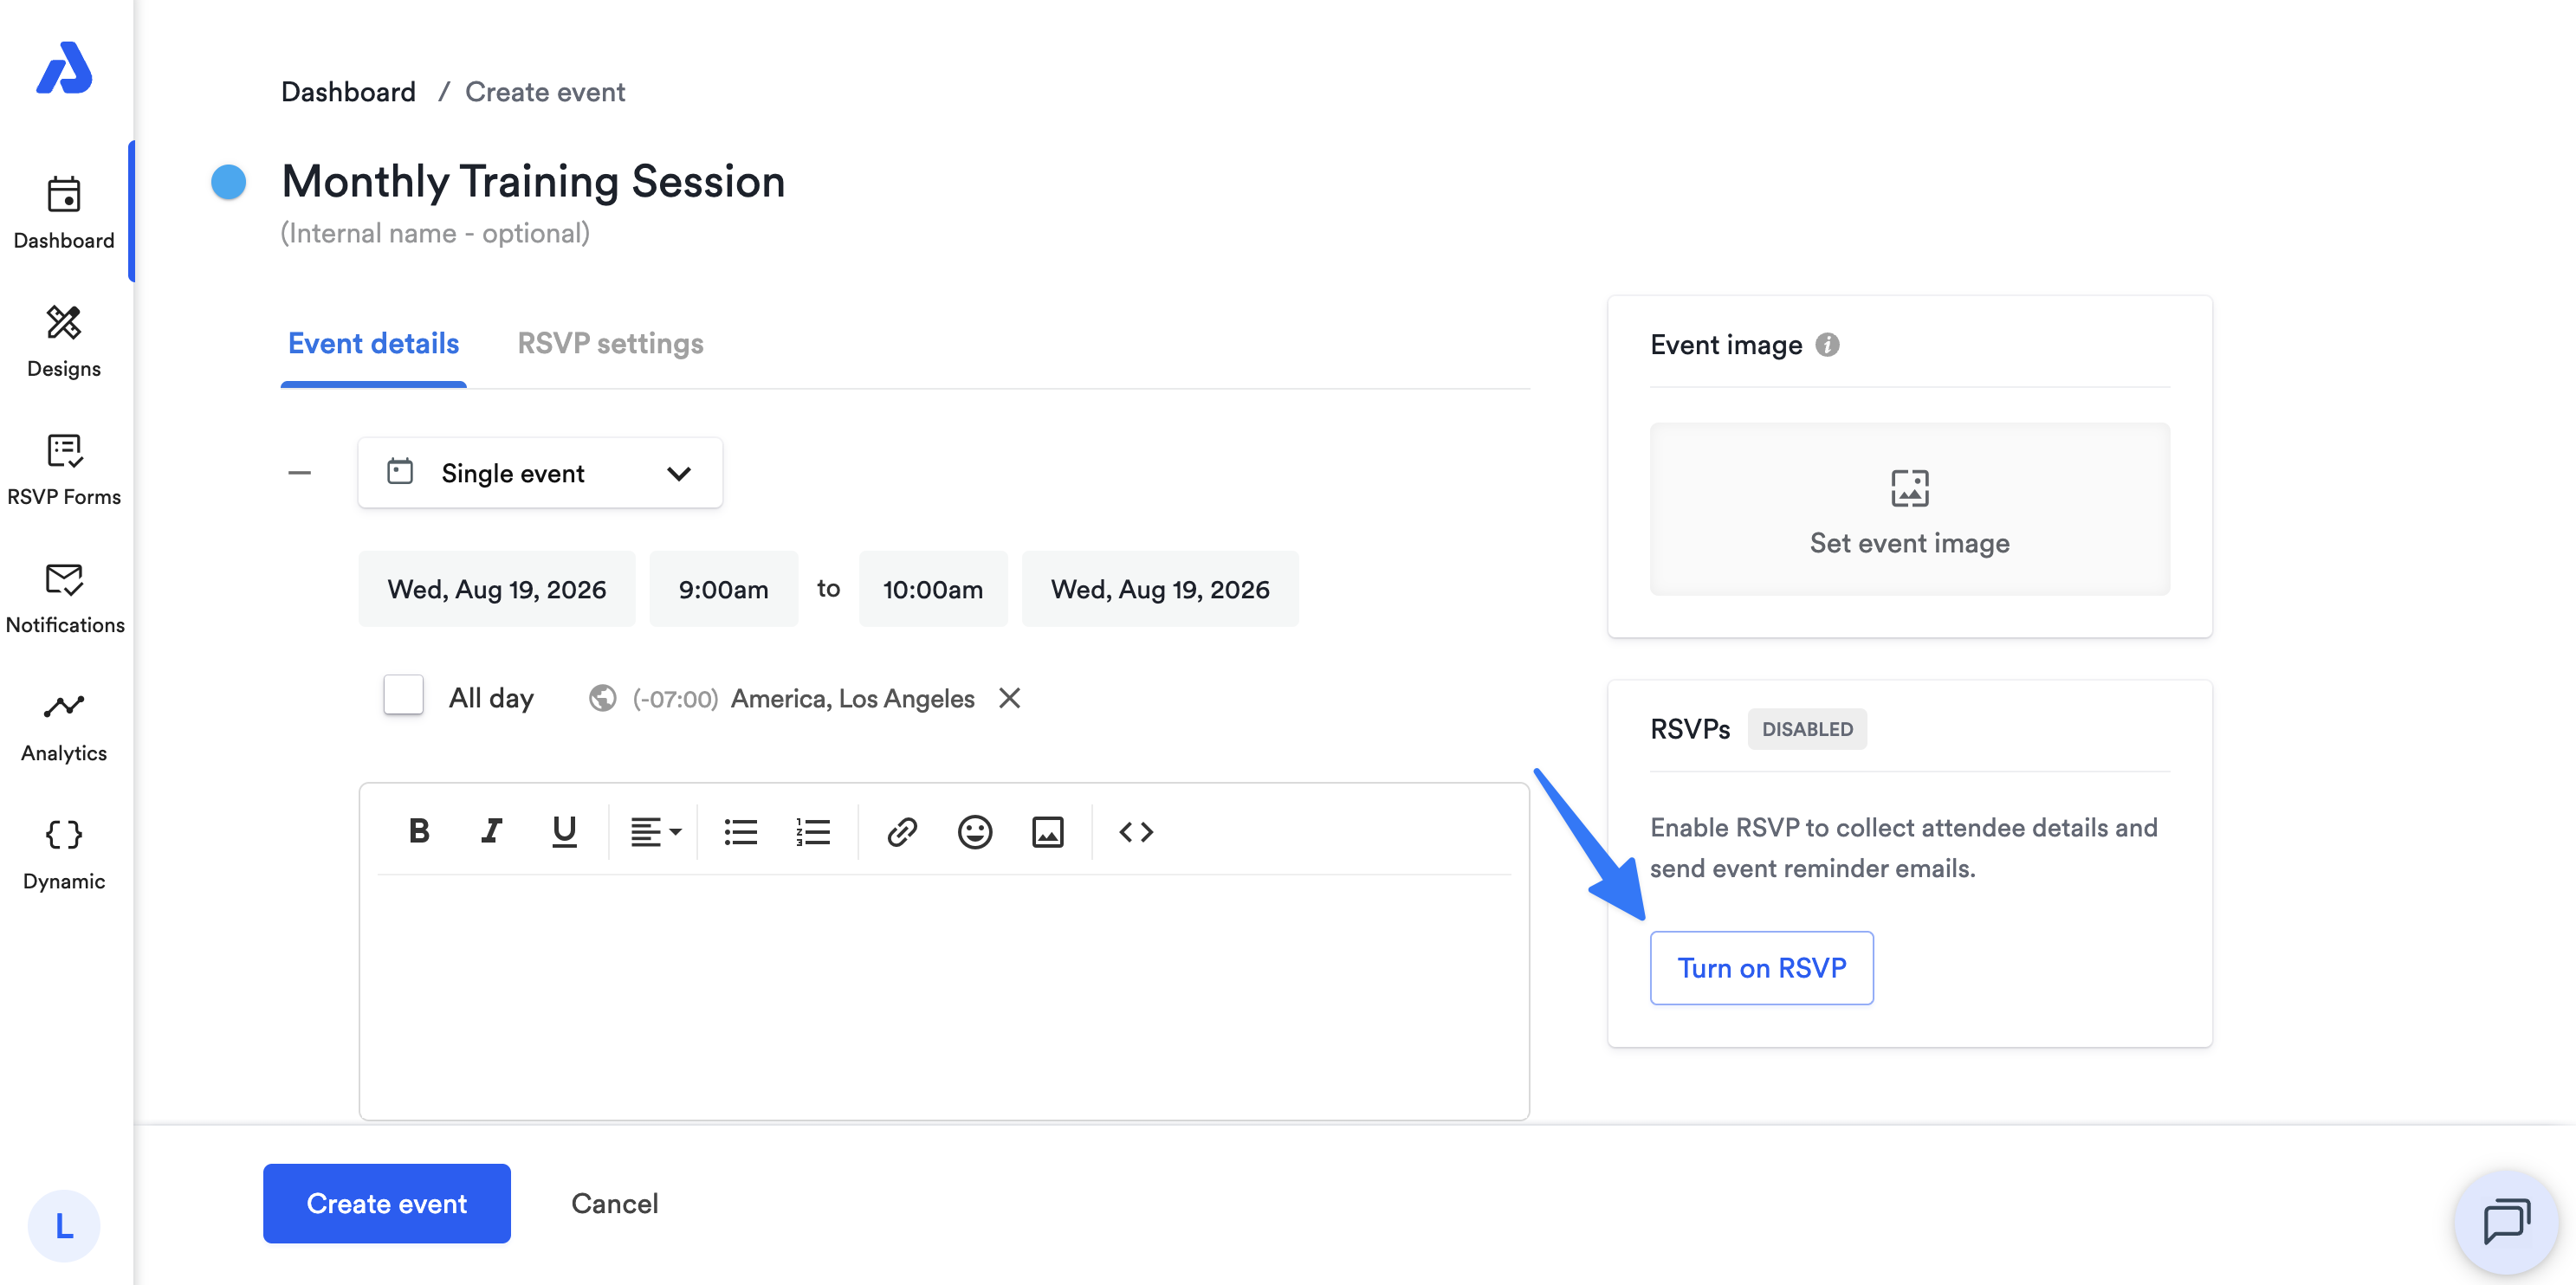
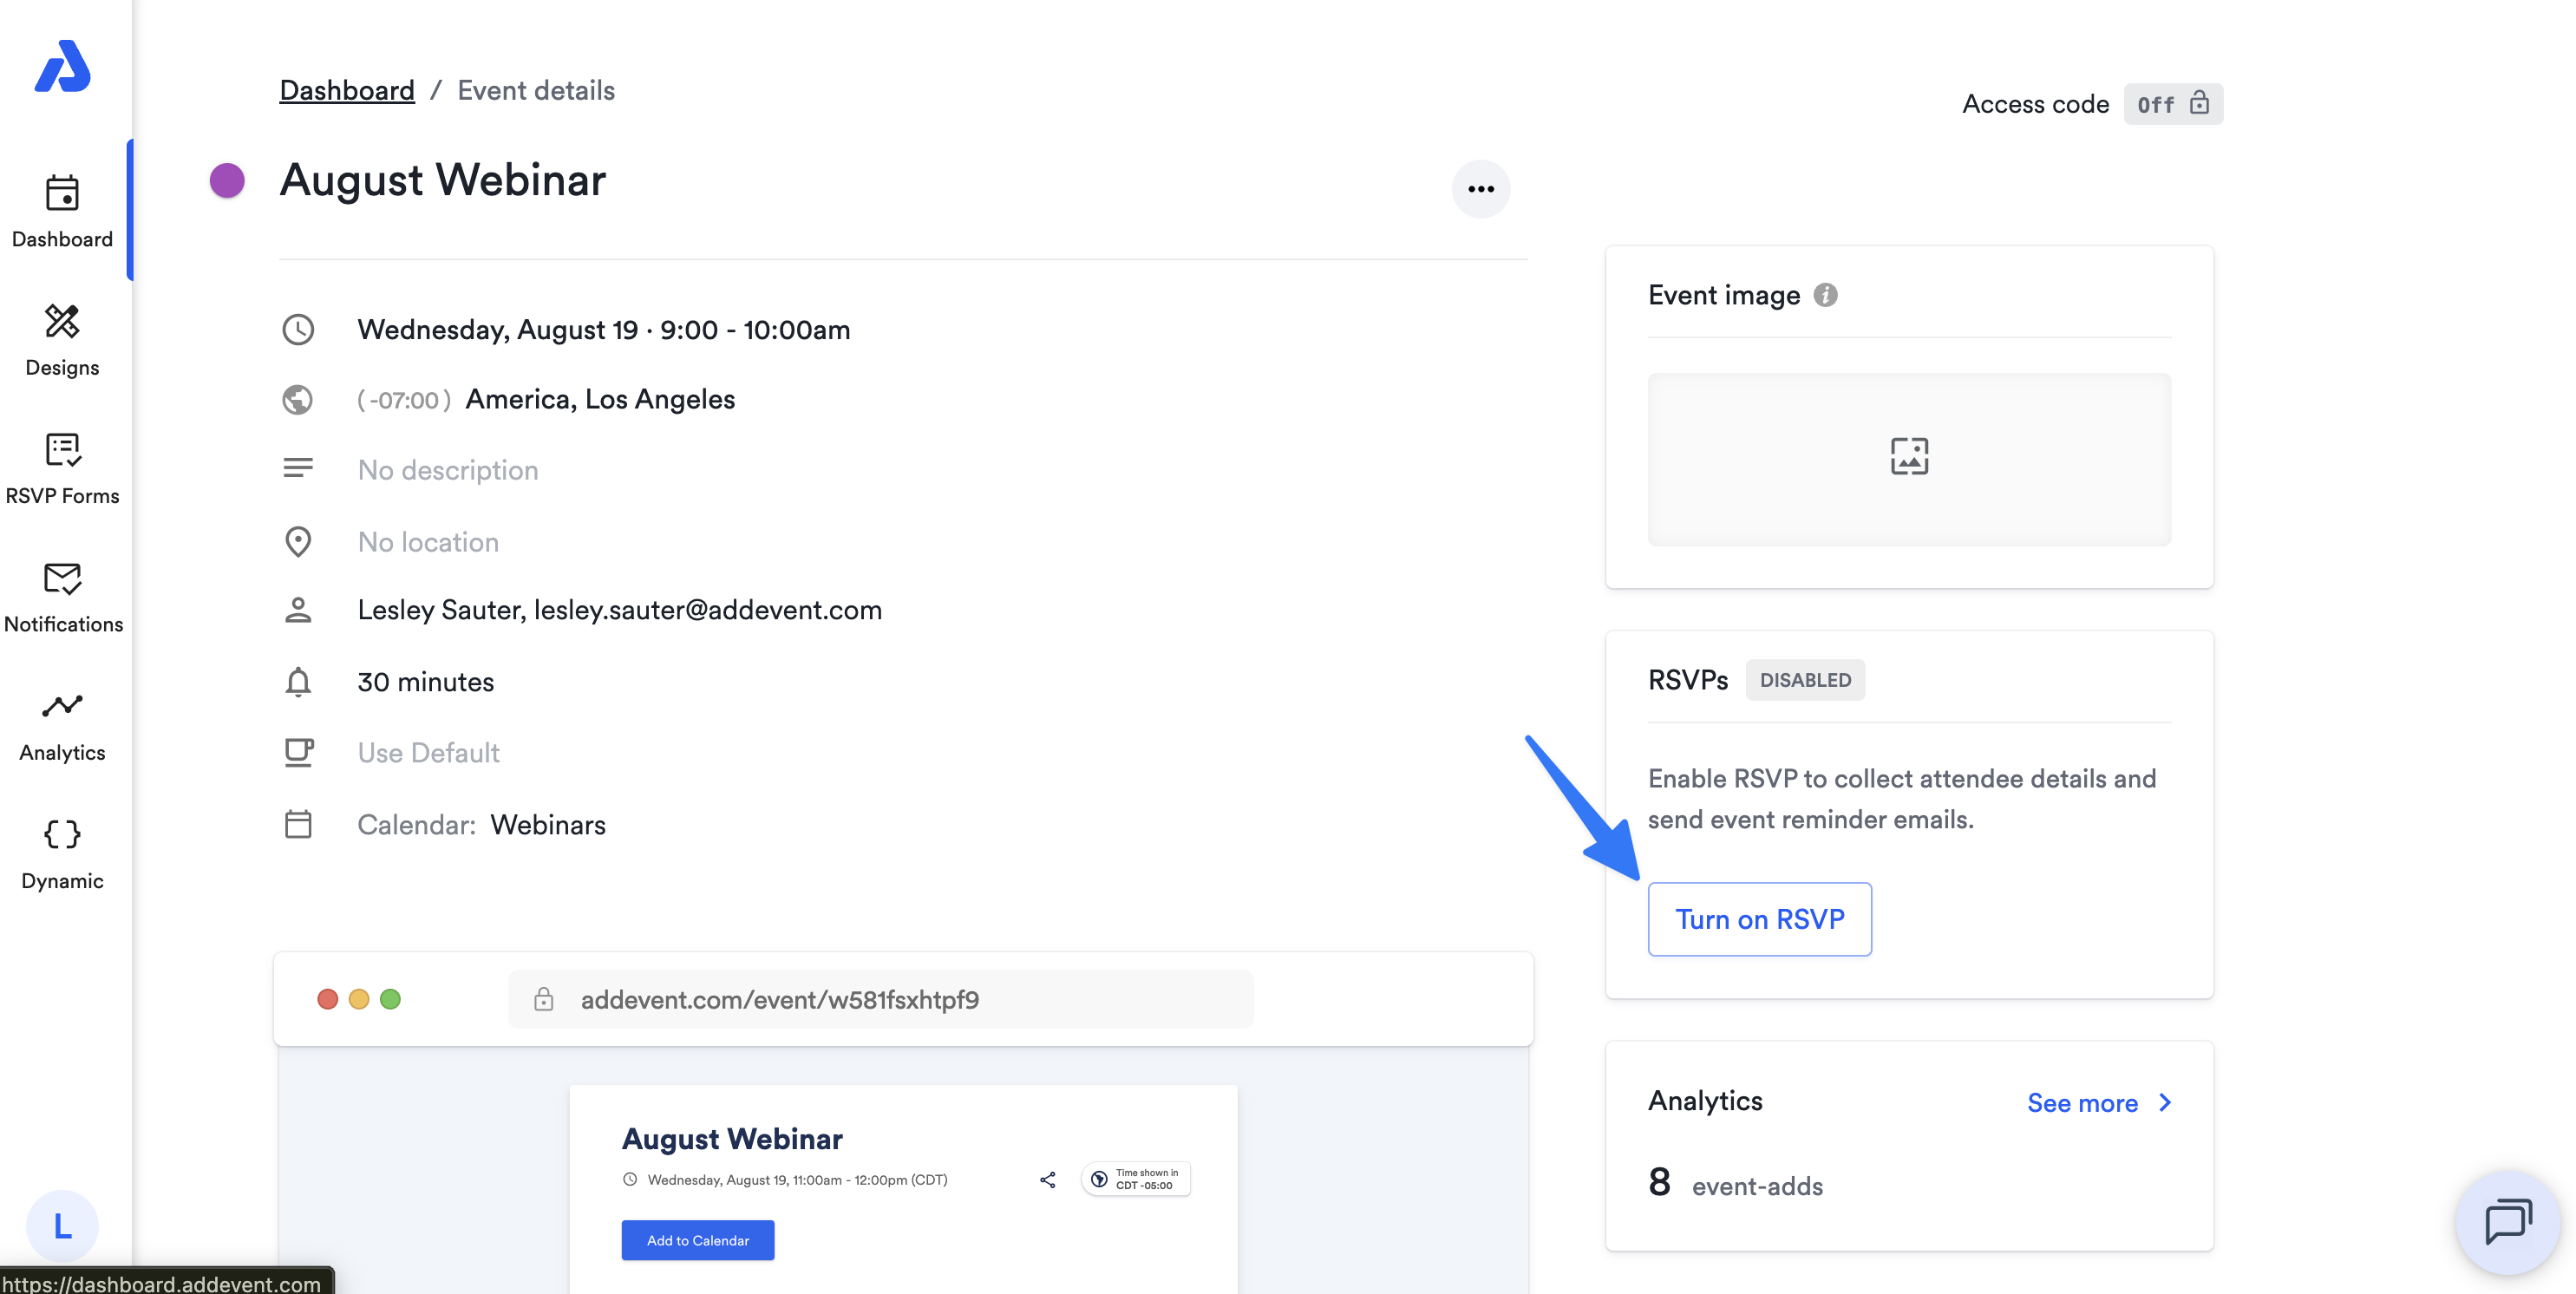
From the Create event or Event details page, go to the RSVPs section on the right side of the page and click Turn on RSVP.
When creating a new event, enable RSVP on the edit/settings page:
When editing an existing event, enable RSVP on the event details page:
Choose an RSVP Form and Configure RSVP Settings
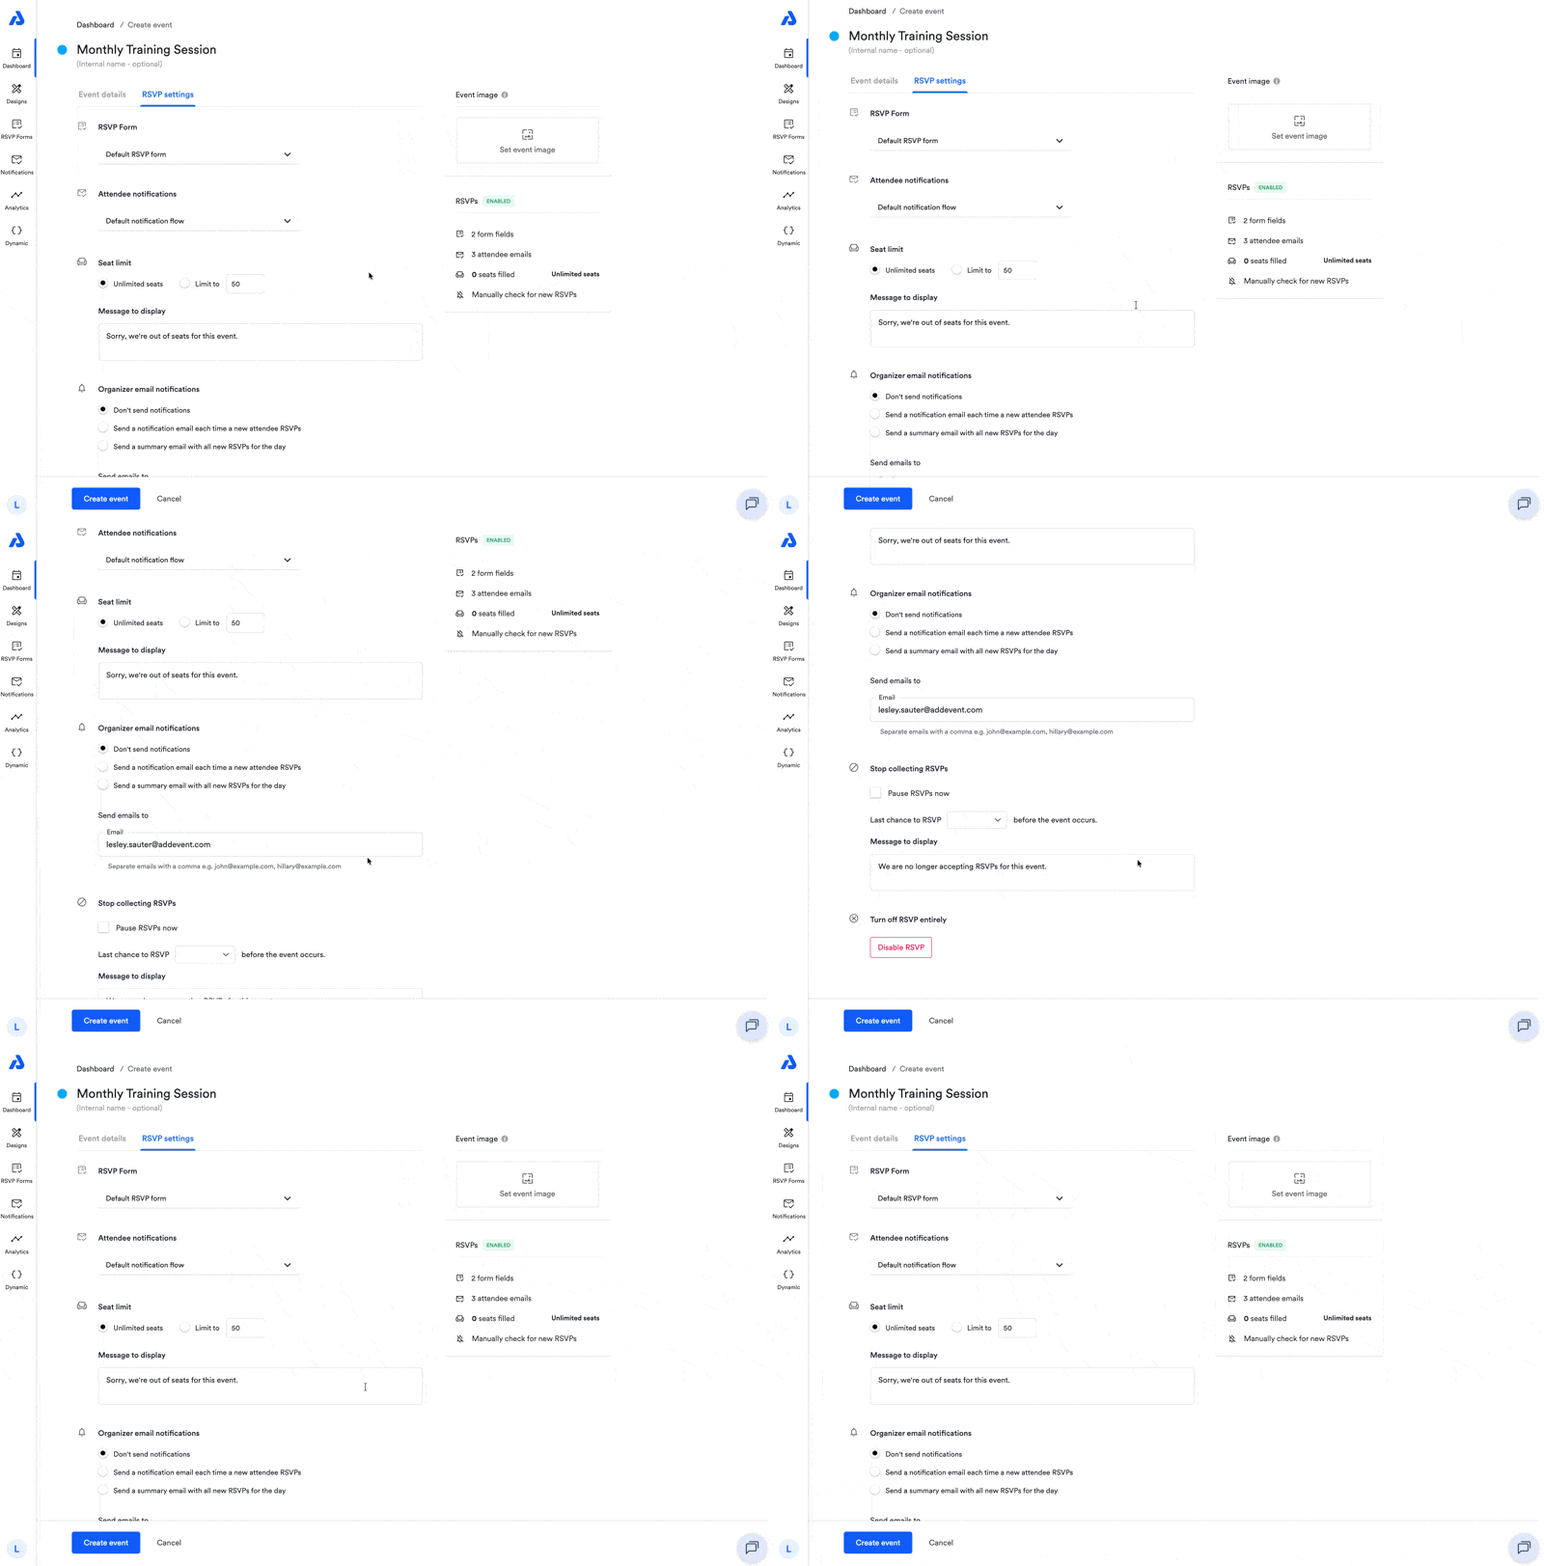
After you turn on RSVP, the RSVP settings tab opens. Select the RSVP form you want to use for the event.
You can also configure these RSVP settings:
- Select a custom Notification Flow. Learn more about Notification Flows here.
- Set a seat limit for the event and customize the message shown when all seats are full. Learn more about setting a seat limit here.
- Choose how you want to be notified about new RSVPs. Learn more about Organizer Notifications here.
- Turn off the ability for end users to RSVP. Learn more about disabling RSVPs here.
- Set a timer to disable RSVPs before the event begins.
Once you are finished editing your RSVP settings, click the Create event button.
Related articles
Watch this Tutorial!
Updated 13 days ago